

Radio Control: Aerobatics
Rick Allison, 15618 NE 56th Way, Redmond WA 98052
Center maneuvers: why they matter
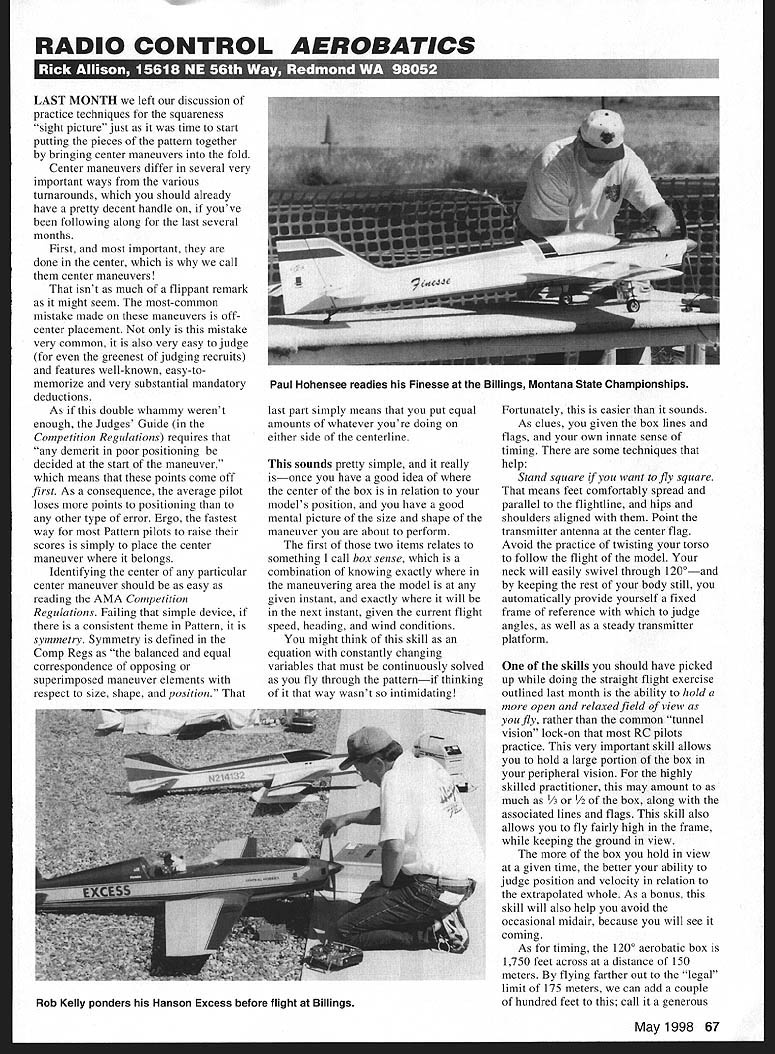
Last month we left our discussion of practice techniques for the squareness "sight picture" just as it was time to start putting the pieces of the pattern together by bringing center maneuvers into the fold.
Center maneuvers differ in several very important ways from the various turnarounds, which you should already have a pretty decent handle on if you've been following along for the last several months.
First, and most important, they are done in the center — which is why we call them center maneuvers. That isn't as flippant as it might seem. The most common mistake made on these maneuvers is off-center placement. Not only is this mistake very common, it is also very easy to judge (for even the greenest judging recruits) and features well-known, easy-to-memorize and very substantial mandatory deductions.
The Judges' Guide (in the Competition Regulations) requires that "any demerit in poor positioning be decided at the start of the maneuver," which means that these points come off first. As a consequence, the average pilot loses more points to positioning than to any other type of error. Ergo, the fastest way for Pattern pilots to raise their scores is simply to place the center maneuver where it belongs.
Identifying the center of any particular center maneuver should be as easy as reading the AMA Competition Regulations. Failing that, if there is a consistent theme in Pattern it is symmetry. Symmetry is defined in the Comp Regs as "the balanced and equal correspondence of opposing or superimposed maneuver elements with respect to size, shape, and position." That last part simply means that you put equal amounts of whatever you're doing on either side of the centerline.
This sounds pretty simple — and it really is — once you have a good idea of where the center of the box is in relation to your model's position, and you have a good mental picture of the size and shape of the maneuver you are about to perform.
Box sense and positioning
The first of those two items relates to something I call box sense, which is a combination of knowing exactly where in the maneuvering area the model is at any given instant, and exactly where it will be in the next instant given the current flight speed, heading, and wind conditions.
You might think of this skill as an equation with constantly changing variables that must be continuously solved as you fly through the pattern — if thinking of it that way wasn't so intimidating! Fortunately, this is easier than it sounds. As clues, you are given the box lines and flags, and your own innate sense of timing. There are some techniques that help:
- Stand square if you want to fly square. Feet comfortably spread and parallel to the flightline; hips and shoulders aligned with them.
- Point the transmitter antenna at the center flag.
- Avoid twisting your torso to follow the flight of the model. Your neck will easily swivel through 120° — and by keeping the rest of your body still you automatically provide yourself a fixed frame of reference with which to judge angles, as well as a steady transmitter platform.
One of the skills you should have picked up while doing the straight flight exercise outlined last month is the ability to hold a more open and relaxed field of view as you fly, rather than the common "tunnel vision" lock-on that most RC pilots practice. This very important skill allows you to hold a large portion of the box in your peripheral vision — for the highly skilled practitioner, as much as one-third to one-half of the box, along with the associated lines and flags. This skill also allows you to fly fairly high in the frame while keeping the ground in view.
The more of the box you hold in view at a given time, the better your ability to judge position and velocity in relation to the extrapolated whole. As a bonus, this skill will also help you avoid the occasional midair because you will see it coming.
Timing and rhythm
The 120° aerobatic box is 1,750 feet across at a distance of 150 meters. By flying farther out to the "legal" limit of 175 meters, we can add a couple of hundred feet to this; call it a generous 2,000 feet across the box at maximum depth.
Within this corridor, at a speed of 90 mph, you get about 132 feet/second, or roughly 14–15 seconds to fly across the box at that depth. Halve that and it comes to about seven seconds to the center flag, which is a manageable chunk of time for your subconscious mind to absorb and partition.
By keeping your throttle application consistent and your passes at a consistent depth in the box — as you did in last month's exercise — repetition will soon breed a comfortable and surprisingly accurate rhythm to your flying.
A good mental picture of any maneuver you are placing in the frame starts with a study of the maneuver description. If the maneuver is unfamiliar to you, draw it on a piece of paper using the correct angles and radii. It's amazing how simply drawing the maneuver can fix the overall shape in your mind's eye.
Maneuver elements
All maneuvers consist of a number of basic elements taken from the different maneuver families:
- Lines
- Loops
- Rolls
- Snaps
- Stall Turns
Even a simple loop or roll includes line elements for the entry and exit. For those unfamiliar with this concept, an excellent discussion of maneuver families may be found in the AMA RC Pattern Judge's Guide.
The center maneuvers called out in the different class schedules generally become more complex (containing more elements) as the difficulty/skill level of the class increases. This is by intent, to force pilots to learn the basic aerobatic skills. At the Masters or F3A level, those basic skills have (supposedly) been learned, so schedule writing becomes more a matter of arranging familiar elements in different ways to keep the challenge fresh, rather than a strictly educational exercise.
Nonetheless, as one progresses through the classes, the complexity of a new schedule filled with unfamiliar high-"K" maneuvers can appear daunting indeed.
Break maneuvers into elements
The best way to attack the beast is the way it was designed: learn the elements first. A Square Loop with Half Rolls first appears to be an enormous task, but broken into elements it becomes a simple quarter loop, followed by a straight line, followed by a half roll, followed by a straight line, followed by a quarter outside loop, and so on. The trick is to never see the maneuver as either whole or finished.
Instead of individual and very complex maneuvers that are unconnected and intimidating, the pattern breaks down into simple-but-connected acrobatic tasks. The elements themselves aren't intimidating and can be flown very accurately once the old habit of thinking, "Now I've got to do a Figure M with 3/4 Rolls," is replaced by, "Pull quarter loop now, draw the line, 3/4 roll now, draw the line, etc."
The clear advantage of looking at the pattern this way is that, at the so-called "end" of the maneuver, the brain continues to think: "Pull quarter loop to level now, draw the line, pull quarter loop to vertical, draw the line, half roll now, draw the line, push quarter loop outside to level, draw the line, etc." A ballet-like rhythm replaces the old idea of discrete, individual maneuvers, and the flight becomes an organic whole.
Practice progression
To get to that enviable point, go through these steps:
- Master any unfamiliar elements in the schedule, such as snaps, spins, inverted rolls, etc. Put the new elements together into the center maneuvers and practice those maneuvers individually. Pay attention to proper positioning and distance.
- Deduce your mistakes by observing the uncorrected results. You will find that the essential mistake usually occurs one or more elements before it becomes visible; a heading problem following a pull to level may actually be the result of an over- or under-roll on the preceding down line, and so forth.
- Assemble the new maneuvers into mini-sequences of three maneuvers each: a turnaround, followed by the center maneuver, followed by the turnaround. Use the actual turnarounds from the schedule. Practicing these mini-sequences will allow you to pinpoint problem areas. Focus on placing the model properly in the box at each entry and exit; these are your essential "checkpoints."
- Assemble the mini-sequences into the entire pattern and fly through it several times, noting any spots where you have consistent problems. Remember that a small problem in practice almost always means a big one on contest day.
- Go back to the mini-sequences to fix the problems. Focus on the problems — not on what you already do well. The shortest route to any goal is almost always over the largest obstacle you can find in your path.
- Assemble the completed sequence and begin to "burn in" the geometry, pacing, flow, and positioning. The homework you've done to this point should now have you starting your center maneuvers at the proper spot in the box in a good, wings-level position, and finishing at the proper spot in a good, wings-level position for the turnaround.
By this time, the maneuvers themselves will have disappeared into the continuing flow of element following element. "Wings-level" should be both a mantra and an automatic habit.
You will find that as your brain stops turning on and off between maneuvers, a magical thing happens: time will seem to slow, and the pattern that seemed so impossibly hurried becomes relaxed and graceful. The trick is to do one perfect element at a time and to stay mentally "locked in" to the moment as you do it. No thinking ahead past the next element; no cursing mistakes in the last one. Any necessary adjustments are smoothly made as the elements are flown, and not "between maneuvers." Between maneuvers the model is just a perfect straight-line element that is flown the same as all the other elements: with total, relaxed concentration.
This state is hard to achieve initially, but becomes natural with practice. One thing that is absolutely essential is memorizing (and physically internalizing) the maneuver sequence so that the flow of elements into one another becomes automatic. Use your caller as a security blanket for contests — not as an excuse for failing to learn the pattern. On the flightline, you really can't afford the mental "computer time" it takes to process indecision. Your mind should be free to concentrate on lines, shapes, angles, wind corrections, and keeping the aircraft heading straight. And level.
Rudder and fundamentals
I haven't said much about "using the rudder" throughout this series because, as a general rule, I see far too much emphasis on learning to fix consistent mistakes after they happen, rather than on learning how to not make the mistake in the first place.
Newcomers to Pattern seem obsessed with rudder corrections. Learning the rudder is a fine thing to do — it is certainly necessary for taxiing, takeoffs, wind correction, snaps, spins, stall turns, slow rolls, and point rolls. But aside from that, learning how to not shoot a hole in the bottom of your boat is preferable to learning how to bail (or to swim).
Learn the basic skills first. After you have bought and paid for a set of solid fundamentals with a fair amount of fuel and practice, you can get sophisticated with the rudder. I will tackle some practice techniques for learning the rudder sometime soon.
Coaching
A good coach is a tremendous help with any learning process, including the one outlined here. Another pair of eyes will often see things the pilot does not in terms of the sight pictures we've talked about.
I can recall a time when I was absolutely convinced that I was centering a maneuver properly, until several judges told me the same thing that my coach had been saying all along: the darned thing was always to the left! I listened to my coach, put the center where she said it should go, and the scores went up. After a few weeks, the new sight picture for centering that maneuver became natural.
Listen to those trying to help you and learn. If you were right, you would be scoring better than you are.
Transcribed from original scans by AI. Minor OCR errors may remain.

