

RADIO CONTROL ELECTRICS
Bob Kopski 25 West End Drive, Lansdale PA 19446
This Month's Column
This month's column includes discussion on a new belt drive, supplemental information on electric suppliers and catalogs, and measuring and using motor voltage and current information.
Late-breaking news: The Dallas Electric Aircraft Fliers (DEAF) announces its tenth annual Electric Fly-In October 5–6. Contact Contest Director Frank Korman, 9354 Forest Hills Blvd., Dallas TX 75218; Tel.: (214) 327-8411.
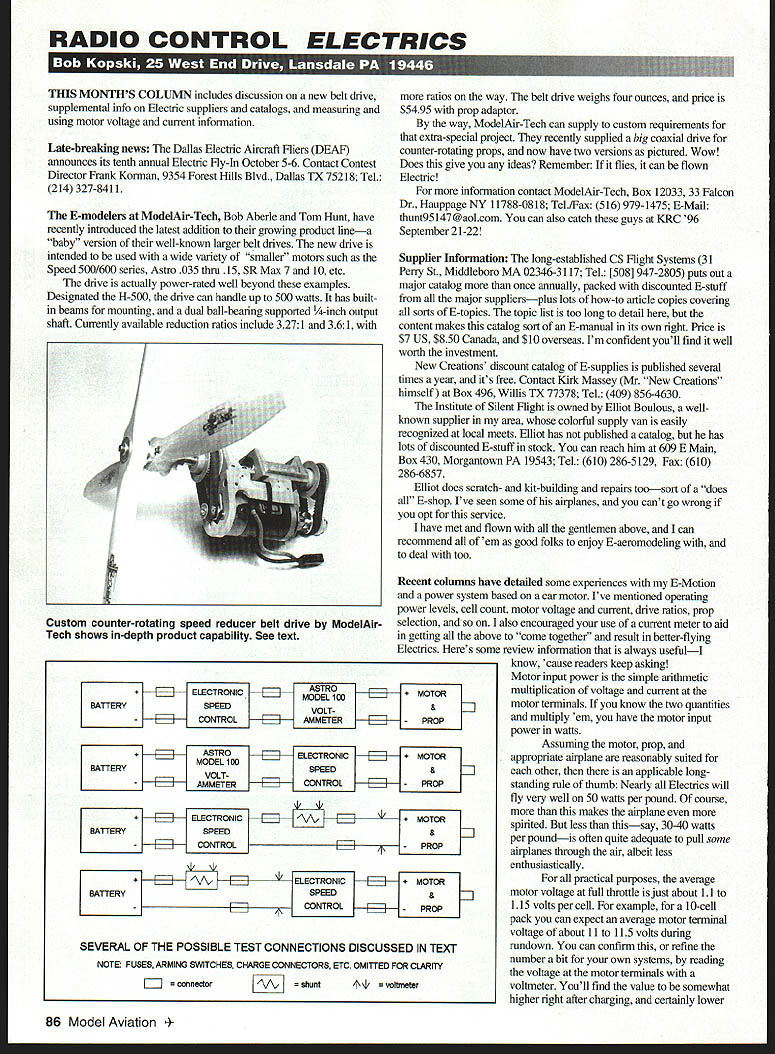
New Belt Drive (ModelAir-Tech H-500)
The E-modelers at ModelAir-Tech, Bob Aberle and Tom Hunt, have introduced a "baby" version of their well-known larger belt drives. The new drive is intended for a wide variety of smaller motors such as the Speed 500/600 series, Astro .035 through .15, SR Max 7 and 10, etc. The drive is actually rated well beyond these examples.
- Designation: H-500
- Power rating: up to 500 watts
- Mounting: built-in beams for mounting
- Output shaft: dual ball-bearing supported 1/4-inch shaft
- Available reduction ratios: 3.27:1 and 3.6:1 (more ratios planned)
- Weight: 4 ounces
- Price: $54.95 with prop adapter
ModelAir-Tech can supply custom drives for special projects (they recently supplied a large coaxial drive for counter-rotating props). For more information contact ModelAir-Tech, Box 12033, 33 Falcon Dr., Hauppauge NY 11788-0818; Tel./Fax: (516) 979-1475; E-Mail: thunt95147@aol.com. You can also catch them at KRC '96 September 21–22.
Supplier Information
A few established suppliers and catalogs worth knowing:
- CS Flight Systems
- Address: 31 Perry St., Middleboro MA 02346-3117
- Tel.: (508) 947-2805
- Publishes a major annual catalog packed with discounted electric items and many how-to article reprints. Price: $7 US, $8.50 Canada, $10 overseas.
- New Creations
- Contact: Kirk Massey
- Address: Box 496, Willis TX 77378
- Tel.: (409) 856-4630
- Publishes a free discount catalog several times a year.
- Institute of Silent Flight (Elliot Boulous)
- Address: 609 E Main, Box 430, Morgantown PA 19543
- Tel.: (610) 286-5129; Fax: (610) 286-6857
- No catalog, but carries discounted electric items, kit-building, repairs, and scratch-building services.
I have met and flown with the people above and recommend them as good sources and pleasant to deal with.
Motor Voltage, Current, and Power — Basics and Measurement
Motor input power is simply voltage multiplied by current at the motor terminals (watts = volts × amps).
Rule of thumb: Nearly all electrics will fly very well on about 50 watts per pound. More gives a more spirited airplane; 30–40 watts per pound can be adequate for less-demanding performance.
Average motor voltage at full throttle is about 1.1 to 1.15 volts per cell. For example, a 10-cell pack typically shows about 11 to 11.5 volts at the motor terminals during run. You can confirm this by measuring motor terminal voltage with a voltmeter. Battery terminal voltage will usually read slightly higher because of voltage loss in wiring and the speed control.
Motor current is measured in series with the motor. A current meter is placed in series with one motor lead to indicate current flow in amperes.
One convenient product that measures both motor voltage and current (with a switch) is the Astro Model 100 Volt/Amp Meter. The switch configures the internal wiring so the unit can function in either voltage or current mode without reconnecting. It has two input wires and two output wires and simply plugs into the motor circuit. You can connect the instrument input leads to the speed control output and the output leads to the motor, then run the motor while monitoring current and voltage.
Other measurement approaches:
- Motor voltage: almost any multimeter set to a voltage scale, connected to the motor terminals.
- Motor current: use a shunt and a multimeter on a low-voltage range.
Be wary of meter test leads near the prop; they can get caught.
A shunt is a calibrated low-resistance resistor connected in series with the motor circuit that develops a small voltage drop proportional to current. That voltage is measured by a voltmeter and translated into amps. A combination shunt/voltmeter can read out directly in amps.
Two ways to get a shunt:
- Make your own shunt (described in the April 1986 column) using temperature-stable resistive wire and modeling hardware. This allows accurate calibration and many modelers still use their original builds.
- Buy a shunt from Steve Kowalski, 32 Hollo Dr., Holbrook NY 11741. Steve's shunt (described in the January 1993 column) can be supplied with Sermos ($10) or Astro ($16) connectors.
Examples:
- Typical home-built shunt: 10 milliohms (0.01 ohm)
- Steve's shunt: 1 milliohm (0.001 ohm)
If motor current is 20 amps, the indicating voltage across the shunts is 0.2 V and 0.02 V respectively. Most digital multimeters have low-voltage ranges (200–300 mV) so reading motor current this way is easy and accurate.
Why not use the DMM current ranges? Many DMMs only go to 10 amps on the current ranges, which is inadequate for most electric applications. Also, the insertion loss (voltage drop) of a DMM and its leads can be significantly higher than a shunt designed for high-current use and will affect the measurement.
You can insert the meter or shunt in the battery circuit as well; at full throttle, battery input current and motor current are nearly identical. Note that speed control input current and motor current can differ at intermediate speeds with some controllers. Always read motor voltage at the brushes.
ESC input power (voltage × current at the ESC input) will be nearly identical to motor voltage × motor current at any speed because modern speed controls have very low power loss. In some installations (e.g., brushless motors) measurements may only be possible at the ESC input.
Using Voltage and Current Measurements
Why measure motor voltage and current?
- Prop evaluation: Different props change motor input power immediately. Change diameter, pitch, or brand and motor current and power will change, and flight performance will change accordingly.
- Confirming full voltage at the motor when throttle is up.
- Protecting the motor: Excessive current can damage brushes and the commutator.
- Motor timing: Current is the indicator used during timing adjustment.
- Estimating run time: Current tells you how fast the battery is drained.
- Bench testing: Simple bench measurements for a given cell count, prop, motor, or drive ratio provide useful expectations for in-flight performance.
If this seems complicated, it need not be. Beginners can ignore these details initially, but the information will be valuable as experience increases. Many former beginners now use these measurements routinely and some have entered the electric business.
There is a wealth of electric-knowledge in past columns and magazines. Many readers lament discarding back issues—hint: tear useful pages out and keep them in a ring binder.
Please enclose a SASE with any correspondence for which you'd like a reply. See ya at KRC!
Transcribed from original scans by AI. Minor OCR errors may remain.

