

Radio Control: Electrics
Bob Kopski 25 West End Dr. Lansdale, PA 19446
Introduction
This month's column features more photos and somewhat less text — I have an abundance of the former, and less of the latter is needed. The primary topic is fuses and connections for electric RC models. Over the years I've learned it's very unwise to leave electric installations unfused. I've seen and experienced fried armatures, melted wiring insulation, welded switches and other damage that could have been prevented by simple fuse protection.
Fuses are now small, light, inexpensive, and readily available. Many imported systems (Kyosho, Goldberg, DSC, Great Planes, etc.) include fuse protection; many American-made products do not. Because Ni‑Cd battery packs in our models store a lot of energy and can present a fire hazard in a crash, I believe a "must fuse" safety requirement would be a prudent addition to future AMA regulations.
Fuses and connections
Why fuse?
- Prevents costly motor and wiring damage from stalls, prop snarls, wiring shorts, and crashes.
- Reduces fire risk from battery packs in mishaps.
- Small, lightweight fuses are now available — no good reason not to use them.
Recommended fuse type and parts
- Standard automotive ATC-type blade fuses (available at auto-supply stores and Radio Shack). Ratings are simple numbers (e.g., 15, 20) indicating amperes at which the fuse will blow.
- Matching fuse holders / electrical disconnects (various styles available). My favorite has a built-in partial plastic insulator.
- Heat-shrink tubing (I prefer Du-Bro part no. 439 — hobby-shop tubing with an unshrunk diameter of 1/4 inch, yellow).
- Crimp terminals or disconnects sized for your wire gauge.
- Crimping tool with color-coded notches (blue for 16–14 AWG, red for 22–18 AWG).
How to add a fuse to an existing or new installation
Tools and materials
- ATC blade fuse of appropriate rating
- Fuse holder / electrical disconnects and lugs
- Heat-shrink tubing (Du-Bro 439 or similar)
- Wire stripper, crimping tool, pliers, small heat source (heat gun or lighter)
- Optional: soldering iron (if you prefer soldered connections)
Step-by-step installation
- Select a wire to interrupt — preferably a battery lead — and work close to the battery.
- Note on safety: perform this work with the battery discharged if possible, and be careful with exposed terminals. Some installers put the fuse in the positive lead between the battery and speed control; for safer handling while working, placing the fuse in the negative lead close to the battery is commonly used.
- Cut the chosen wire at the selected location.
- Strip about 1/4 inch of insulation from both cut ends, taking care not to nick the strands.
- Twist the exposed strands together with your fingers.
- Insert the wire into the crimp terminal and place the crimp "wire-tube" into the proper jaw notch on the crimping tool (use the color or gauge marking to match wire size). Give one very firm squeeze to make a deep, tight crimp.
- Inspect the crimp. Trim any stray strands and re-crimp if necessary.
- Slide a piece of heat-shrink tubing over the crimped joint and shrink it with a heat gun or brief exposure to a lighter flame. Move the heat source around so the shrink is even and snug; do not overheat.
- Hook up the fuse in the chosen lead and reconnect the battery to test operation. If working in the negative lead, you can test before inserting the fuse; if in the positive lead, take care during hookup.
- Install the fuse into its holder, connect the other half of the holder into the circuit, and tuck the fuse holder into a protected spot. Wrap with foam rubber or place in a small box to prevent snagging.
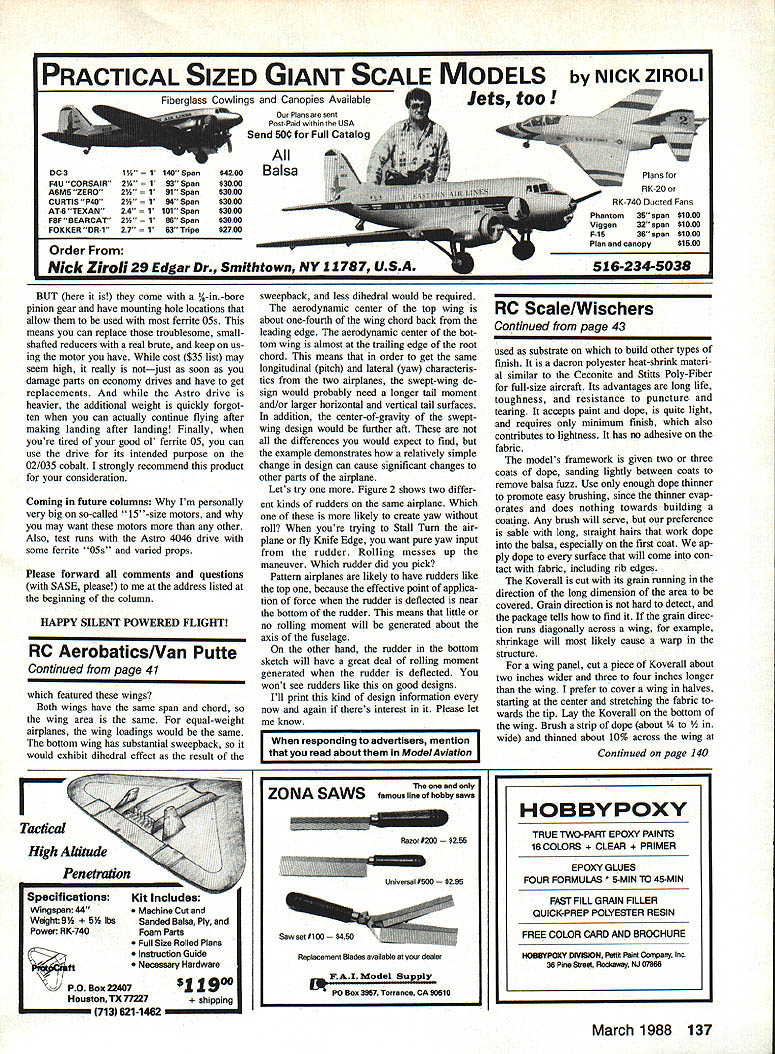
Insulating the terminal (neat finish)
- Slip a 3/16-inch length of the 1/4-inch Du-Bro heat-shrink tubing over the terminal so the end is flush with (or extends slightly beyond) the terminal end.
- Heat evenly with a covering gun or heat source until it forms a tight, compact, insulated terminal.
Alternatives and tips
- Some disconnects are sold without the crimpable partial insulator and are intended for soldered connections. If soldering, use a longer piece of heat-shrink tubing that covers the terminal and about 1/8 inch of the wire insulation.
- Plastic-hooded terminals are available that fully cover the terminal; they are bulkier and can be harder to adjust if a fuse fits loosely.
- If a fuse fits loosely in a heat-shrink-insulated disconnect, remove the fuse and lightly squeeze the disconnect's two curled "teeth" with pliers to tighten the fit, then reinstall the fuse.
Choosing a fuse rating
- Pick a fuse rating just above your normal operating current so it tolerates brief surges but opens on sustained overloads or shorts.
- My personal choices: 20-amp fuse for Astro cobalt and super-ferrite motors; 15 amps for most "economy" motors.
- Typical ratings can be determined from motor and ESC specifications or by simple bench testing under load.
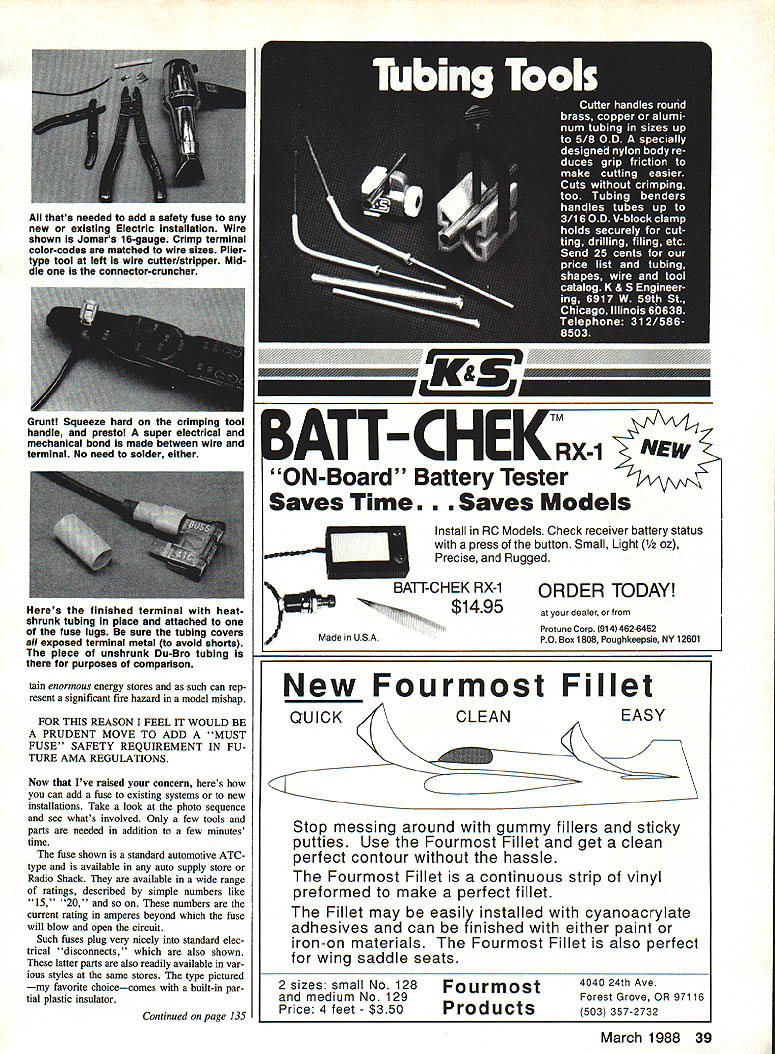
Folders (folding props)
One photo shows my collection of K&W folding props for electrics. Highlights:
- Most blade sizes (except the very smallest 6-inch) fit two larger hub sizes.
- Blades are fiberglass and available individually, as are hubs.
- Designed so blades do not fold forward on startup.
- Hubs are rugged and pre-bored for 1/4-inch shafts, suitable even for large gear drives while retaining plenty of hub material around the bore.
- Currently manufactured by K&W (7824 Lexington Ave., Philadelphia, PA 19152). Plans exist for Sonic-Tronics to produce them in volume. Contact Tom Kerr for orders and details.
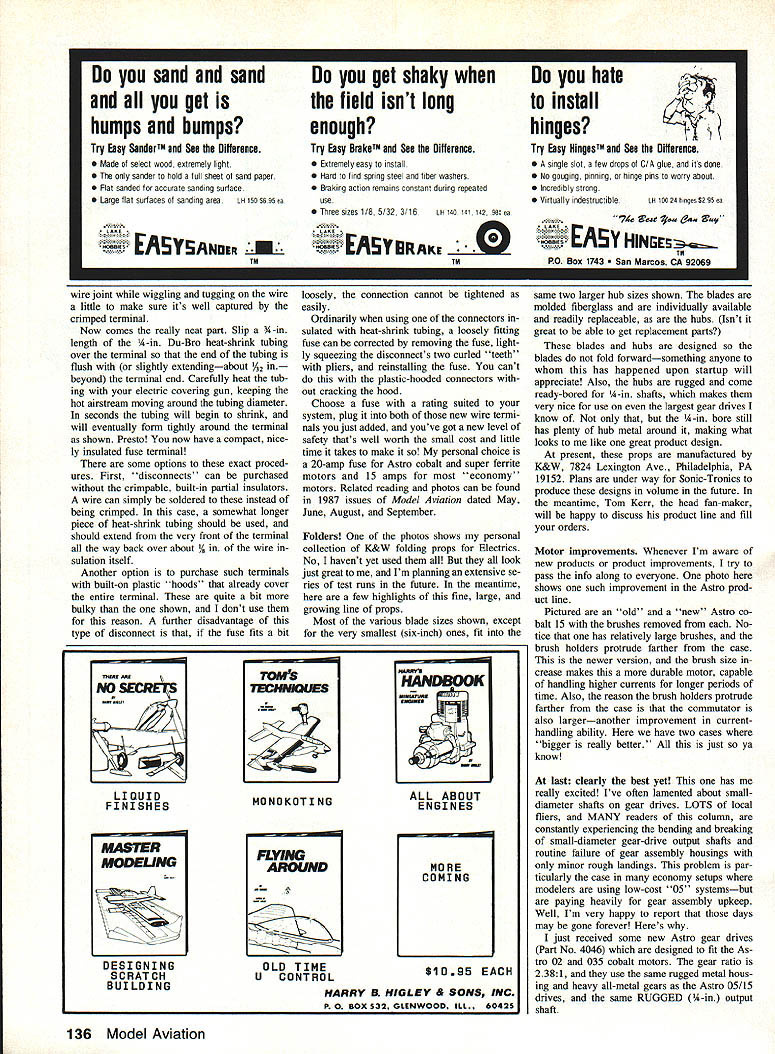
Motor improvements
One photo compares "old" and "new" Astro cobalt 15 motors with brushes removed:
- The newer version has larger brushes and brush holders that protrude farther from the case.
- The commutator is larger as well; both changes improve current-carrying capability and durability.
- In these cases, bigger is better.
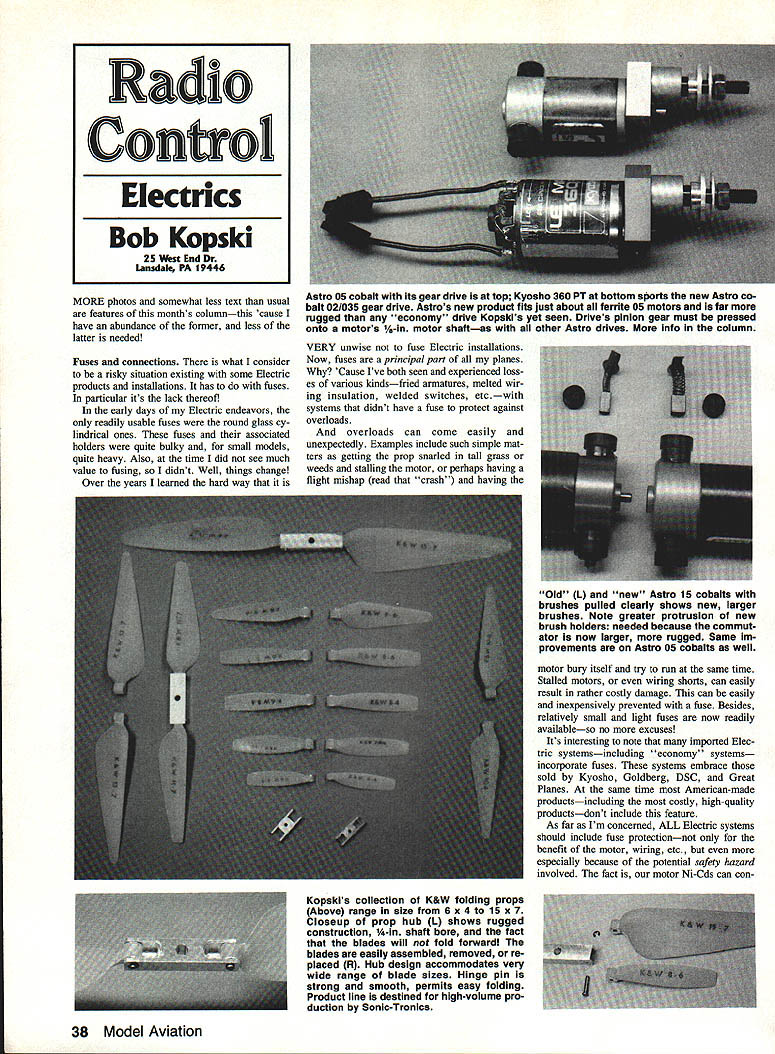
Gear-drive improvements
Recently received Astro gear drives (Part No. 4046) designed for Astro 02 and 035 cobalt motors:
- Gear ratio: 2.38:1
- Rugged metal housing and heavy all-metal gears (same as Astro 05/15 drives)
- RUGGED 1/4-inch output shaft — addresses the common problem of bending/breaking small-diameter gear-drive shafts and housing rip-out on rough landings, especially with economy drives.
Conclusion
Adding a simple automotive ATC fuse and proper terminals is inexpensive, quick, and significantly increases safety and component longevity. Choose the correct fuse rating for your system, insulate terminals properly, and protect the fuse holder from snagging. I strongly recommend adding fuse protection to any electric installation that lacks it.
Related reading and photos: Model Aviation, 1987 issues — May, June, August, September.
Transcribed from original scans by AI. Minor OCR errors may remain.

