

RADIO CONTROL ELECTRICS
Bob Kopski, 25 West End Dr., Lansdale, PA 19446
This Month's Topics:
- The Electric Connection Service
- Meet announcement
- Motor mount follow-up
- Playboy "motor/engine" follow-up
- Seven-cell charging follow-up
- Jomar's new speed control
- My latest Electric
The ECS this month brings a request from Jack Reinemeyer, 2550 26th St. W., Bradenton, FL 34205; Tel: (813) 753-3163. Jack wants to share Electric with others in his area. I do know there are many other Electric modelers in Florida, because I've heard from many and have met some at past meets. What's needed now is for those near Jack to hook up with him — for that's what the ECS is all about. So do it, please!
Meet announcement: The 1993 Gulf States Electric Fly-In is scheduled for October 23 and 24 at the Louisiana Polo Field near New Orleans. From what readers have told me, this is becoming an excellent meet with more and more activities each year. For further information, contact Ben Mathews, 101 Mulberry, Metairie, LA 70005; Tel.: (504) 833-5589; or call Boyd O'Brian, P.O. Box 7153, Metairie, LA; Tel.: (504) 835-5212.
The April column featured some motor mount suggestions, including one I had recently devised using brass straps and draw screws. At that time I commented that I'd used the method on some smaller motors and that I felt it would be perfectly workable on larger ones as well.
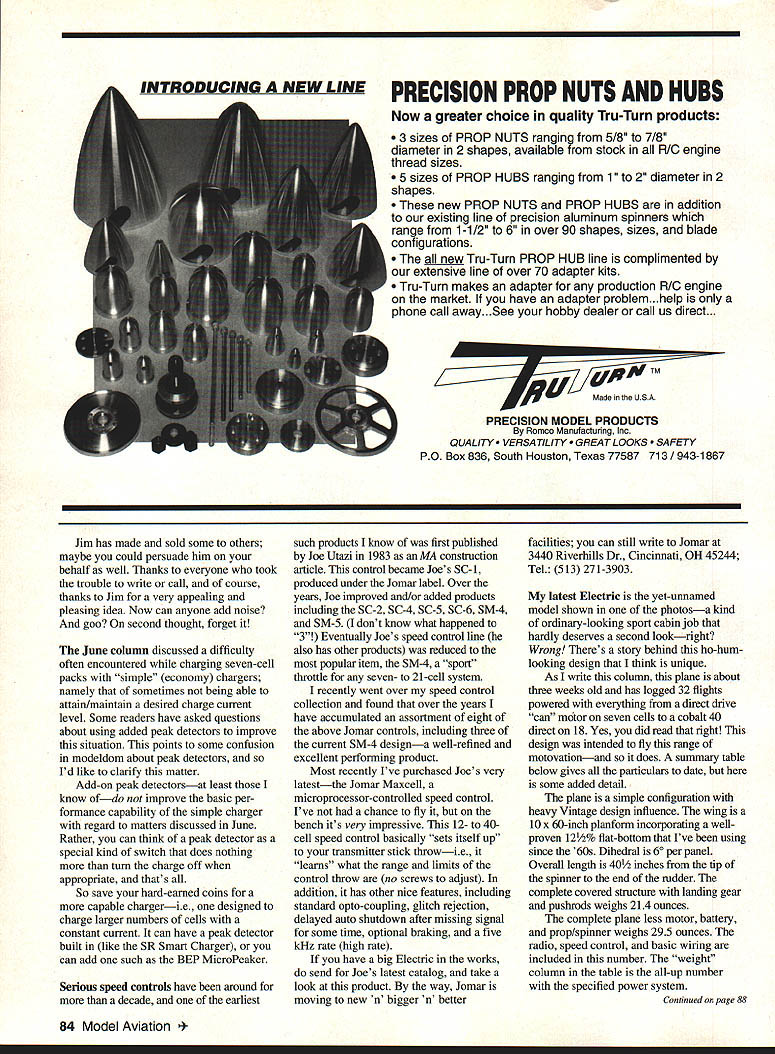
Since that was written, I've actually used this method on 15s, 25s, and 40s, and it does in fact work very well. This was all part of trying out my latest Electric, which I will describe below. In the meantime, however, I'd like to suggest that you refer to the April issue, and then I'd like to direct your attention to the photo that shows some recent improvements to this motor mount idea.
I found that handling the straps and related hardware was easier if the square tubing section was held at the J-bend end of the brass strap with a short length of heat-shrink tubing. In particular, the Du-Bro yellow tubing proved to be the right choice. When shrunk, this tubing prevents the square draw tube from accidentally slipping off the strap end during installation. Note that this is not a necessity, but is an improvement for handling convenience.
Similarly, I found that a short length of Du-Bro green tubing heat-shrunk on the screw itself would keep the flat washer under the screw head from slipping off during handling. Make the shrink tubing no longer than the square section tube, and enjoy this convenience as well. As will be seen below, this mounting method has tremendous versatility. Here's hoping you find this technique to your liking.
The May column featured a photo of a very convincing OT ignition "wet" power plant hiding a geared cobalt underneath — all the business end of a Playboy. I had taken the photo at KRC '92, but didn't ID the modeler at the time.
Several readers quickly responded with what I really should have known in the first place — the modeler in question is Jim Duckworth, 123 Forrest Lake Dr., Warner Robins, GA 31093. Jim made the dummy engine using cardboard tube and such; he has produced a real fooler. If you didn't get right up against it, you didn't know what was really there.
Jim has made and sold some to others; maybe you could persuade him on your behalf as well. Thanks to everyone who took the trouble to write or call, and of course, thanks to Jim for a very appealing and pleasing idea. Now can anyone add noise? And go? On second thought, forget it!
The June column discussed a difficulty often encountered while charging seven-cell packs with "simple" (economy) chargers; namely, sometimes not being able to attain/maintain a desired charge current level. Some readers have asked questions about using added peak detectors to improve this situation. This points to some confusion in modeldom about peak detectors, and so I'd like to clarify this matter.
Add-on peak detectors — at least those I know of — do not improve the basic performance capability of the simple charger with regard to matters discussed in June. Rather, you can think of a peak detector as a special kind of switch that does nothing more than turn the charge off when appropriate, and that's all.
So save your hard-earned coins for a more capable charger — i.e., one designed to charge larger numbers of cells with a constant current. It can have a peak detector built in (like the SR Smart Charger), or you can add one such as the BEP MicroPeaker.
Serious speed controls have been around for more than a decade, and one of the earliest such products I know of was first published by Joe Utazi in 1983 as an MA construction article. This control became Joe's SC-1, produced under the Jomar label. Over the years, Joe improved and/or added products including the SC-2, SC-4, SC-5, SC-6, SM-4, and SM-5. (I don't know what happened to "3"!) Eventually Joe's speed control line (he also has other products) was reduced to the most popular item, the SM-4, a "sport" throttle for any seven- to 21-cell system.
I recently went over my speed control collection and found that over the years I have accumulated an assortment of eight of the above Jomar controls, including three of the current SM-4 design — a well-refined and excellent performing product.
Most recently I've purchased Jomar's very latest — the Jomar Maxcell, a microprocessor-controlled speed control. I've not had a chance to fly it, but on the bench it's very impressive. This 12- to 40-cell speed control basically "sets itself up" to your transmitter stick throw — i.e., it "learns" what the range and limits of the control throw are (no screws to adjust). In addition, it has useful features, including standard opto-coupling, glitch rejection, delayed auto shutdown after missing signal for some time, optional braking, and a five kHz rate (high rate).
If you have a big Electric in the works, do send for Joe's latest catalog, and take a look at this product. By the way, Jomar is moving to new 'n' bigger 'n' better facilities; you can still write to Jomar at 3440 Riverview Dr., Cincinnati, OH 45244; Tel.: (513) 271-3903.
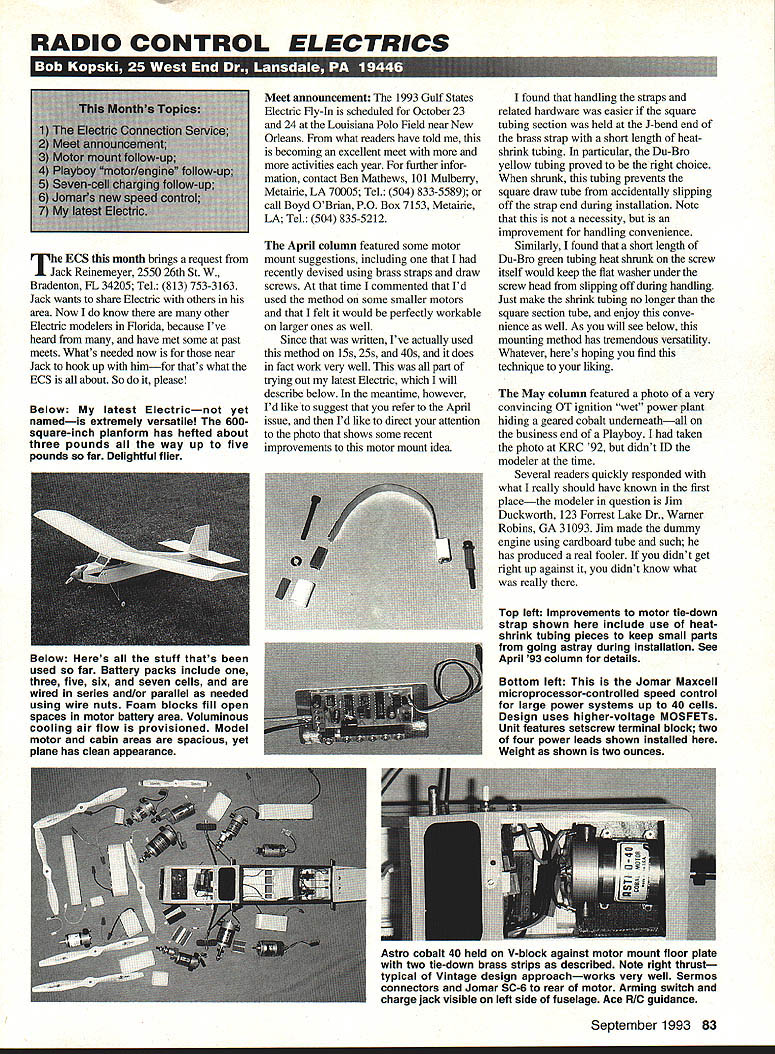
My latest Electric is the yet-unnamed model shown in one of the photos — a kind of narrow-looking sport cabin job that hardly deserves a second look — right? Wrong! There's a story behind this ho-hum-looking design that I think is unique.
As I write this column, the plane is about three weeks old and has logged 32 flights powered with everything from a direct-drive "can" motor to a 9-cell NiCad direct-drive unit to an .18. Yes, you did read that right! This design was intended to fly this range of motorization — and so it does. A summary table below gives all the particulars to date, but here are some added details.
The plane is a simple configuration with a heavy V-tail influence. The wing is a 10% thick airfoil incorporating a well-proven 12-1/2% flat-bottom that I've been using since the '60s. Dihedral is 6-1/2° per panel. Overall length is 40-1/2 inches. The plane is easy to build and is very forgiving in flight.
The complete plane less motor, battery, and receiver weighs 21.4 ounces. The radio, speed control, and basic wiring are included in this number. The "weight" column in the table is the all-up number with the specified power system.
Now I realize it may be hard for many to believe that any plane actually flies with this range of power systems. I've run into this reaction on my own flight line as I've swapped power systems, to the gaping disbelief of some onlookers. What they witnessed was not only that it does fly, but that it flies well — including takeoff from grass — for all combinations. So just how can the same plane fly so well from an "05" to a "40"? Simple.
As I've labored to explain so many times in this column, nomenclature like "oh-five," "Turbo," "550," and on and on means nothing. What matters is watts! Watts is what flies! And the power systems shown in one of the photos cover the range from about 120 to 450 watts — not nearly so large a range as the silly nomenclature might imply. All that's really needed for a plane to accommodate such a power range is that it be light enough to perform at the low-power end and rugged enough to carry the weight of the top-power end installation. And that's all there is to it.
Of course, I knew all this would work before I started construction — I don't like to build "for naught." All I had to do was apply my own rules of thumb from the 1983-1984 "All About Electrics" series in Model Aviation and build the plane as any Electric should be built — light everywhere and strong where needed. No computer assist was ever needed to do this job; imagine that! Building this design and flying it proved the point to the extent that I've already had parts requests.
The model flies so well that I've never even touched the transmitter trims, from the very first takeoff through the entire range of power system complements in calm and clear and wind and rain and cool and warm — testimony, I feel, to the solid Vintage design influence.
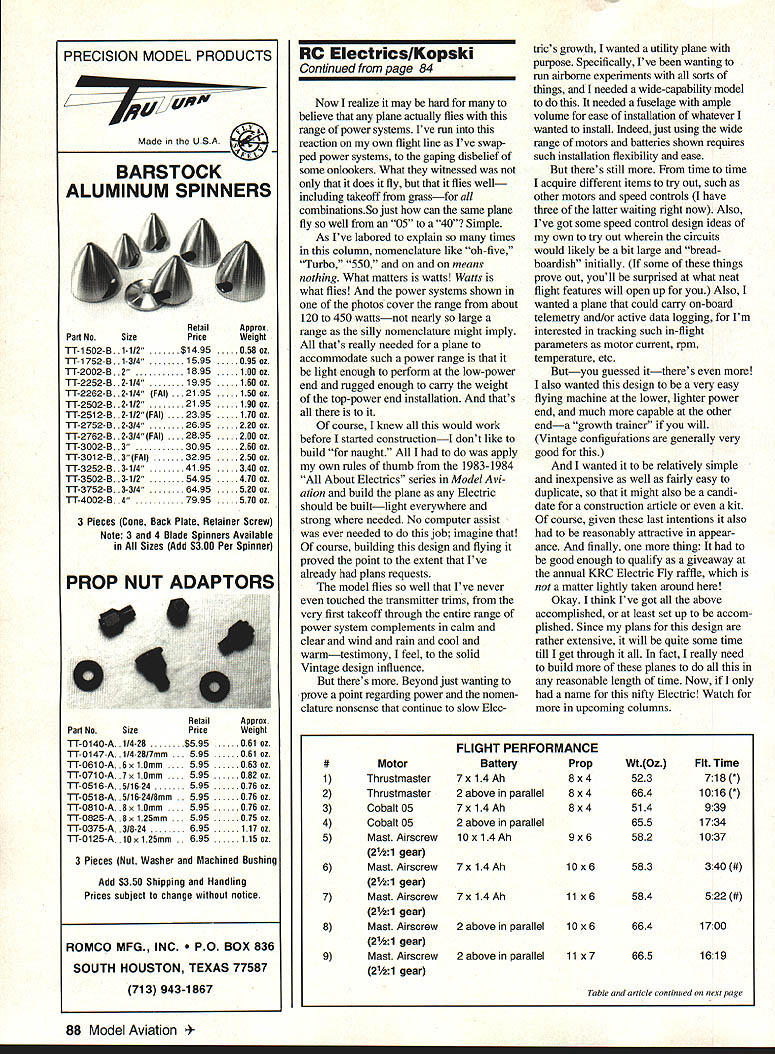
But there's more. Beyond just wanting to prove a point regarding power and the nomenclature nonsense that continue to slow electrics' growth, I wanted a utility plane with purpose. Specifically, I've been wanting to run airborne experiments with all sorts of things, and I needed a wide-capability model to do this. It needed a fuselage with ample volume for ease of installation of whatever I wanted to install. Indeed, just using the wide range of motors and batteries shown requires such installation flexibility and ease.
From time to time I acquire different items to try out, such as other motors and speed controls (I have three of the latter waiting right now). Also, I've got some speed control design ideas of my own to try out wherein the circuits would likely be a bit larger and "breadboardish" initially. (If some of these things prove out, you'll be surprised at what neat flight features will open up for you.) Also, I wanted a plane that could carry on-board telemetry and/or active data logging, for I'm interested in tracking such in-flight parameters as motor current, rpm, temperature, etc.
But — you guessed it — there's even more! I also wanted this design to be a very easy flying machine at the lower, lighter power end, and much more capable at the other end — a "growth trainer" if you will. (Vintage configurations are generally very good for this.)
And I wanted it to be relatively simple and inexpensive as well as fairly easy to duplicate, so that it might also be a candidate for a construction article or even a kit. Of course, given these last intentions it also had to be reasonably attractive in appearance. And finally, one more thing: it had to be good enough to qualify as a giveaway at the annual R/C Electric Fly raffle, which is not a matter lightly taken around here!
Okay. I think I've got all the above accomplished, or at least set up to be accomplished. Since my plans for this design are rather extensive, it will be some time till I get enough built to show all. In fact, I really need to build more of these planes to do all this in any reasonable length of time. Now, if I only had a name for this nifty Electric! Watch for more in upcoming columns.
FLIGHT PERFORMANCE
- Thrustmaster — 7 x 1.4 Ah — 8 x 4 — Wt. (oz.): 52.3 — Flt. Time: 7:18 (*)
- Thrustmaster — 2 above in parallel — 8 x 4 — Wt. (oz.): 66.4 — Flt. Time: 10:16 (*)
- Cobalt 05 — 7 x 1.4 Ah — 8 x 4 — Wt. (oz.): 51.4 — Flt. Time: 9:39
- Cobalt 05 — 2 above in parallel — 8 x 4 — Wt. (oz.): 65.5 — Flt. Time: 17:34
- Mast. Airscrew (2½:1 gear) — 10 x 1.4 Ah — 9 x 6 — Wt. (oz.): 58.2 — Flt. Time: 10:37
- Mast. Airscrew — 7 x 1.4 Ah — 10 x 6 — Wt. (oz.): 58.3 — Flt. Time: 3:40 (#)
- Mast. Airscrew — 7 x 1.4 Ah — 11 x 6 — Wt. (oz.): 58.4 — Flt. Time: 5:22 (#)
- Mast. Airscrew — 2 above in parallel — 10 x 6 — Wt. (oz.): 66.4 — Flt. Time: 17:00 (2½:1 gear)
- Mast. Airscrew — 2 above in parallel — 11 x 7 — Wt. (oz.): 66.5 — Flt. Time: 16:19 (2½:1 gear)
FLIGHT PERFORMANCE (Continued)
- Mast. Airscrew (2½:1 gear) — 2 above in parallel — 11 x 7 — Wt. (oz.): 66.5 — Flt. Time: 17:24
- Mast. Airscrew (2½:1 gear) — 2 above in parallel — 11 x 7 — Wt. (oz.): 66.5 — Flt. Time: 15:38
- Cobalt "05G" — 7 x 1.4 Ah — 11 x 7 — Wt. (oz.): 53.2 — Flt. Time: 4:10 (#)
- Cobalt "05G" — 7 x 1.4 Ah — 11 x 7 — Wt. (oz.): 53.2 — Flt. Time: 4:47 (#)
- Cobalt "05G" — 7 x 1.4 Ah — 11 x 7 — Wt. (oz.): 53.2 — Flt. Time: 8:08
- Cobalt "05G" — 7 x 1.4 Ah — 11 x 7 — Wt. (oz.): 53.2 — Flt. Time: 10:02
- Cobalt "05G" — 7 x 1.4 Ah — 11 x 7 — Wt. (oz.): 53.2 — Flt. Time: 6:47 (#)
- Cobalt "05G" — 7 x 1.4 Ah — 11 x 7 — Wt. (oz.): 53.2 — Flt. Time: 9:26
- Cobalt "05G" — 7 x 1.4 Ah — 11 x 7 — Wt. (oz.): 53.2 — Flt. Time: 8:06
- Cobalt "05G" — 7 x 1.4 Ah — 11 x 7 — Wt. (oz.): 53.2 — Flt. Time: 9:04
- Cobalt "05G" — 7 x 1.4 Ah — 11 x 7 — Wt. (oz.): 53.2 — Flt. Time: 9:28
- Cobalt "05G" — 2 above in parallel — 11 x 7 — Wt. (oz.): 67.3 — Flt. Time: 12:57
- Cobalt "15" — 12 x 1.4 Ah — 8 x 4 — Wt. (oz.): 61.5 — Flt. Time: 14:57
- Cobalt "15G" — 12 x 1.4 Ah — 11 x 7 — Wt. (oz.): 64.3 — Flt. Time: 14:10
- Cobalt "25" — 14 x 1.4 Ah — 9 x 6 — Wt. (oz.): 69.2 — Flt. Time: 8:56 (#)
- Cobalt "25" — 14 x 1.4 Ah — 9 x 6 — Wt. (oz.): 69.2 — Flt. Time: 13:01
- Cobalt "25" — 14 x 1.4 Ah — 9 x 6 — Wt. (oz.): 69.2 — Flt. Time: 13:52
- Cobalt "25" — 14 x 1.4 Ah — 9 x 6 — Wt. (oz.): 69.2 — Flt. Time: 11:37
- Cobalt "25" — 14 x 1.4 Ah — 9 x 6 — Wt. (oz.): 69.2 — Flt. Time: 11:36
- Cobalt "40" — 18 x 1.4 Ah — 10 x 6 — Wt. (oz.): 79.5 — Flt. Time: 16:43
- Cobalt "40" — 18 x 1.4 Ah — 10 x 6 — Wt. (oz.): 79.5 — Flt. Time: 16:53
- Turbo 700 BB — 10 x 1.4 Ah — 9 x 6 — Wt. (oz.): 63.4 — Flt. Time: 12:28
- (*) = marginal ground handling but not marginal in flight.
- (#) = known "short" flight times because of partial charges, wind/rain/nightfall, or flights purposely cut short for other reasons.
Other notes: Because I wanted to present this info in this month's column, some flight tests above were rushed. This shows up as limited data for some power combos compared with others. Also, I had to fly even in adverse weather conditions to fit it all in, so some direct comparisons may be inappropriate.
One general trend is clear: the more battery, the longer the flight. Also, most (but not all) flights included some touch-and-goes, loops, aggressive "flying," and "just cruisin'," but no "hanging on the prop." In other words, these flights were all reasonably representative of a typical sport flight. More to come later.
Please enclose an SASE with any correspondence for which you'd like a reply. And please address all correspondence to my address — not to Model Aviation or the Academy of Model Aeronautics.
Note here that my first writing with MA appeared in the September 1983 issue. Please accept my gratitude for being with me, and my best wishes for a Happy Electri-Flyin' Season!
Jack Reinemeyer
Transcribed from original scans by AI. Minor OCR errors may remain.

