

Radio Control GIANT SCALE
By Bob Beckman
This month I'm going to review three things: engine accessories, kits, and plans.
Engine accessories
#### Quadra starter Quadra has a new item that looks like a real jewel: a recoil-type pull starter that fits into their cast-aluminum engine mount. The unit comes disassembled and complete with the mount. Although I haven't put mine together yet, it doesn't look difficult at all.
You select the exit point for the pull rope, so you can set it up for any engine mounting position or cowling situation. The handle that comes with the starter is fairly small and could be used for many installations, hidden behind a dummy access panel, for instance. Dario Brisighella went one step farther on his Starduster Too—his dummy panel is the handle. Another possibility is to use a removable handle. However you do it, a starter like this is well worth the $24.95 and the few ounces it costs.
Available from U.S. Quadra, 1032 East Manitowoc Ave., Oak Creek, WI 53154.
#### CB Quadra muffler I recently reported on one of the new muffler systems available from CB Associates. I have been using their exhaust pipe on the Quadra in my Stinson Voyager, but I had to cobble together a manifold for it. Now CB has put out their complete Quadra muffler kit.
The manifold is a reasonably large, rectangular expansion chamber with several options for routing the exhaust pipe:
- You can run the pipe out of either side.
- You can come out of both sides and wind up with Pitts-type exhaust stacks (this requires some additional pipe pieces).
The muffler sells for $32.95; the extra pipe is $3.95 plus $6.85 for either a 90-degree or a 45-degree elbow. They may not be in shops yet, but you can get them direct from CB Associates, Inc., 21658 Cloud Way, Hayward, CA 94545.
#### Quadra carburetor adaptor One awkward thing about the Quadra has been the linkage to the throttle. The standard position of the carburetor requires a right-angle approach to the throttle arm, and there are several such units available. The other way to go is to turn the carb so the throttle arm lines up with a pushrod coming straight through the firewall. If done properly, this can also result in a more convenient location for the needle valves.
There are two potential pitfalls with that latter solution. First, you must maintain a path for the crankcase pressure/vacuum to the diaphragm pump in the carb. Most people know that by now, but the second pitfall is less well known. About the only way to turn that carb around is to make a mounting block to replace the original plastic block. If that mounting block is metal, especially aluminum, it can conduct heat from the crankcase to the carb and affect starting and running when the engine is hot. Then, understandably, people at Quadra get upset when someone says their engine doesn't run right.
Quadra has listened to complaints and come up with a solution. Their carburetor-rotating kit has a metal carburetor mount with a plastic spacer block. You get a straight shot at the throttle, easy access to the needles, and the carb no farther out from the engine than it was before. This kit is available from U.S. Quadra for $9.95.
Kits
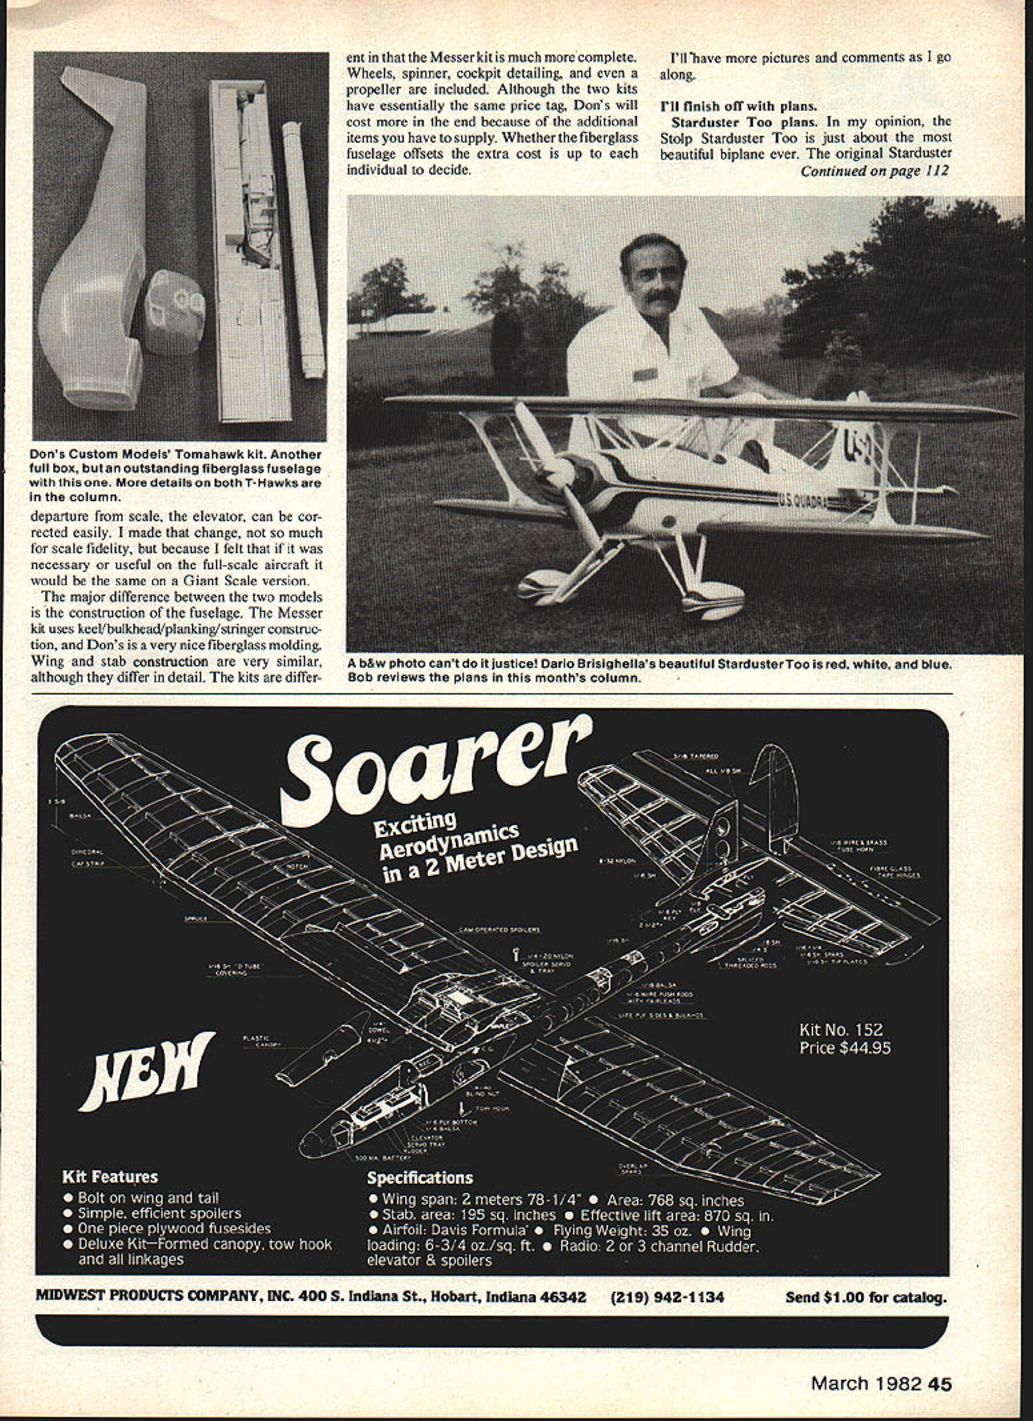
#### Piper Tomahawks A few months ago I reviewed the Jim Messer plans for the Piper Tomahawk and mentioned that I would be building one of his kits. Actually, I'm building two Tomahawk models in parallel: the Jim Messer kit and the fiberglass fuselage version by Don's Custom Models. Why build two different kits of the same airplane at the same time? They are for a "How To" book on Giant Scale, and I've committed to having them finished early in 1982. That seems to be the only way I can get any building done anymore: tie it in with an article or book.
I am impressed by both kits and thought you might like to hear more about them. When you look at the prices in the Giant Scale kit advertisements, you can't help asking if a kit, even for a big airplane, can really be worth that much. Both of these kits sell for over $200, and at this point I would say they are well worth the money. Even though there are many differences between the kits, the materials and workmanship are outstanding in both. They do use the same fiberglass cowl, and it is one of the best examples of fiberglass molding I have ever seen.
Both models are 1/4-scale, but there are enough little differences that you know they can't both be absolutely true to scale. Although I haven't gone to the trouble to really research it, it seems to me that Don's model is the more accurate of the two. Jim tells you that he changed the wing in both span and chord to improve flight performance. There are other changes as well: Jim's model has one-half degree more dihedral in each wing panel than Don's, and it lacks the dynamically balanced elevator. These things are relatively unimportant unless you're a stickler for scale detail. The one immediately obvious departure from scale—the elevator—can be corrected easily. I made that change, not so much for scale fidelity, but because I felt that if it was necessary or useful on the full-scale aircraft it would be the same on a Giant Scale version.
The major difference between the two models is the construction of the fuselage. The Messer kit uses keel/bulkhead/planking/stringer construction, and Don's is a very nice fiberglass molding. Wing and stab construction are very similar, although they differ in detail. The kits are different in that the Messer kit is much more complete. Wheels, spinner, cockpit detailing, and even a propeller are included. Although the two kits have essentially the same price tag, Don's will cost more in the end because of the additional items you have to supply. Whether the fiberglass fuselage offsets the extra cost is up to each individual to decide.
I'll have more pictures and comments as I go along.
Plans
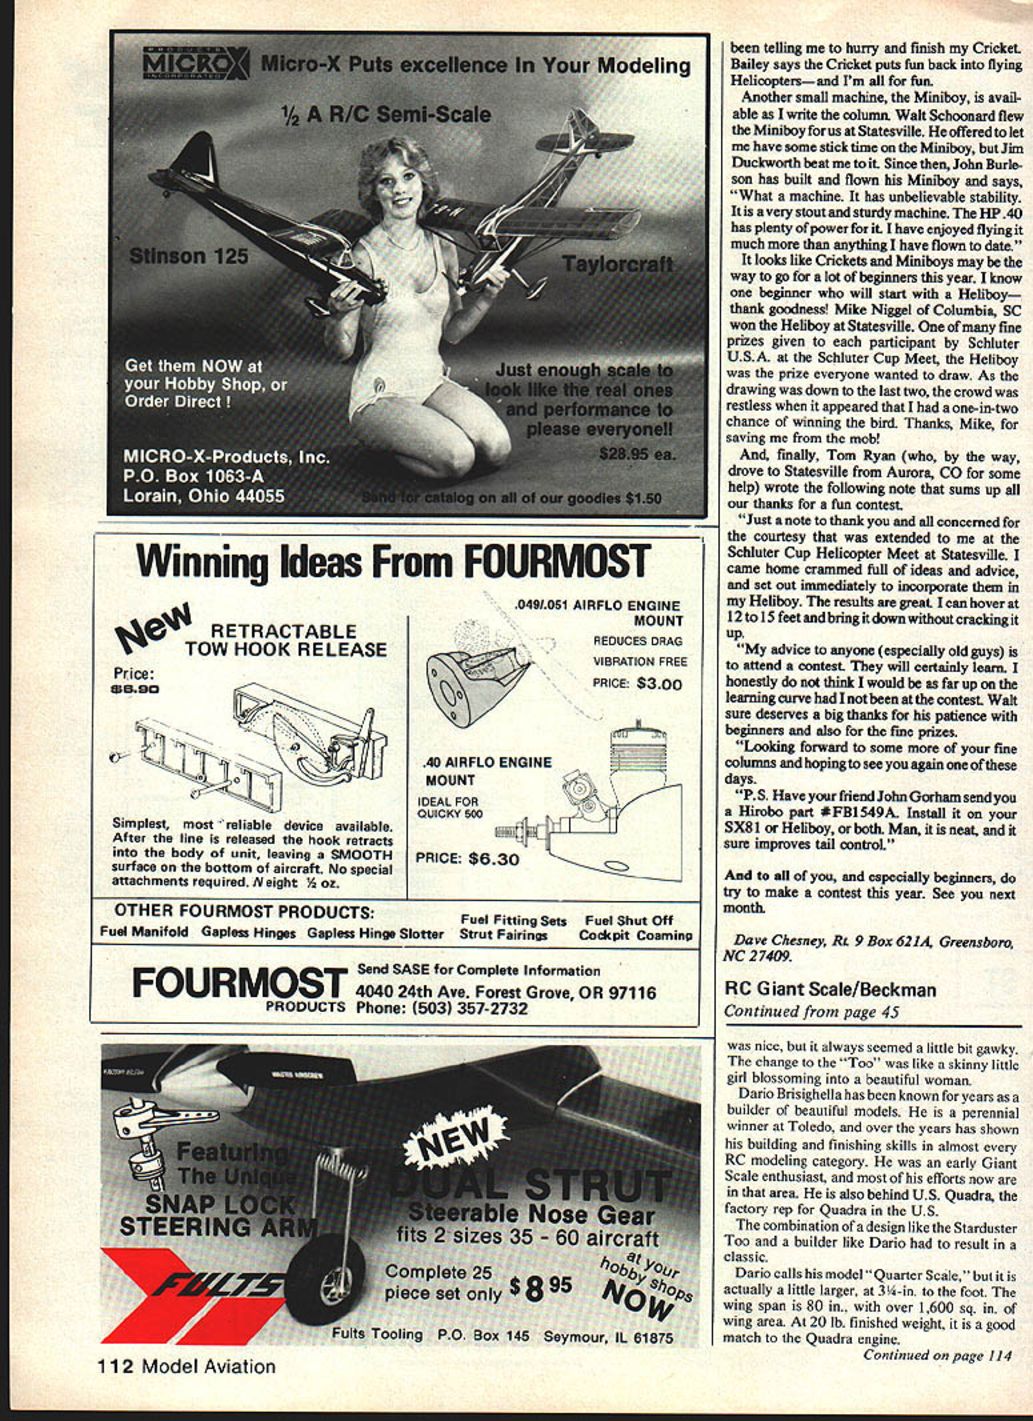
#### Starduster Too plans In my opinion, the Stolp Starduster Too is just about the most beautiful biplane ever. The original Starduster was nice, but it always seemed a little gawky. The change to the "Too" was like a skinny little girl blossoming into a beautiful woman.
Dario Brisighella has been known for years as a builder of beautiful models. He is a perennial winner at Toledo, and over the years has shown his building and finishing skills in almost every RC modeling category. He was an early Giant Scale enthusiast, and most of his efforts now are in that area. He is also behind U.S. Quadra, the factory rep for Quadra in the U.S.
The combination of a design like the Starduster Too and a builder like Dario had to result in a classic.
Dario calls his model "Quarter Scale," but it is actually a little larger, at 3-3/4 in. to the foot. The wingspan is 80 in., with over 1,600 sq. in. of wing area. At 20 lb. finished weight, it is a good match to the Quadra engine.
The plans consist of four sheets and are shipped rolled. There is almost 80 sq. ft. of drawing, with very little blank space. I think the plans are worth the price just for the many techniques detailed here that are usable on any Giant Scale project. Frankly, I plan to crib some of his ideas for use on my Tomahawks.
Dario says the model has been designed so the average modeler can build it without difficulty. I would agree, but with some reservations. There are some skills required that any Giant Scale builder should have, but too many "average" builders have yet to learn them. This would be a good place to learn some valuable techniques. I don't mean that Dario's plans will teach you these things—that's a bit much to ask. However, to properly build, for example, the landing gear you will have to learn how to braze steel and brass. This is not particularly difficult, but it is a skill not often needed in most RC modeling.
The basic construction of the model is quite conventional. The fuselage is a truss-type structure with formers, planking, and stringers. The load-bearing members are spruce or plywood, with balsa where appropriate to reduce weight. The wings are spruce spars with balsa ribs. The trailing edge is a little unusual, being cut from 1/16-in. plywood. This makes the elliptical shape of the trailing edge and tip easy to do and also provides a hard edge to the wing. Those elliptical wings are not as hard as they seem. Most of the ribs can be stack-cut and then modified at the trailing edge.
The aircraft employs scale bracing on the tail surfaces. This bracing is functional, not just for show. On the other hand, the size and structure of the wings make full-scale wire rigging unnecessary. The interplane "I" struts are required, of course. The scale rigging can be added for appearance, but leaving it off makes the assembly job a lot simpler when you're just out for some weekend afternoon fun.
Dario's unusual cabane strut assembly allows adjustment and complete removal of the struts. This can be a big help when covering and finishing the bird. The fittings required take some machining, but it's a simple job that can be done with a drill press and some large thread-cutting dies. A lathe would help, but isn't absolutely necessary.
This is another Giant Scale design that I would give my eye teeth to build. I wouldn't recommend it as a first building effort, but even a beginner can learn a lot from just looking at these drawings. Plans are $30.00, which includes postage, from:
Dario G. Brisighella, Sr. 1032 East Manitowoc Avenue Oak Creek, WI 53154
Bob Beckman 8248 Holly Grove Ct. Manassas, VA 22110
Transcribed from original scans by AI. Minor OCR errors may remain.

