
Radio Control: Giant Scale
Bob Beckman
Nostalgia Time
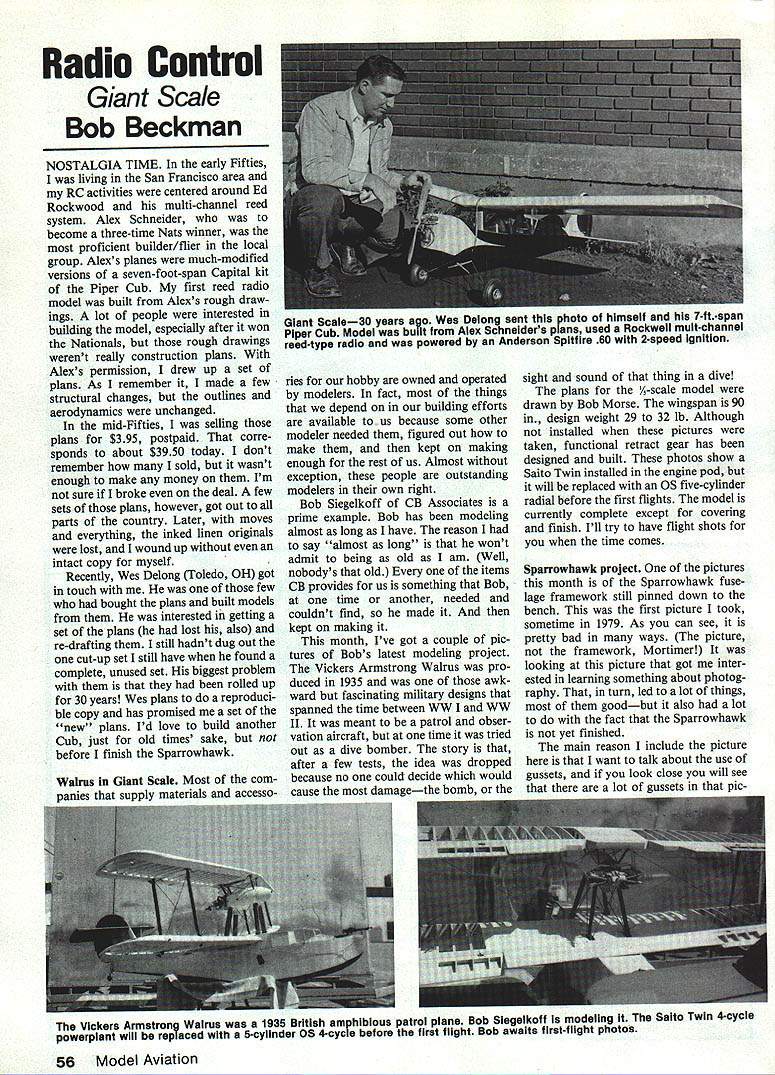
In the early Fifties I was living in the San Francisco area and my RC activities were centered around Ed Rockwood and his multi-channel reed system. Alex Schneider, who would become a three-time Nats winner, was the most proficient builder/flier in the local group. Alex's planes were much-modified versions of a seven-foot-span Capital kit of the Piper Cub. My first reed-radio model was built from Alex's rough drawings. A lot of people were interested in building the model, especially after it won the Nationals, but those rough drawings weren't really construction plans. With Alex's permission I drew up a set of plans. As I remember it, I made a few structural changes, but the outlines and aerodynamics were unchanged.
In the mid-Fifties I sold those plans for $3.95, postpaid — about $39.50 in today's dollars. I don't remember how many I sold, but it wasn't enough to make any money on them. I may not even have broken even. A few sets of those plans, however, got out to all parts of the country. Later, with moves and everything, the inked-linen originals were lost, and I wound up without even an intact copy for myself.
Recently Wes Delong (Toledo, OH) got in touch with me. He was one of those few who had bought the plans and built models from them. He was interested in getting a set of the plans (he had lost his, too) and re-drafting them. I still hadn't dug out the cut-up set I had when he found a complete, unused set. His biggest problem with them is that they had been rolled up for 30 years. Wes plans to do a reproducible copy and has promised me a set of the "new" plans. I'd love to build another Cub just for old times' sake, but not before I finish the Sparrowhawk.
Walrus in Giant Scale
Most of the companies that supply materials and accessories for our hobby are owned and operated by modelers. In fact, most of the things we depend on in our building efforts are available because some other modeler needed them, figured out how to make them, and then kept on making enough for the rest of us. Almost without exception, these people are outstanding modelers in their own right.
Bob Siegelkoff of CB Associates is a prime example. Bob has been modeling almost as long as I have. (I say "almost" because he won't admit to being as old as I am.) Every item CB provides was once something Bob needed and couldn't find, so he made it — and then kept on making it.
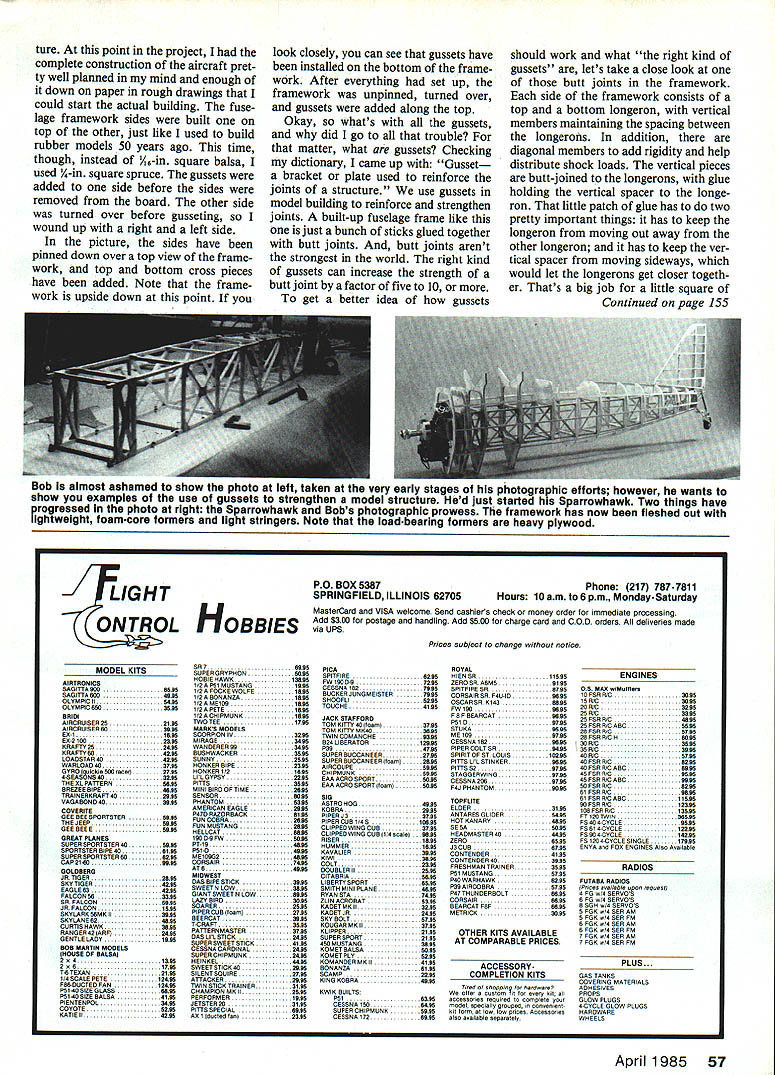
This month I've got a couple of pictures of Bob's latest modeling project. The Vickers Armstrong Walrus was produced in 1935 and was one of those awkward but fascinating military designs that spanned the time between WWI and WWII. It was meant to be a patrol and observation aircraft, but at one time it was tried out as a dive bomber. The story is that after a few tests the idea was dropped because no one could decide which would cause the most damage — the bomb, or the sight and sound of that thing in a dive!
The plans for the 1/4-scale model were drawn by Bob Morse. The wingspan is 90 in., design weight 29 to 32 lb. Although not installed when these pictures were taken, functional retract gear has been designed and built. The photos show a Saito twin installed in the engine pod, but it will be replaced with an OS five-cylinder radial before the first flights. The model is currently complete except for covering and finish. I'll try to have flight shots for you when the time comes.
Sparrowhawk project
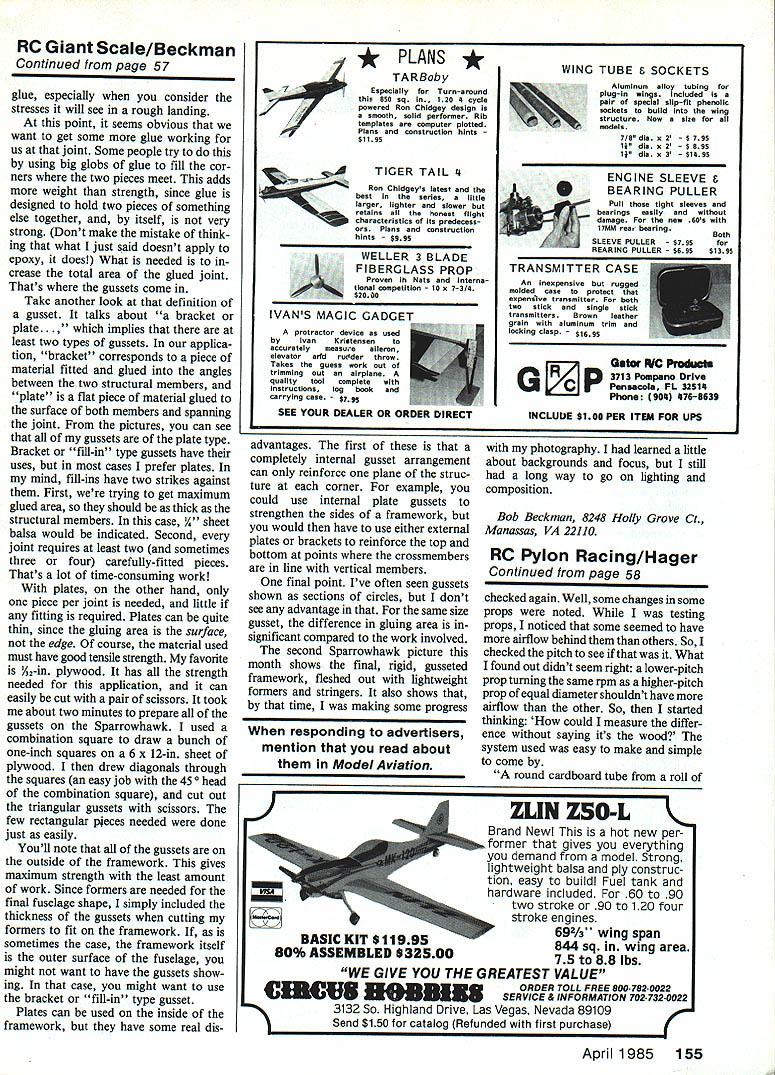
One of the pictures this month is of the Sparrowhawk fuselage framework still pinned down to the bench. This was the first picture I took, sometime in 1979. As you can see, it is pretty bad in many ways (the picture, not the framework!). It was looking at this picture that got me interested in learning something about photography. That, in turn, led to a lot of things, most of them good — but it also had a lot to do with the fact that the Sparrowhawk is not yet finished.
The main reason I include the picture here is that I want to talk about the use of gussets, and if you look closely you will see that there are a lot of gussets in that picture.
What is a gusset?
A gusset is a bracket or plate used to reinforce the joints of a structure. We use gussets in model building to reinforce and strengthen joints. A built-up fuselage frame like this one is just a bunch of sticks glued together with butt joints, and butt joints aren't the strongest. The right kind of gussets can increase the strength of a butt joint by a factor of five to ten, or more.
How I build sides
I build the fuselage framework sides top-side down, just like they used to build rubber models 50 years ago. The difference is that instead of 1/8-in. square balsa I use 1/8-in. square spruce. Gussets are added to each side before the sides are removed from the board and the other side is turned over before gusseting. That way you wind up with right and left sides that are identical.
In the picture the sides have been pinned down; top and bottom cross pieces have been added. Note that the framework is upside down at this point. You can see gussets installed in the bottom framework. After everything is set up, the framework is unpinned, turned over, and gussets are added along the top. I include the thickness of the gussets when cutting my formers to fit on the framework.
Why use gussets?
Take a close look at one of those butt joints in the framework. Each side of the framework consists of a top and a bottom longeron, with vertical members maintaining the spacing between the longerons. Diagonal members add rigidity and help distribute shock loads. The vertical pieces are butt-joined to the longerons, with glue holding the vertical spacer to the longeron.
That little patch of glue has to do two important things: it has to keep the longeron from moving away from the other longeron, and it has to keep the vertical spacer from moving sideways, which would let the longerons get closer together. That's a big job for a little square of glue, especially when you consider the stresses it will see in a rough landing.
Some people try to add strength by using big globs of glue to fill the corners where pieces meet. This adds more weight than strength, since glue holds two pieces together and, by itself, is not very strong. (That applies to epoxy as well.) What is needed is to increase the total area of the glued joint — that's where gussets come in.
Take another look at the definition of gusset: "a bracket or plate..." That implies at least two types of gussets:
- Bracket (fill-in): a piece of material fitted and glued into the angle between two structural members. These should be as thick as the structural members (e.g., 1/4-in. sheet balsa) and often require multiple carefully fitted pieces, which is time-consuming.
- Plate: a flat piece of material glued to the surface of both members and spanning the joint. Only one piece per joint is needed, little fitting is required, and the gluing area is the surface, not the edge.
I prefer plate gussets. The material must have good tensile strength; my favorite is 1/32-in. plywood. It has the necessary strength and can be cut easily with scissors. It took me about two minutes to prepare all of the gussets on the Sparrowhawk. I used a combination square to draw a bunch of 1-in. squares on a 6 x 12-in. sheet of plywood, drew diagonals with the 45-degree head, and cut out the triangular gussets with scissors. The few rectangular pieces needed were done just as easily.
You'll note that all of my gussets are on the outside of the framework. This gives maximum strength with the least amount of work. If the framework itself will be the outer surface of the fuselage and you don't want the gussets showing, use the bracket or fill-in type instead.
Plates can be used on the inside, but they have real disadvantages. An internal plate arrangement can only reinforce one plane of the structure at each corner. For example, internal plate gussets can strengthen the sides of a framework, but you would then need external plates or brackets to reinforce the top and bottom where crossmembers align with vertical members.
One final point: I've often seen gussets shown as sections of circles, but I don't see any advantage. For the same size gusset, the difference in gluing area is insignificant compared to the extra work involved.
The second Sparrowhawk picture in this issue shows the final, rigid, gusseted framework, fleshed out with lightweight formers and stringers. It also shows that, by that time, I was making some progress with my photography. I had learned a little about backgrounds and focus, but I still had a long way to go on lighting and composition.
Bob Beckman 8248 Holly Grove Ct. Manassas, VA 22110
Transcribed from original scans by AI. Minor OCR errors may remain.

