
RADIO CONTROL GIANTS
John A. de Vries 4610 Moffat Lane, Colorado Springs, CO 80915
The Martin B-26 and Ben Ostlind
Ben Ostlind of San Rafael, California has this "thing" about the Martin B-26. It's only reasonable — he flew Marauders in combat during World War II.
The B-26 was quite an airplane. It had two R-2800s to pull it through the air at a rapid rate. After a particularly difficult gestation period and a host of modifications, the Martin bomber scored the lowest loss rate of any U.S. airplane in the European theater.
Some authors have suggested the B-26's fuselage was modeled after a .50-caliber bullet — one smooth, streamlined shape from nose to tail. With a bit more wing area and a slight change in the wing's angle of incidence, the "Widow Maker" became a relatively reasonable airplane to fly.
Unfortunately, only a handful of the Martin bombers survived the war. It became the only aircraft in U.S. history to "share" its designation with another bomber/attack airplane; even as the Army Air Forces were removing the Martin aircraft from the inventory, it was being replaced by the Douglas B-26 (formerly the A-26).
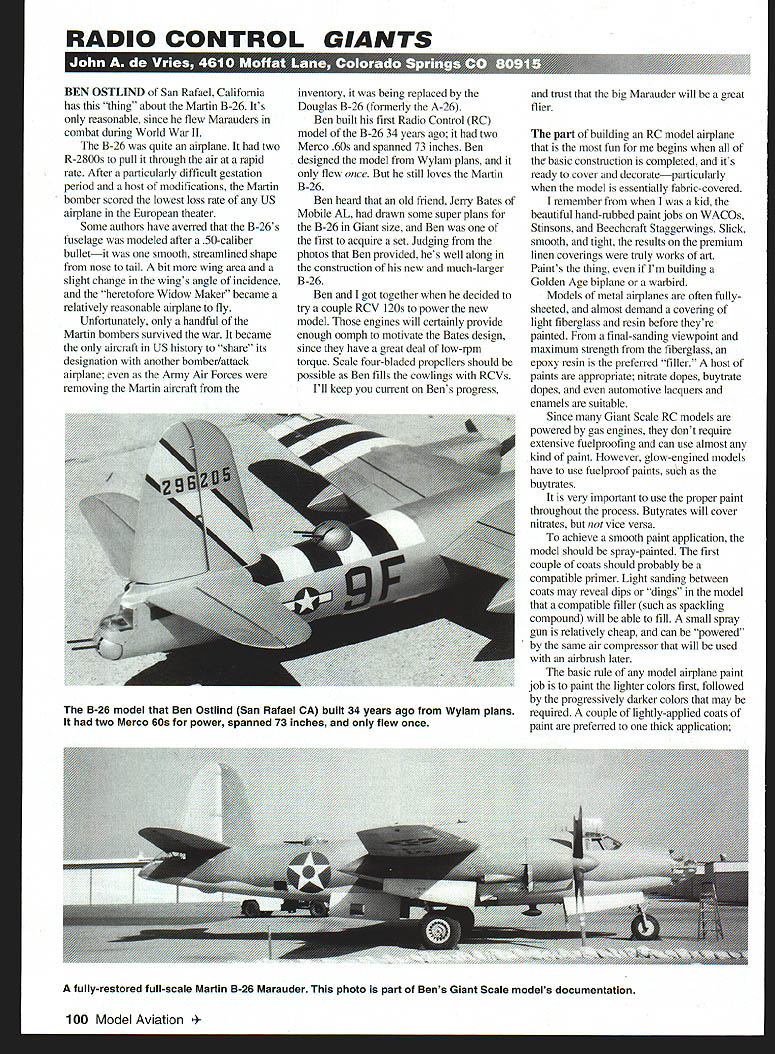
Ben built his first radio control (RC) model of the B-26 34 years ago; it had two Merco .60s and spanned 73 inches. Ben designed the model from Wylam plans, and it only flew once. But he still loves the Martin B-26.
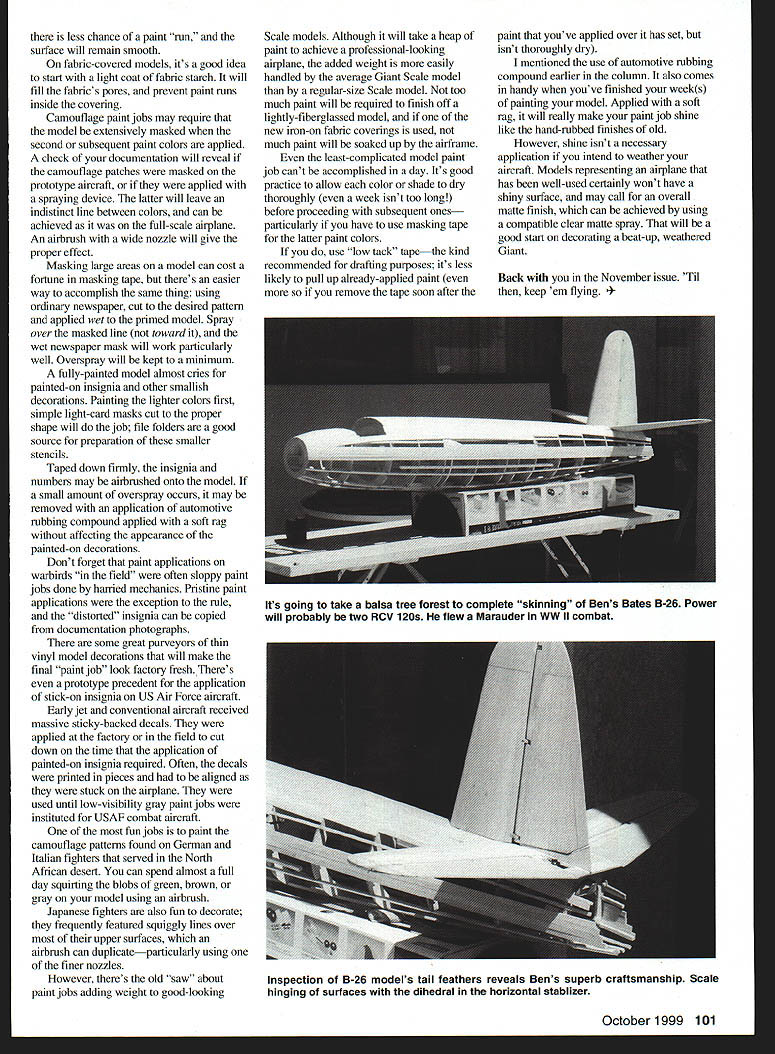
Ben heard that an old friend, Jerry Bates of Mobile, AL, had drawn some super plans for the B-26 in giant size, and Ben was one of the first to acquire a set. Judging from the photos Ben provided, he's well along in the construction of his new, much larger B-26.
Ben and I got together when he decided to try a couple of RCV .120s to power the new model. Those engines will certainly provide enough oomph to motivate the Bates design, since they have a great deal of low-rpm torque. Scale four-bladed propellers should be possible as Ben fills the cowlings with RCVs. I'll keep you current on Ben's progress, and I trust the big Marauder will be a great flier.
Finishing: Covering and Painting
The part of building an RC model airplane that is the most fun for me begins when all of the basic construction is completed and it is ready to cover and decorate — particularly when the model is essentially fabric-covered.
I remember, from when I was a kid, the beautiful hand-rubbed paint jobs on WACOs, Stinsons, and Beechcraft Staggerwings. Slick, smooth, and tight, the results on the premium linen coverings were truly works of art. Paint's the thing, even if I'm building a Golden Age biplane or a warbird.
Models of metal airplanes are often fully sheeted and almost demand a covering of light fiberglass and resin before they're painted. From a final-sanding viewpoint and for maximum strength from the fiberglass, an epoxy resin is the preferred filler. A host of paints are appropriate:
- nitrate dopes
- butyrate dopes
- automotive lacquers and enamels
Since many giant-scale RC models are powered by gas engines, they don't require extensive fuelproofing and can use almost any kind of paint. However, glow-engined models must use fuelproof paints, such as the butyrates.
It is very important to use the proper paint throughout the process. Butyrates will cover nitrates, but not vice versa.
To achieve a smooth paint application, the model should be spray-painted. The first couple of coats should probably be a compatible primer. Light sanding between coats may reveal dips or "dings" in the model that a compatible filler (such as spackling compound) can fill. A small spray gun is relatively cheap and can be powered by the same air compressor that will be used with an airbrush later.
Basic painting rules:
- Paint lighter colors first, followed by progressively darker colors.
- Apply a couple of light coats rather than one thick coat to avoid runs and maintain a smooth surface.
- Allow each color or shade to dry thoroughly before proceeding — even a week isn't too long for proper curing.
For fabric-covered models, start with a light coat of fabric starch. This fills the fabric's pores and helps prevent paint runs.
Masking, Camouflage, and Insignia
For camouflage paint jobs, the model may require that large areas be masked when second or subsequent paint colors are applied. Check documentation; it will reveal how camouflage patches on the prototype aircraft were applied. Spraying can leave soft, indistinct lines between colors, which is often the desired effect on scale models to match full-scale practice. An airbrush with a wide nozzle will give the proper soft-edged effect.
Masking large areas can be costly in tape. There's an easier way using ordinary newspaper: cut the desired pattern and apply it wet to the primed model. Spray over the masked line toward the wet newspaper; the mask will work particularly well and keep overspray to a minimum.
A fully painted model almost cries out for painted-on insignia and other small decorations. Painting lighter colors first is simple; light-card masks cut to the proper shape, taped down firmly, allow insignia and numbers to be airbrushed onto the model. If a small amount of overspray occurs, it may be removed with an application of automotive rubbing compound applied with a soft rag without affecting the appearance of the painted-on decorations.
Don't forget that paint applications on warbirds "in the field" were often sloppy jobs done by harried mechanics. Pristine paint applications were the exception, and distorted insignia can be copied from documentation photographs.
There are great purveyors of thin vinyl model decorations that will make the final "paint job" look factory fresh. There's even a prototype precedent for the application of stick-on insignia on U.S. Air Force aircraft. Early jet and conventional aircraft received massive sticky-backed decals applied at the factory or in the field to cut down on the time required for painted insignia. Often the decals were printed in pieces and had to be aligned as they were stuck on the airplane.
Special Effects and Weathering
One of the most fun jobs is painting the camouflage patterns found on German and Italian fighters that served in the North African desert. You can spend almost a full day squirting blobs of green, brown, or gray on your model using an airbrush.
Japanese fighters are also fun to decorate; they frequently featured squiggly lines over most of their upper surfaces, which an airbrush can duplicate — particularly using one of the finer nozzles.
There is the old saw about paint jobs adding weight to good-looking scale models. Although it will take a heap of paint to achieve a professional-looking airplane, the added weight is more easily handled by the average giant-scale modeler than by a regular-size scale modeler. Not too much paint will be required to finish off a lightly fiberglassed model, and if one of the new iron-on fabric coverings is used, not much paint will be soaked up by the airframe.
Even the least-complicated model paint job can't be accomplished in a day. It's good practice to allow each color or shade to dry thoroughly before proceeding with subsequent ones — particularly if you have to use masking tape. If you must use tape, use "low tack" tape (the kind recommended for drafting purposes); it's less likely to pull up already-applied paint. Remove the tape soon after the paint you've applied over it has set but isn't thoroughly dry to minimize lifting.
Automotive rubbing compound, applied with a soft rag, will really make your paint job shine like the hand-rubbed finishes of old. However, shine isn't necessary if you intend to weather your aircraft. Models representing well-used airplanes certainly won't have a shiny surface and may call for an overall matte finish, which can be achieved with a compatible clear matte spray. That is a good start on decorating a beat-up, weathered giant.
Back with you in the November issue. 'Til then, keep 'em flying.
Transcribed from original scans by AI. Minor OCR errors may remain.

