

Radio Control
Helicopters
Larry Jolly
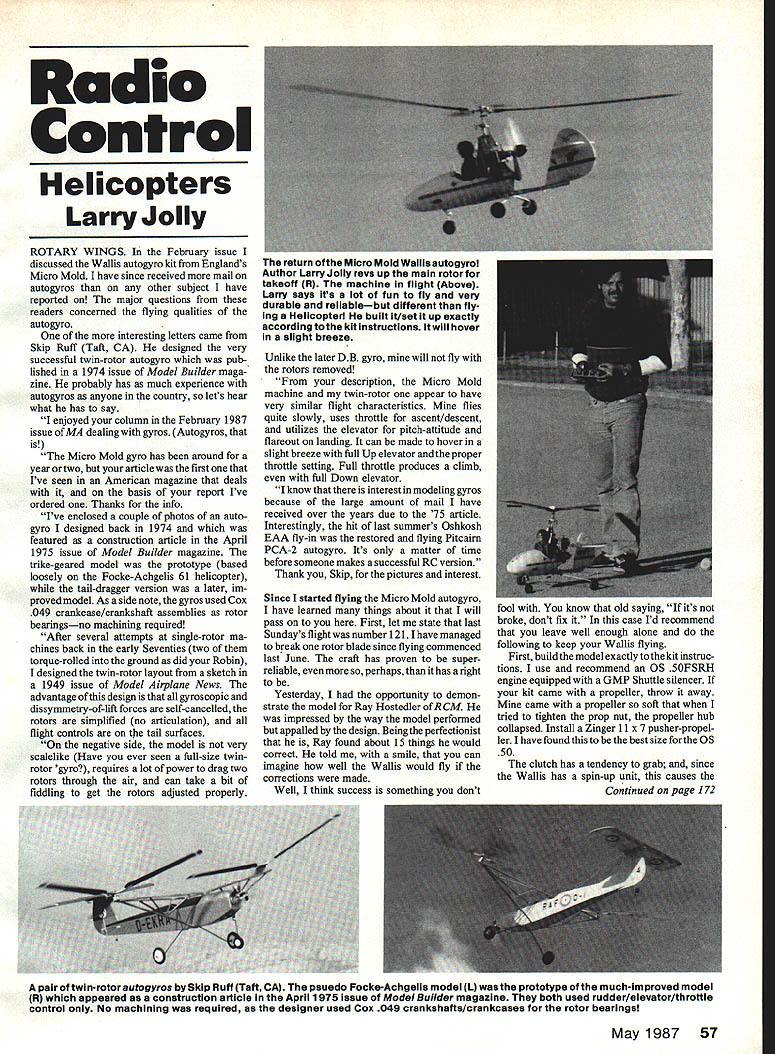
ROTARY WINGS. In the February issue I discussed the Wallis autogyro kit from England's Micro Mold. Since then I've received more mail on autogyros than on any other subject I have reported on. The major questions from readers concerned the flying qualities of the autogyro.
Letter from Skip Ruff
One interesting letter came from Skip Ruff (Taft, CA). He designed a very successful twin-rotor autogyro published in the April 1975 issue of Model Builder magazine. He has extensive experience with autogyros and wrote:
"I enjoyed your column in the February 1987 issue of MA dealing with gyros (autogyros, that is!). The Micro Mold gyro has been around for a year or two, but your article was the first one I've seen in an American magazine that deals with it, and on the basis of your report I've ordered one. Thanks for the info.
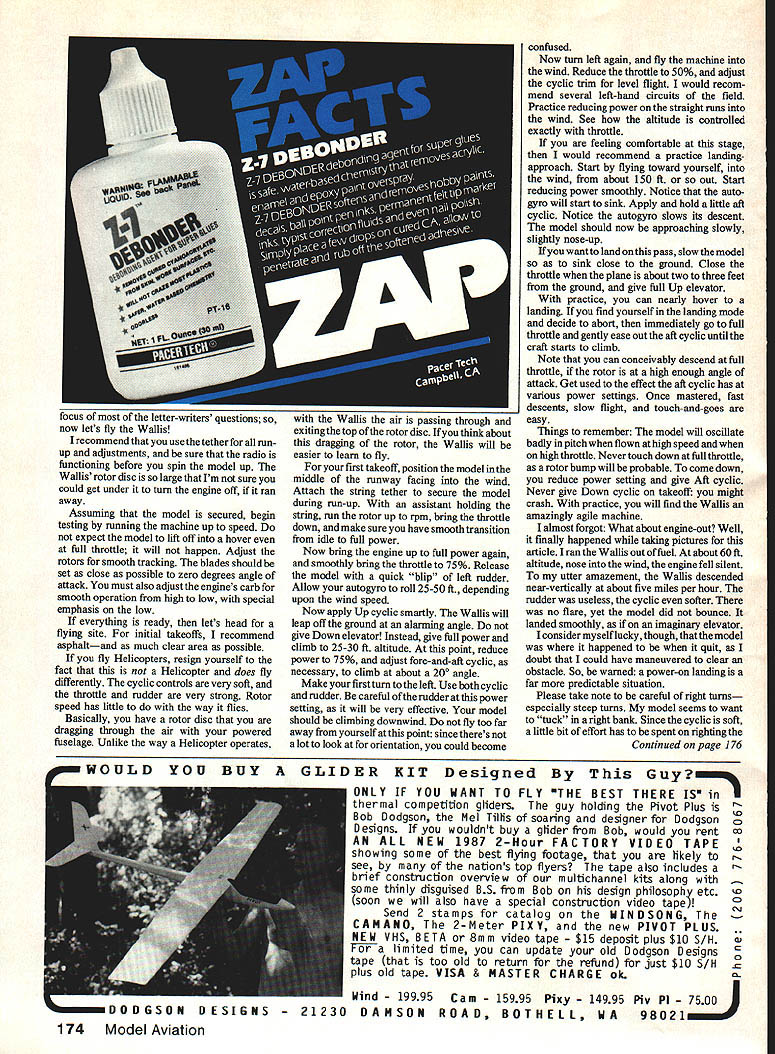
"I've enclosed a couple of photos of an autogyro I designed back in 1974 and which was featured as a construction article in April 1975. The trike-geared model was the prototype (based loosely on the Focke-Achgelis 61 helicopter), while the tail-dragger version was a later, improved model. As a side note, the gyros used Cox .049 crankcase/crankshaft assemblies as rotor bearings—no machining required!
"After several attempts at single-rotor machines in the early seventies (two of them torque-rolled into the ground), I designed the twin-rotor layout from a sketch in a 1949 issue of Model Airplane News. The advantage is that all gyroscopic and dissymmetry-of-lift forces are self-cancelled, the rotors are simplified (no articulation), and all flight controls are on the tail surfaces.
"On the negative side, the model is not very scale-like (have you ever seen a full-size twin-rotor gyro?), requires a lot of power to draw two rotors through the air, and can take a bit of fiddling to get the rotors adjusted properly. Unlike the later D.B. gyro, mine will not fly with the rotors removed!
"From your description, the Micro Mold machine and my twin-rotor one appear to have very similar flight characteristics. Mine flies quite slowly, uses throttle for ascent/descent, and uses elevator for pitch/attitude and flare-out on landing. It can be made to hover in a slight breeze with full up elevator and the proper throttle setting. Full throttle produces a climb, even with full down elevator.
"I know there is interest in modeling gyros because of the large amount of mail I've received over the years due to the '75 article. Interestingly, the hit of last summer's Oshkosh EAA fly-in was the restored and flying Pitcairn PCA-2 autogyro. It's only a matter of time before someone makes a successful RC version."
Thank you, Skip, for the pictures and interest.
My experience with the Micro Mold Wallis
Since I started flying the Micro Mold autogyro I have learned a number of things I'll pass on. As of last Sunday's flight, number 121, I have broken one rotor blade since flying commenced last June. The craft has proven super-reliable.
Yesterday I demonstrated the model for Ray Hostetler of RCM. He was impressed by the way the model performed but appalled at the design. Being a perfectionist, Ray found about 15 things he would correct and remarked how well the Wallis would fly if those corrections were made. I believe in the old saying, "If it's not broke, don't fix it." In this case I recommend building and flying the kit as supplied first; success is something you don't fool with.
Recommended equipment and initial setup
- Build the model exactly to the kit instructions.
- Use the recommended OS .50 FSRH engine equipped with a GMP Shuttle silencer.
- Discard the kit-supplied propeller if it is soft. Install a Zinger 11 x 7 pusher propeller — I have found this to be the best size for the OS .50.
- The OS .50 clutch has a tendency to grab, and since the Wallis has a spin-up unit this can cause the rotor to engage abruptly. As a precaution, squirt a little fuel into the bell housing prior to flight to lubricate the clutch and cure the problem.
- The manual includes excellent instructions for balancing and tracking the rotor blades. Set them up exactly according to the instructions with one important exception: once the rotor blades are square, lock them down securely and Hot Stuff (cyanoacrylate) the blade grips to the screw. If you allow the blades to swing, they will go in and out of track in flight, causing excessive vibration.
- Use the tether for all run-ups and adjustments. The rotor disc is so large you might not be able to get under it to shut the engine off if it runs away.
Rotor blades should be set as close as possible to zero degrees angle of attack. Also adjust the engine carburetor for smooth operation across the throttle range, with special emphasis on the low end.
How the autogyro flies (and how it differs from a helicopter)
If you fly helicopters, accept that an autogyro is not a helicopter and flies differently. Cyclic controls are very soft; throttle and rudder are very strong. Rotor speed has little to do with the way it flies.
Basically, the rotor disc is being dragged through the air by the powered fuselage. Unlike a helicopter, air passes through and within the top of the rotor disc. Think of the rotor as a dragged disc and the Wallis will be easier to learn.
The Wallis uses throttle for altitude control: increase throttle to climb, reduce throttle to descend. Elevator (aft cyclic) is used for pitch/attitude and flare. It can be made to hover in a slight breeze with full up elevator and the proper throttle setting.
Recommended takeoff procedure
- Position the model in the middle of a long asphalt runway facing into the wind. Choose as much clear area as possible for initial flights.
- Attach the tether to the skids and secure the model during run-up.
- With an assistant holding the tether, run the rotor up to speed and bring the throttle to full to ensure smooth transition into free flight.
- Bring the engine to full power again, then smoothly reduce throttle to about 75%.
- Release the model with a quick blip of left rudder and allow it to roll 25–50 ft, depending on wind.
- Apply up cyclic smartly — the Wallis will leap off the ground at a steep angle. Do NOT give down elevator on takeoff.
- Give full power and climb to about 25–30 ft. Reduce power to 75% and adjust fore-and-aft cyclic as necessary to climb at roughly a 20° angle.
- Make the first turn to the left using both cyclic and rudder; rudder will be very effective at this power setting.
- Fly downwind while climbing; do not go too far away since orientation references are limited.
- Turn left again to fly into the wind, reduce throttle to about 50%, and trim cyclic for level flight.
Practice several left-hand circuits. Use the straight runs into the wind to practice reducing power and see how altitude is controlled with throttle.
Landing technique and aborts
- For a practice landing, fly toward yourself into the wind from about 150 ft. Smoothly reduce power; the autogyro will begin to sink. Apply and hold full up elevator to maintain autorotation and a slightly nose-up attitude.
- Slow the model to sink close to the ground. Close the throttle when about 2–3 ft from the ground and give full up elevator to nearly hover to a stop.
- If you need to abort a landing, immediately go to full throttle and ease out aft cyclic until the craft starts to climb.
Get used to how cyclic affects the machine at various power settings. Fast descents, slow flight, and touch-and-goes become easy with practice.
Performance cautions and engine-out behavior
- The model will oscillate badly in pitch when flown at high speed and high throttle. Never touch down at full throttle; a rotor bump is likely.
- Never give down cyclic on takeoff — you might crash.
- Be careful of right turns, especially steep ones. My model tends to "tuck" into a right bank; because the cyclic is soft, you need to apply a little effort to right the machine.
Engine-out: I inadvertently ran the Wallis out of fuel while taking pictures. At about 60 ft altitude, nose into the wind, the engine stopped. The Wallis descended near-vertically at about five miles per hour. Rudder was useless for heading changes, cyclic was nearly useless, and the model simply fell. It landed without bouncing, somewhat safely, as if on an imaginary elevator.
Final notes
- Follow the kit instructions and recommended equipment for best results.
- Balance and track the rotors carefully and lock the blade grips.
- Lubricate the clutch to prevent it from grabbing during spin-up.
Additional technical note: a 12-cell motor is normally chosen to achieve prop speeds around 9,400 rpm. Typical current is about 17 amps and power about 140 watts.
Transcribed from original scans by AI. Minor OCR errors may remain.

