
Radio Control: Helicopters
Larry Jolly 5501 W. Como Santa Ana, CA 92703
Introduction / Apology
Welcome back. I'm really sorry I left you hanging for a month, but unforeseen circumstances did not allow me to finish my column in time for last month's issue. In the last column I was discussing gyros and how to install them. As always, when I describe a list of products, I seem to inadvertently leave someone out. When recently talking with Tony Moreno of Morley Helicopters, I found that they also market two high-quality stick-authority gyros.
If you are interested in the Morley gyro or any ship in their line of helicopters, drop them a line:
- Morley Helicopters, P.O. Box 6026, San Pedro, CA 90734
Now back to your gyro-equipped machine. In the March issue I left you with a completed helicopter—with a gyro installed and checked for proper direction of correction. It is now time to trim your new helicopter.
Preflight checks
If you are a novice and can find someone to help, I advise doing so. If not, proceed as follows.
Before leaving the shop, check that all controls move in the proper direction and center reasonably well. Also check that the main rotors are in the ballpark for collective pitch range.
At the field, start your helicopter engine, and if possible, turn the gyro to the high-rate side. Attempt to lift the helicopter into a hover. If the collective is reasonably close, the chances are that the machine will hover but will turn slowly one way or the other in the yaw axis.
Adjust the tail rotor trim on the transmitter until the helicopter lifts off fairly straight and will hold a constant heading. If you are using a stick-authority gyro, you will get unsatisfactory performance by trying to get the gyro to operate with the transmitter trim set too far to one side. As soon as you are fairly close, set your transmitter trim back to neutral, and adjust the collets on the tail-rotor pitch-change wire manually, increasing or decreasing pitch as required.
Gyro settings for novices
If you are a novice, I would advise turning the gyro up to a high rate as practical for your helicopter. This will be determined largely by how tight your tail-rotor linkage is, because eventually the helicopter will want to sway back and forth in a swimming motion while the gyro fights to find the center. When this happens the gyro is set too high and should be backed off some. For a novice, however, this is just about where you want the gyro for the first steps of rotary-wing training.
With this setting the tail rotor is virtually dead, slaved to the gyro. This is good because if the tail is trimmed fairly straight, there is virtually no way the helicopter can spin around and bite. However, if you can already hover, you will want to back the rate down a few notches—preferably to where it doesn't feel like you are trying to tear the stick out of the transmitter to get the helicopter to turn with the tail rotor.
I didn't use to believe in gyros, but now I can honestly say that they make learning easier. A pilot definitely looks better with a bird that has a tail governed by a properly tuned gyro. Once you've got your ship to where you pretty much feel at home with it, play with the ATS and the gyro until you can virtually get the machine to auto-compensate for collective pitch changes and still have a lively enough tail for normal flight maneuvers.
Battery considerations
By the way, if you are sharing the airborne battery between the gyro and the radio, be careful. The gyro really swallows the amps, and you'll find that you get noticeably fewer flights between charges. If you are flying a small ship, like a Shuttle, Cricket, or Baron 30, I would definitely advise using one of the following airborne packs for added safety:
- 800 mAh
- 900 mAh
If you have any questions, please write to me.
A new Shuttle — Shuttle XX
Back when the GMP Hirobo Shuttle was first announced, it was one of the first to applaud this new concept in helicopter marketing. While the initial production run of Shuttles had its share of minor problems, the Shuttle proved to be a viable competitor in the small helicopter class. I used several Shuttles for TV and motion-picture work and, personally, overlooked its minor quirks while gaining genuine admiration for this cute little beastie.
I'm pleased with the Shuttle. GMP and Hirobo knew that the Shuttle could be made better, and that's exactly what they did. By surprise in January of 1988, Hirobo made several changes in the basic Shuttle and also brought out a new model known as the Shuttle XX.
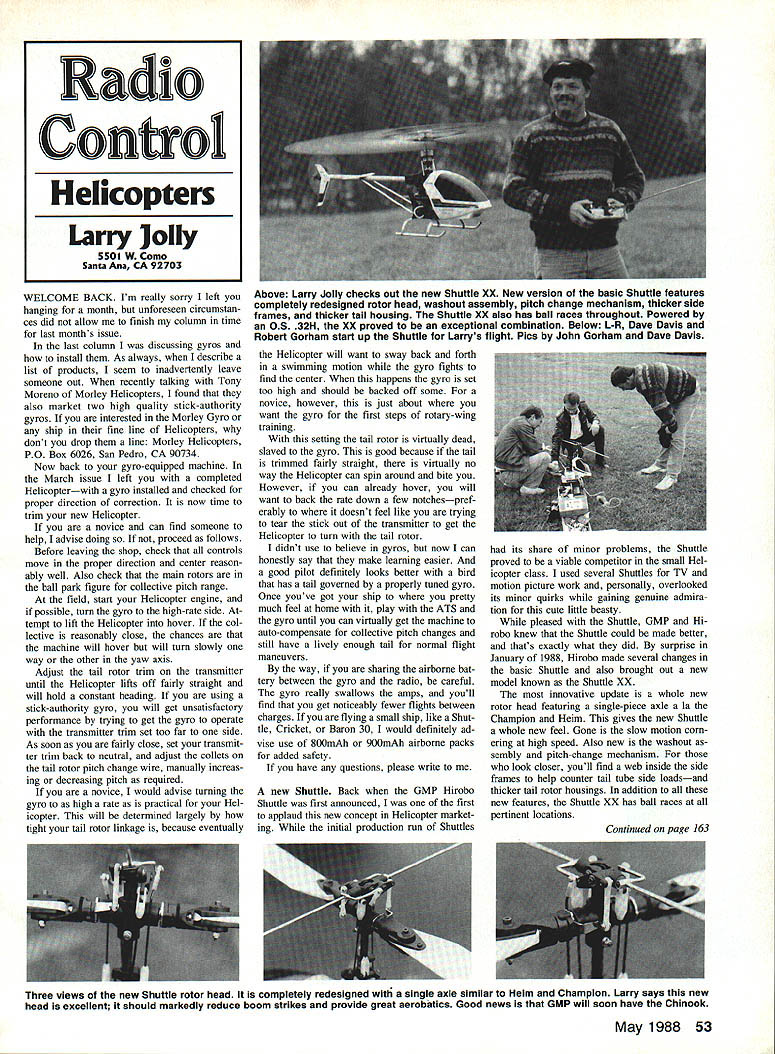
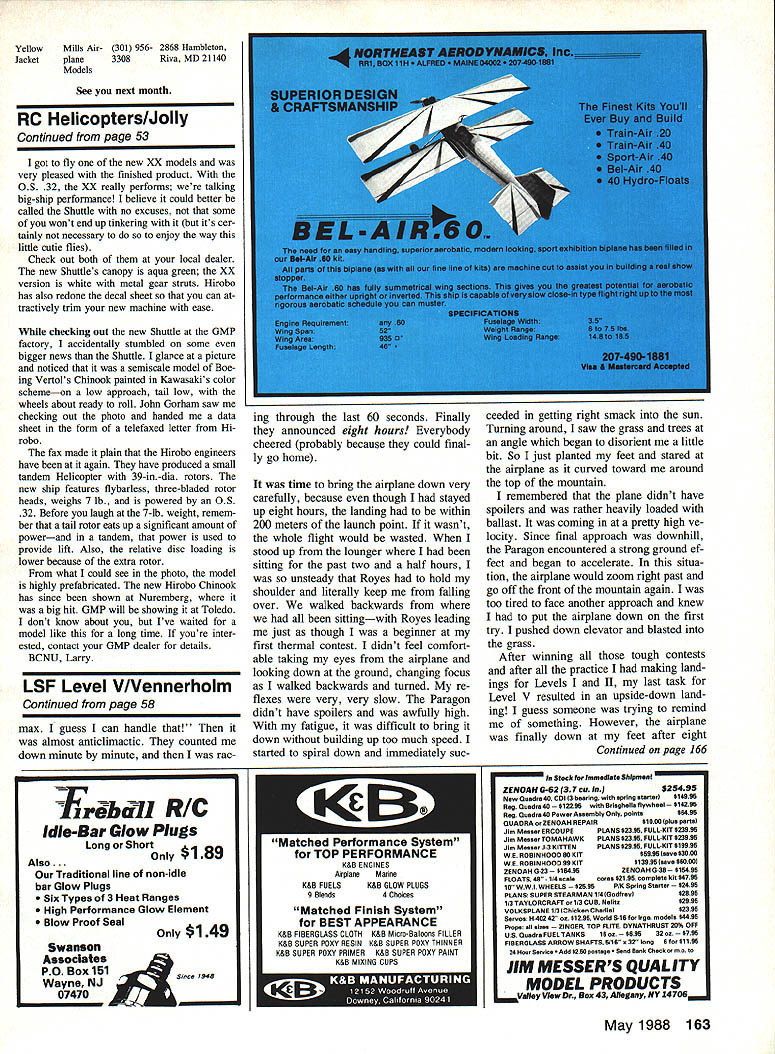
The most innovative update is a whole new rotor head featuring a single-piece axle similar to the Champion and Heim. This gives the new Shuttle a whole new feel. Gone is the slow-motion cornering at high speed. Also new is the washout assembly and pitch-change mechanism. For those who look closer, you'll find a web inside the side frames to help counter tail-tube side loads—and thicker tail-rotor housings. In addition to all these new features, the Shuttle XX has ball races at all pertinent locations.
Powered by an O.S. .32H, the XX proved to be an exceptional combination. I got to fly one of the new XX models and was very pleased with the finished product. With the O.S. .32, the XX really performs; we're talking big-ship performance! I believe it could better be called the Shuttle with no excuses, not that some of you won't end up tinkering with it (but it's certainly not necessary to do so to enjoy the way this little cutie flies).
Check out both of them at your local dealer. The new Shuttle's canopy is aqua green; the XX version is white with metal gear struts. Hirobo has also redone the decal sheet so that you can attractively trim your new machine with ease.
Hirobo Chinook tandem model
While checking out the new Shuttle at the GMP factory, I accidentally stumbled on some even bigger news than the Shuttle. I glanced at a picture and noticed that it was a semiscale model of Boeing Vertol's Chinook painted in Kawasaki's color scheme—on a low approach, tail low, with the wheels about ready to roll. John Gorham saw me checking out the photo and handed me a data sheet in the form of a telefaxed letter from Hirobo.
The fax made it plain that the Hirobo engineers have been at it again. They have produced a small tandem helicopter with 39-inch diameter rotors. The new ship features flybars, three-bladed rotor heads, weighs 7 lb., and is powered by an O.S. .32. Before you laugh at the 7 lb. weight, remember that a tail rotor eats up a significant amount of power—and in a tandem, that power is used to provide lift. Also, the relative disc loading is lower because of the extra rotor.
From what I could see in the photo, the model is highly prefabricated. The new Hirobo Chinook has since been shown at Nuremberg, where it was a big hit. GMP will be showing it at Toledo. I've waited for a model like this for a long time. If you're interested, contact your GMP dealer for details.
BCNU, Larry.
Transcribed from original scans by AI. Minor OCR errors may remain.

