
Radio Control: Helicopters
Larry Jolly
15781 Empire Ln. Westminster, CA 92683
WELCOME back. This month's column is devoted to the Kalt Cyclone II, distributed here in the U.S. by Hobby Dynamics and available at your local hobby shop.
Anyone who has been in the hobby for any length of time is familiar with Kalt Helicopters. I believe Mr. Oki was the second person to form a company to manufacture RC helicopters. Starting with a smaller version of Schluter's Cobra, Kalt has been in business ever since. This gives the company over 20 years of RC-helicopter experience. Kalt has always been known for high-quality Japanese-style machines; consequently its products have always been popular in Japan.
In the late Seventies Kalt expanded its market to include Europe and the U.S.A. Because of this expansion there have been changes to the Kalt line due largely to Western influences and changing times in general.
Several years ago Kalt marketed the original Cyclone. Initially the helicopter fraternity hailed it as Kalt's answer to the Hirobo Shuttle, since the Cyclone was aimed toward the beginner's market and used molded construction, as did the Shuttle. The Cyclone proved to be a good-flying ship of robust construction. Sadly, through whatever circumstances, it never gained the popularity it should have, at least in the U.S. and English markets. Sensing this, Kalt went back to the drawing board and updated the Cyclone.
What's changed on the Cyclone II
Changes include:
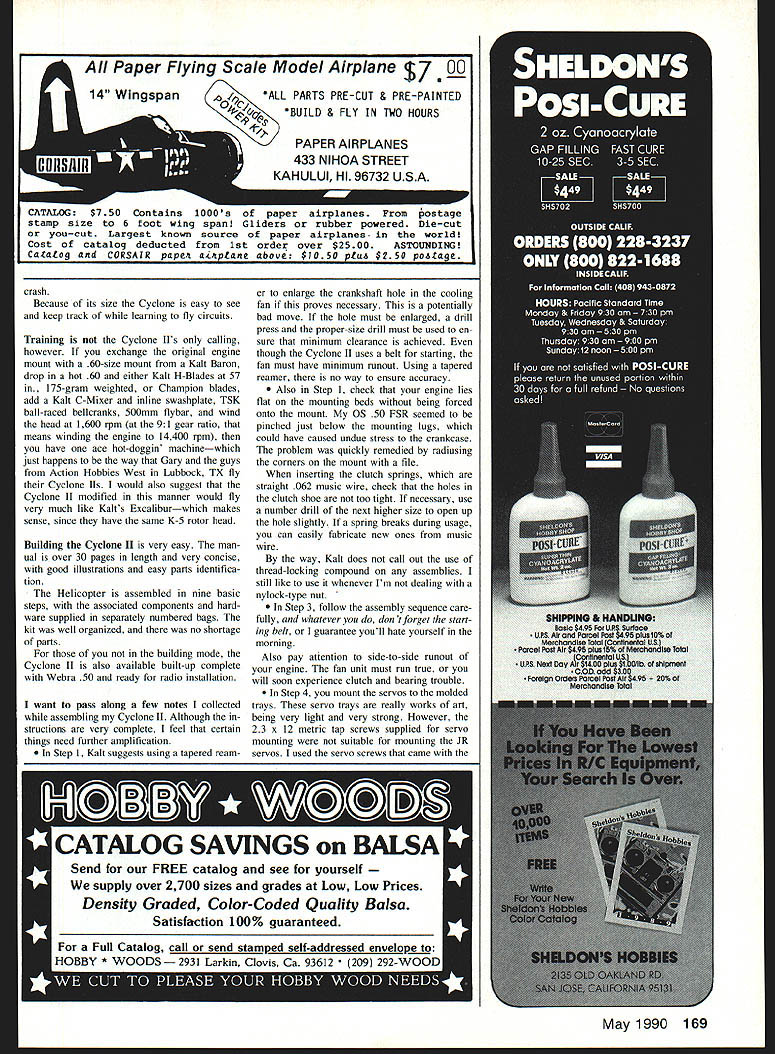
- The K-4 main-rotor flapping head has been exchanged for the new K-5 molded head.
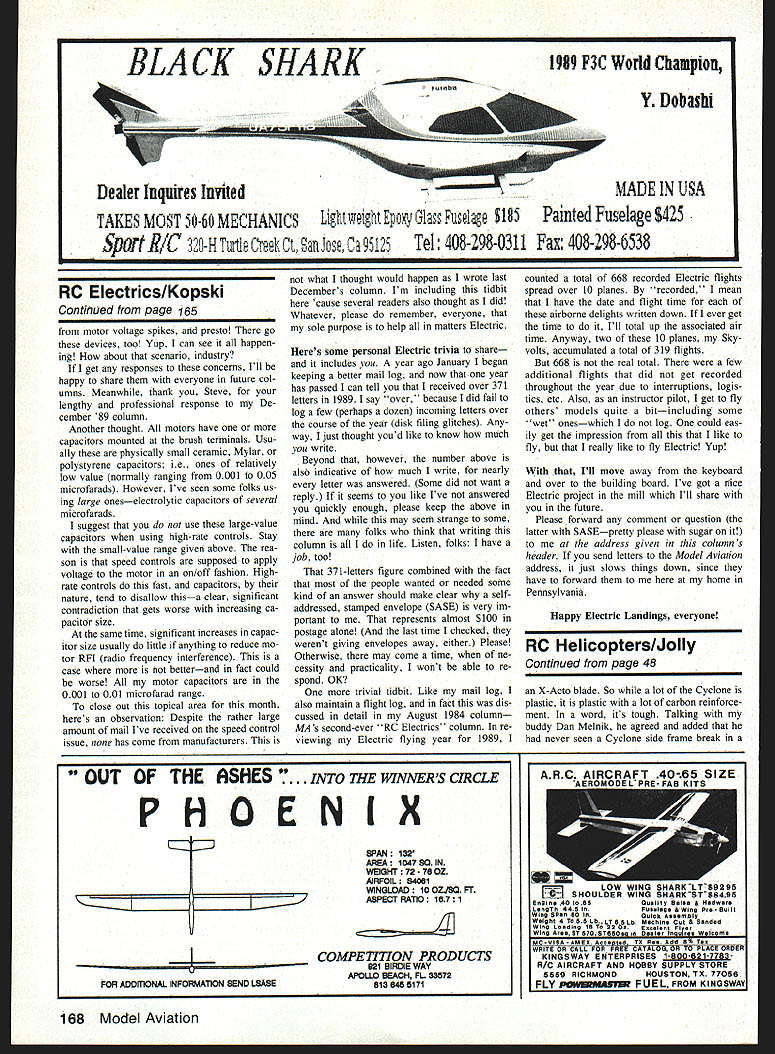
- The flat-belt tail-rotor drive is now a toothed belt.
- The main-rotor pitch-control mixer is made from a new material that is not prone to swelling on the main shaft.
- The autorotation clutch is now standard equipment.
- The original unimaginatively styled cabin has been replaced with a modern, streamlined one that adds much to the Cyclone II's new image.
These are not last-ditch tweaks — in my opinion they make the Cyclone II the helicopter that should have been imported for the U.S. market the first time around.
Cyclone II — specification and role
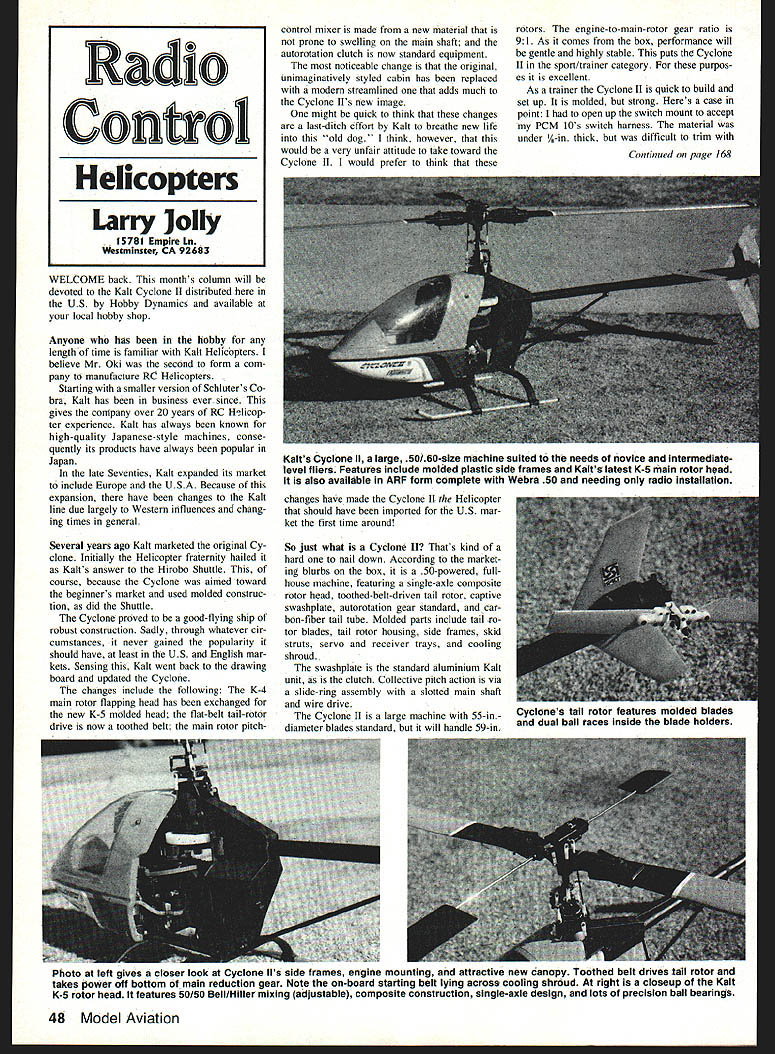
According to the marketing on the box, the Cyclone II is a .50-powered, full-house machine featuring:
- single-axle composite rotor head,
- toothed-belt-driven tail rotor,
- captive swashplate,
- autorotation gear standard,
- carbon-fiber tail tube.
Molded parts include tail-rotor blades, tail-rotor housing, side frames, skid struts, servo and receiver trays, and cooling shroud. The swashplate and clutch are the standard aluminum Kalt units. Collective pitch action is via a slide-ring assembly with a slotted main shaft and wire drive.
The Cyclone II is a large machine with 55-inch diameter blades standard, but it will handle 59-inch rotors. The engine-to-main-rotor gear ratio is 9:1. As it comes from the box, performance is gentle and highly stable, putting the Cyclone II in the sport/trainer category — for those purposes it is excellent.
Because of its size the Cyclone is easy to see and keep track of while learning to fly circuits.
Performance and modification potential
Training is not the Cyclone II's only calling. With modifications the Cyclone II can become a much sportier ship. Swap the original engine mount for a .60-size mount from a Kalt Baron, install a .60 engine, fit either Kalt H-blades at 57 inches (weighted as recommended) or Champion blades, add a Kalt C-mixer and inline swashplate, TSK ball-raced bellcranks, a 500mm flybar, and wind the head to 1,600 rpm (at the 9:1 gear ratio — i.e., about 14,400 rpm engine speed). That yields a very hot machine — the way Gary and the guys from Action Hobbies West in Lubbock, TX fly their Cyclone IIs. A Cyclone II modified in this manner will fly much like Kalt's Excalibur, which makes sense since they use the same K-5 rotor head.
The Cyclone II's molded construction is strong and, in many places, reinforced with carbon. My buddy Dan Menlik added that he'd never seen a Cyclone side frame break in a crash.
Building and documentation
Building the Cyclone II is very easy. The manual is over 30 pages, concise, with good illustrations and parts identification. The helicopter is assembled in nine basic steps, with components and hardware supplied in separately numbered bags. The kit was well organized and there was no shortage of parts.
For those not in the building mode, the Cyclone II is also available built-up, complete with Webra .50 and ready for radio installation.
Assembly notes and tips
A few points I collected while assembling my Cyclone II — the instructions are complete, but some items need further amplification:
- Step 1 — cooling fan/crankshaft hole
- Kalt suggests using a tapered reamer to enlarge the crankshaft hole in the cooling fan if necessary. I recommend against a tapered reamer. If the hole must be enlarged, use a drill press and the proper-size drill to ensure minimum, accurate clearance. Even though the Cyclone II uses a belt for starting, the fan must have minimum runout; a tapered reamer cannot ensure accuracy.
- Step 1 — engine fit
- Check that your engine sits on the mounting studs without being forced onto the mount. My OS .50 FSR seemed pinched just below the mounting lugs, which could have caused undue stress to the crankcase. The problem was remedied by radiusing the corners on the mount with a file.
- Clutch springs and thread-lock
- When inserting the clutch springs (straight .062 music wire), check that the holes in the clutch shoe are not too tight. If necessary, open the hole slightly with the next larger numbered drill. If a spring breaks during use, you can easily fabricate a replacement from music wire.
- Kalt does not call out the use of thread-locking compound on assemblies. I still like to use it whenever I’m not dealing with a nylock-type nut.
- Step 3 — starting belt and engine runout
- Follow the assembly sequence carefully and do not forget the starting belt — you'll regret it in the morning if you do.
- Also pay attention to side-to-side runout of your engine. The fan unit must run true or you will soon experience clutch and bearing trouble.
- Step 4 — servos and mounting screws
- Mount the servos to the molded trays. The servo trays are very light and strong, but the 2.3 x 12 metric tapping screws supplied for radio mounting were not suitable for JR servos. Use the servo screws that come with your servos.
Kalt K-5 rotor head features 50/50 Bell/Hiller mixing, adjustable composite construction, a single-axle design, and lots of precision ball bearings.
- Motor capacitors
- Motors often have capacitors mounted on the brush terminals. Use small-value capacitors (ceramic, Mylar, or polystyrene) in the range of about 0.001–0.005 µF. I've seen some people fit large electrolytic capacitors of several microfarads, but I do not recommend large-value capacitors when using high-rate controls. Stay with the small-value range given above; large capacitors can slow response and may interfere with high-rate systems.
- Step 6 — tail fins
- When you attach the horizontal tailplane, put a bit of silicone glue on the mounting surface. This will keep the tailplane in place without having to clamp it excessively to the tail tube.
- Step 7 — fuel line and pushrods
- Kalt supplies a fuel cutoff clamp and filter — use them. Throw away the small-size silicone line they recommend for inside the tank; it is too small for good fuel flow.
- Kalt uses control rods with Z-bends on one end. While not as good as ball links, they work well provided you use the proper-size drill to relieve servo-arm and bellcrank holes. If you make the holes too big the rods will be sloppy and control will suffer.
- Kalt supplies a plastic pushrod for tail-rotor control. I modified mine by sliding a .062 music-wire pushrod inside the plastic housing and bonding it with CyA glue. I used a Z-bend at the tail-rotor end and a solder link at the servo end. This gives tight tail-rotor control with no risk of pushrod deviation through thermal expansion.
Final assembly and setup
Everything else was completed according to the manual and looks great. It took me just under 10 hours to assemble my Cyclone II, not counting painting the cabin. My Cyclone II features an OS .50 FSR for power and a JR PCM 10 radio for guidance.
Next month I'll go over the setting up and flying of the Cyclone II and any points I can pass along on the PCM 10.
This has been a very enjoyable machine to put together. With everything fitting properly, it's apparent that Kalt pays a lot of attention to quality. For now, my Cyclone II is nearly ready for blast-off. Please come back next month for part II.
BCNU
Transcribed from original scans by AI. Minor OCR errors may remain.

