
Radio Control: Helicopters
Larry Jolly
15781 Empire Ln. Westminster, CA 92683
World Championships
THEY WON! Congratulations to the 1991 U.S. Helicopter team. They just came in first place at the World Championships held in Australia. Team member Wayne Mann finished second, followed by Curtis Youngblood in third and Robert Gorham came in sixth. Mann and Youngblood flew Miniature Aircraft X-Cells while Gorham flew a TSK. The contest was very close with high winds on at least two of the competition days. Sensui from Japan is the new World Champion. He flew a Kalt Omega. Look for a full report soon in Model Aviation.
I have to apologize to Miniature for my last month’s scoop on Wayne Mann’s machine. Wayne did have some new components in his ship, but his was an X-Cell. I had heard about a new engine position. This turned out to be a misunderstanding.
What has happened is that M.A.S. now has several new main gears available; because the gears are larger, the engine’s position has to be adjusted by modified engine mounts, side frames and/or shims. All these items are available from Miniature.
It would appear to me that instead of developing a new .60 machine, the Schoonards are being very wise and are step-by-step evolving the basic X-Cell .60 to keep in step with current trends. Over the last several years they have developed not only a .60-size machine that runs with the best from Japan but have also developed the whole spectrum including the .30-size that dominates the .30 contests. Congratulations Wayne, Curtis, and Robert, and special congratulations to Miniature Aircraft Supply. Keep these great made-in-America helicopters coming.
Futaba Super Seven — Overview
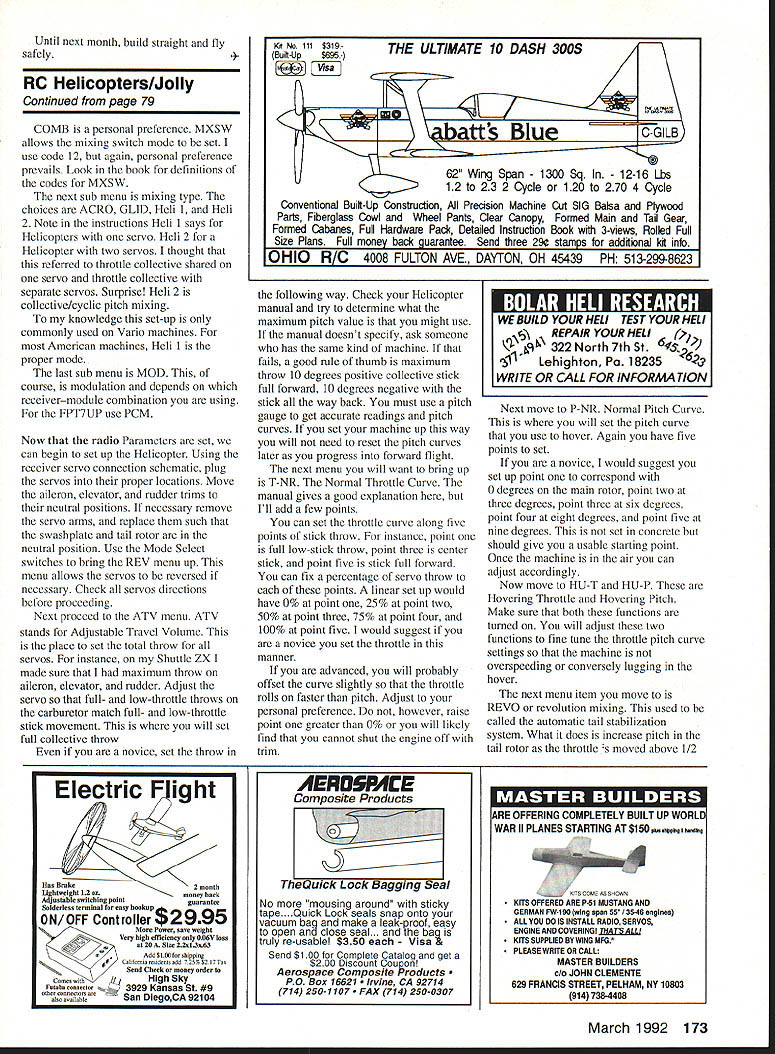
L.J. tests Futaba’s Super Seven: Earlier this year Futaba introduced their new Super Seven series of PCM 1024 radios. These systems feature a microprocessor for setting up and editing programs. There are two Super Seven systems available. One is biased toward helicopters and the other toward fixed-wing models. Both systems have the same Acro–Glider–Helicopter mixing software. The difference is that the Heli version has the transmitter switches in a layout more advantageous for helicopter usage.
The Super Seven Heli system features seven channels, with four-model memory storage, dual rates, exponential throws, four pitch curves, three throttle curves, hovering pitch, hovering throttle, throttle hold, revolution mixing, rudder offset, inverted flight, and one programmable mix. These are the features most demanded for modern helicopter flying. Futaba already had a winner in their FP9UHP designed primarily for FAI flying, but it was a little more radio than most sport fliers were looking for, and you cannot truly fly switchless inverted mixes with the nine-channel.
Enter the Super Seven. This radio will be just as much at home bouncing around in a Concept .30 on whiffle balls or in a crankin’ .60-size, hot-dogging to its limits. Futaba’s manual is very good and spends 26 pages explaining the features of the system, but there are a few items worth going over, especially if you haven’t set up a computer system before.
Making it work — test platform
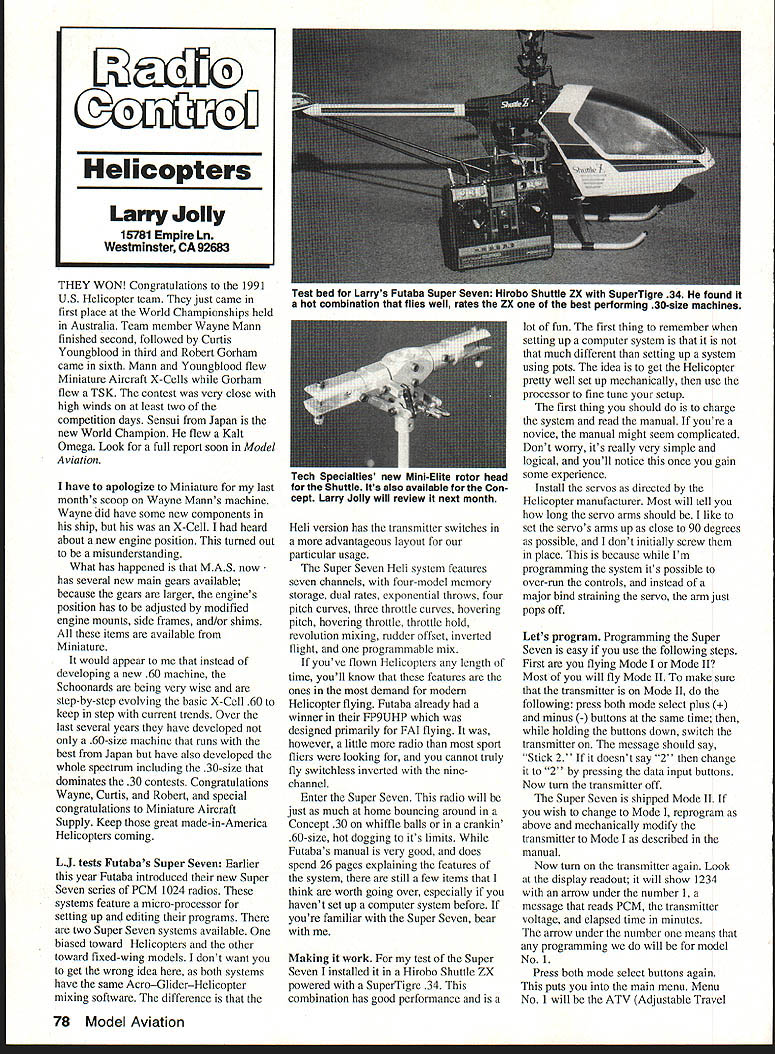
For my test of the Super Seven I installed it in a Hirobo Shuttle ZX powered with a SuperTigre .34. This combination has good performance and is a lot of fun. The first thing to remember when setting up a computer system is that it is not that much different than setting up a system using pots. The idea is to get the helicopter pretty well set up mechanically, then use the processor to fine tune your setup.
- Charge the system and read the manual. If you’re a novice, the manual might seem complicated. Don’t worry — it’s simple and logical once you gain some experience.
- Install the servos as directed by the helicopter manufacturer. Most will specify how long the servo arms should be. I like to set the servo arms as close to 90 degrees as possible. Don’t initially screw them into place because in programming the system it is possible to over-run the controls; instead of a major bind straining the servo arm, the arm will just pop off.
Programming the Super Seven — basic steps
Programming the Super Seven is easy if you follow these steps.
- Mode selection
- Decide whether you are flying Mode I or Mode II. Most fly Mode II.
- To set Mode II: press both mode select plus (+) and minus (‑) data input buttons at the same time, then while holding the buttons down, switch the transmitter on. The message should say “Stick 2.” If it doesn’t, change it to “2” by pressing the data input buttons. Now turn the transmitter off.
- The Super Seven is shipped in Mode II. If you wish to change to Mode I, reprogram as above and mechanically modify the transmitter to Mode I as described in the manual.
- Main menu and PARA screen
- Turn on the transmitter again. The display shows 1234 with an arrow under the number 1, a message that reads PCM, the transmitter voltage, and elapsed time in minutes. The arrow under the number 1 means any programs used will be for model No. 1.
- Press both mode select buttons to enter the main menu. Menu No. 1 is the ATV (Adjustable Travel Volume) display, which we don’t want yet. Press the mode select minus (‑) button four times until the PARA screen appears.
Important: The PARA screen is very important. If you change the Parameters, all previous programming for that model number is erased. For example, if you set servo travel and pitch curves for model number one and then forget to switch to model number two, three, or four before changing Parameters (e.g., switching from HELI to ACRO or doing a RESET), you will lose your previous input. Be careful.
- PARA submenus
- RSET: Activate this. RSET is factory-set to semi-trim a helicopter with a right-hand-rotation main rotor.
- ATL: Turn this on. ATL allows the throttle trim to be active only on the low side of the throttle stick.
- COMB: Allows all the dual-rate functions to activate on one aileron dual-rate switch.
- MXSW: Sets the mixing switch mode. This is a personal preference. I use code 12 — see the manual for MXSW code definitions.
- Mixing type: Choices are ACRO, GLID, Heli 1, and Heli 2. Note: Heli 1 is for helicopters with a single collective mixing setup; Heli 2 is for helicopters with collective/cyclic pitch mixing (commonly used on Vario machines). For most American machines, Heli 1 is the proper mode.
- MOD: Modulation — set this depending on which receiver-module combination you are using (e.g., FP7/FUPE PCM).
Servo hookup and initial checks
- Using the receiver servo connection schematic, plug the servos into their proper locations.
- Move the aileron, elevator, and rudder trims to neutral.
- If necessary, remove servo arms and replace them so the swashplate and tail rotor are neutral.
- Use the Mode Select switches to bring up the REV menu and reverse servos as needed. Check all servo directions before proceeding.
ATV (Adjustable Travel Volume)
ATV is where you set total throw for all servos.
- Set maximum throw on aileron, elevator, and rudder.
- Adjust carburetor servo so full- and low-throttle throws match stick movement. This is where you set full collective throw.
- If you’re a novice, follow this rule of thumb for collective throw: maximum throw about +10° positive collective (stick full forward), and −10° negative (stick full back). Use a pitch gauge to get accurate readings and pitch curves. This setup should serve well into forward flight without frequent changes.
Throttle and pitch curves
- T-NR (Normal Throttle Curve)
- You can set throttle along five stick points: point 1 = full low-stick, point 3 = center, point 5 = full forward.
- A linear setup: 0% at point 1, 25% at point 2, 50% at point 3, 75% at point 4, 100% at point 5 — a good novice starting point.
- Advanced pilots may offset the curve so that throttle rolls on faster than pitch. Do not raise point 1 above 0% or you may be unable to shut the engine off with trim.
- P-NR (Normal Pitch Curve)
- Also five points. Suggested novice starting points:
- Point 1 = 0° on the main rotor
- Point 2 = 3°
- Point 3 = 6°
- Point 4 = 8°
- Point 5 = 9°
- Use a pitch gauge and adjust once the machine is in the air.
- HU-T and HU-P (Hovering Throttle and Hovering Pitch)
- Turn both on. Use them to fine-tune throttle/pitch so the machine does not overspeed or lug in the hover.
REVO (Revolution Mixing)
REVO, or revolution mixing, used to be called the automatic tail stabilization system. It increases tail-rotor pitch as the throttle is moved above half stick and decreases it as the stick is lowered. This function should be turned on and is fairly well set from the factory for a right-hand-rotation machine. If you have a left-hand machine, leave values alone but change the data input to “plus.”
First flights and hover setup
If you are a first-time helicopter pilot, this is as far as you need to program the Super Seven to begin hover practice. Double-check all screws and bolts, servo directions and connections. Check that the gyro is properly installed and that the receiver, battery, and gyro controls are firmly mounted in the cabin.
If capable, attempt to hover with the gyro off and adjust the tail rotor so the trim is neutral at hover. When the trim is neutral, adjust the REVO mix until the tail stays straight and does not kick while climbing or descending. Then turn the gyro on. Most novices can’t hover well enough for this and should seek help from an instructor.
Advanced setup — IDLE UP and inverted flight
If you are more advanced, set up the following menus:
- T-I and T-I2: IDLE UP 1 and IDLE UP 2 throttle curves.
- IDLE UP 1 is normally set so that below half stick the throttle does not go below roughly 40% — allows negative-G during rolls and rolling stall turns.
- IDLE UP 2 is normally set so full forward stick = full throttle and full back stick = full throttle, with mid stick around 30–40% — allows switchless inverted flight.
- P-I1 and P-I2: Corresponding IDLE UP pitch curves.
The Super Seven supports throttle hold with a curve and rudder offset for forward flight. When using IDLE UP 1 and 2 you can set REVO mixing to turn off and have a rudder offset or an additional programmable mix take over. You can also use a conventional inverted flight switch with adjustable high pitch, low pitch, and switch-over positions.
Useful features and trim notes
- The Super Seven features COPY, TRIM memory, and model SELECT. Once you have a model set up, copy the data into another model number if you want a backup. If you use all four memories, save setups in a notebook.
- Trim memory: this sets aileron, elevator, and rudder trim so you can return trim tabs to neutral. Trim memory can only be used once — if you save a trim memory for a model, you cannot reset it without resetting Parameters. I prefer to set trims manually at the model so trim tabs stay neutral and servos remain at 90 degrees to avoid differential in the system.
Summary and rating
I wouldn't normally go into such detail on programming a radio, but I’ve had a lot of inquiries from people having trouble setting up their systems. Futaba has placed a very competent radio on the market at a very competitive price. I’ve found the Super Seven to be glitch-free and easy to use. It’s more radio than 90% of us will ever need, but it allows extreme hot-dog flying and even FAI-caliber performance.
My Super Seven has been outstanding and rates a 10 out of a possible 10. Thank you, Futaba.
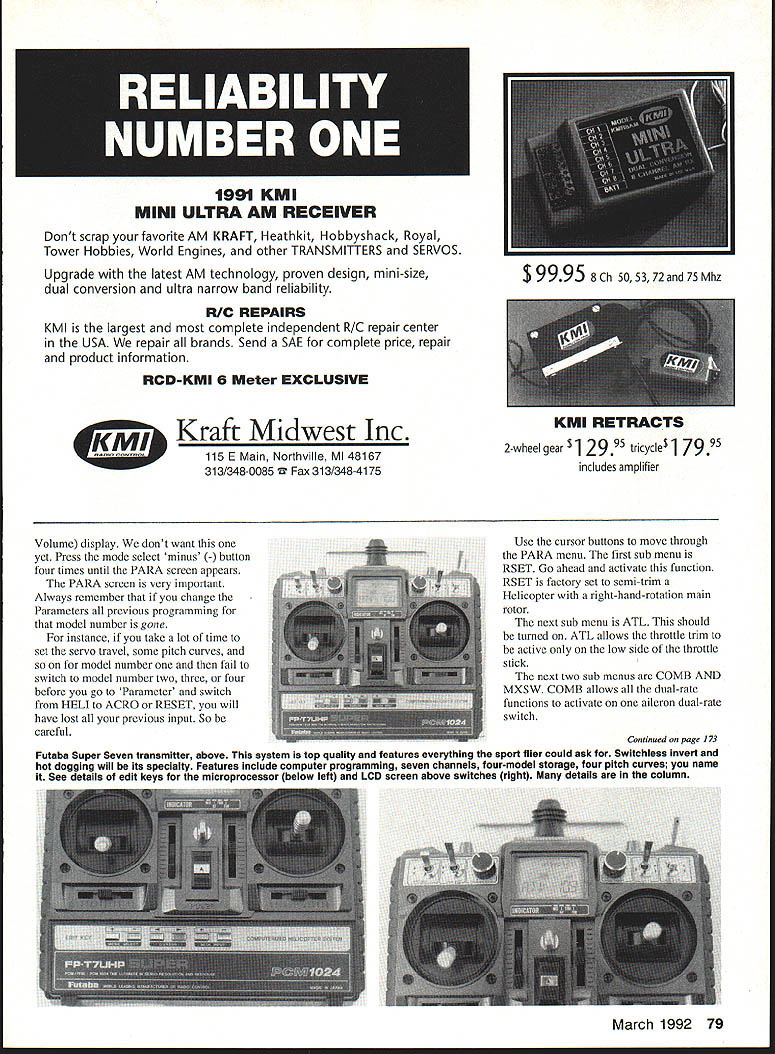
Tech Specialties' Mini Elite Rotor Head
I just received a copy of Tech Specialties' new Mini-Elite rotor head. This unit is all aluminum and appears to be first class. The head is available in two versions: one for the Concept .30 and the other for the Hirobo Shuttle. I suspect a modeler will see a bigger difference in a Concept than in the Shuttle, but I’ve yet to fly mine on my Shuttle, so I’ll report back next month with my conclusions.
BCNU
Transcribed from original scans by AI. Minor OCR errors may remain.

