

Helicopters
Walt Schoonard
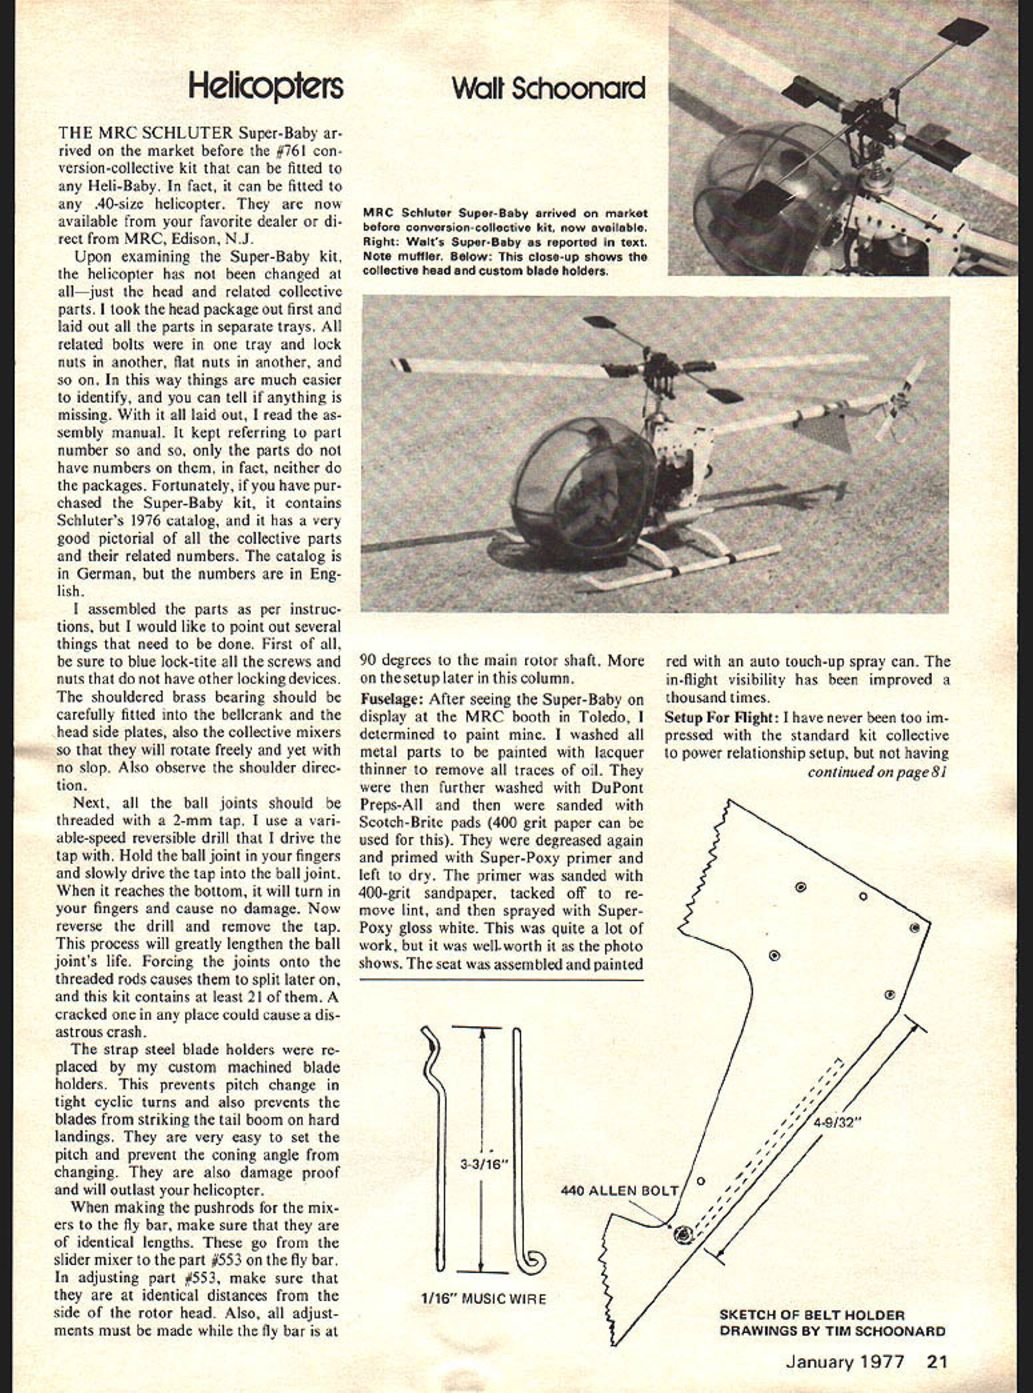
THE MRC SCHLUTER Super-Baby arrived on the market before the #761 conversion-collective kit that can be fitted to any Heli-Baby. In fact, it can be fitted to any .40-size helicopter. They are now available from your favorite dealer or direct from MRC, Edison, N.J.
Upon examining the Super-Baby kit, the helicopter has not been changed at all—just the head and related collective parts. I took the head package out first and laid out all the parts in separate trays. All related bolts were in one tray and lock nuts in another, flat nuts in another, and so on. In this way things are much easier to identify, and you can tell if anything is missing. With it all laid out, I read the assembly manual. It kept referring to part numbers so and so, only the parts do not have numbers on them, in fact, neither do the packages. Fortunately, if you have purchased the Super-Baby kit, it contains Schluter's 1976 catalog, and it has a very good pictorial of all the collective parts and their related numbers. The catalog is in German, but the numbers are in English.
I assembled the parts as per instructions, but I would like to point out several things that need to be done. First of all, be sure to blue lock-tite all the screws and nuts that do not have other locking devices. The shouldered brass bearing should be carefully fitted into the bellcrank and the head side plates, also the collective mixers so that they will rotate freely and yet with no slop. Also observe the shoulder direction.
Next, all the ball joints should be threaded with a 2-mm tap. I use a variable-speed reversible drill that I drive the tap with. Hold the ball joint in your fingers and slowly drive the tap into the ball joint. When it reaches the bottom, it will turn in your fingers and cause no damage. Now reverse the drill and remove the tap. This process will greatly lengthen the ball joint's life. Forcing the joints onto the threaded rods causes them to split later. This kit contains at least 21 of them. A cracked one in any place could cause a disastrous crash.
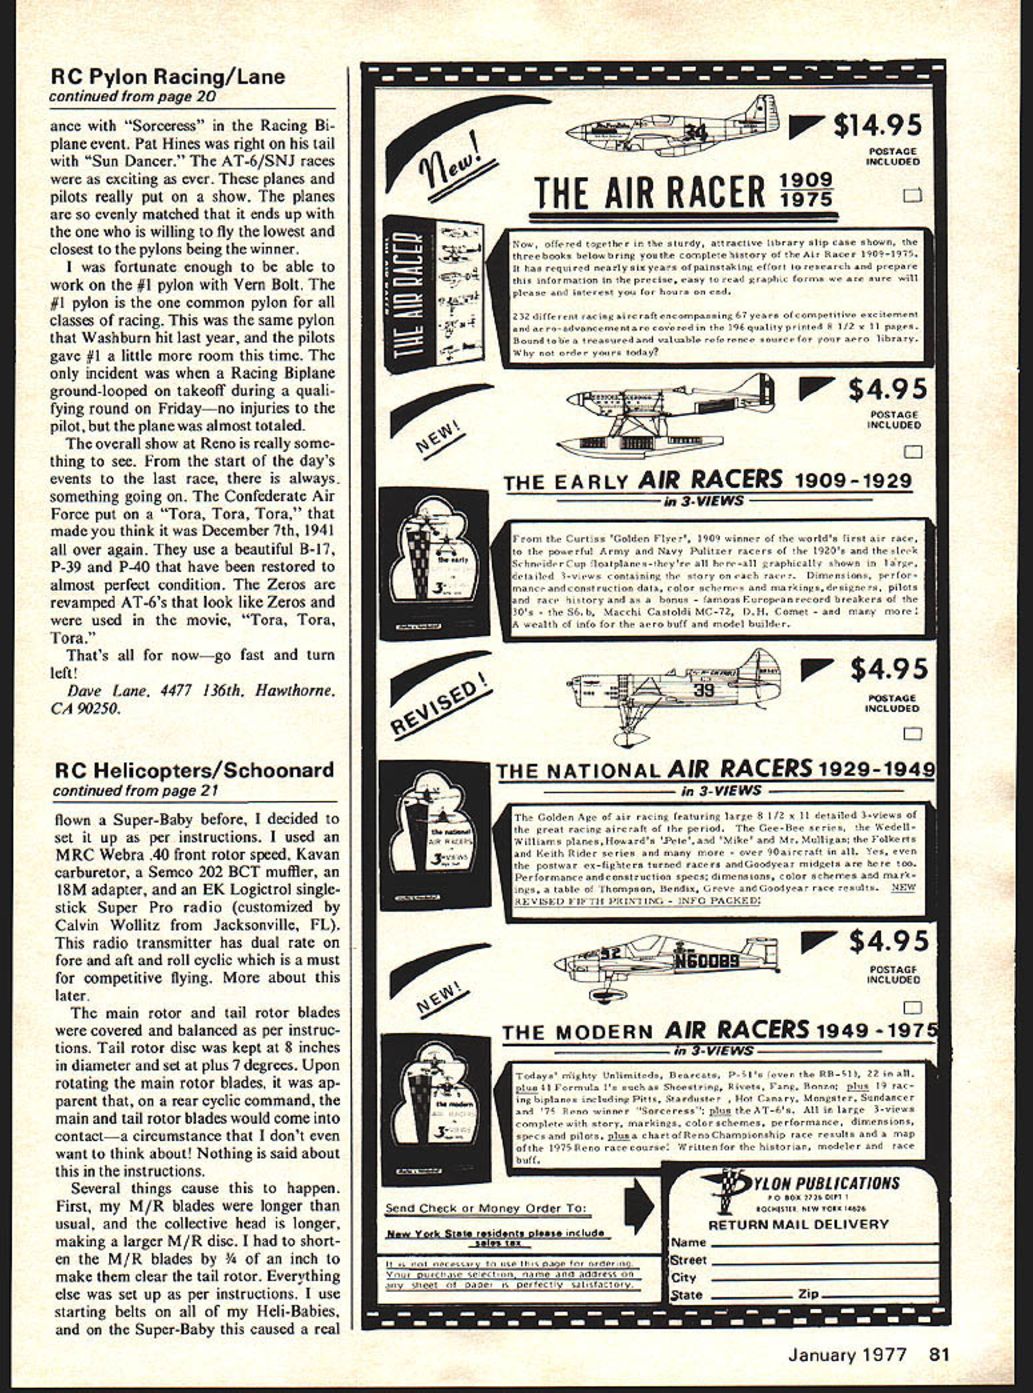
The strap steel blade holders were replaced by my custom machined blade holders. This prevents pitch change in tight cyclic turns and also prevents the blades from striking the tail boom on hard landings. They are very easy to set the pitch and prevent the coning angle from changing. They are also damage proof and will outlast your helicopter.
When making the pushrods for the mixers to the fly bar, make sure that they are of identical lengths. These go from the slider mixer to the part #553 on the fly bar. In adjusting part #553, make sure that they are at identical distances from the side of the rotor head. Also, all adjustments must be made while the fly bar is at 90 degrees to the main rotor shaft. More on the setup later in this column.
Fuselage: After seeing the Super-Baby on display at the MRC booth in Toledo, I determined to paint mine. I washed all metal parts to be painted with lacquer thinner to remove all traces of oil. They were then further washed with DuPont Preps-All and then were sanded with Scotch-Brite pads (400 grit paper can be used for this). They were degreased again and primed with Super-Poxy primer and left to dry. The primer was sanded with 400-grit sandpaper, tacked off to remove lint, and then sprayed with Super-Poxy gloss white. This was quite a lot of work, but it was well worth it as the photo shows. The seat was assembled and painted red with an auto touch-up spray can. The in-flight visibility has been improved a thousand times.
Setup For Flight: I have never been too impressed with the standard kit collective to power relationship setup, but not having flown a Super-Baby before, I decided to set it up as per instructions. I used an MRC Webra .40 front rotor speed, Kavan carburetor, a Semco 202 BCT muffler, an 18M adapter, and an EK Logictrol single-stick Super Pro radio (customized by Calvin Wollitz from Jacksonville, FL). This radio transmitter has dual rate on fore and aft and roll cyclic which is a must for competitive flying. More about this later.
The main rotor and tail rotor blades were covered and balanced as per instructions. Tail rotor disc was kept at 8 inches in diameter and set at plus 7 degrees. Upon rotating the main rotor blades, it was apparent that, on a rear cyclic command, the main and tail rotor blades would come into contact — a circumstance that I don't even want to think about! Nothing is said about this in the instructions.
Several things cause this to happen. First, my M/R blades were longer than usual, and the collective head is longer, making a larger M/R disc. I had to shorten the M/R blades by 3/4 of an inch to make them clear the tail rotor. Everything else was set up as per instructions. I use starting belts on all of my Heli-Babies, and on the Super-Baby this caused a real
RC Helicopters (continued)
storage problem. I usually store the belt in notches cut in the flange on the upper part of the cooling fan housing. This won't work on the Super-Baby because it gets in the way of the collective bellcrank. A simple 1/16 music-wire clip was made for each side of the fuselage plates (see sketch). This has worked well with no problems.
M/R pitch was set at plus 2 degrees at full collective and carburetor-needle valve richened so that tail-rotor speed at lift-off was 7000 rpm's. On the Super-Baby this is 4.8 to 1 of the M/R. This is half-throttle stick to half-carburetor barrel open. All of this is as per the kit instructions. Throttle trim was set at half to start, at full to engage the clutch, and to shut off the engine at full close. Blade tracking was checked and brought to dead on by a simple turn on the ball joints at pitch arm. This is a much needed and welcome change. With everything checked out, the Super-Baby and I were both ready to fly!
First Flight: The Super-Baby flew on the very first attempt, and it took one small trim change on the tail rotor to fly hands off. I ran several tankfuls through it doing take-offs, landings, and hovering. It did all of these things very well for a novice (or someone learning to fly). However, in translational flying, it left a great deal to be desired. I will list some of the undesirable things that it did, and in case you should read any further, I will also tell you that all of these undesirable characteristics have been eliminated, and now it is really a super Super-Baby.
Undesirable Characteristics:
- Collective undefined on lift-off.
- Causes helicopter to swim on lift-offs.
- Blade speed not constant.
- Helicopter "porpoising" in hover and in flight.
- Very sluggish on cyclic control.
- Hard to turn and stop.
- Obvious need for tail-rotor mix.
- Excessive head tilt before fuselage follows.
- Reduction of collective causes instant reduction of blade speed.
Fortunately, I have had quite a lot of experience with the Schluter collective head on the Gazelle so these problems were quickly recognized, and solutions were not hard to come by. Next month's column will deal with these solutions, one by one.
Helicopter Holdouts: If you have been holding off getting into RC helicopters because of the price, Kavan has announced their new prices — Jet Ranger, $320.00, and Alouette, $160.00. I am sure that these prices will never be lower so now is the time. RC helicopters are no longer a mystery, and any part or help you may need are now readily available. Just call me and you will see!
Walt Schoonard, 2080 Sharon Rd., Winter Park, FL 32789. Phone (305) 422-1531, days; (305) 647-1335, nights.
Transcribed from original scans by AI. Minor OCR errors may remain.

