
Radio Control: Helicopters
Paul Tradelius, 6704 Santiago, Ft. Worth TX 76133
Introduction
The new JR Ergo .32 to .46-size helicopter is JR's recent entry into the helicopter field. Until now JR has been known worldwide as a leading manufacturer of radio-control equipment. The company remains on the cutting edge of new design features while continuing to maintain outstanding reliability. Since I have just finished building the Ergo, I'll give you my impressions of the kit in this issue; next issue I'll cover how it performs in the air with the new Webra .33 engine.
Kit sizes and target pilots
The Ergo is available in either a .30 or .46 version. The .30 size accepts engines in the .32 to .36 range; it will appeal to the novice or intermediate flier who wants to learn to fly and then move up to basic aerobatics. Once the basic maneuvers have been mastered, the Ergo can be converted to the .46 version for unlimited aerobatics and 3-D flying. For the first time this year the Nats will feature a Freestyle (3-D) category, and this style of flying is likely to become more popular nationwide.
Instructions and parts identification
The first thing I look at in a new helicopter kit is the instruction manual—how well it is written to ensure accurate and easy assembly. The Ergo instructions are some of the best I have seen. The first page points the modeler to AMA and then goes into the Ergo's main features. It includes illustrations of items required to complete the kit, building supplies, field equipment not included with the kit, and basic hardware identification to make sure the correct parts are used during construction.
Parts identification is enhanced by having the parts separated in large numbered bags that correspond to the building sequence. All small hardware for each step is separated into smaller bags. The instructions suggest placing these smaller parts in something like a coffee can to keep them from getting lost; I prefer a muffin tin or similar baking tin. This keeps the smaller parts well separated (especially where there are several bags of parts) so they can be easily identified.
The remainder of the manual has diagrams on each page for step-by-step building, followed by recommended helicopter and radio adjustments to get you off the ground with the correct setup. Initial setup is made even easier because many control linkages are preassembled at the factory, and other linkages are shown full-size in the instructions.
Construction tip: although not stated in the instructions, ball links should be snapped onto the balls with the JR Propo insignia facing up—otherwise the links are almost impossible to snap onto the balls.
Construction and hardware notes
- Modular main-frame construction using flat side frames improves overall strength and ease of maintenance. (I dressed up the Ergo using T&T Engineering Finish Caps for 3mm bolts; available in purple or gold, they make the helicopter more distinctive.)
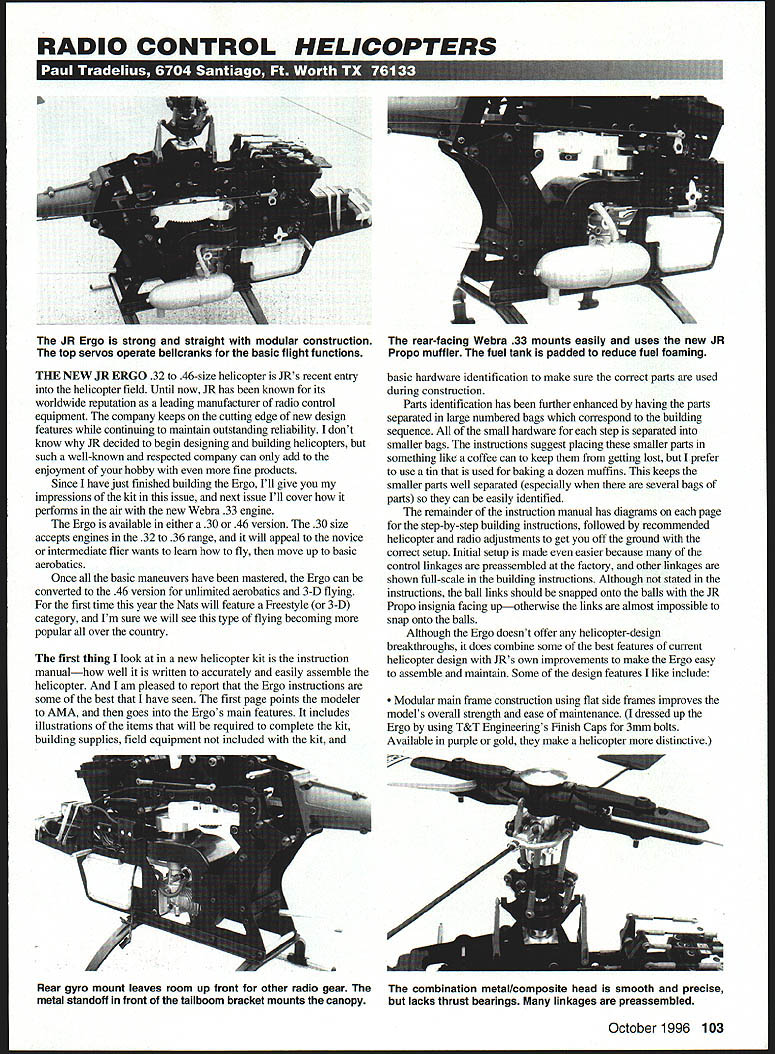
- Top servos operate bellcranks for the basic flight functions.
- The rear-facing Webra .33 mounts easily and uses the new JR Propo muffler. The fuel tank is padded to reduce fuel foaming.
- The rear gyro mount leaves room up front for other radio gear. A metal standoff in front of the tailboom bracket mounts the canopy.
- The combination metal/composite head is smooth and precise, though it lacks thrust bearings. Many linkages are preassembled.
- A one-way hex starting shaft is very short and helps eliminate sources of high-frequency vibration.
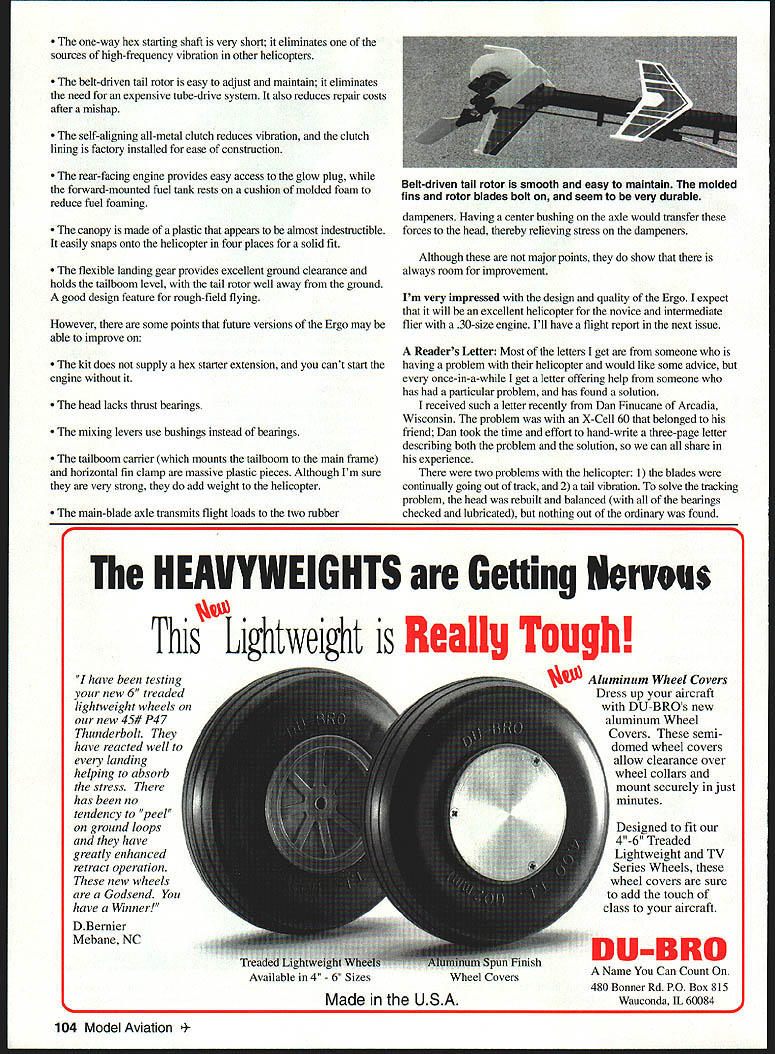
- The belt-driven tail rotor is easy to adjust and maintain; it eliminates the need for an expensive tube-drive system and reduces repair costs after a mishap.
Additional notes:
- A self-aligning all-metal clutch reduces vibration. Clutch lining is factory installed to ease construction.
- The rear-facing engine provides easy access to the glow plug.
- The forward-mounted fuel tank rests on a cushion of molded foam to reduce fuel foaming.
- The plastic canopy appears almost indestructible and snaps onto the helicopter in four places for a solid fit.
- The flexible landing gear provides excellent ground clearance and holds the tailboom level, keeping the tail rotor well away from the ground—a good feature for rough-field flying.
Areas for improvement
There are a few points future versions of the Ergo could improve:
- The kit does not supply a hex-starter extension, so you can't start the engine out of the box.
- The head lacks thrust bearings.
- The mixing levers use bushings instead of bearings.
- The tailboom carrier mounts the tailboom to the main frame; the horizontal-fin clamp is a massive plastic piece. Although likely strong, it adds weight.
- The main-blade axle transmits flight loads through two rubber dampeners. Having a center bushing on the axle would transfer these forces to the head, relieving stress on the dampeners.
These are not major faults but do show there is always room for improvement.
Conclusion
I'm very impressed with the design and quality of the Ergo. I expect it will be an excellent helicopter for the novice and intermediate flier using a .30-size engine. I'll have a flight report in the next issue.
A Reader's Letter
Most letters I receive ask for help with a helicopter problem, but every once in a while I get a letter offering help from someone who solved a particular problem. I recently received such a letter from Dan Finucane of Arcadia, Wisconsin. He hand-wrote a three-page letter describing both the problem and the solution so we can all share his experience.
Problem and solution
There were two problems with his friend's X-Cell 60:
- The blades were continually going out of track.
- A tail vibration.
To solve the tracking problem:
- The head was rebuilt and balanced, and all bearings were checked and lubricated; nothing out of the ordinary was found.
- The blades were closely inspected and rebalanced; again no problem was found, but the out-of-track condition persisted.
- As a last resort, Dan checked the static tracking and found the blades were off by 1/4 inch. He inserted Miniature Aircraft Static Tracking Inserts (part #0563) to adjust the static tracking. This solved the out-of-track condition.
A likely cause to check: the static tracking on an X-Cell is largely controlled by the fit of the blade axle (part #0315) in the rubber O-rings (part #0323). Worn or old O-rings may be the real cause of tracking problems.
Tip: lubricate O-rings during installation. Dan and I have had success using petroleum jelly as initial lubrication; it lubricates without distorting the rubber.
To solve the tail-vibration problem:
- Dan called on Don Chapman, who suspected the front transmission might be out of alignment and putting strain on other parts of the tail-rotor system.
- Dan used the Front Transmission Alignment Tool (part #0057) and found it out of alignment by almost 1/64 inch. Correcting the alignment solved the tail vibration.
Both tools were relatively inexpensive and solved the helicopter's problems; Dan recommends them to other fliers.
Recommendations and final thoughts
- Have radios checked once a year, ideally in winter when you're not flying. Dan does this and believes it has saved a mishap or two.
- During his last checkup, a servo lead was lengthened so it could be used for the X-Cell's elevator without an extension. Eliminating extra connectors provides a little more safety margin.
Dan ended his letter with a nice thought we could all live by: "If everyone would keep helping each other, it would be a wonderful hobby."
Transcribed from original scans by AI. Minor OCR errors may remain.

