
Radio Control Helicopters
Paul Tradelius
4620 Barracuda Dr., Bradenton, FL 34208
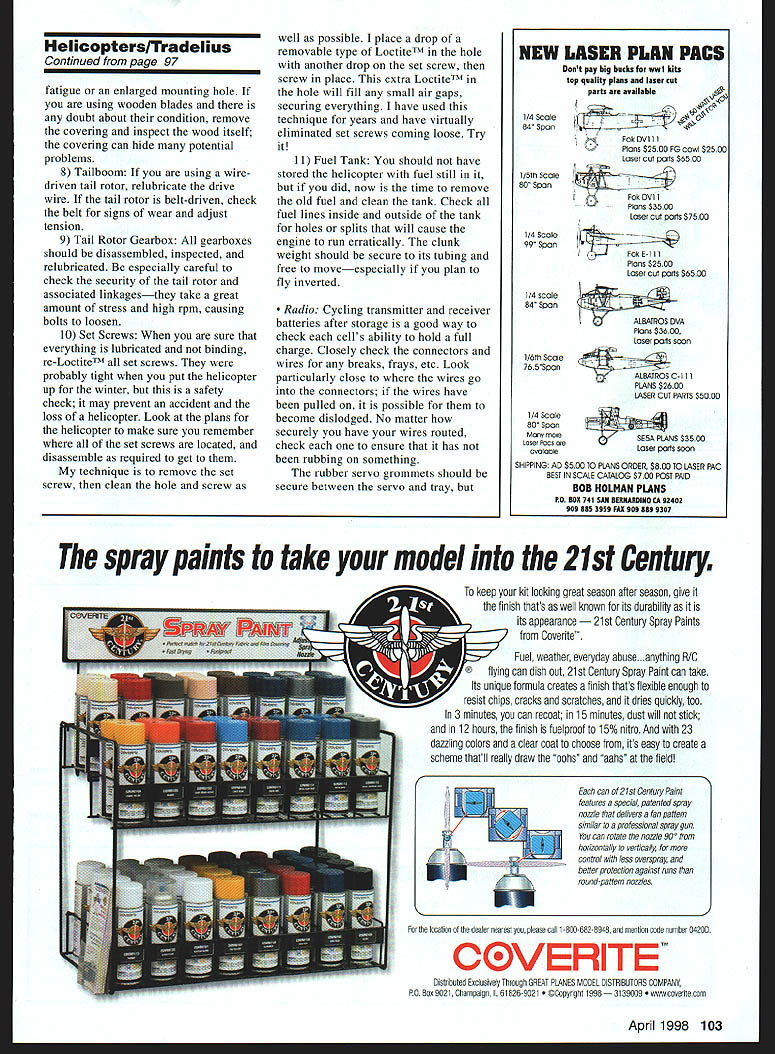
I presented the Ergo 60 Sport in last month's column and promised a follow-up after more flight time. I haven't gotten the planned test flying in yet—ground school, simulator sessions and a flight check kept me grounded—so the flight analysis will have to wait until next month. I did run the Jett Engineering .65 engine a few times and am getting used to its characteristics.
I had to remove the carburetor and reposition the throttle arm to suit the Ergo, which upset the factory settings. Dubb Jett designed this carburetor to be straightforward and easy to adjust: get the main needle valve slightly rich, start the engine, then lean out the idle needle as needed.
One problem I've had is the engine's tendency to lock up at top dead center because it's not a ringed engine and tolerances are very close. By rotating the fan clockwise before engaging the starter I give it a little extra momentum, and it turns over and starts fine. Although I haven't fully wrung the engine out yet, I'm impressed with its quality and robustness.
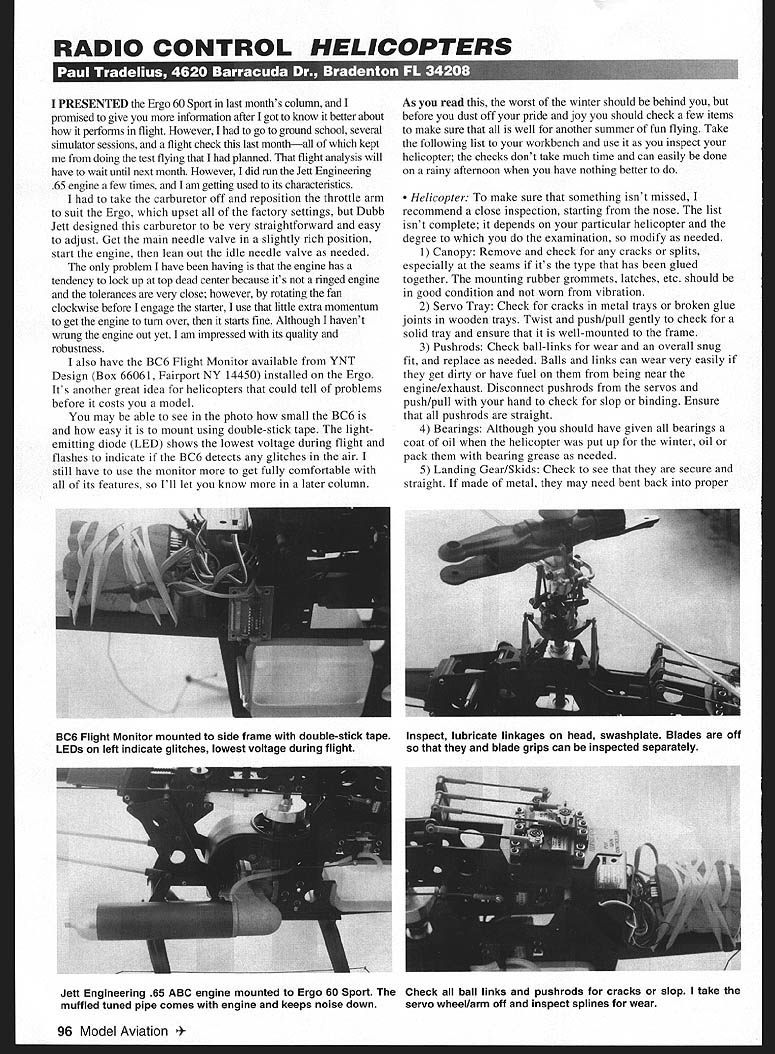
I also installed the BC6 Flight Monitor from YNT Design (Box 66061, Fairport NY 14450) on the Ergo. It's a great idea for helicopters and can alert you to problems before they cost you a model. The BC6 is very small and easy to mount with double-stick tape. Its LED indicates the lowest voltage seen during flight and flashes to show glitches detected in the air. I need more flight time with the monitor to be fully comfortable with all its features; I'll report back in a later column.
As you read this, the worst of winter should be behind you. Before you dust off your pride and joy, check a few items to make sure all is well for another season of flying. The following checklist can be used at your workbench; the checks don't take much time and can be done on a rainy afternoon.
Preseason Checklist
- Canopy
- Remove and check for cracks or splits, especially at glued seams.
- Inspect mounting rubber grommets and latches; worn grommets transmit vibration.
- Servo Tray
- Check for cracks in metal trays or broken glue joints in wooden trays.
- Twist and push/pull gently to ensure the tray is solid and well-mounted to the frame.
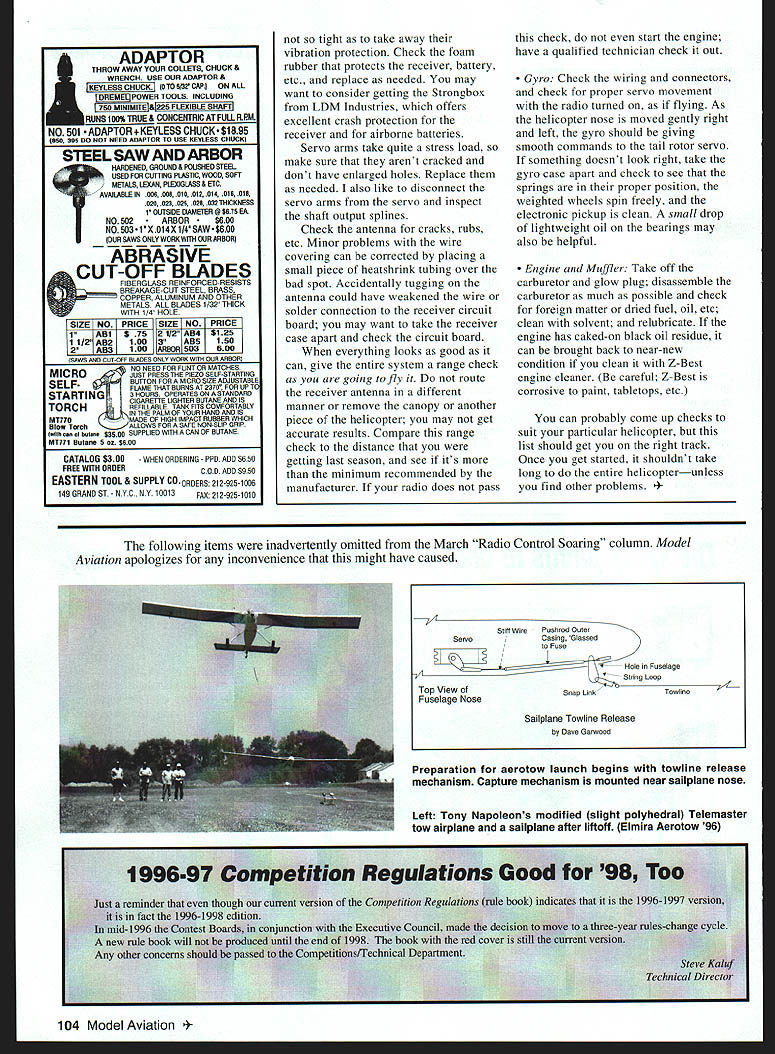
- Pushrods
- Inspect ball-links for wear and ensure a snug fit; replace as needed.
- Dirt and fuel/oil can accelerate ball-link wear. Disconnect pushrods from servos and push/pull by hand to check for slop or binding.
- Ensure all pushrods are straight.
- Bearings
- If you oiled bearings before storage, recheck them; pack or relubricate with grease as needed.
- Landing Gear / Skids
- Ensure they are secure and straight. Metal skids may need to be bent back to proper position.
- Frame
- Check nuts and bolts for security.
- Inspect for vibration stress cracks around engine and skid mounts; replace parts as required.
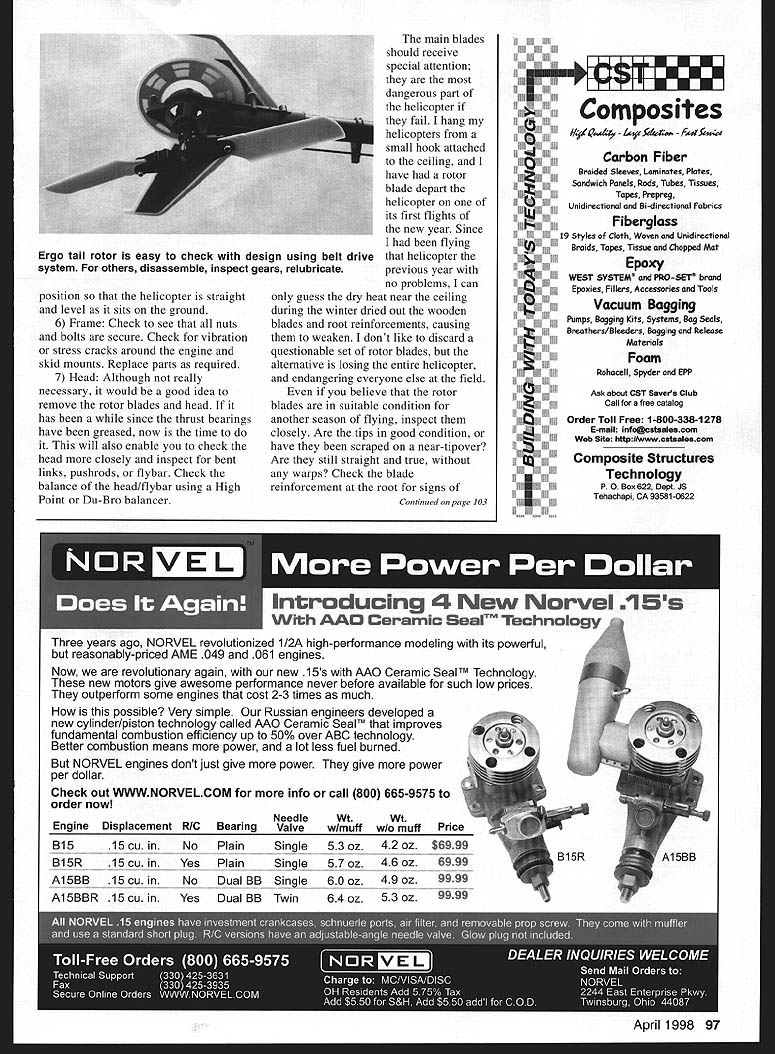
- Head and Main Blades
- Remove rotor blades if possible (thrust bearings have been greased) to inspect the head closely.
- Check links, pushrods, flybar and balance the head/flybar using a High-Point or Du-Bro balancer.
- Main blades deserve special attention—they are the most dangerous part of the helicopter. Even if you flew last season without problems, winter dry heat (for example, near ceilings) can dry and weaken wooden blade root reinforcements.
- Inspect blade tips for scrapes, check for straightness (no warps), and examine root reinforcements for delamination or cracking. If blades are questionable, replace them—losing a blade can mean losing the entire helicopter and endangering others.
- Tailboom
- For wire-driven tails, relubricate the drive wire.
- For belt-driven tails, check the belt for wear and adjust tension.
- Tail Rotor Gearbox
- Disassemble, inspect and relubricate all gearboxes.
- Check security of the tail rotor and associated linkages—these take high stress and RPM and can work loose.
- Set Screws
- Once everything is lubricated and free-moving, re-tighten all set screws.
- My technique: remove the set screw, clean the hole and screw, place a drop of removable Loctite in the hole and another on the set screw, then reinstall. The extra Loctite fills small gaps and helps prevent screws coming loose.
- Fuel Tank
- If fuel was left in the tank over storage, drain and clean it.
- Inspect all fuel lines (inside and outside the tank) for holes or splits that can cause erratic running.
- Ensure the clunk weight is secure to its tubing and free to move—especially important if you plan to fly inverted.
Radio and Electronics
- Cycle transmitter and receiver batteries after storage to check each cell's ability to hold charge.
- Inspect connectors and wires for breaks, frays and stress where wires enter connectors. Even well-routed wires can rub through—check carefully.
- Verify foam rubber that protects the receiver and battery is in good condition; replace if deteriorated. Consider the Strongbox from LDM Industries for excellent crash protection for the receiver and batteries.
- Inspect servo arms for cracks and enlarged holes; replace if needed. Disconnect servo arms from the servos and inspect the output shaft splines.
- Inspect the antenna for cracks or worn insulation. Small damaged spots in the covering can be repaired with heat-shrink tubing. If the antenna or its lead has been tugged, open the receiver case and inspect the solder joints and circuit board.
When everything looks good, perform a range check as you will fly (don't reposition the receiver antenna or remove the canopy while checking). Compare this season's range to last season and to the manufacturer's minimum. If the radio fails the range check, do not start the engine—have a qualified technician inspect it.
Gyro
- Check gyro wiring and connectors.
- With the radio on, check proper servo movement as if flying. Move the helicopter nose gently right and left; the gyro should give smooth commands to the tail rotor servo.
- If the gyro behaves oddly, open the case and verify springs are in place, weighted wheels spin freely, and the electronic pickup is clean.
- A small drop of lightweight oil on the bearings may help.
Engine and Muffler
- Remove the carburetor and glow plug; disassemble the carburetor as much as possible and check for foreign matter or dried fuel/oil. Clean with solvent and relubricate.
- If the engine has caked-on black residue, Z-Best engine cleaner can restore it near to new condition. Be careful—Z-Best is corrosive to paint, tabletops and similar surfaces.
You can likely think of additional checks specific to your helicopter, but this list should get you started. Once you begin, a full inspection usually doesn't take long—unless you find other problems. Start inspection at the nose and work back; the list isn't exhaustive and may be adjusted for your particular model and level of modification.
Transcribed from original scans by AI. Minor OCR errors may remain.

