

Radio Control: Helicopters
Walt Schoonard
YOUMAN'S HEAD MODS. Due to the fact that I'm thinking of too many things at one time, I made a mistake in the mix measurements on the Youman's Head Mods article. They should be as follows: From the center of the pivot to the center of the inner ball is 5/16 in. From the center of the first ball to the center of the outer ball is 5/8 in. Bill has just now changed that on his to 1/2-in. between the inner and outer ball centers. This gives a greater amount of collective and a quicker cyclic response. If your flying skill is not too great as yet, I would go by the first measurements, and when your skill improves, you can change to the latter. I hope that my goof did not confuse you too much. Sorry!
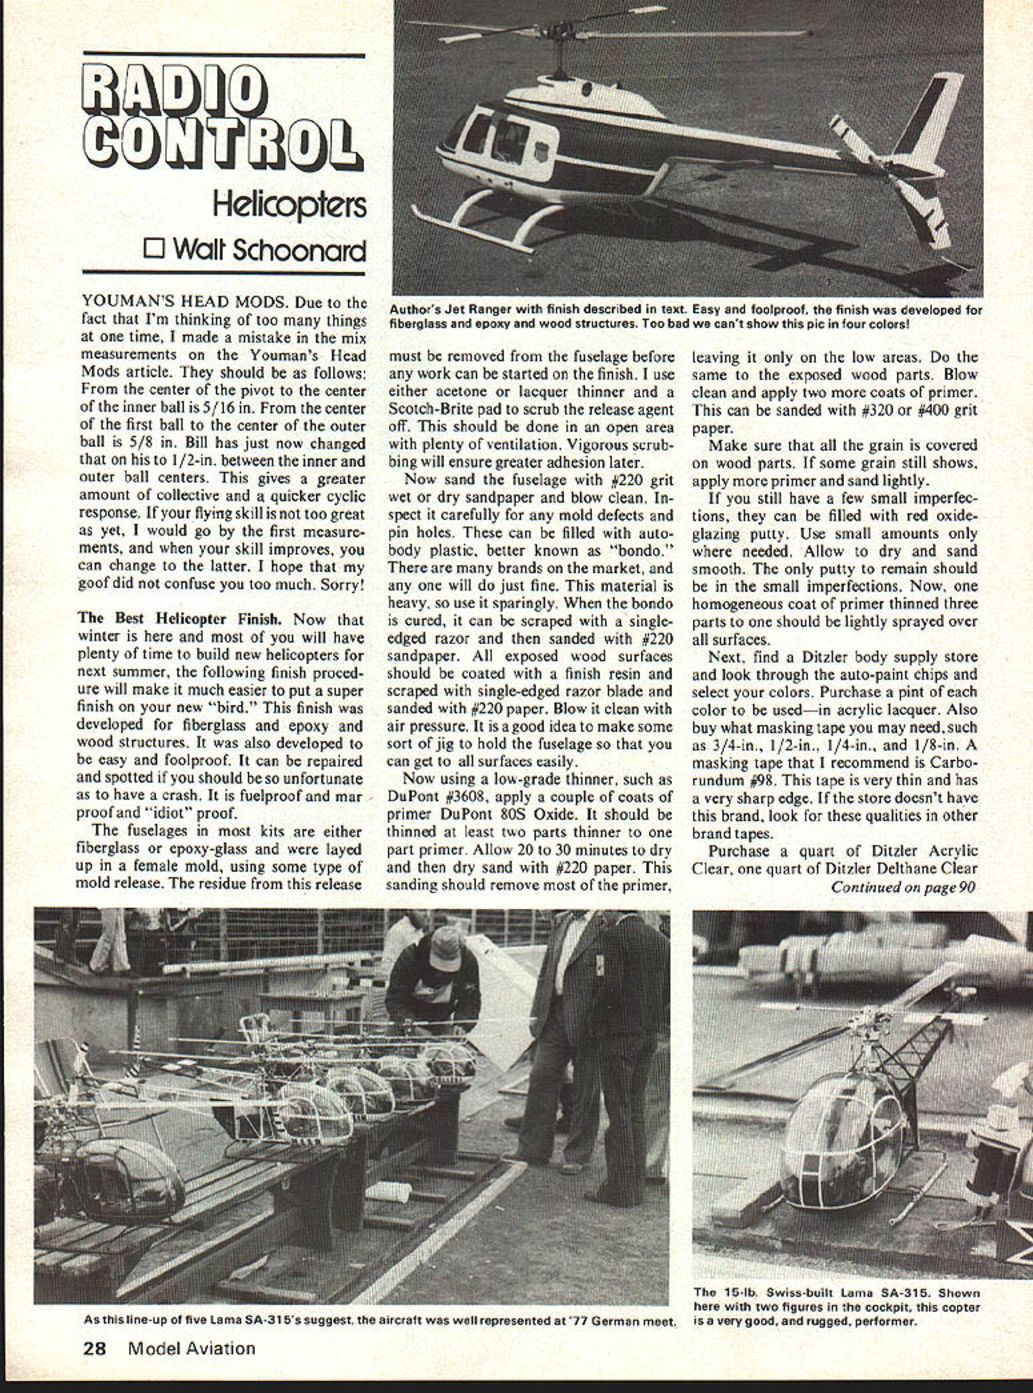
The Best Helicopter Finish. Now that winter is here and most of you will have plenty of time to build new helicopters for next summer, the following finish procedure will make it much easier to put a super finish on your new "bird." This finish was developed for fiberglass and epoxy and wood structures. It was also developed to be easy and foolproof. It can be repaired and spotted if you should be so unfortunate as to have a crash. It is fuelproof and mar-proof and "idiot" proof.
The fuselages in most kits are either fiberglass or epoxy-glass and were laid up in a female mold, using some type of mold release. The residue from this release must be removed from the fuselage before any work can be started on the finish. I use either acetone or lacquer thinner and a Scotch-Brite pad to scrub the release agent off. This should be done in an open area with plenty of ventilation. Vigorous scrubbing will ensure greater adhesion later.
Now sand the fuselage with #220 grit wet or dry sandpaper and blow clean. Inspect it carefully for any mold defects and pin holes. These can be filled with autobody plastic, better known as "bondo." There are many brands on the market, and any one will do just fine. This material is heavy, so use it sparingly. When the bondo is cured, it can be scraped with a single-edged razor and then sanded with #220 sandpaper. All exposed wood surfaces should be coated with a finish resin and scraped with a single-edged razor blade and sanded with #220 paper. Blow it clean with air pressure. It is a good idea to make some sort of jig to hold the fuselage so that you can get to all surfaces easily.
Now using a low-grade thinner, such as DuPont #3608, apply a couple of coats of primer DuPont 80S Oxide. It should be thinned at least two parts thinner to one part primer. Allow 20 to 30 minutes to dry and then dry sand with #220 paper. This sanding should remove most of the primer, leaving it only on the low areas. Do the same to the exposed wood parts. Blow clean and apply two more coats of primer. This can be sanded with #320 or #400 grit paper.
Make sure that all the grain is covered on wood parts. If some grain still shows, apply more primer and sand lightly.
If you still have a few small imperfections, they can be filled with red oxide-glazing putty. Use small amounts only where needed. Allow to dry and sand smooth. The only putty to remain should be in the small imperfections. Now, one homogeneous coat of primer thinned three parts to one should be lightly sprayed over all surfaces.
Next, find a Ditzler body supply store and look through the auto-paint chips and select your colors. Purchase a pint of each color to be used — in acrylic lacquer. Also buy what masking tape you may need, such as 3/4-in., 1/2-in., 1/4-in., and 1/8-in. A masking tape that I recommend is Carborundum #98. This tape is very thin and has a very sharp edge. If the store doesn't have this brand, look for these qualities in other brand tapes.
Purchase a quart of Ditzler Acrylic Clear, one quart of Ditzler Delthane Clear
RC Helicopters/Schoonard continued from page 28
and Hardener. Also a couple of sheets of #600 grit wet-or-dry sandpaper. Using the color that you selected for the base color, spray the entire helicopter until it is cov- ered evenly. When this is dry (about 30 minutes), spray a couple of wet coats of the clear acrylic. Reduce all acrylic materials so that they will spray with no "orange peel." Allow this to dry overnight, then tape up for multi-color schemes. The reason for the clear after the base color is to prevent all kinds of finger marks getting into the porous paint.
When masking for multi-colors, make sure that you have no spot that can leak overspray onto the base color. The first coats of multi-colors should be sprayed rather dry so as to seal the tape edges. Allow multi-colors to dry several hours before removing tape by pulling it back over itself. Any feather edges of paint left standing can be removed by scraping lightly with a single-edged razor blade. This should be done carefully! Now make sure that all the edges are sharp and no overspray is present. If overspray is detected, sand with #600 grit wet, and wipe dry.
Now, wipe the entire helicopter with Preps-Sol (a DuPont grease and wax remover) to remove any finger marks. Using a tack rag, remove all lint and dust. Spray a couple of wet coats of acrylic clear over all painted surfaces. Allow to dry overnight. Now sand all paint edges smooth with #600 grit wet; wipe clean and tack lint free.
Now comes the hard part—but the part that will make the helicopter beautiful and durable. Because the Delthane is difficult to spray, you should practice on some object such as an old gallon paint can. Mix up a small quantity as per instructions on container and practice spraying until you get the knack. It sprays like enamel in that it flows after it is on the surface; it will run if you spray too wet, and it will not flow if you spray too dry. Be sure to wear a protective mask! Let me tell you again—wear a protective mask! The Delthane will cure overnight and can be safely handled in 24 hours.
I have used this type of finish for years and have won every single best finish contest I have ever entered except one. In that one I was beaten by a plane that I painted for another person, and he beat me with my own handiwork! Oh well, it's a fickle world—so what!
You may want to practice this whole procedure on an old box or board or even a sheet of metal until you get the hang of it. The great part of Ditzler Acrylic Lacquer is that it is very forgiving, and any mistakes or dirt or runs or bugs can be sanded out and done over within minutes. The times that I gave are full curing times and do not need to be adhered to for repairs. They can be done as soon as you can touch the paint, which is usually just minutes.
Bill for materials: 1 gallon DuPont #3608 Thinner ($3.50), 1 pint DuPont Preps-Sol Cleaner ($1.80), 1 quart DuPont #808 oxide primer ($4.50), 1 roll 3/4-inch tape ($2.00), 1 roll 1/4-inch tape (85c), 1 roll 1/8-inch tape (85c), 1 Tac-Rag (60c), 1 pint of each color ($3.50 ea.), 1 quart Ditzler Acrylic Clear ($4.50), 1 quart Ditzler Delthane & Hardener ($7.50). These are minimal, but will be enough to do several helicopters. Be sure to mix only the amount of Delthane that you are going to use, as it will cure up and be unusable. Clean out your spray gun after each use with lacquer thinner. Cost-wise, I am sure that you will find this to be as economical as any other process, and you will like the results.
World-Wide RC Helicopter Symposium. Because a great many of the manufacturers cannot come at the time we had planned for the symposium, a new date will have to be selected. This column will keep you informed as progress is made.
If you are not flying, you are not trying hard enough!
Walt Schoonard, 2080 Sharon Rd., Winter Park, FL 32789.
Transcribed from original scans by AI. Minor OCR errors may remain.

