

Radio Control: Helicopters
Dave Chesney
IT TAKES perseverance. Some of you guys have been less than successful with your RC helicopter, yet it is apparent that more and more modelers are successful. Why? Because they persevered.
We've all read that helicopters do not want to fly. Believe it. But believe also that they will fly if you build the machine exactly as instructed and persist at the task of learning to control the beast.
If you are not yet successfully hovering your machine, or if you've tried and have given up prematurely, the following suggestions may help.
Assembly:
1) Carefully assemble the helicopter kit exactly in accordance with the manufacturer's instructions. Most modifications that have been written in various publications may be omitted. Although modifications may improve the performance of the basic kit, they can confuse the beginner during construction and pre-flight set-up. Note: If an experienced RC helicopter flier is available to assist you in construction and set-up, any modifications should be reviewed with him before beginning construction.
2) Use Loctite on all bolts not using lock-washers or lock-nuts.
3) Pay particular attention to building and/or installation of the main and tail rotors. Blade balancing is not an option! The main and tail rotors must be carefully balanced; ideally, each set of blades should be of equal weight. Plan to build a spare set of main rotors now; you'll probably need them.
4) Stick to the manufacturer's suggestions for initial set-up of main-rotor pitch, tail rotor and throttle/collective, etc. These are beginning settings and may need to be altered after run-up and dynamic checks.
5) If possible use a Schnuerle engine of the displacement recommended.
Pre-flight:
1) Re-read and check all assembly notes and check the machine for loose or missing nuts, bolts, screws, etc.
2) Check radio installation: missing servo output arm screws, servo control connectors, ball links, as well as the usual check of proper control movement.
3) Call a local RC helicopter expert if available; call a friend. You'll need a spare hand.
4) Gather equipment necessary to start and adjust the machine. Also make provisions to attach the helicopter firmly to the ground for the first check.
5) Select a flying area secluded from traffic. The surface should be smooth — blacktop or concrete is preferred — and clear of obstacles. Close buildings and trees should be avoided as obstacles also affect wind conditions.
6) Be aware of potential danger to people when a helicopter is around. A friend can help crowd control; when people are present, packing up must be done so you are free to devote full attention to the helicopter.
7) Always remember to turn the radio set to low throttle. The radio should remain on throughout the starting procedure. The main rotor should be grasped firmly during starting to prevent rotation.
8) If the radio is proven reliable, provision should be made to firmly attach the machine to the ground. Due to vibration, mechanical noise or intermittent unwanted servo operation that may be experienced during the initial run-up, the machine should be securely retained to the ground for the first run-up and may be accomplished safely. Once radio reliability is confirmed, the helicopter should be removed from its restraint and placed safely clear of spectators, field boxes, etc. 9) Set blade tracking as recommended in the instructions. Tracking must be accomplished before attempting to learn control movement and response, as it does affect stability of the machine.
10) Remember, the static pitch adjustment of the main and tail rotors was a beginning setting. The main rotor pitch may need adjustment up or down from that setting. Remember blade tracking and recheck after each change of rotor pitch; generally, the high blade is adjusted down to the low blade. The higher the blade rpm at lift-off (generally 1/2-throttle stick), the more stable the helicopter is in the hover. The tail rotor is set to minimize yaw at lift-off after the main rotor has been adjusted for proper lift-off pitch.
Flight:
1) Be prepared to devote your full attention to the machine and its responses to control input. Flying an RC helicopter will be a full-time job; you will not have time to remind spectators to remain clear during your first attempts. Use your friend for crowd control.
2) The helicopter controls respond similarly to a fixed-wing aircraft when the helicopter is in forward flight; however, you must learn to hover first. In the hover the machine will respond to pitch control by moving forward or backward rather than up or down; leave your up elevator habit at home with the fixed-wing machine and concentrate on throttle/collective for altitude control.
If you've tried and quit, try again. If you're still trying, hang in there. Pay close attention to detail, concentrate and, above all, persevere.
The photos show Bill Watson's Kavan Jet Ranger modified cosmetically to the Bell 206A/Army OH58 configuration. The modification was accomplished simply by installing 1/32" plywood pieces to the side window areas to change the outline. Patterns were made from poster board and transferred to the plywood which was then cut and glued in place. The plywood pieces were then reinforced from the inside with fiberglass cloth and resin. The exterior was then Hobbypoxy Stuff sanded flush with the fuselage sides. This is a very simple
Radio Control: Helicopters
Dave Chesney
modification to give you Jet Ranger fliers something just a little different.
Bill Watson is vice-president of the NCHA (North Carolina Helicopter Assoc.). The original members of the NCHA are shown in a group photo of their first meet in Greensboro, NC.
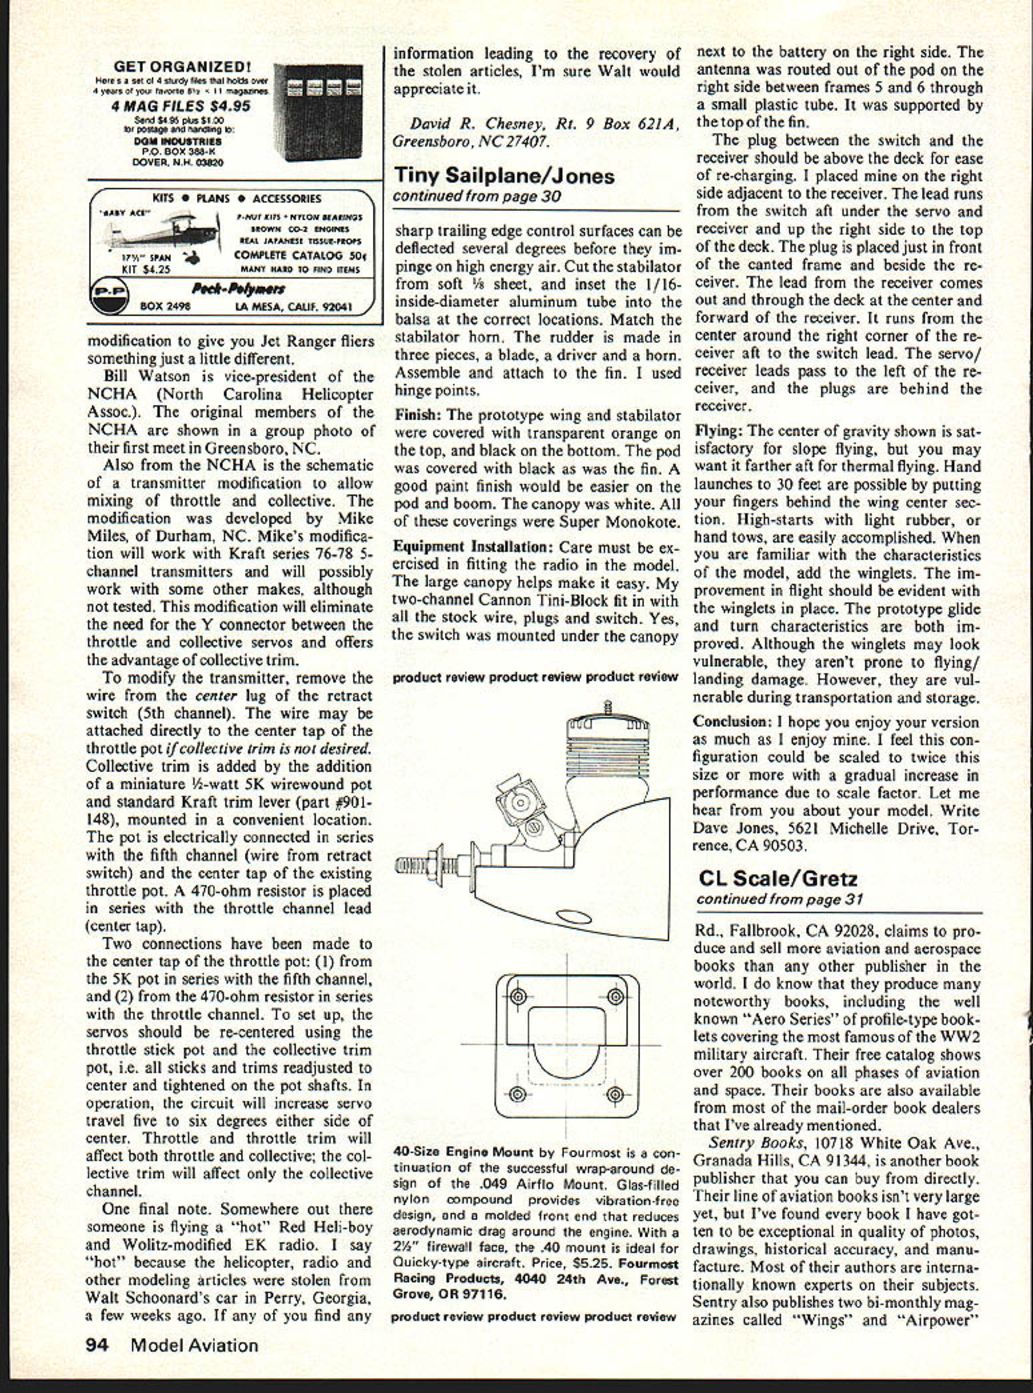
Also from the NCHA is the schematic of a transmitter modification to allow mixing of throttle and collective. The modification was developed by Mike Miles, of Durham, NC. Mike's modification will work with Kraft series 76-78 5-channel transmitters and will possibly work with some other makes, although not tested. This modification will eliminate the need for the Y connector between the throttle and collective servos and offers the advantage of collective trim.
To modify the transmitter, remove the wire from the center lug of the retract switch (5th channel). The wire may be attached directly to the center tap of the throttle pot if collective trim is not desired. Collective trim is added by the addition of a miniature 1/2-watt 5K wirewound pot and standard Kraft trim lever (part #901-148), mounted in a convenient location. The pot is electrically connected in series with the fifth channel (wire from retract switch) and the center tap of the existing throttle pot. A 470-ohm resistor is placed in series with the throttle channel lead (center tap).
Two connections have been made to the center tap of the throttle pot: (1) from the 5K pot in series with the fifth channel, and (2) from the 470-ohm resistor in series with the throttle channel. To set up, the servos should be re-centered using the throttle stick pot and the collective trim pot, i.e., all sticks and trims readjusted to center and tightened on the pot shafts. In operation, the circuit will increase servo travel five to six degrees either side of center. Throttle and throttle trim will affect both throttle and collective; the collective trim will affect only the collective channel.
One final note. Somewhere out there someone is flying a "hot" Red Heli-boy and Wolitz-modified EK radio. I say "hot" because the helicopter, radio and other modeling articles were stolen from Walt Schoonard's car in Perry, Georgia, a few weeks ago. If any of you find any information leading to the recovery of the stolen articles, I'm sure Walt would appreciate it.
David R. Chesney, Rt. 9 Box 621A, Greensboro, NC 27407.
Assembly
- Carefully assemble helicopter kit exactly in accordance with manufacturers' instructions. Most modifications written in various publications may be omitted. Although modifications may improve performance, the basic kit can confuse the beginner during construction and pre-flight set-up. Note: If an experienced RC helicopter flier is available to assist construction and set-up, modifications should be reviewed by him before beginning construction.
- Use Loctite on bolts and use lock-washers and lock-nuts.
- Pay particular attention to building and/or installation of main and tail rotors. Blade balancing of main and tail rotors must be done carefully; ideally, set blades should be of equal weight. Plan to build a spare set of main rotors now — you'll probably need them.
- Stick to manufacturers' suggestions for initial set-up: main-rotor pitch, tail rotor, throttle/collective, etc. Beginning settings may need to be altered after run-up dynamic checks.
- If possible use Schnuerle engine of the displacement recommended.
Pre-flight
- Re-read and check assembly notes; check machine for loose or missing nuts, bolts, screws, etc.
- Check radio installation: missing servo output arm screws, servo control connectors, ball links — as usual check for proper control movement.
- Call a local RC helicopter expert if available; call a friend. You'll need a spare hand.
- Gather equipment necessary to start and adjust the machine. Also make provisions to attach the helicopter firmly to the ground for the first check.
- Select a flying area secluded from traffic; the surface should be smooth — blacktop or concrete — and the area clear of obstacles. Close buildings and trees should be avoided; obstacles also affect wind conditions.
- Be aware of the potential danger a helicopter presents; a friend can help with crowd control. If too many people are present, pack up — you must be free to devote attention to the helicopter.
- Always remember to turn the radio set to low throttle. The radio should remain on throughout the starting procedure. The main rotor should be grasped firmly during starting to prevent rotation.
- If the radio is proven reliable, provision should be made to firmly attach the machine to the ground. Due to vibration, mechanical noise and intermittent unwanted servo operation that may be experienced during the initial run-up, the machine should be securely retained to the ground. The first run-up may be accomplished safely while restrained. Once radio reliability is confirmed, the helicopter should be removed from restraint and placed safely clear of spectators, field boxes, etc.
Transcribed from original scans by AI. Minor OCR errors may remain.

