

Radio Control: Helicopters
Dave Chesney
SX81 Completion and Radio Installation
The time to catch up on those building projects approaches as I write this. Those of us below the Mason‑Dixon line and to the southwest have to force ourselves to build, because good flying weather seems to go on and on. If you're like me, as long as one machine is flyable, building projects will gather dust on the workbench awaiting late returns from the flying field. For those of us who would rather be flying, good weather is bad for building (or writing). Today it's raining.
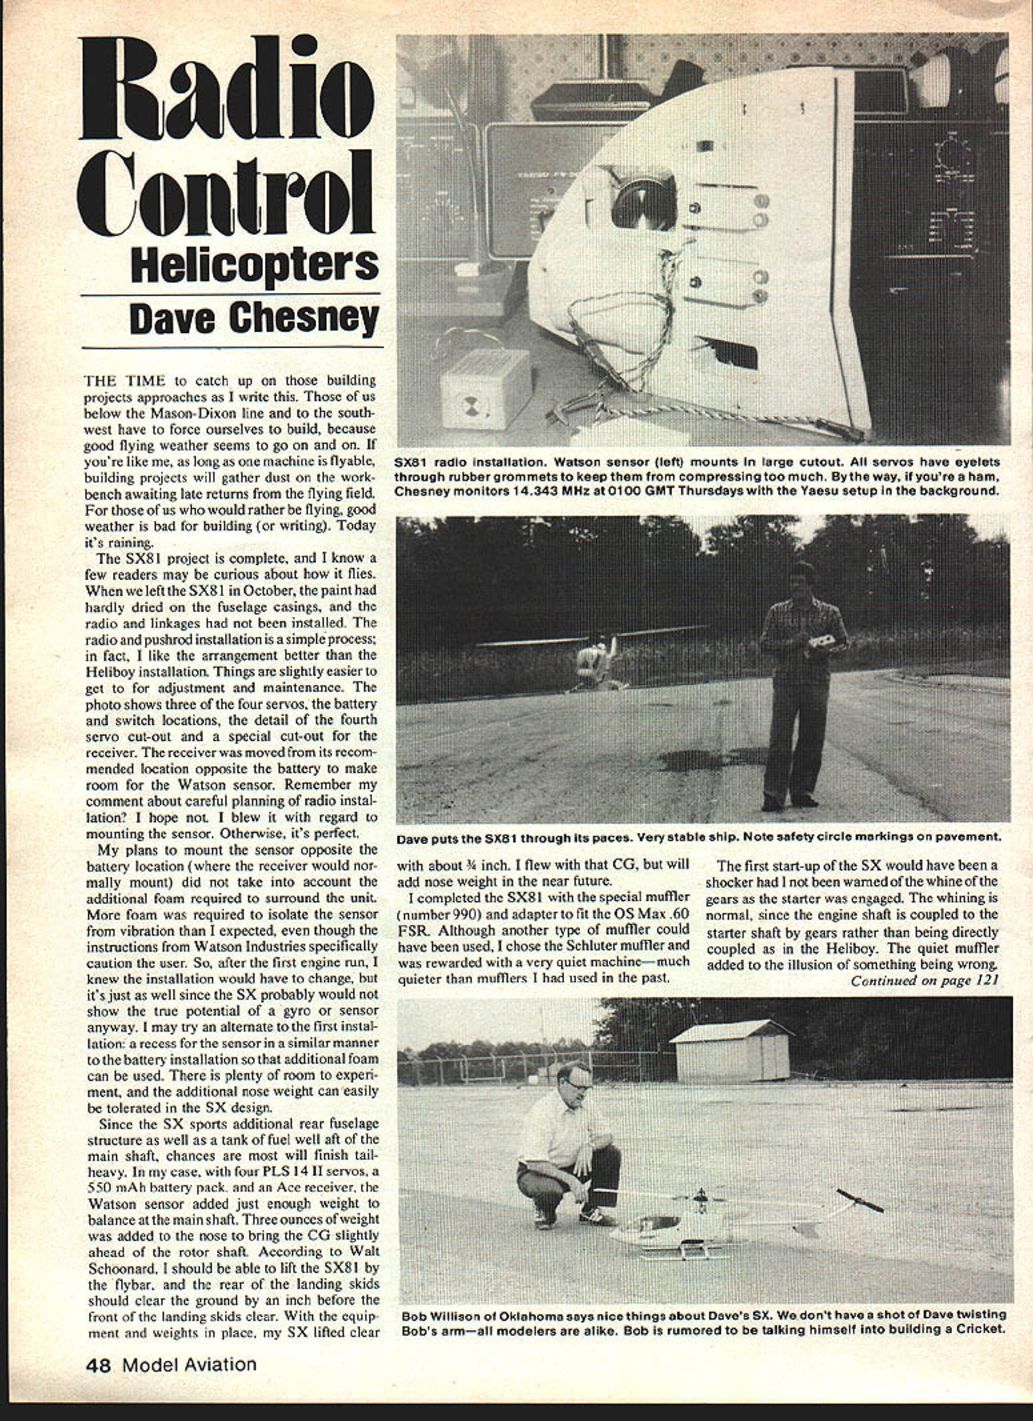
The SX81 project is complete, and I know a few readers may be curious about how it flies. When we left the SX81 in October, the paint had hardly dried on the fuselage casings, and the radio and linkages had not been installed. The radio and pushrod installation is a simple process; in fact, I like the arrangement better than the Heliboy installation. Things are slightly easier to get to for adjustment and maintenance.
The photo shows three of the four servos, the battery and switch locations, the detail of the fourth servo cut‑out and a special cut‑out for the receiver. The receiver was moved from its recommended location opposite the battery to make room for the Watson sensor. Remember my comment about careful planning of radio installation? I hope not. I blew it with regard to mounting the sensor. Otherwise, it's perfect.
Watson Sensor Installation
My plans to mount the sensor opposite the battery location (where the receiver would normally mount) did not take into account the additional foam required to surround the unit. More foam was required to isolate the sensor from vibration than I expected, even though the instructions from Watson Industries specifically caution the user. So, after the first engine run I knew the installation would have to change, but it's just as well since the SX probably would not show the true potential of a gyro or sensor anyway.
I may try an alternate to the first installation: a recess for the sensor in a similar manner to the battery installation so that additional foam can be used. There is plenty of room to experiment, and the additional nose weight can easily be tolerated in the SX design. As for the Watson sensor, I apologize for now. I must either re‑install it in the SX or another machine and give more attention to following instructions.
Balance and Center of Gravity
Since the SX sports additional rear fuselage structure as well as a tank of fuel well aft of the main shaft, chances are most will finish tail‑heavy. In my case, with four PLS 14 II servos, a 550 mAh battery pack, and an Ace receiver, the Watson sensor added just enough weight to balance at the main shaft. Three ounces of weight was added to the nose to bring the CG slightly ahead of the rotor shaft.
According to Walt Schoonard, I should be able to lift the SX81 by the flybar, and the rear of the landing skids should clear the ground by an inch before the front of the landing skids clear. With the equipment and weights in place, my SX lifted clear with about 3/4 inch. I flew with that CG, but will add nose weight in the near future.
Muffler and Engine Notes
I completed the SX81 with the special muffler (number 990) and adapter to fit the OS Max .60 FSR. Although another type of muffler could have been used, I chose the Schluter muffler and was rewarded with a very quiet machine—much quieter than mufflers I had used in the past.
The first start‑up of the SX would have been a shocker had I not been warned of the whine of the gears as the starter was engaged. The whining is normal, since the engine shaft is coupled to the starter shaft by gears rather than being directly coupled as in the Heliboy. The quiet muffler added to the illusion of something being wrong.
During the first hover flights, I decided I had a problem with the fuel draw. No forward flights that day, as the engine began running lean after only half a tank. I contacted Schluter USA for advice, and found Walt had not had similar problems. He recommended reducing the area of the carb on the Max, since I was not running muffler pressure (this is recommended in the Max instructions for the 7B carb).
I chose to install a Robart Super Pumper/Auto Mix. The decision to install the pumper did not come easily, since I really didn't like the idea of messing with my good ol' (four‑year‑old) Max .60. Glad I did, though, because the Robart unit worked beautifully with no adjustment right down to the last drop. When I get a few extra dollars, I may get a new Max .61, but for now the old Max .60 with the Robart Pumper/Auto Mix does a nice job.
Flight Characteristics
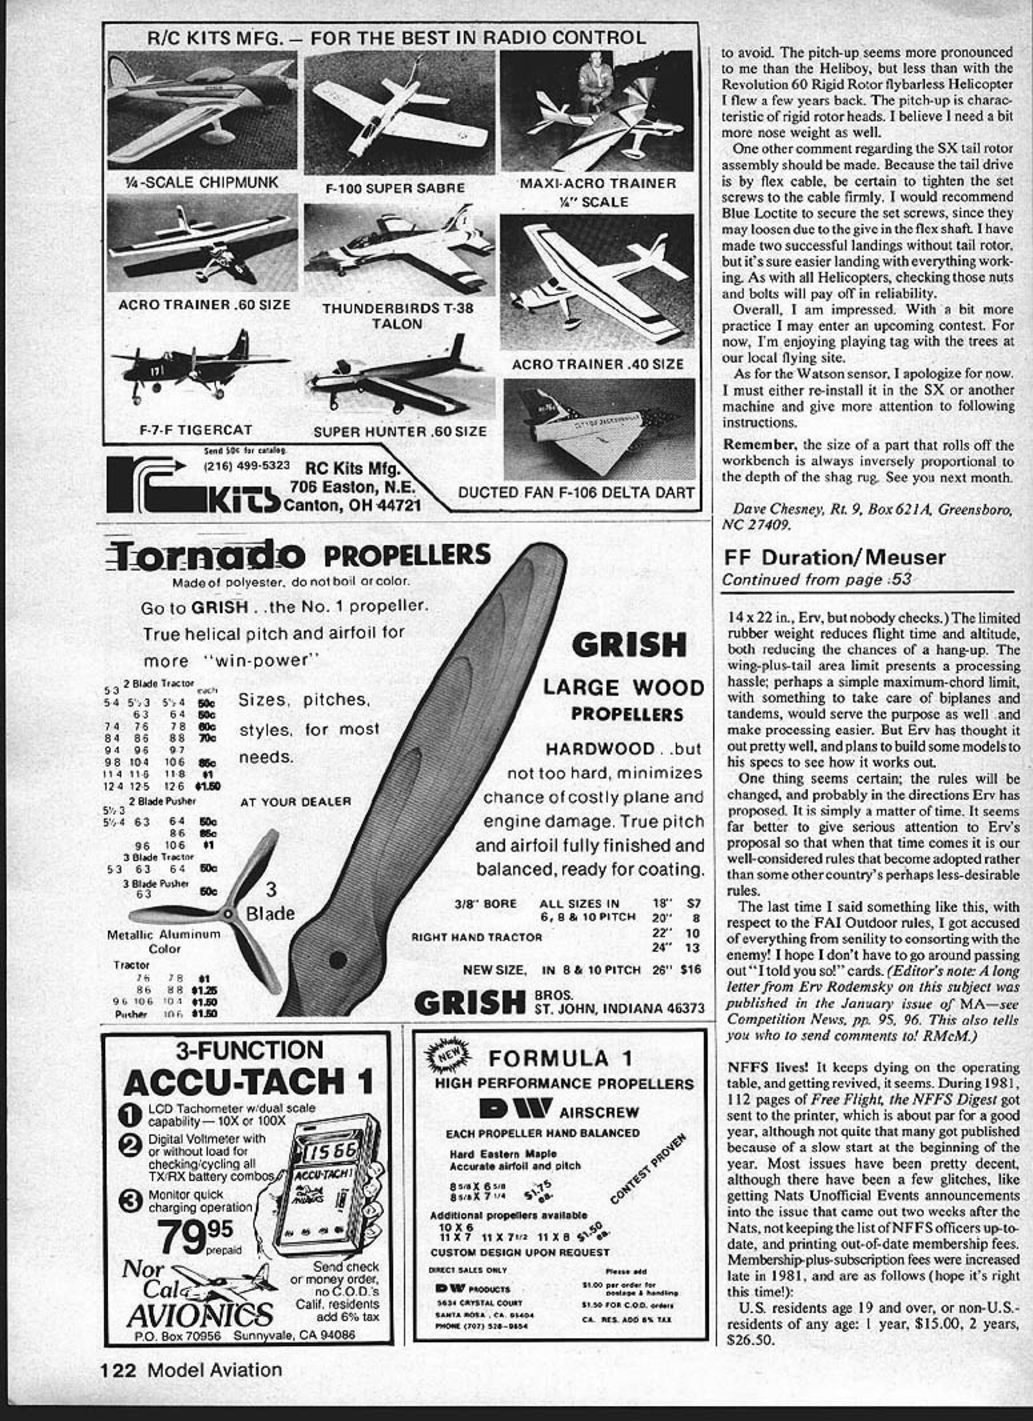
Engine and fuel draw problems out of the way, we did some more hovering. Glenn Willison handled the camera and blade tracking chores on these flights. The SX81 is very smooth, and rather hard to compare with the Heliboy. I guess the yaw axis is the primary difference, as the SX is very good on tail commands. With the tail rotor thrust line kicked up to the level of the main rotor, lateral drift is negligible. Tail rotor turns require little (if any) attention to cyclic. My Heliboy will soon sport a kick‑up tail assembly (mod kit available from Schluter USA), because I am convinced it will improve the Heliboy similarly.
Forward flight with the SX81 at first was not as impressive as the Heliboy. Again, it is different. Perhaps the maneuvers suffer due to the additional weight, but the SX required a different technique to loop and roll. The rudder technique is best described as a fly‑through, rather than the rough‑and‑tumble stick shoving only my Heliboy has tolerated. As I have practiced, I have come to appreciate the flight characteristics of the SX81, and I now can do a reasonable job with aerobatics. This machine is better than the pilot.
The SX is fast in forward flight, and it is smooth. It does tend to pitch up upon exiting accelerated maneuvers, which requires technique to avoid. The pitch‑up seems more pronounced to me than the Heliboy, but less than with the Revolution 60 rigid‑rotor flybarless helicopter I flew a few years back. The pitch‑up is characteristic of rigid rotor heads. I believe I need a bit more nose weight as well.
Tail Drive and Maintenance
One other comment regarding the SX tail rotor assembly should be made. Because the tail drive is by flex cable, be certain to tighten the set screws to the cable firmly. I would recommend Blue Loctite to secure the set screws, since they may loosen due to the give in the flex shaft. I have made two successful landings without a tail rotor, but it's sure easier landing with everything working. As with all helicopters, checking those nuts and bolts will pay off in reliability.
Overall Impressions and Recommendations
Overall, I am impressed. With a bit more practice I may enter an upcoming contest. For now, I'm enjoying playing tag with the trees at our local flying site.
- Recess the Watson sensor and use ample foam for vibration isolation.
- Consider a Robart Super Pumper/Auto Mix if you have fuel draw issues.
- Tighten tail drive set screws and secure with Blue Loctite.
- Add nose weight if the machine tends to pitch up or finish tail‑heavy.
Remember, the size of a part that rolls off the workbench is always inversely proportional to the depth of the shag rug. See you next month.
Dave Chesney Rt. 9, Box 621A, Greensboro, NC 27409.
Transcribed from original scans by AI. Minor OCR errors may remain.

