

Radio Control: Pylon Racing
Bill Hager
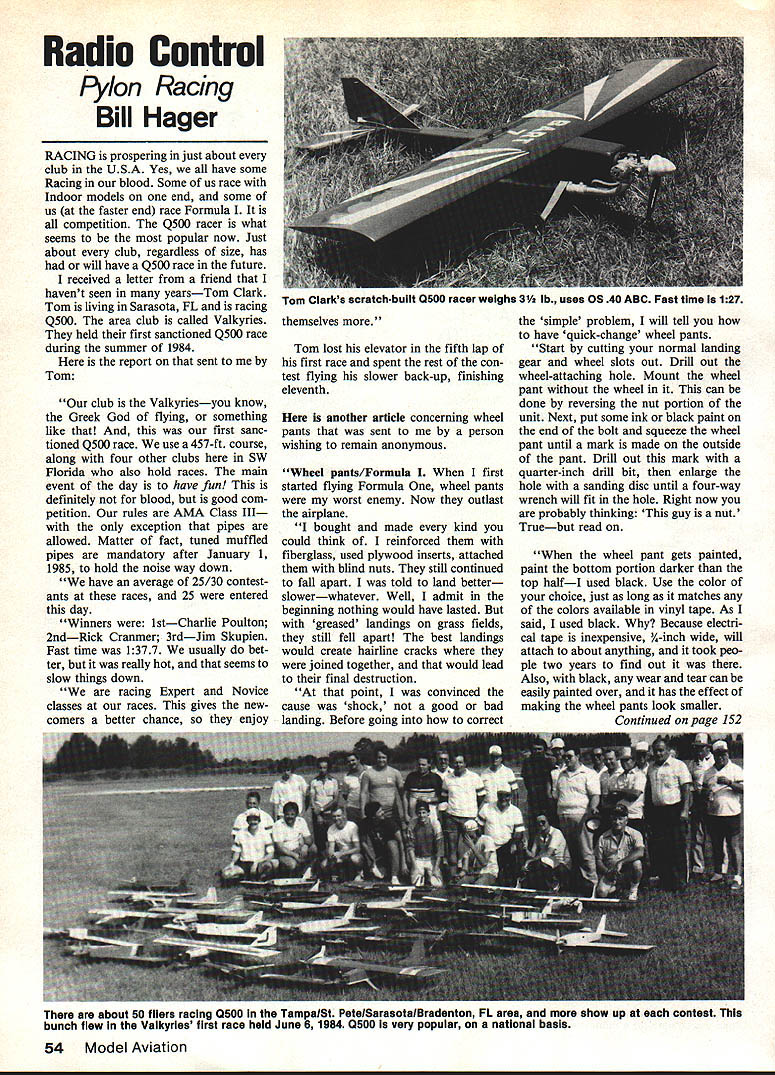
Racing is prospering in just about every club in the U.S.A. Yes, we all have some racing in our blood. Some of us race with indoor models on one end, and some of us (at the faster end) race Formula I. It is all competition. The Q500 racer is what seems to be the most popular now. Just about every club, regardless of size, has had or will have a Q500 race in the future.
I received a letter from a friend that I haven't seen in many years—Tom Clark. Tom is living in Sarasota, FL and is racing Q500. The area club is called Valkyries. They held their first sanctioned Q500 race during the summer of 1984.
Valkyries Q500 Race (report from Tom Clark)
Our club is the Valkyries—you know, the Greek God of flying, or something like that! This was our first sanctioned Q500 race. We use a 457-ft. course, along with four other clubs here in SW Florida who also hold races. The main event of the day is to have fun! This is definitely not for blood, but it is good competition. Our rules are AMA Class III—with the only exception that pipes are allowed. Matter of fact, tuned muffled pipes are mandatory after January 1, 1985, to hold the noise way down.
We have an average of 25–30 contestants at these races, and 25 were entered this day.
Winners were:
- Charlie Poulton — 1st
- Rick Cranmer — 2nd
- Jim Skupien — 3rd
Fast time was 1:37.7. We usually do better, but it was really hot, and that seems to slow things down.
We are racing Expert and Novice classes at our races. This gives the newcomers a better chance, so they enjoy themselves more.
Tom lost his elevator in the fifth lap of his first race and spent the rest of the contest flying his slower back-up, finishing eleventh.
Wheel Pants / Formula I (anonymous)
Wheel pants/Formula I. When I first started flying Formula One, wheel pants were my worst enemy. Now they outlast the airplane.
I bought and made every kind you could think of. I reinforced them with fiberglass, used plywood inserts, attached them with blind nuts. They still continued to fall apart. I was told to land better—slower—whatever. Well, I admit in the beginning nothing would have lasted. But with "greased" landings on grass fields, they still fell apart! The best landings would create hairline cracks where they were joined together, and that would lead to their final destruction.
At that point, I was convinced the cause was "shock," not a good or bad landing. Before going into how to correct the simple problem, I will tell you how to have "quick-change" wheel pants.
Steps to make quick-change wheel pants:
- Start by cutting your normal landing gear and wheel slots out.
- Drill out the wheel-attaching hole.
- Mount the wheel pant without the wheel in it. This can be done by reversing the nut portion of the unit.
- Put some ink or black paint on the end of the bolt and squeeze the wheel pant until a mark is made on the outside of the pant.
- Drill out this mark with a 1/4-inch drill bit, then enlarge the hole with a sanding disc until a four-way wrench will fit in the hole.
- When the wheel pant gets painted, paint the bottom portion darker than the top half—use black or a color that matches available vinyl tape (I used black).
Why black? Because electrical tape is inexpensive, 3/4-inch wide, will attach about anything, and is easy to remove. Also, with black, any wear and tear can be easily painted over, and it has the effect of making the wheel pants look smaller.
How does this make the wheel pants last longer? Well, it doesn't—by itself. The "shocks" which actually destroy the wheel pants are eliminated by attaching them to the landing gear with General Electric's clear bathtub caulking compound. To assure you get the proper "shock mount," slide the wheel pant up on the landing gear, place the caulking compound on the backside of the landing gear where the pant and gear meet. Slide back down, line up the hole in the gear and pant, then clean any unwanted caulk away.
Caution: Clean the caulk out of the screw holes, as it could lock up your wheels when you install them.
Now, assuming this is the final attachment (i.e., wheel pants painted), use a Loctite product to secure the wheels on and tighten down with an Allen wrench and a four-way wrench. Place a piece of vinyl tape over the hole, and the unit is complete.
My experience using this method has been nothing but a convenience factor:
- No special wrench to tighten the unit with.
- Easy replacement.
- Easy paint touch-up to lower-position damage.
- Easy in-field repair or replacement.
- Longer life for your wheel pants.
Hopefully, your experience will be the same.
See you next month.
Bill Hager 706 Glen Haven Dr. Conroe, TX 77385.
Transcribed from original scans by AI. Minor OCR errors may remain.

