
Radio Control: Pylon Racing
Bill Hager 4 Holly Springs Dr. Conroe, TX 77302
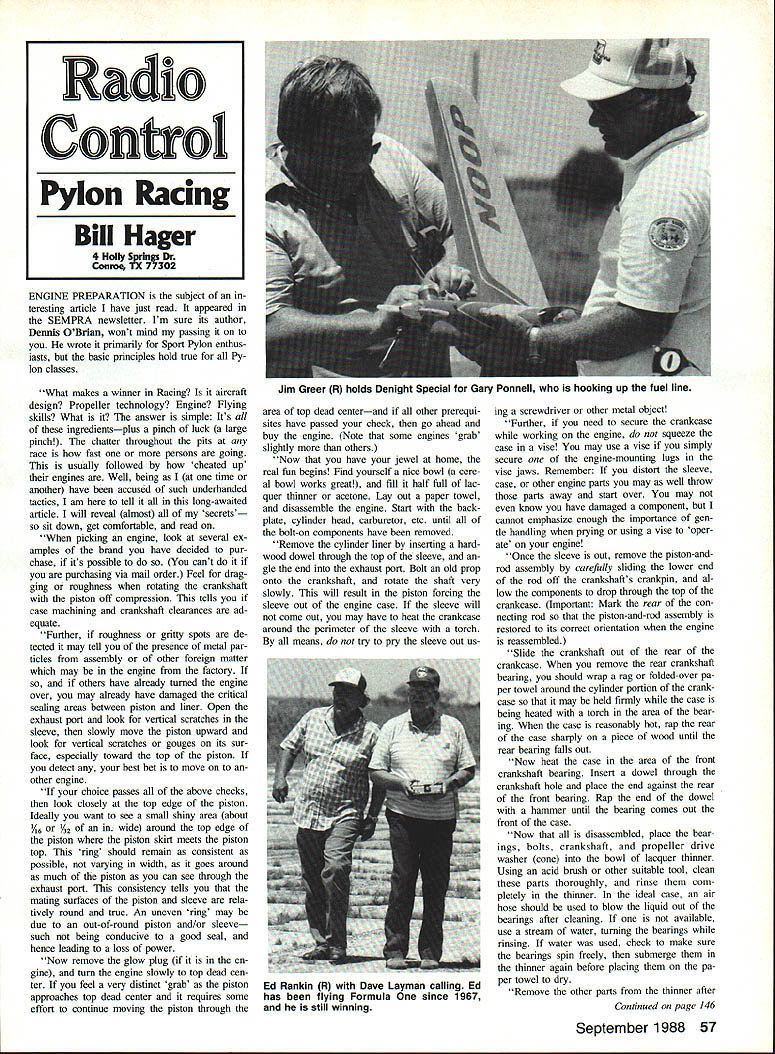
The following article on engine preparation was written by Dennis O'Brian for the SEMPRA newsletter. Bill Hager passes it on for the benefit of pylon racers. The principles apply to most pylon classes.
Engine Preparation
Inspecting a new engine
- If possible, examine several examples of the brand you plan to buy (note: not possible with mail order).
- With the piston off compression, rotate the crankshaft and feel for dragging, roughness, or gritty spots. These can indicate poor case machining, incorrect crankshaft clearances, or metal/foreign particles left from assembly.
- Open the exhaust port and inspect the sleeve for vertical scratches. Slowly move the piston upward and inspect the piston skirt and crown for vertical scratches or gouges, especially near the top. If you find these, choose another engine.
- Look closely at the top edge of the piston through the exhaust port. Ideally you should see a small, consistent shiny ring (about 1/64"–1/32" wide) where the piston skirt meets the piston top. A consistent ring indicates mating surfaces and bore are round and true. An uneven ring may indicate an out-of-round piston or sleeve and will reduce sealing and power.
- Remove the glow plug (if installed) and turn the engine slowly to top dead center (TDC). You should feel a distinct "grab" as the piston approaches TDC; if it takes some effort to get through TDC—and all other checks passed—this is a good sign. (Some engines grab more than others.)
Disassembly and cleaning
- Prepare a bowl (a cereal bowl works) half full of lacquer thinner or acetone and lay out paper towels.
- Disassemble the engine, removing backplate, cylinder head, carburetor, and all bolt-on components.
- To remove the cylinder liner: insert a hardwood dowel through the top of the sleeve, angle the end into the exhaust port, bolt an old propeller to the crankshaft, and rotate the shaft slowly. The piston will force the sleeve out of the case. If it will not come out, heat the crankcase around the sleeve perimeter with a torch. Do not pry the sleeve out with metal tools.
- When securing the crankcase, do not squeeze the case in a vise. If using a vise, secure only an engine-mounting lug. Distorting the sleeve, case, or other parts can ruin them.
- Remove the piston-and-rod assembly by sliding the lower end of the rod off the crankpin and letting the parts drop through the top of the crankcase. Important: mark the rear connecting-rod/piston assembly so it can be reinstalled in its original orientation.
- Slide the crankshaft out the rear of the crankcase and remove the rear crankshaft bearing. Wrap a rag or folded paper towel around the cylinder portion of the crankcase if it was heated. Rap the rear case sharply with a piece of wood until the rear bearing falls out.
- Heat the area around the front crankshaft bearing, insert a dowel through the crankshaft hole, place the dowel against the rear of the front bearing, and rap the dowel end with a hammer until the bearing comes out the front of the case.
- Place bearings, bolts, crankshaft, propeller drive washer (cone), and small parts in the bowl of lacquer thinner. Use an acid brush or suitable tool to clean thoroughly. Rinse completely in thinner.
- Ideally use an air hose to blow thinner out of the bearings after cleaning. If no air hose is available, use a stream of water while turning the bearings until they spin freely. Dry and wrap the inner bearing before placing on paper towel to finish drying.
- After cleaning, spray a fine mist of WD-40 or other compatible lubricant on cleaned parts, then lightly oil bearing surfaces before reassembly.
Case and port work
- Inspect the crankcase interior for flash, sharp edges around ports, and foreign material. Use a #11 X-Acto blade to gently remove flash and burrs.
- Inspect the sleeve bore and case where the sleeve seats. If high spots or rough edges exist, wrap #400 or #600 wet/dry sandpaper around a dowel or small hardwood and gently rotate it in the bore to remove metal. Be conservative—remove only what's needed.
- Inspect the rear crankcase cover for contact marks; if the crankshaft is contacting the cover, polish the face that faces the crankshaft. Inspect dowel-pin holes for burrs and flash.
- After cleaning and any necessary polishing or sanding, lightly oil internal parts and reassemble.
Bearing installation note
- When installing a bearing into a hot case, be sure to seat the bearing so the oil groove faces the outside of the case. If the groove faces inward, oil may not reach the bearing surfaces during the first seconds of operation and may cause premature failure.
Reassembly
- Reassemble the engine by reversing the disassembly sequence. Ensure the sleeve aligns with the transfer ports when installing it. Rotate the crankshaft several times by hand after assembly to confirm nothing binds.
Break-in Procedure
I prefer a four-step method for breaking in racing engines. Many tuners have their own routines, but this method has given consistent results.
- Run the engine on the stand at about 40% throttle with a slightly rich mixture for 30 seconds. Shut off and let it cool for 10 minutes.
- Run at about 60% throttle, slightly rich, for 30 seconds. Shut off and cool for 10 minutes.
- Run at about 80% throttle, slightly rich, for 30 seconds. Shut off and cool for 10 minutes.
- Run at full throttle, slightly rich, for 30 seconds. Shut off and cool.
- Repeat this cycle two or three times, gradually leaning the mixture during the last cycles.
- Heavily rich conditions during break-in help ensure adequate lubrication and prevent scoring. After break-in, tune for best performance.
Racing Tips
- Walk the course before flying. Identify wind direction and areas of turbulent air; mark obstacles that might affect your approach or pattern.
- Make sure your model meets class rules for wing area, weight, and propeller size.
- Weight is critical—keep the model as light as possible without sacrificing structural integrity.
- Cooling is important. Consider cowl flaps or additional cooling holes if your engine runs hot.
- Use fresh, properly mixed fuel. Contaminated or old fuel can cost power during a race.
- Practice the course; the more you fly it, the more predictable your model will be in close competition.
Thanks to Dennis O'Brian for these tips. If you have helpful hints for fellow fliers, send them to Bill Hager at the address above so they can be passed along.
If you feel it necessary to "modify" your engine, then we need you in Formula I. Good luck.
Transcribed from original scans by AI. Minor OCR errors may remain.

