

Radio Control: Pylon Racing
Bill Hager 4 Holly Springs Dr. Conroe, TX 77302
This month I'm going to pass along two articles. The first, written by Art Arro for the NMPRA while I was President in 1980, proved very helpful in promoting racing — you are welcome to copy and hand it out in your area. The second article was written by Brian Richmond and printed in the 11th Lap newsletter; its subject is prop technology.
Why Radio-Control Pylon Racing? — Art Arro
The urge to race dates back to early civilization when foot and chariot races were held during Greek and Roman periods. The risk, excitement, and challenge of racing are basic to human nature. Racing appeals because it provides an objective method of determining the winner — the first to cross the finish line or the shortest elapsed time from start to finish. There is little subjectivity in judging the outcome of a race. Today we enjoy races involving boats, automobiles, horses, and even turtles.
Races involving aircraft began shortly after the advent of powered flight by the Wright brothers. Racing soon started in model aviation — first with rubber-powered free-flight planes and later with control-line team racing events. The ability to precisely control a model in three dimensions provided the impetus for RC pylon racing as we know it today. The first suggestion for RC pylon racing was made at the 1948 Nationals in Olathe, Kansas. Initial rules were presented to the AMA RC Committee in 1956. The first AMA pylon event was flown in 1957 and was won by Howard Bonner with a semiscale Bonzo. Two years later a finalized version of the rules was adopted by the AMA, and RC pylon racing was born.
Early pylon racing used a two‑pylon course with pilots standing in the center. The winner was the plane posting the shortest elapsed time, which translated to the highest speed. There were no aircraft design specifications then, and because of low drag, flying-wing and delta models often dominated.
In the mid‑1960s there was growing interest in racing scale‑type aircraft flown over a triangular course similar to that used by full‑size Goodyear Midget Racers of the late 1940s. Flown as an exhibition at the 1965–1966 Nationals, the "Goodyear" model event became official at the 1967 Nats in Los Angeles and soon became very popular.
Current RC pylon racing has developed into four AMA event classes separated by aircraft requirements, engine specifications, fuel restrictions, and course length: Formula I, Quarter Midget, Sport, and 1/2A. The specific rules for each are printed in the AMA Competition Regulations. Quickie 500 (Formula 500) is a popular variation of Sport Pylon and has largely replaced the older Sport event in many areas. Formula I and Quarter Midget retain scale‑like aircraft requirements in some rule sets.
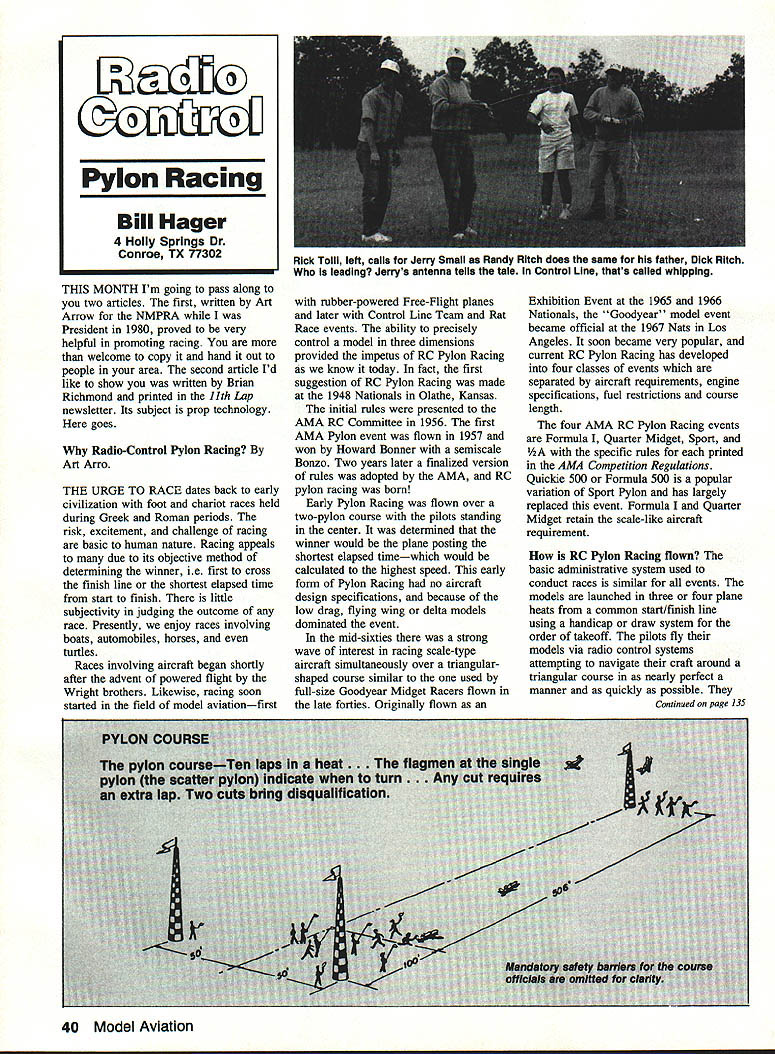
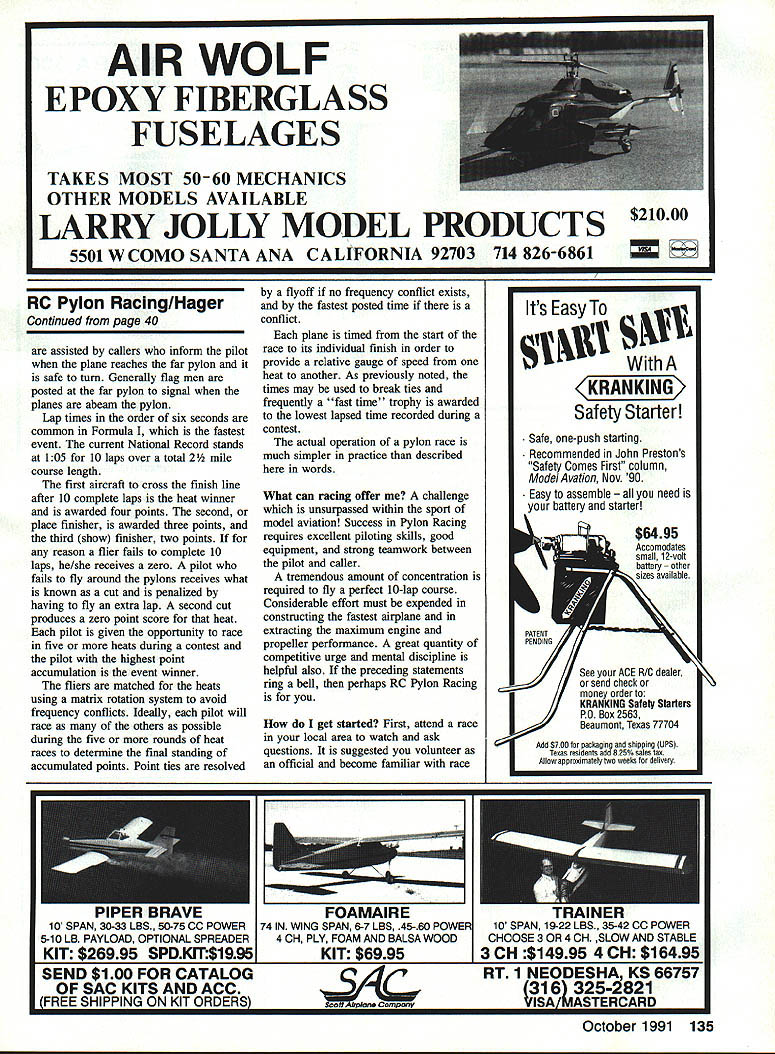
How is RC pylon racing flown? The basic administrative system is similar across events. Models are launched in three‑ or four‑plane heats from a common start/finish line using a handicap or draw system for order of takeoff. Pilots fly their models by radio control around a triangular course as cleanly and as quickly as possible. Callers inform pilots when the plane reaches the far pylon and it is safe to turn. Flagmen are generally posted at the far pylons to signal when planes are abeam the pylon.
Lap times on the order of six seconds are common in Formula I, the fastest event. The current national record is 1:05 for 10 laps over a total 2-1/2 mile course length.
Scoring and heats:
- The first aircraft to cross the finish line after 10 complete laps is the heat winner and is awarded 4 points.
- Second place receives 3 points; third place receives 2 points.
- Fail to complete 10 laps = zero points.
- A "cut" (failing to fly around a pylon correctly) requires the pilot to fly an extra lap; a second cut in a heat results in zero points.
- Pilots typically race five or more heats during a contest. The pilot with the highest point total wins the event.
- Heat matchups use a matrix rotation system to avoid frequency conflicts and to try to match pilots against many different opponents.
- Ties are resolved by flyoff if no frequency conflict exists, otherwise by the fastest posted time.
- Each plane is timed individually from start to finish for relative speed comparisons; fast-time trophies are often awarded.
What can racing offer me? RC pylon racing is an unsurpassed challenge within model aviation. Success requires excellent piloting skills, good equipment, and strong teamwork between pilot and caller. Racing demands concentration, careful aircraft construction, engine and propeller tuning, competitive drive, and mental discipline. If that appeals to you, pylon racing may be for you.
How do I get started?
- Attend a local race to watch and ask questions. Volunteer as an official to learn race operations before entering.
- Join a local racing group to exchange ideas; beginners are usually welcome.
- Build a plane for a beginner‑oriented event such as Quickie 500, Formula 500, Sport Pylon, or 1/2A Pylon and enter your first race. Strive for smooth, consistent laps and record heat times. Work to reduce lap times; once you start winning, you may move up to Quarter Midget or Formula I.
What is the NMPRA? The National Miniature Pylon Racing Association is a special interest group of RC pylon racing enthusiasts in the U.S., Canada, and Mexico dedicated to promoting the sport. Dating from 1965, the NMPRA works with the Academy of Model Aeronautics to develop rules and organizes annual championship races in Quarter Midget and Formula I classes. The NMPRA maintains point standings for members, awards trophies and shirts to top finishers, and publishes a monthly News Release with schedules, reports, reviews, rule proposals, technical discussions, and selected classifieds.
The NMPRA elects officers annually (President, Quarter Midget Executive Vice President, regional vice presidents, and associate vice presidents). There are seven regional districts in the U.S. and Canada; district officers promote racing, report events, maintain district standings, and recommend top Formula I point scorers to qualify for the annual Formula I Championship Race.
RC Pylon Racing — Buzz Words (Glossary)
The racing community develops its own buzz words and jargon. A selection of common terms:
- Back-to-Back Heat: A pilot scheduled for the last heat of one round and the first heat of the next round.
- Cut Judge: Course official who determines when planes turn inside the pylon and assesses cuts.
- Double-Cut (Cut-out): Cutting two pylons in succession; often causes a zero point score.
- Freebie: A heat in which a lone pilot is scheduled because of frequency conflicts or scratches.
- Goose-Egg: A zero point score for a heat.
- Grudge Race: A heat between two evenly matched pilots with a rivalry.
- Handicap Judging: Judging Formula I aircraft for scale fidelity, workmanship, and appearance to determine order of takeoff.
- Lap Counter: Official who counts laps and displays the count (often on flip cards); one lap counter is assigned to each pilot. Accumulated cuts are also displayed.
- Matrix: System of matching pilots into heats by radio frequency; heat makeup rotates each round.
- Racehorse Start: A starting procedure where all planes are launched simultaneously.
- Ready Box: Area outside the safety zone where pilots and planes are assembled into heats.
- Fueling/Defueling Station: A designated area for fueling and defueling when standard fuel mixtures are used.
- Safety Zone: Area around the pylon course where no personnel are permitted during a race; distances vary by event and are in the AMA rulebook.
- Safety Inspection: Mandatory check of radio installation and structural integrity before flying.
- Scatter Pylon (No. 1 Pylon): The most distant pylon from the start-finish line.
- Starter: The chief course official who flags the start, determines finish order, and coordinates actions on the pylon course, including safety.
- Trick: Any advantage, real or imagined, from special prop shapes, fuel ingredients, aircraft design, engine work, etc.
- Turkey: (slang) an unwanted or poor result — self explanatory.
Prop Technology — Brian Richmond
I was asked to discuss a few of my ideas, theories, and guesses about propeller technology. I won't bore everyone with complicated formulas (because I don't know any), but I'll discuss what has worked for me in the Formula I event over the years.
Choose good wood
- A good piece of wood has stiff, straight grain, is reasonably balanced, and evenly pitched. These are hard to find.
- Many stock props can be as much as 1/2 inch out of pitch or badly out of balance. Excessive sanding to correct pitch can weaken a blade and cause resonation or structural failure.
Tools required
- Good balancer
- Sanding block
- Sandpaper: 80, 100, 220, 400 grit
- Single-edge razor blade
- Prather pitch gauge (or a borrowed one)
- Thin CA (cyanoacrylate), epoxy or "Hot Stuff" adhesive
- Microballoons or lightweight filler
- About 30–45 minutes of time for cleanup and balance
General approach
- Experiment to find a prop that works for your engine and desired rpm range. Some engines make power at lower rpm (torque-driven), others at higher rpm.
- Once you select a candidate prop, clean it up and balance it both for pitch and weight.
- If you plane the trailing edge to get the required pitch you may make that blade too light; add weight to the trailing edge using thin CA followed by a small drop of epoxy or Hot Stuff and some microballoon filler if needed.
- Remove material only from the top surface of the blades. Do not sand the underside except to true bevel edges.
- Remove minimal material until both blades match. If blades are way out of pitch, better to replace the blade than ruin it.
- Trim tips about even; sand lightly to obtain a slight taper on the tips. Do not spoon them; an elliptical tip shape is efficient.
- Lightly sand the back (underside) to eliminate nicks and to build a gradual camber. Viewing the blade in profile helps judge camber.
- Taper the root slightly for engine head clearance and to streamline the hub area; some builders add a small fillet at the hub for strength.
Pitch measurement and balance
- Measure pitch at 70% of the radius using a Prather gauge or a homemade gauge.
- Use the same reference point on both blades.
- If material removal unbalances weight, rebalance on a balancer and/or add weight to the lighter blade with thin CA and microballoons.
Leading and trailing edges
- Do not carve complicated profiles into the leading edge — keep it simple and consistent. A reproducible shape works better than an intricate one that's hard to duplicate.
- Sharpening leading and trailing edges reduces drag. Use a 100‑grit block to thin and smooth the leading edge, then refine the trailing edge with the block and finish with a single‑edge razor blade (scraping from tip toward hub).
- Stock props often have a blunt trailing edge near the hub that should be thinned back to a proper trailing edge.
Root section and undercamber trick
- The inner root section moves slower through the air and some say it contributes little thrust. You can, however, make the root section contribute.
- Starting about station six (roughly one third in from the tip), carefully work toward the tip with 100‑grit to remove a little from the leading edge and more from the trailing edge, being careful not to remove material from the center of the blade (about 30% back from the leading edge).
- A semi‑symmetrical shape is acceptable; take care to keep both blades matched.
- Another technique is to undercamber the root section to about 1/8 of the radius from the hub. The deepest camber should be about 30% back from the leading edge. Transition from undercambered root to flat midsection to semi‑symmetrical tips should be very gradual.
- The effect is similar to a glider wing: undercamber near the root provides lift/thrust at lower relative speeds while the tips remain semi‑symmetrical for higher‑speed efficiency.
- After shaping, sand the entire back with 220 then 400 grit and check pitch again. Remove the pitch gauge from the hub only after final cleanup.
Final notes
- Keep the top surfaces mostly intact; only minor cleanup is usually needed there.
- The sharpest practical leading and trailing edges result in lower drag. Unlike full‑scale props, model props do not generally face FOD (foreign object damage) issues, so sharper edges are acceptable.
- Practice and patience will improve your work; expect to sacrifice a prop or two while learning the techniques.
Good luck — experiment, measure, and keep the blades balanced and matched. The gains in reduced drag and smoother airflow can make a real difference on race day.
Transcribed from original scans by AI. Minor OCR errors may remain.

