
RADIO CONTROL PYLON RACING
Duane Gall, 1267 S. Beeler Ct., Denver CO 80231; E-mail: stinger4@earthlink.net
QUICKIE 500 RECORD
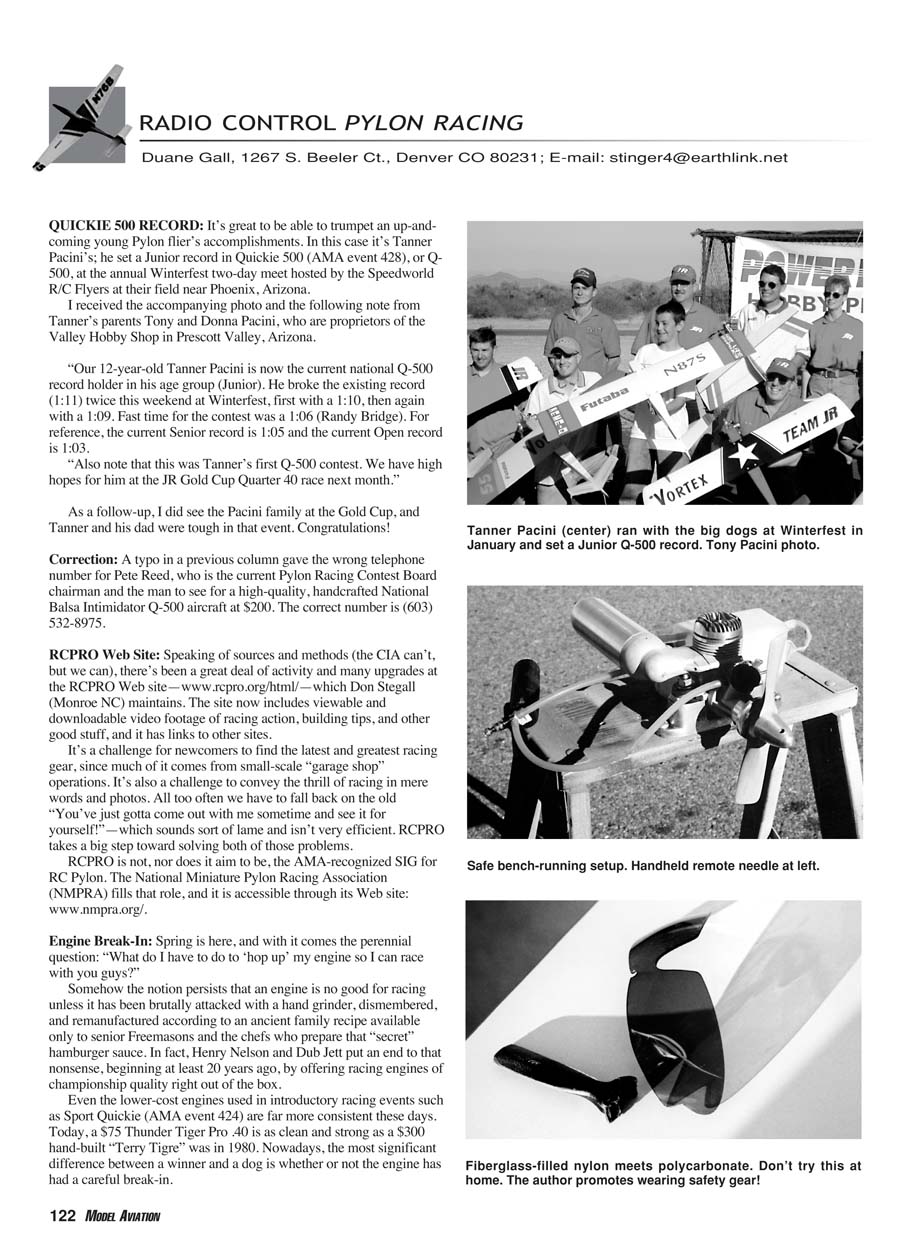
It’s great to be able to trumpet an up-and-coming young Pylon flier’s accomplishments. In this case it’s Tanner Pacini’s; he set a Junior record in Quickie 500 (AMA event 428), or Q-500, at the annual Winterfest two-day meet hosted by the Speedworld R/C Flyers at their field near Phoenix, Arizona.
I received the accompanying photo and the following note from Tanner’s parents Tony and Donna Pacini, who are proprietors of the Valley Hobby Shop in Prescott Valley, Arizona.
“Our 12-year-old Tanner Pacini is now the current national Q-500 record holder in his age group (Junior). He broke the existing record (1:11) twice this weekend at Winterfest, first with a 1:10, then again with a 1:09. Fast time for the contest was a 1:06 (Randy Bridge). For reference, the current Senior record is 1:05 and the current Open record is 1:03.
“Also note that this was Tanner’s first Q-500 contest. We have high hopes for him at the JR Gold Cup Quarter 40 race next month.”
As a follow-up, I did see the Pacini family at the Gold Cup, and Tanner and his dad were tough in that event. Congratulations!
Correction
A typo in a previous column gave the wrong telephone number for Pete Reed, who is the current Pylon Racing Contest Board chairman and the man to see for a high-quality, handcrafted National Balsa Intimidator Q-500 aircraft at $200. The correct number is (603) 532-8975.
RCPRO Web Site
Speaking of sources and methods (the CIA can’t, but we can), there’s been a great deal of activity and many upgrades at the RCPRO Web site—www.rcpro.org/html/—which Don Stegall (Monroe NC) maintains. The site now includes viewable and downloadable video footage of racing action, building tips, and other good stuff, and it has links to other sites.
It’s a challenge for newcomers to find the latest and greatest racing gear, since much of it comes from small-scale “garage shop” operations. It’s also a challenge to convey the thrill of racing in mere words and photos. All too often we have to fall back on the old “You’ve just gotta come out with me sometime and see it for yourself!”—which sounds sort of lame and isn’t very efficient. RCPRO takes a big step toward solving both of those problems.
RCPRO is not, nor does it aim to be, the AMA-recognized SIG for RC Pylon. The National Miniature Pylon Racing Association (NMPRA) fills that role, and it is accessible through its Web site: www.nmpra.org/.
Engine Break-In
Spring is here, and with it comes the perennial question: “What do I have to do to ‘hop up’ my engine so I can race with you guys?”
Somehow the notion persists that an engine is no good for racing unless it has been brutally attacked with a hand grinder, dismembered, and remanufactured according to an ancient family recipe available only to senior Freemasons and the chefs who prepare that “secret” hamburger sauce. In fact, Henry Nelson and Dub Jett put an end to that nonsense, beginning at least 20 years ago, by offering racing engines of championship quality right out of the box. Even the lower-cost engines used in introductory racing events such as Sport Quickie (AMA event 424) are far more consistent these days. Today, a $75 Thunder Tiger Pro .40 is as clean and strong as a $300 hand-built “Terry Tigre” was in 1980. Nowadays, the most significant difference between a winner and a dog is whether or not the engine has had a careful break-in.
There are as many theories about break-in as there are pilots, but following are a few ground rules on which pretty much everyone agrees.
New engines have tight fits between the moving parts, and occasionally small burrs or sharp edges inside need to be worn away to reduce internal friction. The process of wearing away tight places and sharp edges produces "particles of wear"—microscopic chips of metal that can hang around inside the engine as it runs and roughen up the places that need to stay smooth, such as the piston/cylinder interface ("piston seal"), ball bearings, and bushings in the ends of the connecting rod.
Excess fuel, containing oil, flushes out the particles of wear as they develop. The way to get surplus fuel into the engine is to run it rich, which also cools it off.
Heat is necessary to loosen the piston fit at the top of the stroke on a tapered-sleeve engine such as the Nelson, Jett, and Thunder Tiger. The way to increase heat is to run the engine leaner, which also reduces the amount of excess fuel.
The upshot of all this is that the engine should be run fast, rich, and alternately warm and cool on a small propeller for a substantial period of time, on a test bench.
Why a test bench? Why not just mount the engine on the airplane and tie it down—or even better, fly it?
There are two reasons. First, you'll be varying the fuel/air mixture greatly. Unless you have a radio-controlled needle-valve setup and a good ear, you just can't do that while flying. Second, the test bench absorbs vibration that would otherwise prematurely age your airplane and radio system.
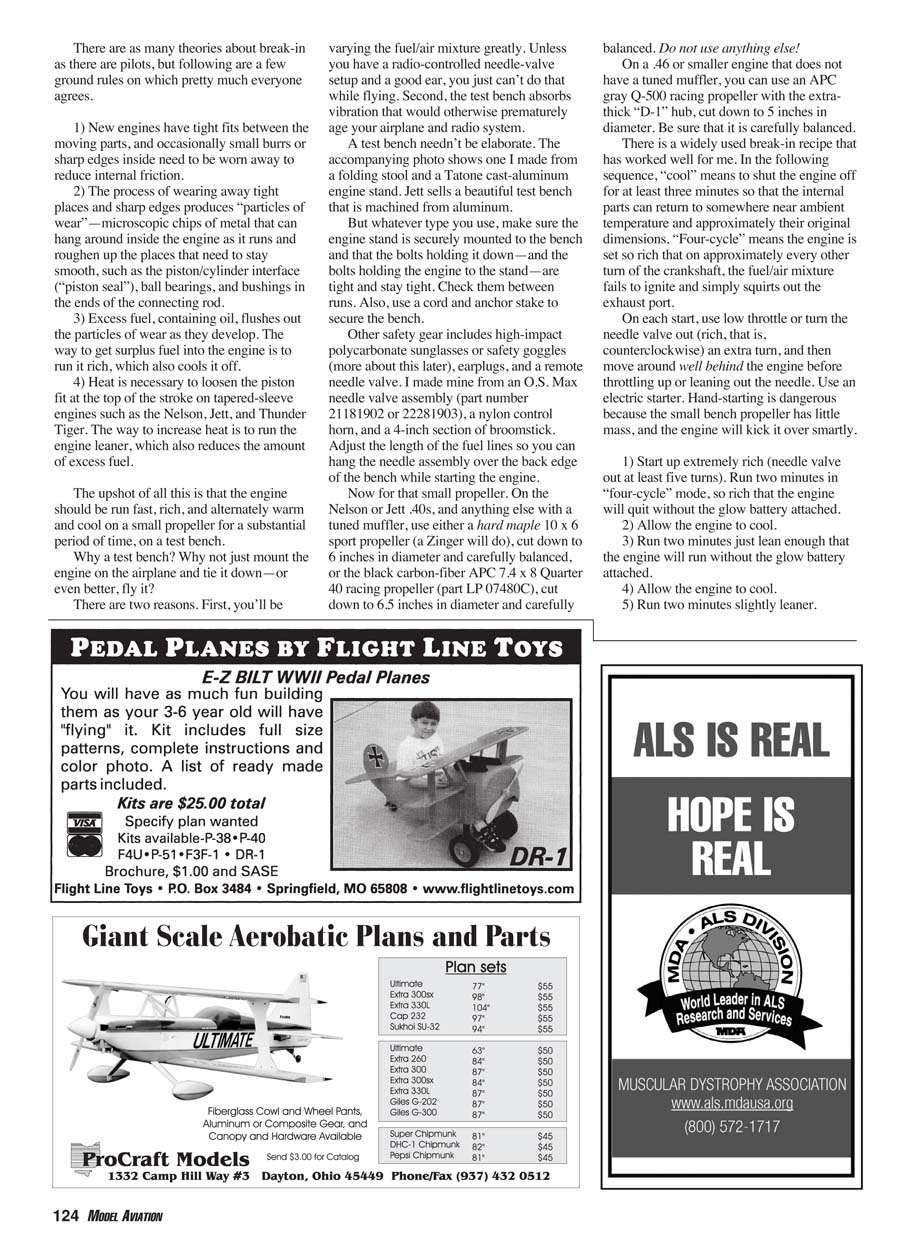
A test bench needn't be elaborate. One example can be made from a folding stool and a Tatone cast-aluminum engine stand. Jett sells a beautiful test bench that is machined from aluminum.
But whatever type you use, make sure the engine stand is securely mounted to the bench and that the bolts holding it down—and the bolts holding the engine to the stand—are tight and stay tight. Check them between runs. Also, use a cord and anchor stake to secure the bench.
Other recommended safety gear:
- High-impact polycarbonate sunglasses or safety goggles
- Earplugs
- A remote needle valve
I made my remote needle valve from an O.S. Max needle valve assembly (part number 21181902 or 2281903), a nylon control horn, and a 4-inch section of broomstick. Adjust the length of the fuel lines so you can hang the needle assembly over the back edge of the bench while starting the engine.
Now for that small propeller. On the Nelson or Jett .40s, and anything else with a tuned muffler, use either a hard maple 10 x 6 sport propeller (a Zinger will do), cut down to 6 inches in diameter and carefully balanced, or the black carbon-fiber APC 7.4 x 8 Quarter 40 racing propeller (part LP 07480C), cut down to 6.5 inches in diameter and carefully balanced. Do not use anything else!
On a .46 or smaller engine that does not have a tuned muffler, you can use an APC gray Q-500 racing propeller with the extra-thick "D-1" hub, cut down to 5 inches in diameter. Be sure that it is carefully balanced.
There is a widely used break-in recipe that has worked well for me. In the following sequence, "cool" means to shut the engine off for at least three minutes so that the internal parts can return to somewhere near ambient temperature and approximately their original dimensions. "Four-cycle" means the engine is set so that on approximately every other turn of the crankshaft, the fuel/air mixture fails to ignite and simply squirts out the exhaust port.
On each start, use low throttle or turn the needle valve out (rich, that is, counterclockwise) an extra turn, and then move around well behind the engine before throttling up or leaning out the needle. Use an electric starter. Hand-starting is dangerous because the small bench propeller has little mass, and the engine will kick it over smartly.
- Start up extremely rich (needle valve out at least five turns). Run two minutes in "four-cycle" mode, so rich that the engine will quit without the glow battery attached.
- Allow the engine to cool.
- Run two minutes just lean enough that the engine will run without the glow battery attached.
- Allow the engine to cool.
- Run two minutes slightly leaner.
- Allow the engine to cool.
- Run two minutes lean enough to periodically break into "two-cycle" mode.
- Allow the engine to cool.
- Run two minutes in steady two-cycle, pinching the line or needling up to clean out for a few seconds at a time.
- Allow the engine to cool.
- Repeat the previous step, cleaning out a bit more aggressively.
- Allow the engine to cool.
- Repeat the previous step, needling up nearly to peak for five seconds at a time.
- Allow the engine to cool.
- Repeat the previous step (with five-second peaks) twice more, including cooldown periods.
Now you are ready to mount the engine on the airplane, switch to a normal-sized flying propeller, and fly it rich—at least 1,000 rpm down from peak if you have a tachometer or with an audible "burble" in the exhaust note and a visible smoke trail in the air if you're not using a tachometer. Make at least three flights this way, slightly leaner each time. If you're not in a hurry, make a dozen flights this way.
At this point you are ready to race. When race day comes, remember that it is better to be slightly rich than slightly lean. In the fuel/air mixture, fuel makes power; too much air just makes heat.
Blah, blah, safety, blah, blah. In aeromodeling, especially racing, we enjoy pushing the limits. We've become accustomed to technology and power that were not even dreamed of just a few years ago.
The typical .40 cu. in. racing engine develops nearly five times the energy it did when RC Pylon was young. Today's carbon-fiber wings can weigh a few ounces and be only an inch thick at the root, yet hold up under the forces inflicted by a 4-pound airplane turning hard at 180 mph, time after time.
How did we get here? By trial and error, mostly. The beauty of racing is that it rewards results; anything that will get you to the finish line ahead of the other guy—safely and reliably—is by definition good. If it doesn't, it's not.
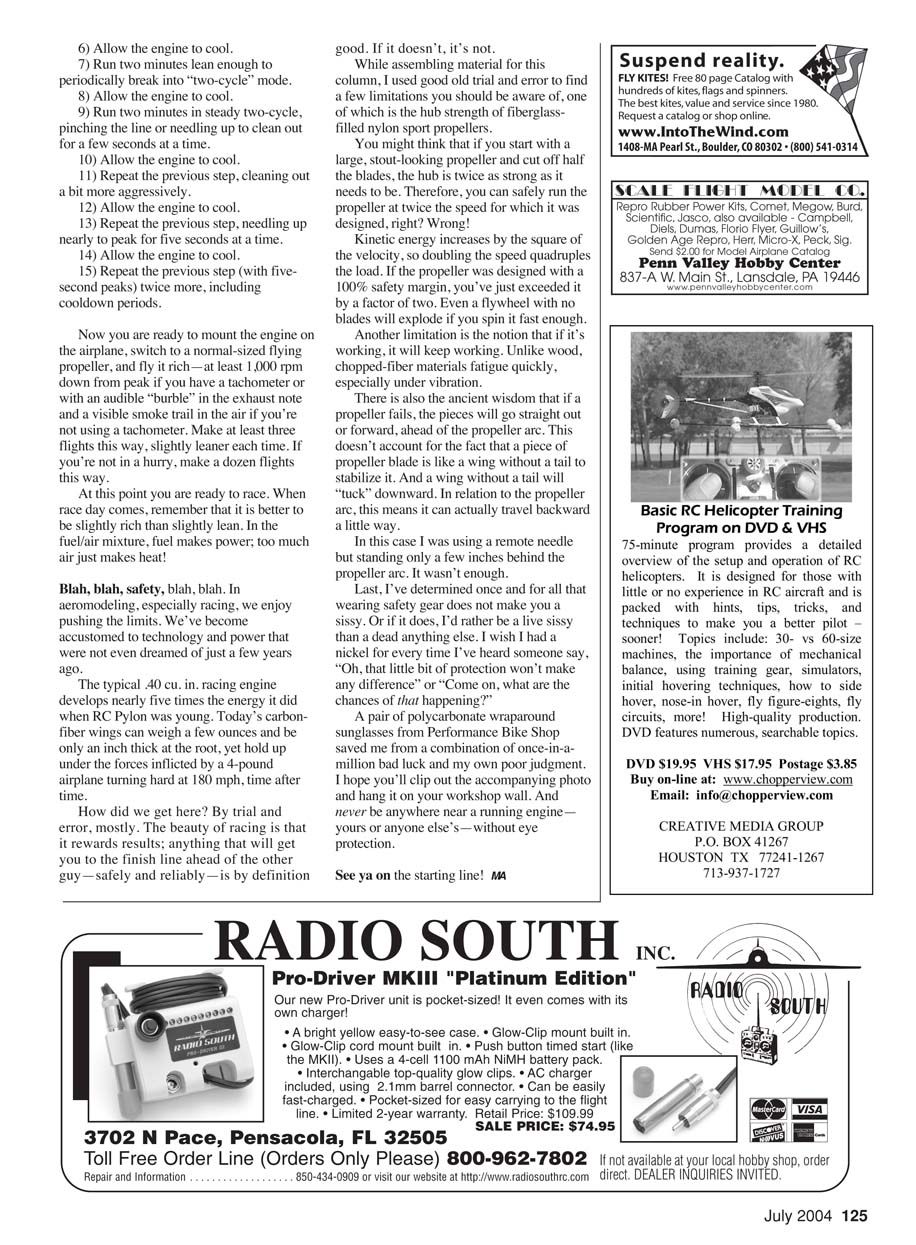
While assembling material for this column, I used good old trial and error to find a few limitations you should be aware of, one of which is the hub strength of fiberglass-filled nylon sport propellers.
You might think that if you start with a large, stout-looking propeller and cut off half the blades, the hub is twice as strong as it needs to be. Therefore, you can safely run the propeller at twice the speed for which it was designed, right? Wrong!
Kinetic energy increases by the square of the velocity, so doubling the speed quadruples the load. If the propeller was designed with a 100% safety margin, you've just exceeded it by a factor of two. Even a flywheel with no blades will explode if you spin it fast enough.
Another limitation is the notion that if it's working, it will keep working. Unlike wood, chopped-fiber materials fatigue quickly, especially under vibration.
There is also the ancient wisdom that if a propeller fails, the pieces will go straight out or forward, ahead of the propeller arc. This doesn't account for the fact that a piece of propeller blade is like a wing without a tail to stabilize it. And a wing without a tail will "tuck" downward. In relation to the propeller arc, this means it can actually travel backward a little.
In this case I was using a remote needle but standing only a few inches behind the propeller arc. It wasn't enough.
Last, I've determined once and for all that wearing safety gear does not make you a sissy. Or if it does, I'd rather be a live sissy than dead and anything else. I wish I had a nickel for every time I've heard someone say, "Oh, that little bit of protection won't make any difference" or "Come on, what are the chances of that happening?" A pair of polycarbonate wraparound sunglasses from Performance Bike Shop saved me from a combination of once-in-a-million bad luck and my own poor judgment. I hope you'll clip out the accompanying photo and hang it on your workshop wall. And never be anywhere near a running engine—yours or anyone else's—without eye protection.
See ya on the starting line! MA
Transcribed from original scans by AI. Minor OCR errors may remain.

