
RADIO CONTROL PYLON RACING
Bill Hager, 4 Holly Springs Dr., Conroe TX 77302
Nats and QM 40 Records
It's Nats time. This will be the first year for the Nats at Muncie. The National Miniature Pylon Racing Association (NMPRA) is putting this one on; it should be a good one.
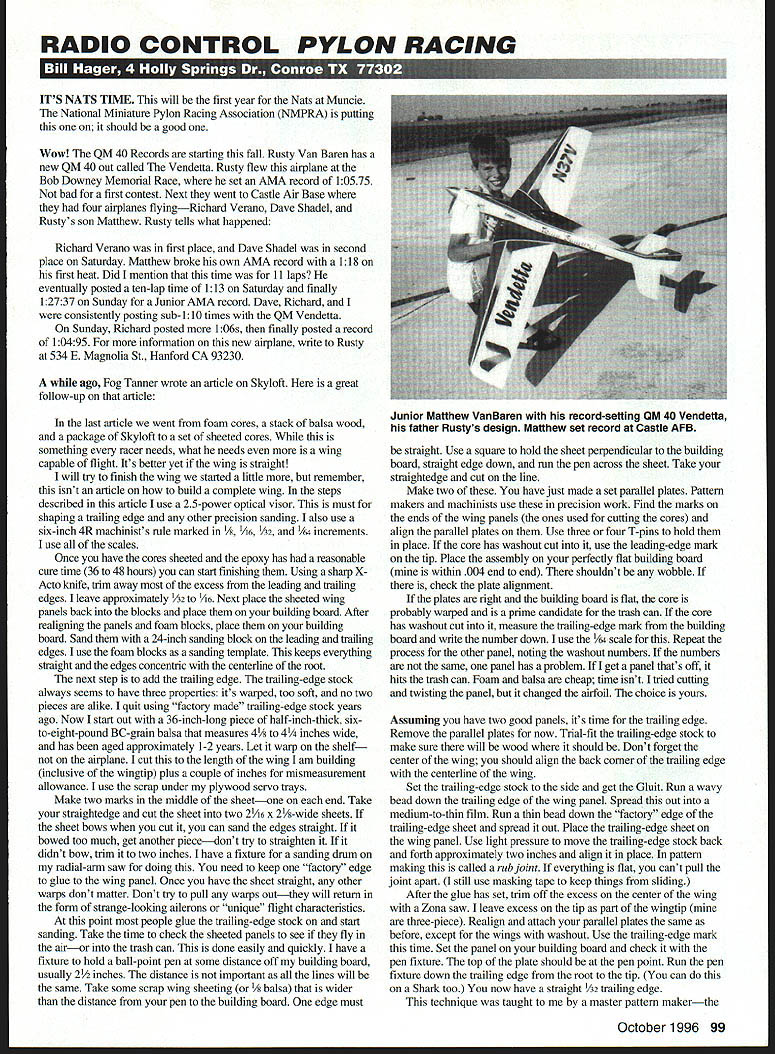
Wow — the QM 40 records are starting this fall. Rusty Van Baren has a new QM 40 out called The Vendetta. Rusty flew this airplane at the Bob Downey Memorial Race, where he set an AMA record of 1:05.75. Not bad for a first contest. Next they went to Castle Air Base where they had four airplanes flying—Richard Verano, Dave Shadel, Rusty's son Matthew, and Rusty.
Richard Verano was in first place and Dave Shadel was in second on Saturday. Matthew broke his own AMA record with a 1:18 on his first heat. (Did I mention that this time was for 11 laps?) He eventually posted a ten-lap time of 1:13 on Saturday and finally 1:27.37 on Sunday for a Junior AMA record. Dave, Richard, and Rusty were consistently posting sub-1:10 times with the QM Vendetta.
On Sunday Richard posted more 1:06s, then finally posted a record of 1:04.95. For more information on this new airplane, write to Rusty at 534 E. Magnolia St., Hanford CA 93230.
WING BUILDING — Follow-up to Skyloft
This is a follow-up to Fog Tanner's article on Skyloft. In the last article we went from foam cores, a stack of balsa, and a package of Skyloft to a set of sheeted cores. While sheeted cores are necessary, what you need even more is a wing capable of flight — preferably a straight one. The following describes finishing that wing (not a complete wing build).
Tools and small items
- 2.5-power optical visor (must for precision shaping)
- 6-inch 4R machinist's rule (scales: 1/2, 1/16, 1/32, 1/64)
- Sharp X-Acto knife
- 24-inch sanding block
- Ball-point pen fixture (about 2½ inches off the building board)
- Masking tape (two-inch wide, cheap)
- Small sanding blocks (3/4-inch 15-ply aircraft plywood)
- Resin-bonded sandpaper (40, 36 grit recommended)
- Glue-It (foam-safe adhesive), cyanoacrylate (CyA), finishing epoxy
- Glass cloth (light 6-oz and heavier cloth for subsequent coats)
- Small one-inch brush, squeegee (or playing cards)
- Heat lamp or warm sun for curing epoxy
Preparing the sheeted cores
- After epoxy cure (36–48 hours), trim excess from leading and trailing edges with an X-Acto, leaving about 1/32" to 1/16".
- Place sheeted panels back into their foam blocks on the building board, realign, and sand leading and trailing edges with a 24" sanding block using the foam blocks as a template. This keeps edges straight and concentric with the root centerline.
Trailing-edge stock
- I stopped using factory trailing-edge stock years ago. Start with a 36" piece of 1/2"-thick, 6–8 lb BC-grain balsa, about 4-3/4" wide, aged 1–2 years. Let it warp on the shelf, not on the airplane.
- Cut to wing length plus a couple of inches for allowance. Keep one factory edge to glue to the wing panel.
- If the sheet bows, sand the edges straight; if it bows too much, get another piece. Do not try to force warps out — they return as odd ailerons or flight characteristics.
Making parallel plates (quick straightness test)
- Use scrap wing sheeting or 1/8" balsa wider than the pen-to-board distance. One edge must be straight.
- With a square, hold the sheet perpendicular to the building board (straight edge down) and run the pen across the sheet, then cut on the pen line to make parallel plates.
- Make two plates — these are used for precision alignment.
Checking panel straightness and washout
- Find the end marks used for cutting the cores and align the parallel plates on them with 3–4 T-pins.
- Place the assembly flat on the building board and check for flatness; mine is within .004" end-to-end.
- If the core has washout cut into it, measure the trailing-edge mark from the building board (I use the 1/64 scale). Repeat for the other panel.
- If washout numbers don't match or the core is warped, discard the panel. Foam and balsa are cheap; your time isn't. Attempts to cut and twist a warped panel usually change the airfoil.
Gluing the trailing edge
- Trial-fit the trailing-edge stock to ensure wood where needed and alignment with the wing centerline.
- Run a wavy bead of Glue-It down the trailing edge of the panel and spread into a medium-to-thin film. Do the same on the factory edge of the trailing-edge stock.
- Place the trailing-edge stock, rub it back and forth about two inches to form a rub joint, and tape to prevent sliding.
- After glue sets, trim excess at the center with a Zone saw and realign and top-glue the trailing-edge stock on the other panel the same way.
- For wings with washout, use the trailing-edge mark to center the panel on the building board and check with the pen fixture; the top of the plate should be at the pen point as you run it root to tip. You should now have a straight 1/32" trailing edge.
(Note: this rub-joint technique was taught by the late Bill James. Bill used an outside scribe; a pen works fine.)
Sanding the trailing edge — shaping sequence
Blocks and grits:
- Block 1: 40-grit on one side / 50-grit on the other
- Block 2: 60-grit / 80-grit
- Block 3: 36-grit (very aggressive; similar to 40-grit but removes wood fast)
Procedure:
- Put two-inch masking tape on the sheeting in front of the trailing edge to avoid tearing.
- Shape the bottom first (airfoils are flatter on the bottom). Hold the bottom flat on the building board.
- Start with 36-grit: hold the sanding block at about 45° and remove wood. When ~1/8" from the pen line, flatten the block toward the leading edge. Watch for gouges near the centerline and sheeting.
- Progress with 40-grit, then 50-grit, then 60-grit, getting closer to the pen line. Leave about 1/64" from the pen line at this point.
- Use 80-grit to sand to the pen line. This should take ~15 minutes for a straight trailing edge.
- Flip and repeat for the top side. Final trailing edge target: ~1/32" wide. If storing overnight before joining, place panels flat with a 2–3" gap between them to prevent warping.
Sanding the dihedral and joining panels
- Transfer the centerline of the root to the leading edge (draw a leading-edge centerline using the same pen method).
- Lay panels together top-side up, find where they meet, flip, and place them together. Use a 6–8" piece of two-inch masking tape (half on each panel) at the meeting point to hold them.
- Pick up the wing from the middle, line up leading/trailing-edge marks, and check for warps or twists. Small misalignments (~1/8") can be adjusted; large ones (~3/8") may require remaking panels.
- Turn the wing over and fold the halves open. Use Glue-It to hold the halves together (epoxy is too heavy for most of the foam-to-foam surfaces). Spread Glue-It on both mating surfaces into a film, flip panels over, align marks, add another strip of masking tape toward the trailing edge, wipe excess, and allow to set.
- Glue the leading- and trailing-edge stock together with CyA. The Glue-It layer will keep CyA from melting the foam. Support the wing upside-down on the dihedral joint while the CyA sets (30 minutes to 2 hours, depending on weather). After the glue sets you can handle the wing.
Glassing the wing
- Block-sand the wing with 220-grit to prepare the surface.
- Use a finishing epoxy (polyester can warp thin trailing edges). Recommended resins: Bob Smith finishing resin (20-minute pot life) or E-Z Lam (30/60-minute pot life).
- Cut four pieces of cloth (grain tip-to-tip), oversize for each panel side (bottom and top).
- Lay cloth in place and brush epoxy through to saturate. Start in the middle and brush toward the tip, then toward the leading and trailing edges. Be generous with epoxy to wet out the cloth.
- Pull bubbles out with the brush or squeegee, let epoxy tack up, then use heat or sun to cure faster.
- When mostly wetted, use a squeegee (I use a deck of playing cards) to remove excess epoxy so the weave shows and cloth is glued with a minimum of weight. The heavy cloth later fills the weave.
- After epoxy cures (8–24 hours), trim excess cloth and sand with 220-grit, careful around the trailing edge. Fill any rough spots with microballoons or lightweight spackle, sand smooth, and repeat with the top cloth.
- After top cure, sand smooth and round the leading edge as needed.
Final assembly and controls
- Install ailerons, bellcranks, torque rods, and cut control holes with a sharp hobby knife. Take time to keep cuts neat.
- Install servo trays and secure servos. Ensure aileron travel and hinge smoothness.
- Balance the airplane laterally by adding weight to the light wingtip if necessary.
- Fill any low spots with spackle or micro, sand smooth, prime, sand with fine wet-or-dry, then apply color and markings.
- Check fit on the fuselage and make final adjustments.
Landing-gear plate
- Lay out the landing-gear plate location and cut away sheeting where needed. The back of the plate should reach the basswood spars.
- Holding the plate on edge, remove foam until the plate is recessed enough to allow the gear to sit flush in the wing.
- Remove a 1/4"-wide strip at the spars from one side to the other to wing sheeting level. Cut a piece of hard 1/4" balsa with grain vertical, trial-fit, and glue with five-minute epoxy.
- Glue the landing-gear plate to the leading edge, basswood spars, and the balsa step. This method prevents driving gear through the wing; it saved me after a mild landing once.
Finishing notes and philosophy
- These techniques have helped new racers build straight wings and experienced racers build multiple wings with at least one straight one.
- There are no real speed secrets — good technique, careful workmanship, and sharing knowledge are what grow the sport.
- If I get more from Fog, I'll pass it on. See you next month.
Transcribed from original scans by AI. Minor OCR errors may remain.

