
Radio Control
Pylon Racing
Bill Hager
Racing is now going full tilt. It seems that every year there are new clubs popping up to put on a race. Here in the South Central West District, a couple of new groups have surfaced.
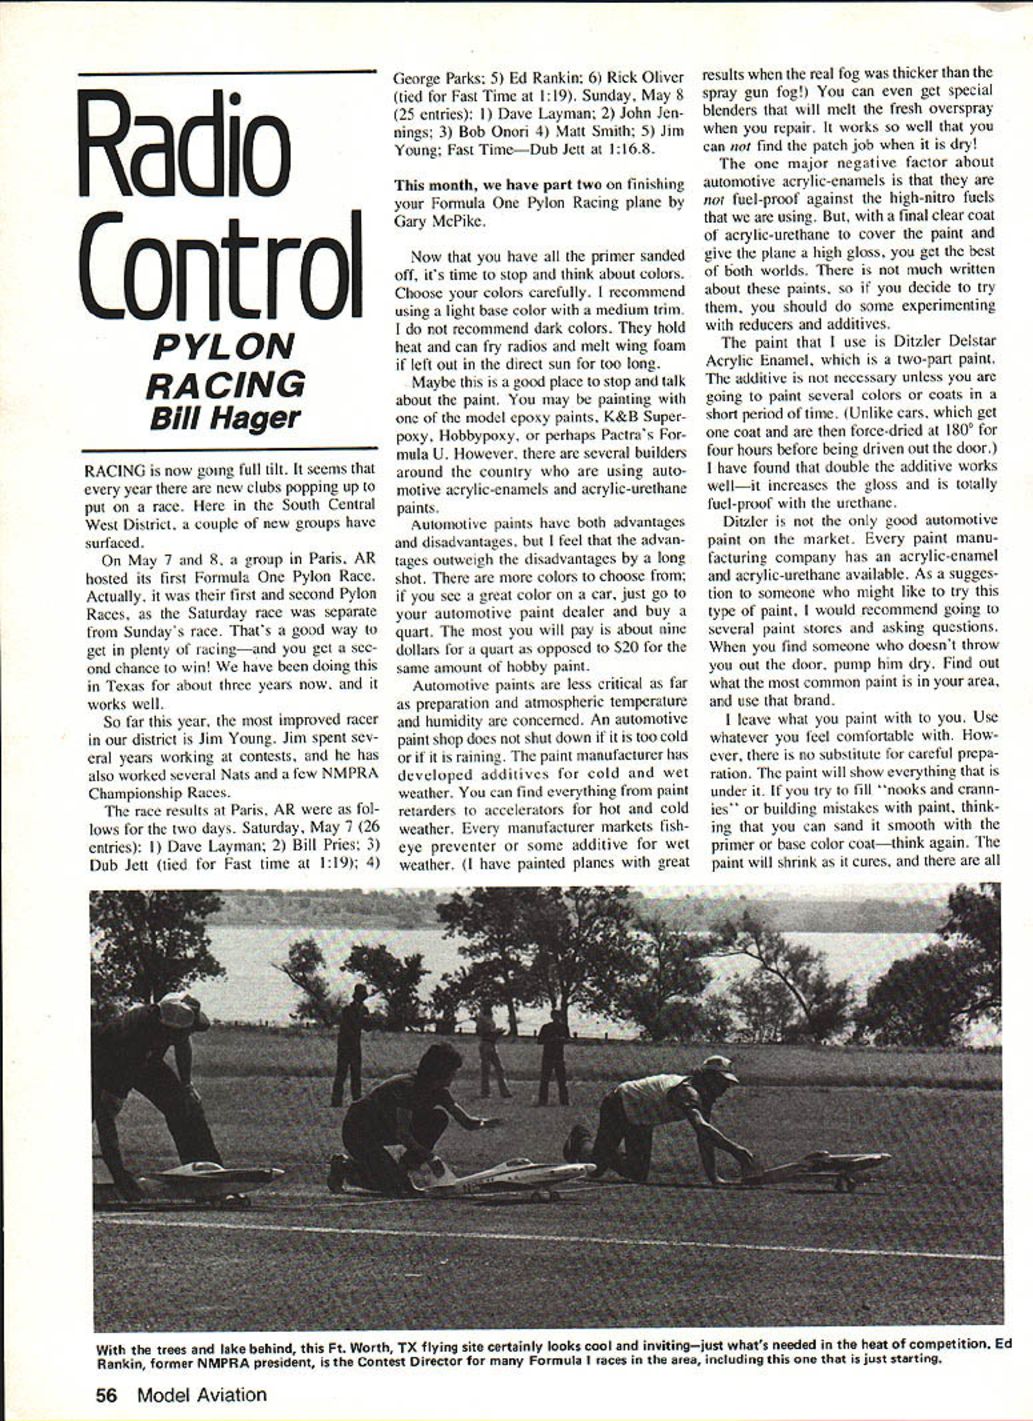
On May 7 and 8, a group in Paris, AR hosted its first Formula One Pylon Race. Actually, it was their first and second pylon races, as the Saturday race was separate from Sunday's race. That's a good way to get in plenty of racing—and you get a second chance to win! We have been doing this in Texas for about three years now, and it works well.
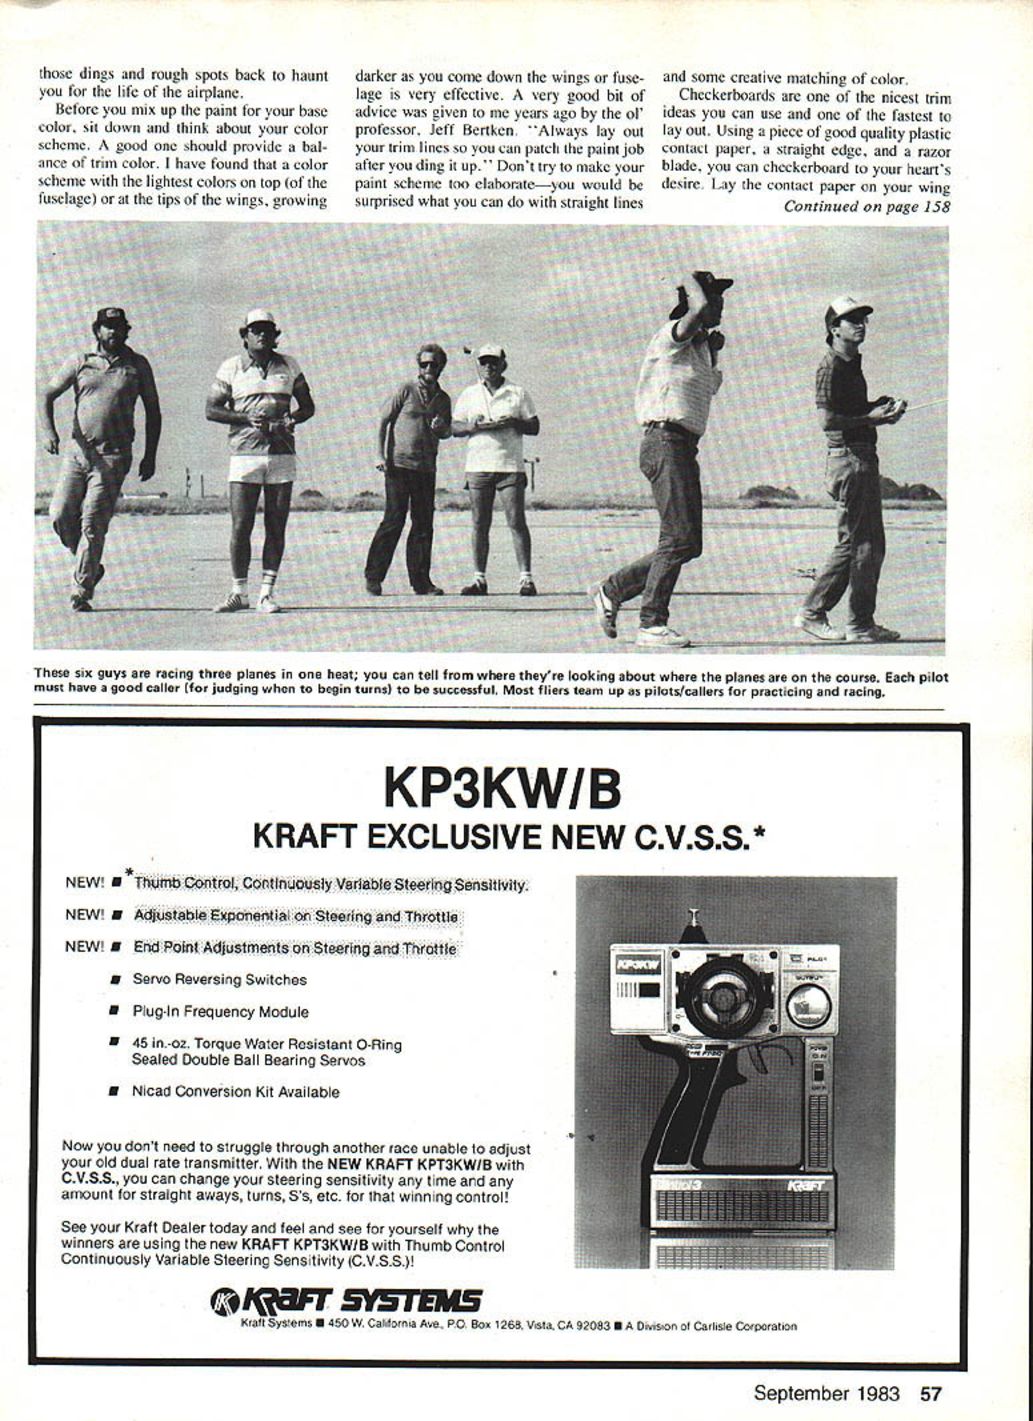
So far this year, the most improved racer in our district is Jim Young. Jim spent several years working at contests, and he has also worked several Nats and a few NMPRA Championship Races.
Race Results (Paris, AR)
Saturday, May 7 (26 entries):
- 1) Dave Layman
- 2) Bill Pries
- 3) Dub Jett (tied for Fast Time at 1:19)
- 4) George Parks
- 5) Ed Rankin
- 6) Rick Oliver (tied for Fast Time at 1:19)
Sunday, May 8 (25 entries):
- 1) Dave Layman
- 2) John Jennings
- 3) Bob Onori
- 4) Matt Smith
- 5) Jim Young
- Fast Time — Dub Jett at 1:16.8
This month we have part two on finishing your Formula One pylon racing plane, by Gary McPike.
Finishing Your Formula One Pylon Racing Plane (Part Two)
Now that you have all the primer sanded off, it's time to stop and think about colors. Choose your colors carefully. I recommend using a light base color with a medium trim. I do not recommend dark colors. They hold heat and can fry radios and melt wing foam if left out in direct sun for too long.
Maybe this is a good place to talk about paint. You may be painting with one of the model epoxy paints—K&B Superpoxy, Hobbypoxy—or perhaps Pactra's Formula U. However, there are several builders around the country who are using automotive acrylic-enamels and acrylic-urethane paints.
Automotive paints have both advantages and disadvantages, but the advantages outweigh the disadvantages by a long shot. There are more colors to choose from; if you see a great color on a car, just go to your automotive paint dealer and buy a quart. The most you will pay is about nine dollars for a quart as opposed to $20 for the same amount of hobby paint.
Automotive paints are less critical as far as preparation and atmospheric temperature and humidity are concerned. An automotive paint shop does not shut down if it is too cold or if it is raining. The paint manufacturer has developed additives for cold and wet weather. You can find everything from paint retarders to accelerators for hot and cold weather. Every manufacturer markets fisheye preventer or some additive for wet weather. (I have painted planes with great results when the real fog was thicker than the spray gun fog!) You can even get special blenders that will melt the fresh overspray when you repair. It works so well that you cannot find the patch job when it is dry.
The one major negative factor about automotive acrylic-enamels is that they are not fuel-proof against the high-nitro fuels that we use. But with a final clear coat of acrylic-urethane to cover the paint and give the plane a high gloss, you get the best of both worlds. There is not much written about these paints, so if you decide to try them, you should do some experimenting with reducers and additives.
The paint that I use is Ditzler Delstar Acrylic Enamel, which is a two-part paint. The additive is not necessary unless you are going to paint several colors or coats in a short period of time. (Unlike cars, which get one coat and are then force-dried at 180°F for four hours before being driven out the door.) I have found that double the additive works well—it increases the gloss and is totally fuel-proof with the urethane.
Ditzler is not the only good automotive paint on the market. Every paint manufacturer has an acrylic-enamel and acrylic-urethane available. As a suggestion to someone who might like to try this type of paint, go to several paint stores and ask questions. When you find someone who doesn't throw you out the door, pump him dry. Find out what the most common paint is in your area, and use that brand.
I leave what you paint with to you. Use whatever you feel comfortable with. However, there is no substitute for careful preparation. The paint will show everything that is under it. If you try to fill "nooks and crannies" or building mistakes with paint, thinking you can sand it smooth with the primer or base color coat—think again. The paint will shrink as it cures, and those dings and rough spots will come back to haunt you for the life of the airplane.
Before you mix up the paint for your base color, sit down and think about your color scheme. A good one should provide a balance of trim color. I have found that a color scheme with the lightest colors on top of the fuselage or at the tips of the wings, growing darker as you come down the wings or fuselage, is very effective. A very good bit of advice was given to me years ago by the old professor, Jeff Bertken: "Always lay out your trim lines so you can patch the paint job after you ding it up." Don't try to make your paint scheme too elaborate—you would be surprised what you can do with straight lines and some creative matching of color.
Checkerboards are one of the nicest trim ideas you can use and one of the fastest to lay out. Using a piece of good quality plastic contact paper, a straight edge, and a razor blade, you can checkerboard to your heart's desire. Lay the contact paper on your wing or tail, mark out the vertical and horizontal lines and cut out the squares, being careful not to cut through the paint. Remove the ones that get painted.
After you have a paint scheme worked out that you like, draw it on a three-view and pin it on the wall. Look at it for a few days while you are putting the base color on and doing the color sanding. If it still looks good, then use it. However, you will probably want to change it after staring at it for a few days.
Your spray equipment is as important as the surface preparation. A good spray gun in proper working order won't save a poorly prepared surface, but it will lay down a smooth coat of paint on a properly prepared wing or fuselage. I use a professional painter's "touch-up gun" with an eight-ounce cup. My compressor is a Sears 3/4-horsepower model with a good quality water trap and regulator. All the trim painting I do is with a Binks airbrush equipped with a B tip.
Get out your alcohol and clean the plane. Then clean it again. Take an old toothbrush and get into the hinge lines. Next, blow off the whole plane inside and out at the highest pressure your compressor will pump. Then go over the plane again with a good epoxy-compatible tack rag.
The base color should be shot in two stages: a light first or tack coat, then 15 minutes later a good wet coat to cover the entire plane with an even color. No "transparent" spots should be showing at this point. The trick to painting a good and lightweight base color is to know when to stop. It's so easy to keep loading on the paint—but every pass of the spray gun is weight you're putting on the airplane. Paint in a good light and stop when you cannot see through the color to the exposed fiberglass and primer under it. Clean your gun and walk away from the plane for a day or two. Let it dry out of the sun.
If you are painting with a gloss hobby paint and are not going to use a clear coat over it, you are ready for your trim layout now. I use a flattening additive in my base color and it seems to cover better with less paint. It also dries a bit faster than high gloss.
Now that the paint has cured for a day or two, it's time to color-sand it. Using 500-grit wet paper and soapy water, sand the whole airplane. Use a sanding block on dust and runs only. Watch the edges and high points on the cheek cowl and wheel pants. You can sand through the color layer in a few strokes.
Now get that three-view down off the wall. If it still looks good, start laying it out on the airplane. I recommend Scotch FineLine Masking Tape. It's a light green color, flexible, and leaves a clean line. You can get it at any good auto paint store in widths from 1/32 to 1/4 inch. I lay out the whole trim scheme in a soft pencil before I put any tape on the plane. Some people can eyeball a trim job, but I can't. You should be able to lay out the entire trim scheme with the spacing between colors planned so that you do not have to remask for each color. A 1/8-inch line between colors looks good and provides contrast as well as making the trim job go faster.
After you have all the trim masking down, take a good-quality art eraser and get all the pencil lines off the area to be painted. Then, with cheap paper masking tape and good quality paper (butcher's paper works well), mask off all the base color. Pick the color you are going to shoot first and mask again all the other areas with tape and paper. Masking is a pain, but it is well worth the effort.
Clean the exposed surfaces well with methanol alcohol, and go over the surface to be painted with a tack rag. Mix up your trim color and shoot it on. If you are using a "touch-up" gun, shoot a very light tack coat, then a light color coat. You don't need a lot of paint to get color, and you don't want to build up too much paint around the edge of the masking tape. It just has to be sanded off again. If you are using an airbrush, a light wet coat will do. You only need to put enough paint to get a uniform color.
After the first color has dried, pull the masking tape and paper off the area of the second color and mask the first color. Clean and go over this area with a tack rag and paint it. If there is a third or fourth color, repeat the procedure.
As soon as the last color has tacked up (about one hour), start stripping off all the masking. Then sit back and admire your handiwork. Let the plane sit for another day or two. Then, with 600-grit wet paper and soapy water, very carefully sand the trim. Do not use a sanding block. Just knock the chips and dust off. A good technique is to sand across the trim lines at about a 45-degree angle to the edges. This will take the excess paint off around the edges where it had built up next to the masking tape.
If you sand through the color, don't worry. Just mask off the area around the "boo-boo" and spot-paint it. Let it dry, and sand again.
If you are going to clearcoat, put on at least one good coat of a quality automotive clear. After the clear has dried and cured, you can wet-sand with 1000- to 1500-grit and then buff and polish with a good rubbing compound. That will give you a durable, high-gloss finish.
One final tip—if you are going to use high-nitro fuels, do your final finishing with urethane clear over an acrylic-enamel base. That combination has stood up to fuel better for me than many hobby paints.
Good luck with your paint job and with the pylon season. See you at the races.
In the next issue, we will cover the clear coat, fading techniques, and the final airplane setup.
If your club has a race, write something about it and send it to me. I will see if I can get it in this column. If you have some good pictures (they should be black and white, high-contrast pictures), send them to me.
See you next month.
Bill Hager 706 Glen Haven Conroe, TX 77302
Transcribed from original scans by AI. Minor OCR errors may remain.

