
Radio Control
Pylon Racing
Bill Hager
When you read this, the 1983 Nats will be history. If you didn't attend, I am sure you will have missed the best racing of the year.
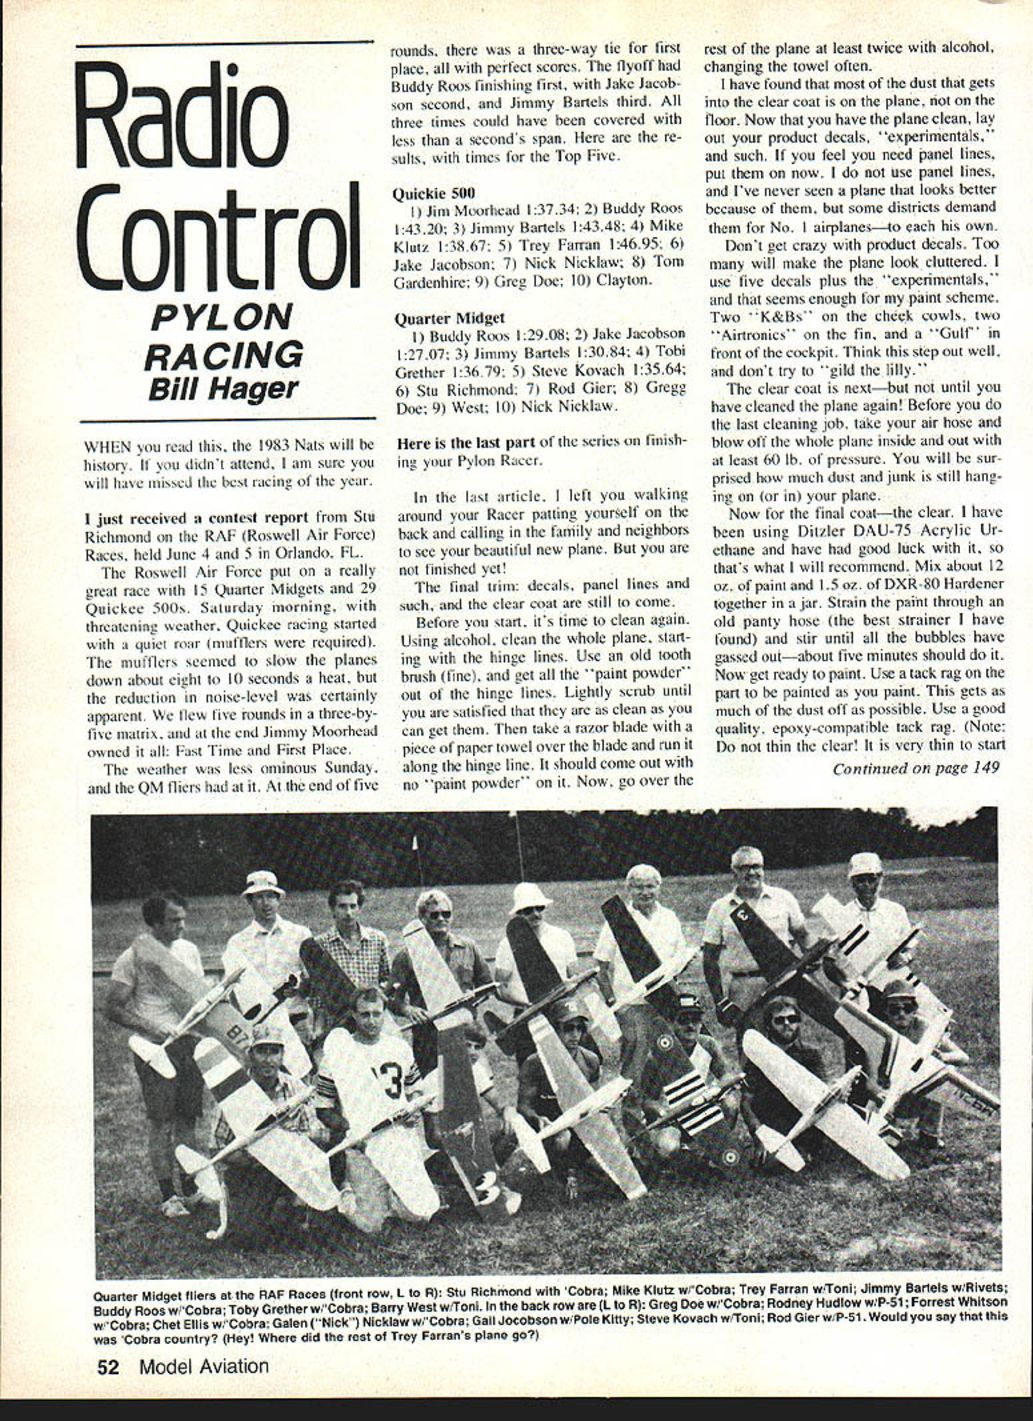
I just received a contest report from Stu Richmond on the RAF (Roswell Air Force) Races, held June 4 and 5 in Orlando, FL.
The Roswell Air Force put on a really great race with 15 Quarter Midgets and 29 Quickie 500s. Saturday morning, with threatening weather, Quickie racing started with a quiet roar (mufflers were required). The mufflers seemed to slow the planes down about eight to ten seconds a heat, but the reduction in noise level was certainly apparent. We flew five rounds in a three-by-five matrix, and at the end Jim Moorhead owned it all: Fast Time and First Place.
The weather was less ominous Sunday, and the Quickie fliers had at it. At the end of five rounds, there was a three-way tie for first place, all with perfect scores. The flyoff had Buddy Roos finishing first, with Jake Jacobson second, and Jimmy Bartels third. All three times could have been covered within less than a second's span. Here are the results, with times for the top five.
Quickie 500 Results
- Jim Moorhead — 1:37.34
- Buddy Roos — 1:43.20
- Jimmy Bartels — 1:43.48
- Mike Klutz — 1:38.67
- Trey Farran — 1:46.95
- Jake Jacobson
- Nick Nicklaw
- Tom Gardenhire
- Gregg Doe
- Clayton
Quarter Midget Results
- Buddy Roos — 1:29.08
- Jake Jacobson — 1:27.07
- Jimmy Bartels — 1:30.84
- Tobi Grether — 1:36.79
- Steve Kovach — 1:35.64
- Stu Richmond
- Rod Gier
- Gregg Doe
- West
- Nick Nicklaw
Finishing Your Pylon Racer
Here is the last part of the series on finishing your Pylon Racer.
In the last article I left you walking around your racer patting yourself on the back and calling in the family and neighbors to see your beautiful new plane. But you are not finished yet! The final trim — decals, panel lines and such, and the clear coat — are still to come.
Before you start, it's time to clean again. Using alcohol, clean the whole plane, starting with the hinge lines. Use an old (fine) toothbrush and get all the "paint powder" out of the hinge lines. Lightly scrub until you are satisfied that they are as clean as you can get them. Then take a razor blade with a piece of paper towel over the blade and run it along the hinge line. It should come out with no "paint powder" on it. Now go over the rest of the plane at least twice with alcohol, changing the towel often.
I have found that most of the dust that gets into the clear coat is on the plane, not on the floor. Now that you have the plane clean, lay out your product decals, "experimentals," and such. If you feel you need panel lines, put them on now. I do not use panel lines, and I've never seen a plane that looks better because of them, but some districts demand them for No. 1 airplanes — so each his own.
Don't get crazy with product decals. Too many will make the plane look cluttered. I use five decals plus the "experimentals," and that seems enough for my paint scheme.
- Two "K&Bs" on the cheek cowls
- Two "Airtronics" on the fin
- A "Gulf" in front of the cockpit
Think this step out well, and don't try to "gild the lily."
The clear coat is next — but not until you have cleaned the plane again! Before you do the last cleaning job, take your air hose and blow off the whole plane inside and out with at least 60 lb. of pressure. You will be surprised how much dust and junk is still hanging on (or in) your plane.
Now for the final coat — the clear. I have been using Ditzler DAU-75 Acrylic Urethane and have had good luck with it, so that's what I will recommend. Mix about 12 oz. of paint and 1.5 oz. of DXR-80 Hardener together in a jar. Strain the paint through an old pantyhose (the best strainer I have found) and stir until all the bubbles have gassed out — about five minutes should do it.
Now get ready to paint. Use a tack rag on the part to be painted as you paint. This gets as much of the dust off as possible. Use a good quality, epoxy-compatible tack rag. Note: do not thin the clear! It is very thin to start.
Set your spray gun to shoot a medium mist at about 30–35 lb. of pressure. Shoot on a medium tack coat of clear. Don't try to "wet" the whole surface, just get a fairly even coat of paint on. Stop, wait 15 minutes, and then put on a good medium coat of clear.
- On the wing, shoot the bottom first, then the top.
- On the fuselage, shoot from the tail forward.
- Put the wheel pants and cheek cowl on wooden sticks and shoot them last, holding the gun at least 12 inches away. Just fog the paint on until they get glossy.
The hardest part of shooting a clear coat is knowing when to stop. When you find yourself squinting into the light looking for dry places to give one last squirt — stop! You usually have enough paint on, and any more will just buy you runs.
Now put your gun down and walk away from the plane for at least a half hour. Have a cup of coffee or a cold drink, but get away from it! After your break, come back and clean your gun and look at the plane. The paint will dry dust-free in that half hour, but don't touch it for at least 12 hours, and 24 hours would be better. In a half hour, the paint will flow out and film over, and what you see is the way it will look when it is completely dry.
If you have any runs or big pieces of dust in the clear coat, look at where they are. If they are on the bottom or are otherwise hard to see when the plane is put together and sitting on the ground, leave them alone (if you can live with them). If not — knowing that you may blow the whole paint job — wait about 36 hours after you shot the clear coat, block-sand the unacceptable areas with old No. 600 paper, and machine-polish with a good polish like Mother's on a six-inch lamb's-wool wheel attached to an electric drill.
That's it. The clear coat is probably the simplest part of the paint job, but because it is the last, it is the most critical. I feel that the secrets to a good clear coat are:
- Preparation — clean the plane, strain the paint, and have a well-built and painted plane to start with.
- Knowing when to stop — more good clear coats are turned into sagging messes by saying "Just a little more on that tip."
When to Paint
I have found that sunrise or early in the morning is probably the best time to paint clear. The air is clean and just a little damp, there is usually no wind, and the plane has the whole day to dry before you come back to fiddle it.
After drying for a day, the clear coat is just about bulletproof. Go ahead and put your radio and engine in, silicone the wing saddle, and fly it.
Fading Colors
One thing I have had lots of questions about is how to go about fading colors, so I'll take some time to go over color-fading techniques.
Fading is probably the easiest way to do a striking paint job — but it can also create a total mess! Many painters try to fade colors that are too far away from each other on the color spectrum, and they come out looking like they forgot a piece of masking tape. If you are going to try fading colors, you should use shades that are close to one another. Dark/light of the same color works the best, or colors next to one another on a color wheel.
- Always shoot the colors together with as little drying time as possible.
- Always fade the lightest color over the dark.
- Always hold the airbrush so the overspray goes back into the color you are spraying.
Again, the biggest secret to fading is knowing when to quit.
I hope that this series of articles has given you some painting points that you did not know before. My way is not the only way to paint, but it has been successful for me.
My thanks to Gary McPike for the tips on finishing your Pylon Racer.
See you next month.
Bill Hager 706 Glen Haven Dr. Conroe, TX 77302.
Transcribed from original scans by AI. Minor OCR errors may remain.

