
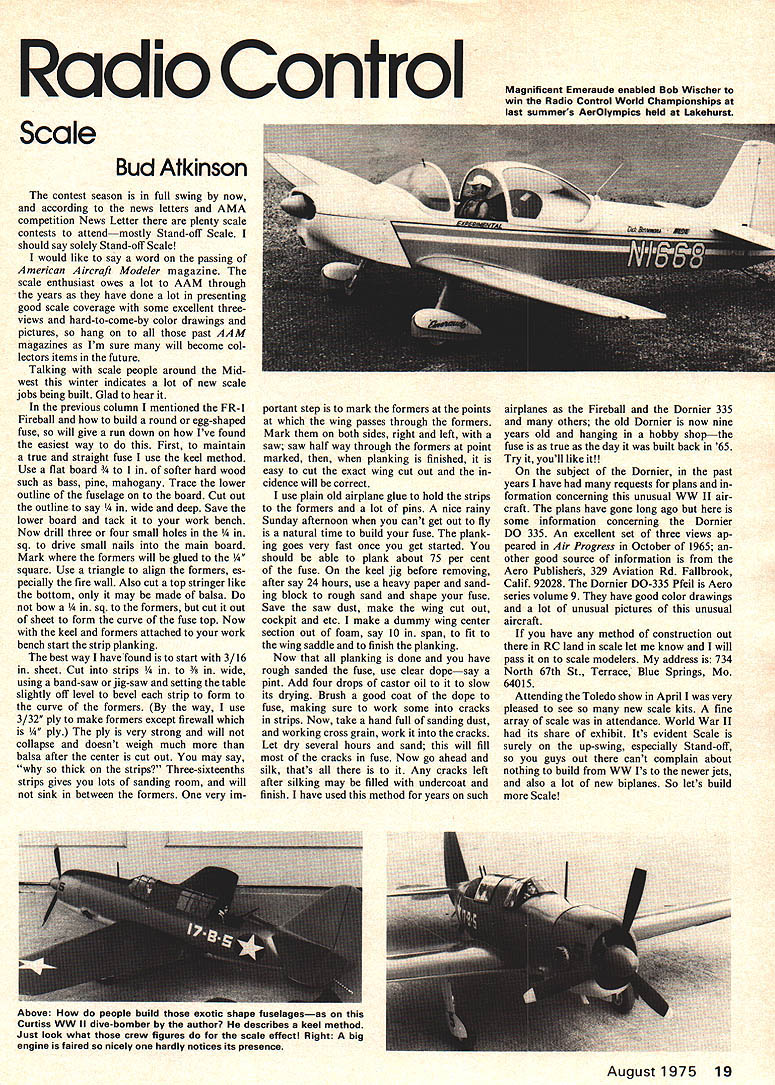
Radio Control
Scale
Bud Atkinson
The contest season is in full swing by now, and according to the news letters and AMA competition News Letter there are plenty scale contests to attend—mostly Stand-off Scale. I should say solely Stand-off Scale!
I would like to say a word on the passing of American Aircraft Modeler magazine. The scale enthusiast owes a lot to AAM through the years as they have done a lot in presenting good scale coverage with some excellent threeviews and hard-to-come-by color drawings and pictures, so hang on to all those past AAM magazines as I'm sure many will become collectors items in the future.
Talking with scale people around the Midwest this winter indicates a lot of new scale jobs being built. Glad to hear it.
In the previous column I mentioned the FR-1 Fireball and how to build a round or egg-shaped fuse, so will give a run down on how I've found the easiest way to do this. First, to maintain a true and straight fuse I use the keel method. Use a flat board 3/4 to 1 in. of softer hard wood such as bass, pine, mahogany. Trace the lower outline of the fuselage on the board. Cut out the outline to say 1/4 in. wide and deep. Save the lower board and tack it to your work bench. Now drill three or four small holes in the 1/4 in. sq. to drive small nails into the main board. Mark where the formers will be glued to the 1/4" square. Use a triangle to align the formers, especially the fire wall. Also cut a top stringer like the bottom, only it may be made of balsa. Do not bow a 4 in. sq. to the formers, but cut it out of sheet to form the curve of the fuse top. Now with the keel and formers attached to your work bench start strip planking.
The best way I have found is to start with 3/16 in. sheet. Cut into strips 1/4 in. to 3/8 in. wide, using a band-saw or jig-saw and setting the table slightly off level to bevel each strip to form to the curve of the formers. (By the way, I use 3/32" ply to make formers except firewall which is 1/4" ply.) The ply is very strong and will not collapse and doesn't weigh much more than balsa after the center is cut out. You may say "why so thick on the strips?" Three-sixteenths strips gives you lots of sanding room, and will not sink in between the formers. One very important step is to mark the formers at the points at which the wing passes through the formers. Mark them on both sides, right and left, with a saw; saw half way through the formers at the point marked, then, when planking is finished, it is easy to cut the exact wing cut out and the incidence will be correct.
I use plain old airplane glue to hold the strips to the formers and a lot of pins. A nice rainy Sunday afternoon when you can't get out to fly is a natural time to build your fuse. The planking goes very fast once you get started. You should be able to plank about 75 per cent of the fuse on the keel jig before removing; after say 24 hours, use a heavy paper and sanding block to rough sand and shape your fuse. Save the saw dust, make the wing cut out, cockpit, etc. I make a dummy wing center section out of foam, say 10 in. span, to fit the wing saddle to finish the planking.
Now the planking done and the fuse rough sanded use clear dope—say a pint. Add four drops castor oil to slow its drying. Brush a good coat of dope to the fuse, making sure to work some into the cracks between strips. Now take a handful of sanding dust and work it cross grain into the cracks. Let dry several hours and sand; this will fill most of the cracks in the fuse. Now go ahead and silk—that's all there is to it. Any cracks left after silking may be filled with undercoat and finish. I have used this method for years on such airplanes as the Fireball and the Dornier 335 and many others; the old Dornier is now nine years old and hanging in a hobby shop—the fuse is as true as the day it was built back in '65. Try it, you'll like it!
On the subject of the Dornier, in the past years I have had many requests for plans and information concerning this unusual WWII aircraft. The plans have gone long ago but here is some information concerning the Dornier DO 335. An excellent set of three views appeared in Air Progress in October of 1965; another good source of information is Aero Publishers, 329 Aviation Rd., Fallbrook, Calif. 92028. The Dornier DO-335 Pfeil is Aero Series volume 9. They have good color drawings and a lot of unusual pictures of this unusual aircraft.
If you have any method of construction out there in RC land in scale let me know and I will pass it on to scale modelers. My address is: 734 North 67th St., Terrace, Blue Springs, Mo. 64015.
Attending the Toledo show in April I was very pleased to see so many new scale kits. A fine array of scale was in attendance. World War II had its share of exhibit. It's evident Scale is surely up-swing, especially Stand-off. So let's build more Scale!
Transcribed from original scans by AI. Minor OCR errors may remain.

