
Scale
Bud Atkinson
STAND-OFF SCALE for competition has come a long way in the last three or four years. It has been accepted as a Scale competition class at most contests and, of course, the state of the art naturally has improved. The Stand-off Scale model in general has excellent performance and far surpasses its AMA scale or FAI counterparts. Many of these airplanes are capable of seriously competing with so-called Pattern airplanes, and by far are more realistic than most of them.
The static aspect of Stand-off-Scale models has advanced along with their flying ability. Our rules have governed complexity, as in AMA Scale, but over the last several years modelers have found ways to improve their Scale birds within the rules. The rules have tried to disallow rivets and metal seam lines; that's the intent anyway, and they are not supposed to count for static points. There are cowl outlines, door outlines, etc., that are visible at some distance and I believe should be allowable.
One easy way to simulate these details is the use of 1/32" or 1/64" trim tape. I have found a source through art stores and art suppliers and it's called drafting tape or A.C.S. tape. The color usually does not matter since I apply the tape just before the final color coat is applied. For sure the tape is raised but at a distance of 10 feet or more it gives the illusion of being a break line in the skin, such as a cowling. The wider tape, 1/8" or 1/4", may be used on flying surfaces to simulate fabric-covered ribs. The A.C.S. tape works fine with any finish, dope, enamel or even epoxies and does not curl up as do some of the so-called trim tapes. It also has excellent adhesion.
Bob Cross has sent me a good idea on how to make door outlines—gun hatches and, etc. He says that, after you apply color coat cut doors out of Monokote trim (that's the kind that has the stickum on it), it may be necessary to apply two thicknesses to make the door stand out. Sand very lightly with fine wet-and-dry paper and apply the color coat and your door will stand out very visibly. Install appropriate handles, hinges, and so on. Monokote trim sheets are popular for making insignia, lettering, and so forth, but of course Monokote is very glossy, and you want it flat and weathered looking. Obtain some steel wool from your local hardware or variety store. Ask for 4-0000 steel wool (that's the finest wool made). Using a little water and tooth powder, briskly rub the Monokote after applying it to your model, wipe clean and you may attain a soft, flat sheen.
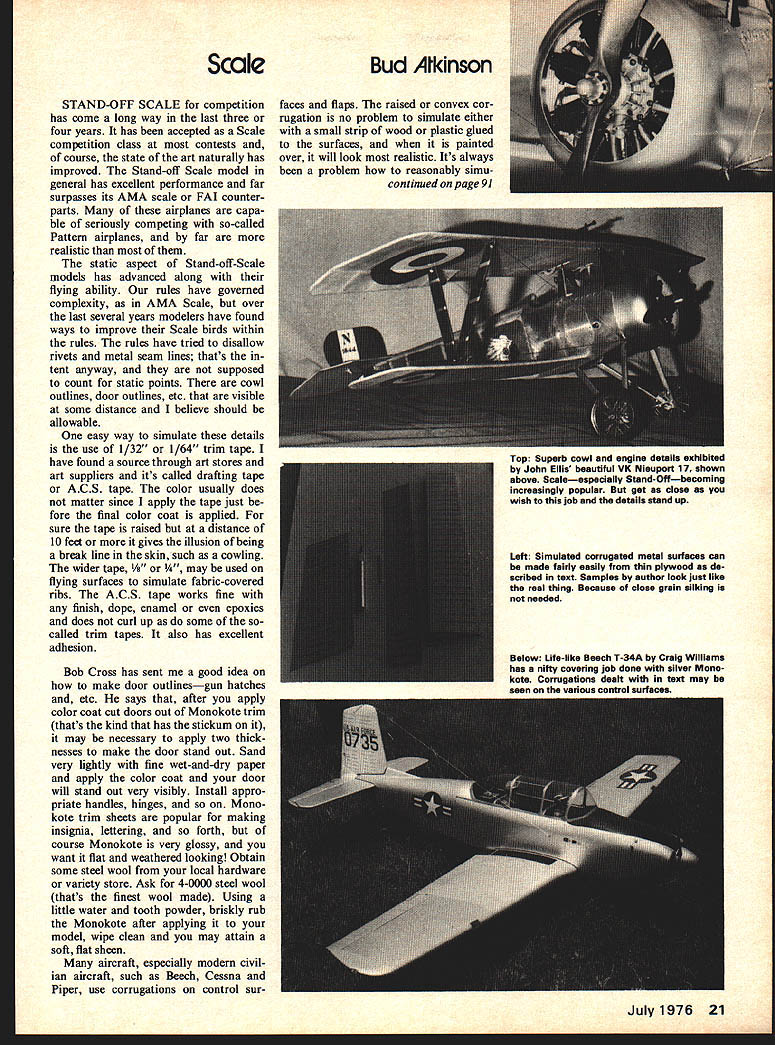
Many aircraft, especially modern civilian aircraft, such as Beech, Cessna and Piper, use corrugations on control surfaces and flaps. The raised or convex corrugation is no problem to simulate either with a small strip of wood or plastic glued to the surfaces, and when it is painted over it will look most realistic. It's always been a problem how to reasonably simulate the concave parts or where the corrugations are lower than the surface. Having toyed with this for sometime I have come up with what I believe to be an easy way to achieve this. Most modelers have used, or heard of, the 1/64" ply sheets available through Sig Mfg. This versatile material is very strong, light and, with today's balsa cost, it is slightly cheaper than balsa.
The accompanying picture almost explains how to simulate the corrugation. Cover your wing and control surface with either balsa or the 1/64" ply sheet, then cut another 1/64" ply sheet the size of the surface to be corrugated. Using three views, pictures, or whatever you have to prove corrugation and its position, draw lines with a rule where corrugation will be located. Make sure corrugations are straight and in line. There should be a margin top and bottom from 1/8" to 3/8". Using brass tubing; in most cases, 3/32" to 1/8" O.D. are used as a drill. Sharpen the end of the tubing to a sharp edge so it will cut the plywood without tearing it. If possible use a drill press; also a hardwood board as the metal drill press base will dull the tubing very quickly.
Cut or drill a hole at the top and bottom of each corrugation. A regular drill will not do a good job and will tear the plywood, but the tubing will cut a clean round hole. Next, with a straight-edge as a guide, cut two lines between the holes with a sharp knife, taking care to stay in line with the outsides of the two holes. Lay the ply on a hardwood block to cut on, so it will not buckle. No doubt, there may be 100 or more corrugations but you will be surprised how fast it goes once you are set up for it. The end results are well worth it.
After the corrugations are cut on each surface, sand lightly on both sides, taking care not to tear the ply. Seal the control surface with two or three coats of dope. Next, using contact cement, apply the plywood to the control surface. After setting a while, feather the leading and trailing edges. One advantage of the 1/64" ply is that it has such close grain that no silking is needed. Just seal, undercoat and paint. You will find a realistic corrugation job made easy by this method.
With the contest season upon us it looks as if there are plenty of scale contests in the offing in most parts of the nation. The Kansas City Radio Control Association's 19th annual contest, to be held June 12, 13, has the usual Pattern event and Stand-off Scale to be flown both days. Lots of prizes and trophies.
Also received a colorful brochure from Harry Braunlich, N.Y., announcing the Sky Rovers Flying Club's Sport Scale and Multi-Wing Contest to be held July 10, 11. If the brochure is an indication it should be a bang-up affair! For more information call or write Harold Ford, CD, at 115 Stephens St., Clifton Park, NY 12424. Phone 315-462-2235.
(My address is: 734 North 6th St. Terrace, Blue Springs, MO 64015.)
Transcribed from original scans by AI. Minor OCR errors may remain.

