
Radio Control: Scale
Dan Parsons 11809 Fulmer Dr. Albuquerque, NM 87111
Introduction
Pet subjects of mine are going to be the focus for this and next month's columns. Several points of scale RC modeling fall into the categories of these pet subjects that I'm going to cover. Though not unique, I feel these points are important and hope my ideas will be different enough to be both interesting and helpful to you.
Tail-draggers
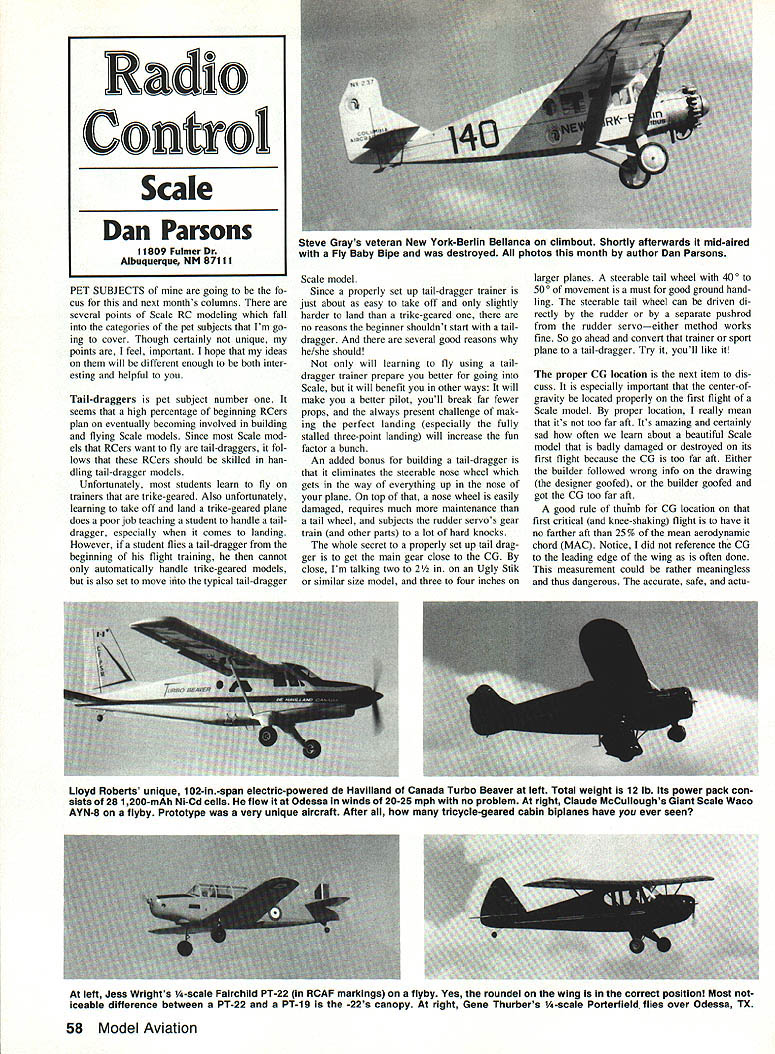
Tail-draggers are pet subject number one. A high percentage of beginning RCers plan on eventually becoming involved in building and flying scale models. Since most scale models that RCers want to fly are tail-draggers, it follows that these RCers should be skilled in handling tail-dragger models.
Unfortunately, students typically learn to fly on trainers with tricycle (trike) gear. Learning to take off and land a trike-geared plane does a poor job of teaching a student to handle a tail-dragger, especially when it comes to landing. However, if a student flies a tail-dragger from the beginning of flight training, he or she can not only automatically handle trike-geared models later, but will also be well prepared to move into the typical tail-dragger scale model.
Since a properly set up tail-dragger trainer is about as easy to take off and only slightly harder to land than a trike-geared one, there are no reasons the beginner shouldn't start with a tail-dragger. Several good reasons to start with a tail-dragger are:
- It prepares you better for scale models.
- It will make you a better pilot.
- You'll break far fewer props.
- The challenge of making a perfect landing (especially the fully stalled three-point landing) increases the fun factor.
An added bonus when building a tail-dragger is that it eliminates the steerable nose wheel, which gets in the way of everything in the nose of your plane. A nose wheel is easily damaged, requires more maintenance than a tail wheel, and exposes the rudder servo's gear train (and other parts) to hard knocks.
The key to a properly set up tail-dragger is to get the main gear close to the CG. By close, I mean:
- 2 to 2-1/2 inches on an Ugly Stik or similar size model
- 3 to 4 inches on larger planes
A steerable tail wheel with 40° to 50° of movement is a must for good ground handling. The steerable tail wheel can be driven directly by the rudder or by a separate pushrod from the rudder servo—either method works fine. So go ahead and convert that trainer or sport plane to a tail-dragger. Try it—you'll like it!
Proper CG Location
Proper center of gravity (CG) location is critical, especially on the first flight of a scale model. By "proper location" I mean the CG should not be too far aft. It's amazing—and certainly sad—how often a beautiful scale model is badly damaged or destroyed on its first flight because the CG was too far aft. Either the designer goofed or the builder goofed and got the CG too far aft.
A good rule of thumb for CG location on that first critical (and knee-shaking) flight is to have it no farther aft than 25% of the mean aerodynamic chord (MAC). Note that I do not reference the CG to the leading edge of the wing, as is often done; that measurement can be rather meaningless and thus dangerous. The accurate, safe, and actually easy way is to measure the CG referenced to the MAC.
The mean aerodynamic chord can be easily determined by graphical means. This has been covered in several articles in the model magazines over the years; any book on basic aerodynamics will show the technique. A constant-chord wing is easy since its chord is the MAC.
One very important word: before that first flight on your scale plane, always add nose ballast to bring a CG that is too far aft forward to the 25% point of the MAC. Never worry more about carrying extra ballast than about letting the CG be too far aft. It is always far better to carry the extra weight than to risk flying with the CG too far aft on that critical first flight.
Only the proper operation of the radio is more critical than proper CG location.
Batteries
Battery failure (usually the receiver pack) is still frequently reported as a leading cause of equipment-failure crashes. If true, it's a real shame, because Ni-Cad packs of today, if properly treated and cared for, are extremely reliable and will last several years.
There have been many excellent articles on the care and feeding of Ni-Cad batteries, so I won't cover the basics here. I do want to add one point on checking your batteries that I've rarely seen mentioned: check the voltage of each cell during a discharge cycle. This will pick up a weak cell so you can replace it before it suddenly goes bad during a flight. Here I'm talking about checking the receiver pack, since a single bad cell there is most critical.
If you buy assembled receiver packs you will have to cut away the plastic covering of the pack to get to each cell with your voltmeter leads. This causes no problems; when you've finished checking, just wrap your pack in foam and stuff it in a small plastic bag.
Transmitter packs are often sealed in a tougher cover and harder to get into. For transmitter packs (if wrapped in foam and a plastic bag) I usually monitor the complete pack rather than checking each cell individually.
I check my receiver battery cells under load after every flying session. This quick check keeps me up to date on their condition and catches any problem before it develops into a catastrophe.
A final suggestion: if you don't have a good digital voltmeter, get one. It will make checking your batteries quick, accurate, and reliable.
Transcribed from original scans by AI. Minor OCR errors may remain.

