
Radio Control: Scale
Author
Jeff Troy 3612 Westmoreland Dr. Mays Landing, NJ 08330
Overview
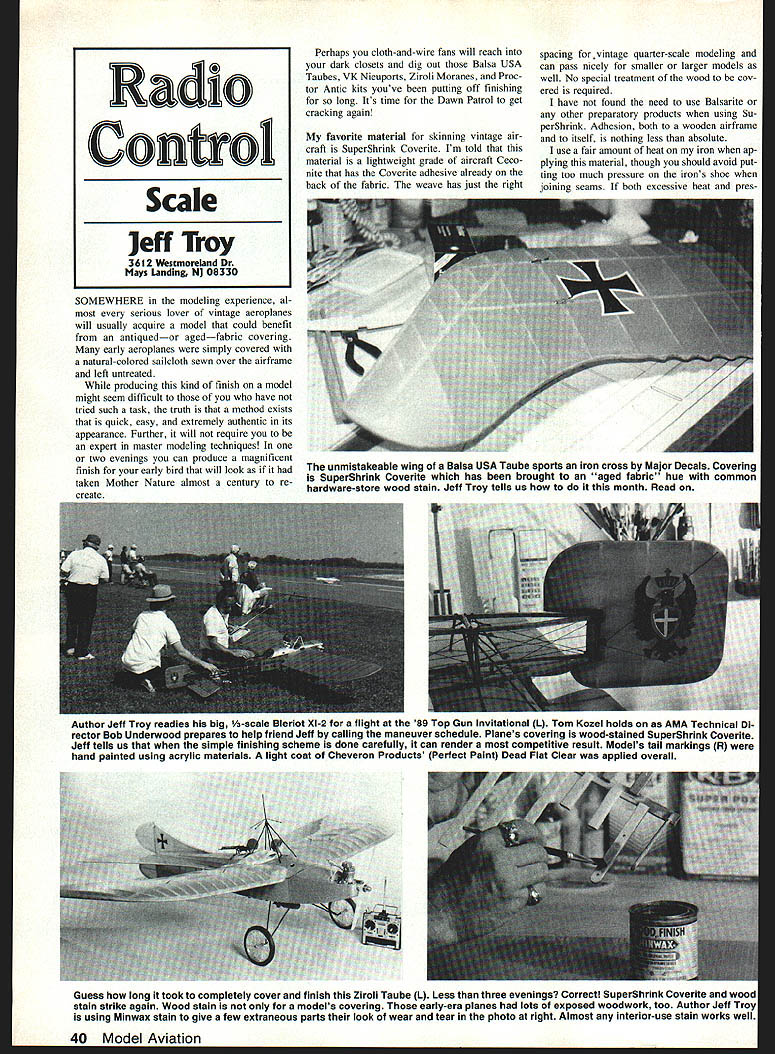
Somewhere in the modeling experience, almost every serious lover of vintage aeroplanes will usually acquire a model that could benefit from an antiqued—or aged—fabric covering. Many early aeroplanes were simply covered with a natural-colored sailcloth sewn over the airframe and left untreated.
Producing this kind of finish on a model might seem difficult if you haven't tried it, but a method exists that is quick, easy, and extremely authentic in appearance. It will not require expert master-modeling techniques. In one or two evenings you can produce a magnificent finish for your early bird that will look as if it had taken Mother Nature almost a century to recreate.
Materials
- SuperShrink Coverite (preferred fabric)
- Iron (for iron-on covering)
- 1-1/2 in. soft flat dope brush
- Interior wood stains (a few shades)
- Paper towels
- Water-soluble decals (optional; not "stickies")
- Urethane clear coats (gloss or flat)
- Optional: heat gun (hardly necessary)
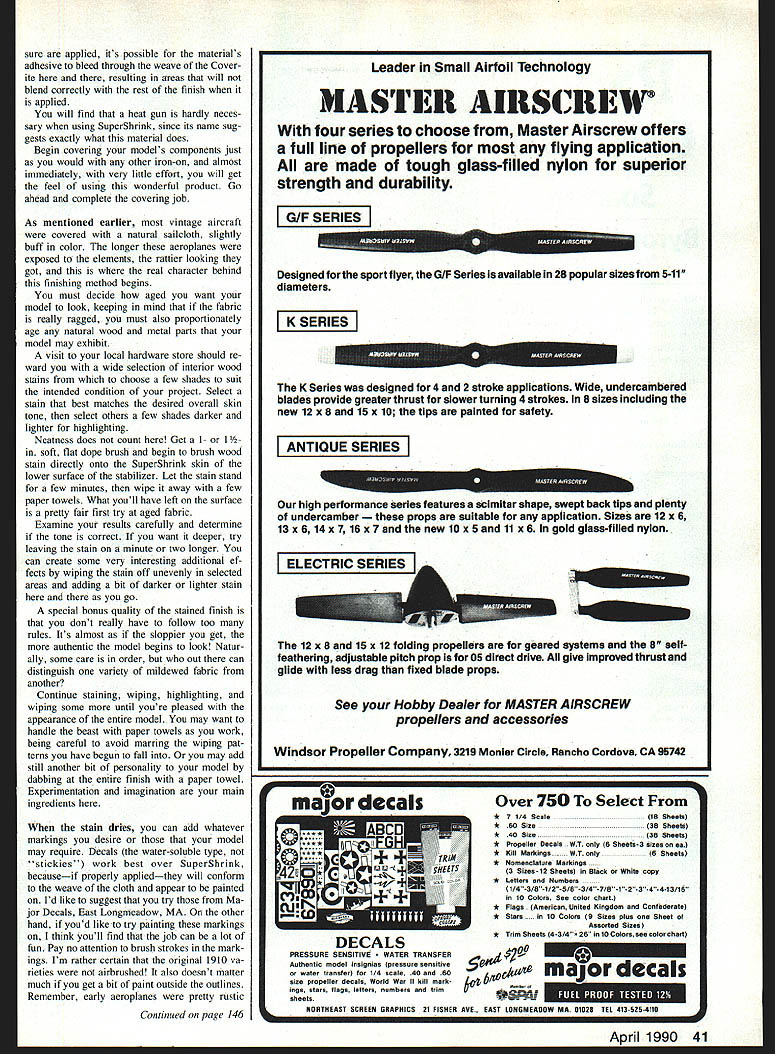
Recommended decals: Major Decals, East Longmeadow, MA. Recommended clears: Pactra Formula U Clear Varnish (gloss) and Chevron Hobby Products Perfect Paint Dead Flat Clear.
Covering technique
My favorite material for skinning vintage aircraft is SuperShrink Coverite. This material is a lightweight grade of Ceconite with the Coverite adhesive already on the back of the fabric. The weave has just the right spacing for vintage quarter-scale modeling and can pass nicely for smaller or larger models as well. No special treatment of the wood to be covered is required.
I have not found any need to use Balsarite or other preparatory products when using SuperShrink. Adhesion, both to a wooden airframe and to itself, is excellent.
I use a fair amount of heat on my iron when applying this material, though you should avoid putting too much pressure on the iron’s shoe when joining seams. If both excessive heat and pressure are used, problems can occur. Be sure the adhesive is applied; it's possible the material’s adhesive may bleed through the weave of Coverite—resulting areas will blend correctly with the rest of the finish. A heat gun is hardly necessary using SuperShrink since its name suggests exactly what the material does. Begin covering model components just as you would other iron-on fabrics—almost immediately very little effort will get you the feel of using this product. Go ahead and complete the covering job.
Aging and weathering the fabric
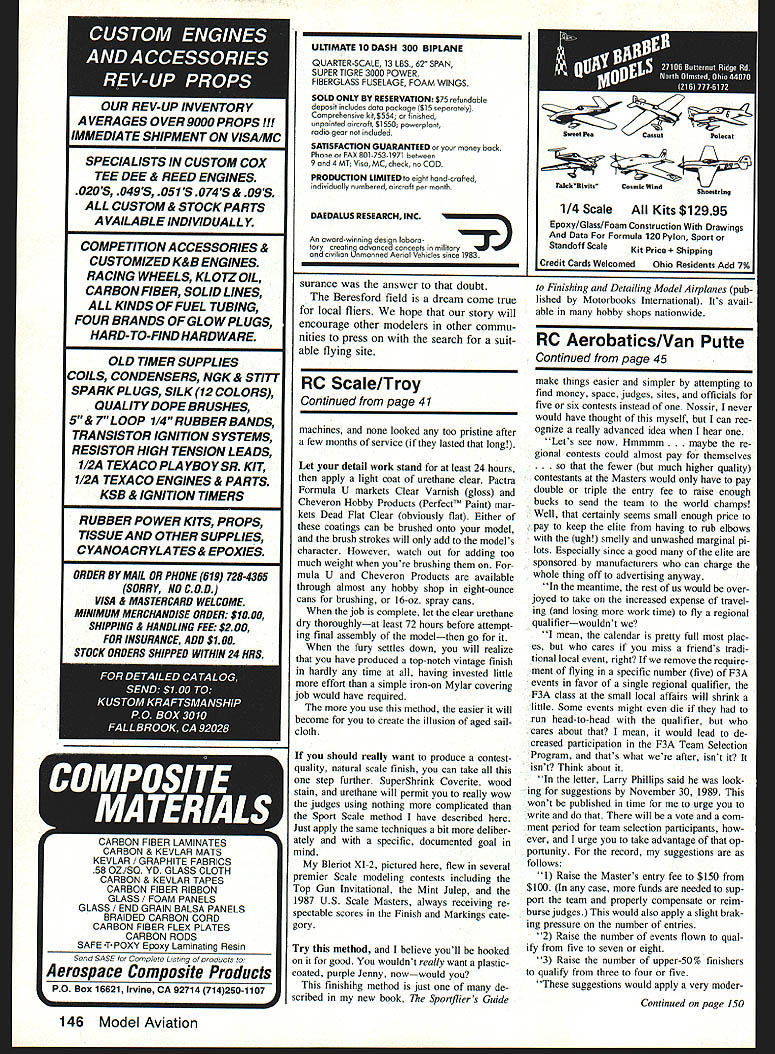
As mentioned earlier, vintage aircraft were covered with natural sailcloth, a slightly buff color. The longer aeroplanes were exposed to the elements the rattier they became; that wear gives them real character. Decide how aged you want the model to look, and remember that if the fabric is really ragged you should also proportionately age the natural wood and metal parts of the model.
A visit to your local hardware store should reward you with a wide selection of interior wood stains. Choose a few shades to suit the intended condition of the project: one to match the overall skin tone and others a few shades darker for highlighting.
Neatness does count. Get a 1-1/2 in. soft flat dope brush and begin brushing wood stain directly onto the SuperShrink skin of the lower surface and stabilizer. Let the stain stand a few minutes and wipe away with paper towels. What you'll have left is a pretty fair aged-fabric surface on the first try.
Examine results carefully to determine if the tone is correct. If you want deeper color, try leaving the stain on a minute or two longer. You can create interesting additional effects by wiping stain off unevenly in selected areas, adding darker or lighter highlights. As a special bonus to a quality stained finish you don't have to follow too many rules—it's almost sloppier to get an authentic model to begin to look right. Naturally, some care and order can distinguish one variety of mildewed fabric from another.
Continue staining, wiping, highlighting, and wiping some more until you're pleased with the appearance of the entire model. You may want to handle the model with paper towels as you work, being careful to avoid smearing the wiping patterns. You may also add personality by dabbing at the entire finish with a paper towel. Experimentation and imagination are your main ingredients.
Markings
When the stain dries, add whatever markings you desire. Water-soluble decals (not "stickies") work well over SuperShrink; if properly applied they will conform to the weave of the cloth and appear painted on. I suggest trying Major Decals.
If you prefer to paint markings, the job can be a lot of fun. Pay no attention to brush strokes in the markings—I'm rather certain that the original 1910–14 era aeroplanes were never painted perfectly. It also doesn't matter much if you get a bit of paint outside the outlines. Remember, early aeroplanes were pretty rustic machines, and none looked any too pristine after a few months of service (if they lasted that long).
Clearcoating and finishing
Let your detail work stand for at least 24 hours, then apply a light coat of urethane clear. Pactra Formula U makes a Clear Varnish (gloss); Chevron Hobby Products (Perfect Paint) markets Dead Flat Clear. Either of these coatings can be brushed onto your model—brush strokes will only add to the model's character. However, watch out for adding too much weight when brushing them on. Chevron products are available through most hobby shops in eight-ounce cans for brushing or 16-oz. spray cans.
When the job is complete, let the clear urethane dry thoroughly—at least 72 hours—before attempting final assembly of the model. When the flurry settles down, you will realize that you have produced a top-notch vintage finish in hardly any time at all, having invested little more effort than a simple iron-on Mylar covering job would have required.
The more you use this method, the easier it becomes to create the illusion of aged sailcloth.
Contest-quality finish
If you want a contest-quality, natural scale finish, take this one step further. SuperShrink Coverite, wood stain, and urethane will permit you to impress judges using nothing more complicated than the sport-scale method described here. Apply the same techniques more deliberately and with a specific, documented goal in mind.
My Bleriot XI-2 flew in several premier scale-modeling contests including the Top Gun Invitational, the Mint Julep, and the 1987 U.S. Scale Masters, always receiving respectable scores in the Finish and Markings category.
Final note
Try this method and you'll likely be hooked. You wouldn't really want a plastic-coated, purple Jenny, now—would you?
This finishing method is just one of many described in my book The Sportflier's Guide to Finishing and Detailing Model Airplanes (Motorbooks International). It's available in many hobby shops nationwide.
Transcribed from original scans by AI. Minor OCR errors may remain.

