
Radio Control: Scale
Jeff Foley
P.O. Box 58306 Raleigh, NC 27658
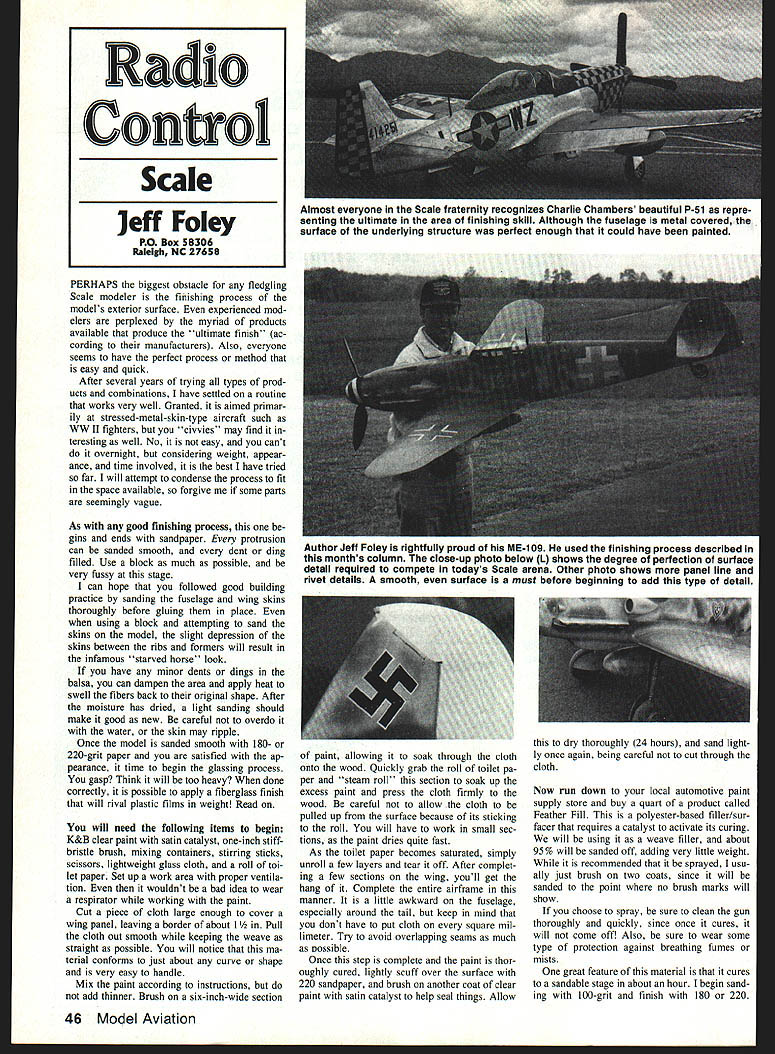
Perhaps the biggest obstacle for any fledgling scale modeler is the finishing process of the model's exterior surface. Even experienced modelers are perplexed by the myriad of products available that claim to produce the "ultimate finish." Also, everyone seems to have the perfect process or method that is easy and quick.
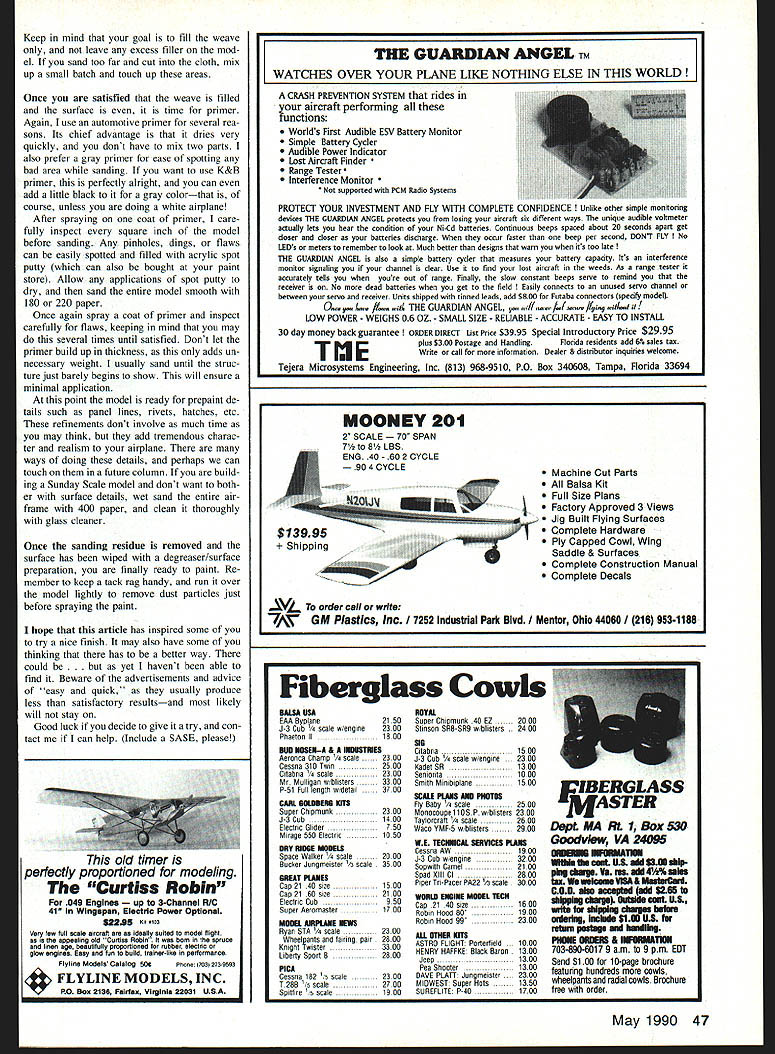
After several years of trying many products and combinations, I have settled on a routine that works very well. It is aimed primarily at stressed-metal-skin-type aircraft such as WWII fighters, but you civvies may find it interesting as well. No, it is not easy, and you can't do it overnight, but considering weight, appearance, and time involved, it is the best I have tried so far. I will condense the process to fit the space available, so forgive me if some parts are seemingly vague.
As with any good finishing process, this one begins and ends with sandpaper. Every protrusion can be sanded smooth, and every dent or ding filled. Use a block as much as possible, and be very fussy at this stage.
I hope you followed good building practice by sanding the fuselage and wing skins thoroughly before gluing them in place. Even when using a block and attempting to sand the skins on the model, the slight depression of the skins between the ribs and formers will result in the infamous "starved horse" look.
If you have minor dents or dings in the balsa, you can dampen the area and apply heat to swell the fibers back to their original shape. After the moisture has dried, a light sanding should make the area as new. Be careful not to overdo it with the water, or the skin may ripple.
Once the model is sanded smooth with 180- or 220-grit paper and you are satisfied with the appearance, it's time to begin the glassing process.
Materials
- K&B clear paint with satin catalyst
- One-inch stiff-bristle brush
- Mixing containers and stirring sticks
- Scissors
- Lightweight glass cloth
- Roll of toilet paper
- Proper ventilation and respirator (recommended)
Glassing process
- Cut a piece of cloth large enough to cover a wing panel, leaving about a 1/2 in. border. Pull the cloth out smooth while keeping the weave as straight as possible. The material conforms to curves and is easy to handle.
- Mix the clear paint according to instructions, but do not add thinner.
- Brush on a six-inch-wide section of paint, allowing it to soak through the cloth onto the wood.
- Quickly take the roll of toilet paper and "steam roll" this section to soak up excess paint and press the cloth firmly to the wood. Be careful not to pull the cloth up from the surface because it may stick to the roll. Work in small sections, as the paint dries quite fast.
- As the toilet paper becomes saturated, unroll a few sections and tear them off. After a few sections of wing you'll get the hang of it. Complete the entire airframe this way. It gets a little awkward on the fuselage, especially around the tail. Try to avoid overlapping seams as much as possible.
Once this step is complete and the paint is thoroughly cured, lightly scuff the surface with 220 sandpaper and brush on another coat of clear paint with satin catalyst to help seal things. Allow to dry thoroughly (24 hours), and sand lightly once again, being careful not to cut through the cloth.
Weave filling (Feather Fill)
- Buy a quart of Feather Fill (a polyester-based filler/surfacer that requires catalyst) from an automotive paint supply store.
- Use it as a weave filler; about 95% will be sanded off, adding very little weight.
- It is recommended to spray; if you brush it, apply two coats since it will be sanded to the point where no brush marks will show. Choose spray if you can, because once cured it will come off more cleanly.
- Wear protection against fumes or mists.
- Feather Fill cures to a sandable stage in about an hour. Begin sanding with 100-grit and finish with 180 or 220.
- Your goal is to fill the weave only, not leave excess filler on the model. If you sand too far and cut into the cloth, mix up a small batch and touch up those areas.
Priming and defect correction
- Once satisfied that the weave is filled and the surface is even, apply primer. I use an automotive primer because it dries quickly and you don't have to mix two parts. A gray primer is preferred to help spot bad areas while sanding. (If you use K&B primer, you can add a little black for gray—unless you're doing a white airplane.)
- Spray one coat of primer, then carefully inspect every square inch. Any pinholes, dings, or flaws can be filled with acrylic putty (available at paint stores). Allow spot putty to dry and then sand the entire model smooth with 180 or 220 paper.
- Spray another coat of primer and inspect again. Repeat as needed until satisfied. Don't let primer build up in thickness, as this only adds unnecessary weight. I usually sand until the structure just barely begins to show to ensure minimal application.
Prepaint details and final painting
- At this point, add prepaint details such as panel lines, rivets, hatches, etc. These refinements add tremendous character and realism. There are many ways to do these details—we may cover them in a future column.
- If you're building a "Sunday Scale" model and don't want surface details, wet sand the entire airframe with 400 paper and clean it thoroughly with glass cleaner.
- Remove sanding residue and wipe the surface with a degreaser/surface preparation. Keep a tack rag handy and run it over the model lightly to remove dust particles just before spraying the paint.
I hope this article has inspired some of you to try a nice finish. It may also have some of you thinking that there has to be a better way—there could be, but as yet I haven't found it. Beware of advertisements and advice promising "easy and quick," as they usually produce less-than-satisfactory results—and most likely will not stay on. Good luck if you decide to give it a try, and contact me if I can help (include a SASE, please!).
Jeff Foley P.O. Box 58306 Raleigh, NC 27658
Transcribed from original scans by AI. Minor OCR errors may remain.

