
Radio Control: Scale
Earl Aune 13165 N.W. Filbert St. Portland, OR 97229
Why build scale models?
What is so intriguing about building scale models? Many outsiders look on, see what they believe to be a toy, and have no appreciation for what we go through to recreate history.
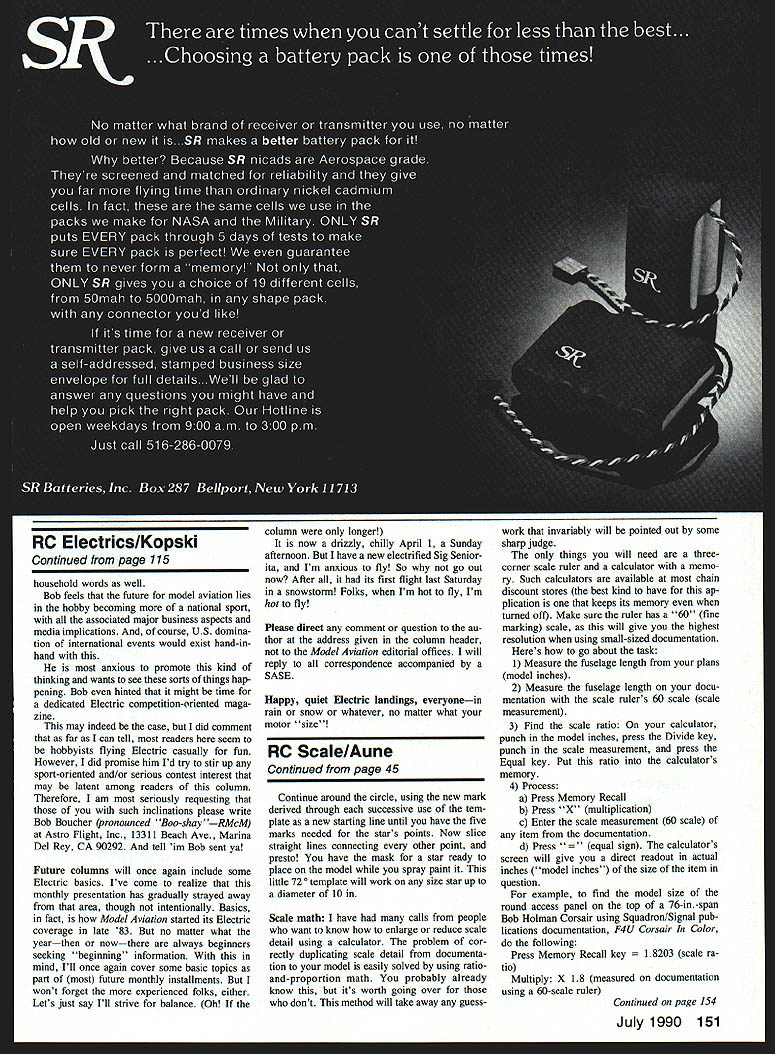
Flying scale models is an extremely unforgiving sport. All it takes is one little pilot or builder error, and months of hard work disassembles itself right before everyone's eyes. But the satisfaction you get is indescribable when you watch a scale creation you worked so hard on fly gracefully across the sky and come in for a perfect landing. It can only be experienced by those who obtain this appreciation—by those who build.
I have always held in awe those who can create such detail in a model that it becomes difficult to tell if it is full-size or a model. This acquired knowledge comes from many years of trial and error or experimentation, but we know that learning is a way of life, both challenging and fun. Besides, building scale models presents many opportunities for developing our problem-solving skills.
Panel lines and rivets
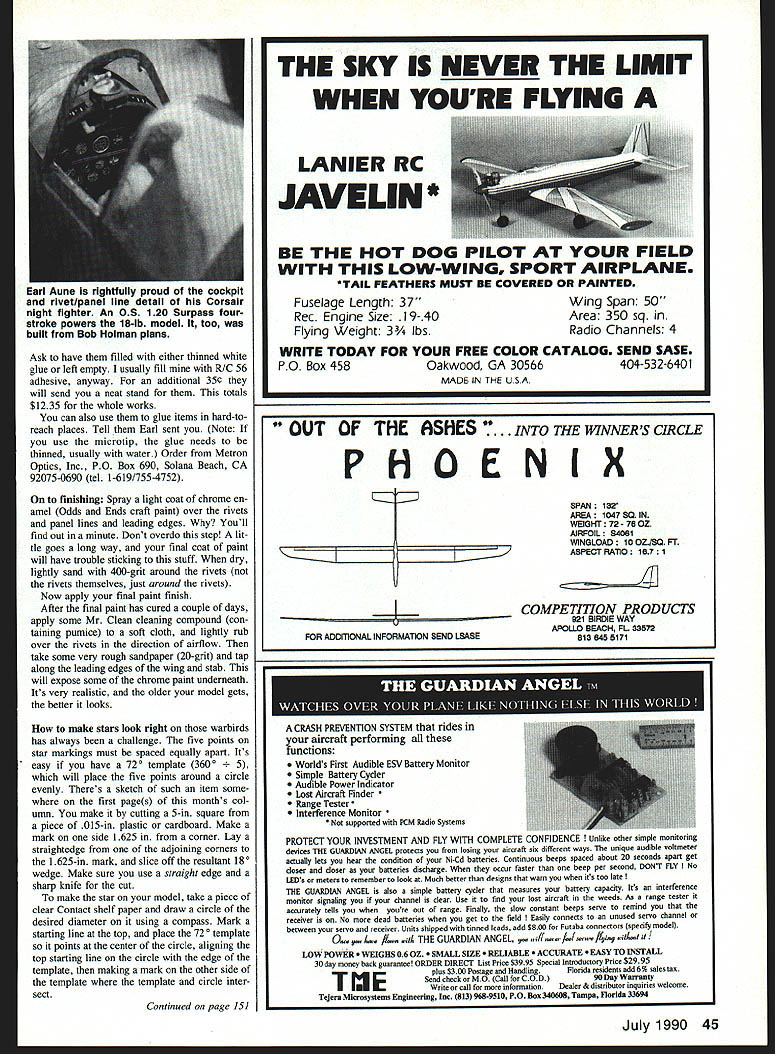
Panel lines and rivets are some of those small details that transform a model from "just" a model to something that draws a crowd. An automotive pinstripe tape made by 3M is 1/16" wide and works very well for simulating panel lines. If you need a smaller size tape, take 3M's 1/8" tape and split it down the middle with a sharp knife. Lay out the tape in proper position according to your three-views, and spray three or four heavy coats of PlastiCote #466 automotive gray primer right over the tape, allowing a couple of minutes between each coat. This primer is fuelproof, sands easily, and goes on thickly, since it has spot putty in it. After about 15 minutes, peel off the tape, and you're ready for rivets.
Adding rivet detail
Several methods have been used successfully to install "rivets." Scale rivets are usually made by depositing a small drop of glue on the model's surface. When it dries and is painted, it closely resembles a "real" rivet. Tools have ranged from toothpicks to hypodermic needles; however, they all had drawbacks, the chief one being the length of time to install each rivet.
I received an item in the mail that will make toothpicks a thing of the past. This item was intended for marking circuit boards and IC chips with ink, solder mask, resistive ink, and so on. It's like a fountain pen that has a reservoir and a needle tip. You just give it a little squeeze, and it forms a perfect glue drop. You can really go fast! These things come in two sizes, and you will need one of each: standard and microtip (0.013 in.). The price is $5.25 for the standard tip and $5.75 for the microtip (add a dollar for postage).
Order from: Metron Optics, Inc., P.O. Box 690, Solana Beach, CA 92075-0690; tel. 1-619-755-4752.
Finishing
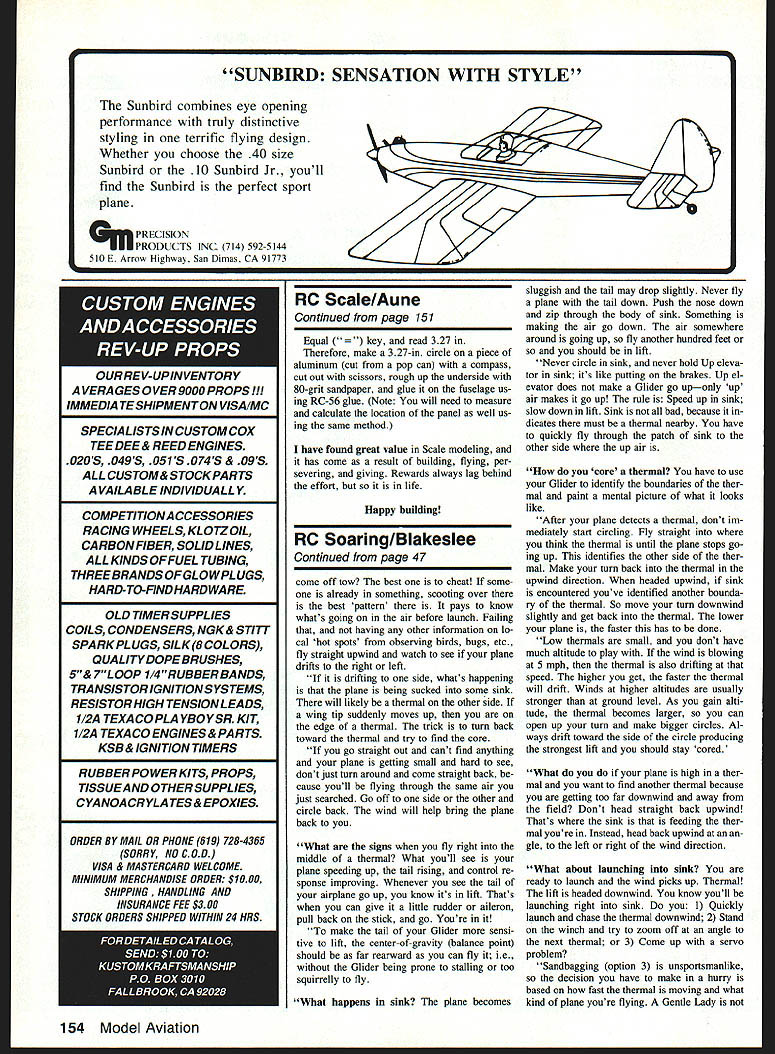
Spray a light coat of chrome enamel over rivets, panel lines, and leading edges. Don't overdo it—a little goes a long way. When the paint has dried, lightly sand with 400-grit around the rivets (just around the rivets). Now apply the final paint finish. After the final paint has cured a couple of days, apply some Mr. Clean cleaning compound containing pumice on a soft cloth and lightly rub over the rivets in the direction of airflow.
To simulate wear, take some very rough sandpaper (20-grit) and tap along the leading edges of the wing and stabilizer; this will expose some chrome paint underneath. It's very realistic; an older model gets a better look.
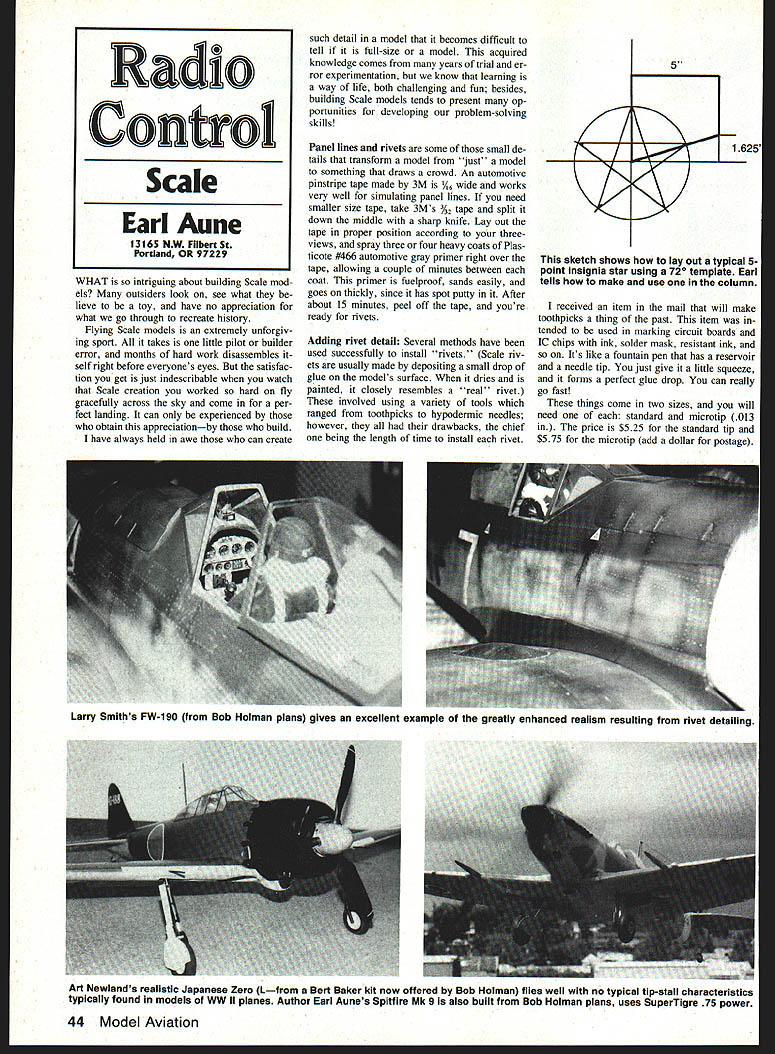
Making star markings
On warbirds it has always been a challenge to make five-point star markings spaced equally apart. It's easy if you have a 72° template; this will place five points around a circle evenly. To make the template:
- Cut a 5-in. square piece of .015-in. plastic or cardboard.
- Make a mark on one side 1.625 in. from the corner.
- Lay a straightedge adjoining corners and the 1.625-in. marks and slice off the resultant 36° wedge. Make sure to use a straightedge and a sharp knife.
To make a star for the model:
- Take a piece of clear contact shelf paper and draw a circle the desired diameter using a compass.
- Mark a starting line at the top, and place the 72° template so it points at the center of the circle.
- Mark the point where the template edge crosses the circle, rotate the template so that mark is on the starting line, and repeat until you have five marks around the circle.
- Connect the marks, cut out the star from the contact paper, and apply it to the model.
Scale math
I have had many calls from people who want to know how to enlarge or reduce scale detail using a calculator. The problem of correctly duplicating scale detail from documentation to your model is easily solved by using ratio-and-proportion math. This method will take away any guesswork that invariably will be pointed out by some sharp judge.
The only things you will need are a three-corner scale ruler and a calculator with a memory. Such calculators are available at most chain discount stores (the best kind to have for this application is one that keeps its memory even when turned off). Make sure the ruler has a "60" (fine marking) scale, as this will give you the highest resolution when using small-sized documentation. Here's how to go about the task:
- Measure the fuselage length from your plans (model inches).
- Measure the fuselage length on your documentation with the scale ruler's 60 scale (scale measurement).
- Find the scale ratio: On your calculator, punch in the model inches, press Divide, punch in the scale measurement, and press Equal. Put this ratio into the calculator's memory.
- Process any measurement you need to convert:
- Press Memory Recall.
- Press "×" (multiplication).
- Enter the scale measurement (60 scale) of the item from the documentation.
- Press "=" (equal sign).
The calculator's screen will give you a direct readout in actual inches ("model inches") of the size of the item in question.
For example: Using Squadron/Signal documentation (F4U Corsair in Color) for a 76-in. span Bob Holman Corsair, suppose the scale ratio (memory recall) is 1.8203 and the measured item on the documentation (60 scale) is 1.8. Then:
- Memory recall = 1.8203
- Multiply by 1.8 (measured on documentation)
- Result = 3.27 in.
Therefore, make a 3.27-in. circle on a piece of aluminum (cut from a pop can) with a compass, cut out with scissors, rough up the underside with 80-grit sandpaper, and glue it on the fuselage using RC-56 glue. (Note: You will need to measure and calculate the location of the panel as well using the same method.)
Conclusion
I have found great value in scale modeling, and it has come as a result of building, flying, preserving, and giving. Rewards always lag behind the effort, but so it is in life.
Happy building!
Transcribed from original scans by AI. Minor OCR errors may remain.

