
Radio Control
Scale
Jeff Foley 3705 Marlin Ct. Raleigh, NC 27604
Finishing
I recently described a finishing technique I have developed over the last few years. Because of the amazing response and the numerous questions regarding other aspects of finishing and detailing, I decided to expand on the subject a bit.
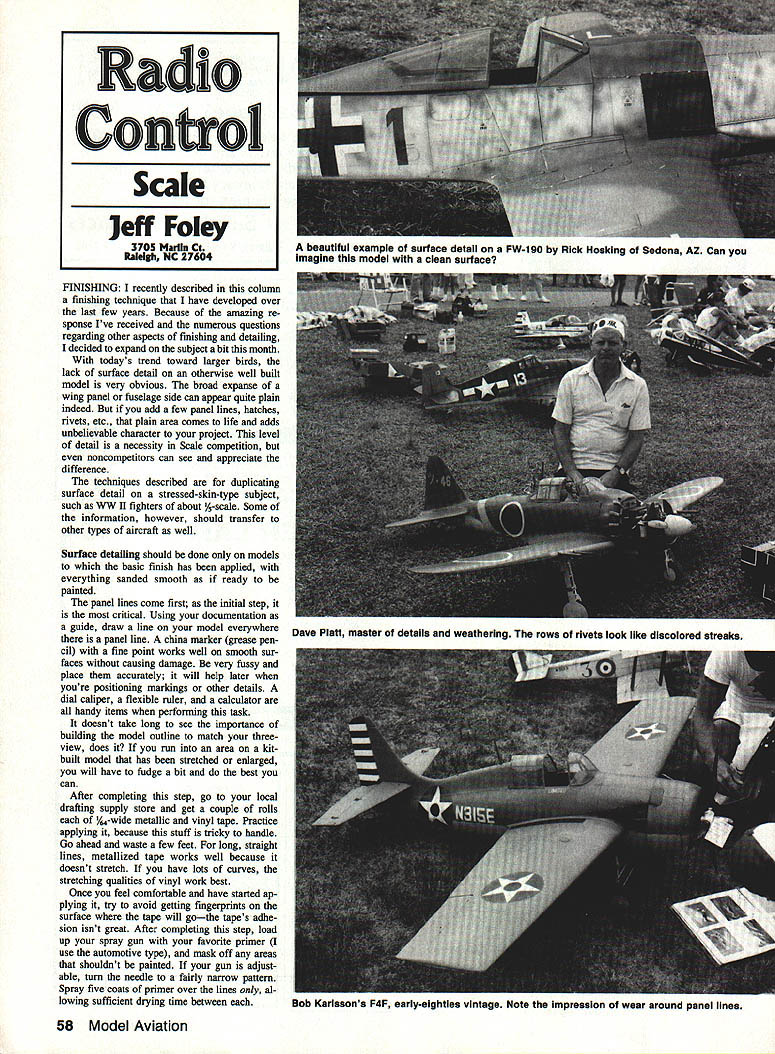
With today's trend toward larger birds, the lack of surface detail on an otherwise well-built model is very obvious. A broad expanse of wing panel or fuselage side can appear quite plain. Add a few panel lines, hatches, rivets, etc., and the plain area comes to life and adds unbelievable character to the project. This level of detail is a necessity in Scale competition, but even noncompetitors can see and appreciate the difference. The techniques described are aimed at duplicating surface detail on stressed-skin subjects (for example, WWII fighters at about 1/5-scale), but much of the information transfers to other aircraft types.
Surface detailing should be done only after the model's basic finish has been applied and everything has been sanded smooth, as if ready to be painted.
Panel lines
- The panel lines come first; this initial step is critical. Using your documentation as a guide, draw a line on the model everywhere there is a panel line. A china marker (grease pencil) with a fine point works well on smooth surfaces without causing damage.
- Be very fussy and place the lines accurately; accurate placement helps later when positioning markings or other details. A dial caliper, a flexible ruler, and a calculator are handy when performing this task.
- If you encounter an area on a kit-built model that has been stretched or enlarged, you will have to fudge a bit and do the best you can.
Taping and priming
- Visit a drafting supply store and get a couple of rolls each of 1/16- to 1/32-inch-wide metallic and vinyl tape. Practice applying it—this stuff is tricky to handle, so expect to waste a few feet.
- For long, straight lines use metallized tape because it doesn't stretch. For lots of curves use vinyl tape because it will conform better. Try to avoid getting fingerprints on the surface where the tape will go—the tape's adhesion isn't great and prints can transfer when tape is removed.
- Mask off any areas that shouldn't be painted, load your spray gun with an automotive-type primer, set the gun needle to a fairly narrow pattern, and spray about five coats of primer over the lines only, allowing sufficient drying time between coats.
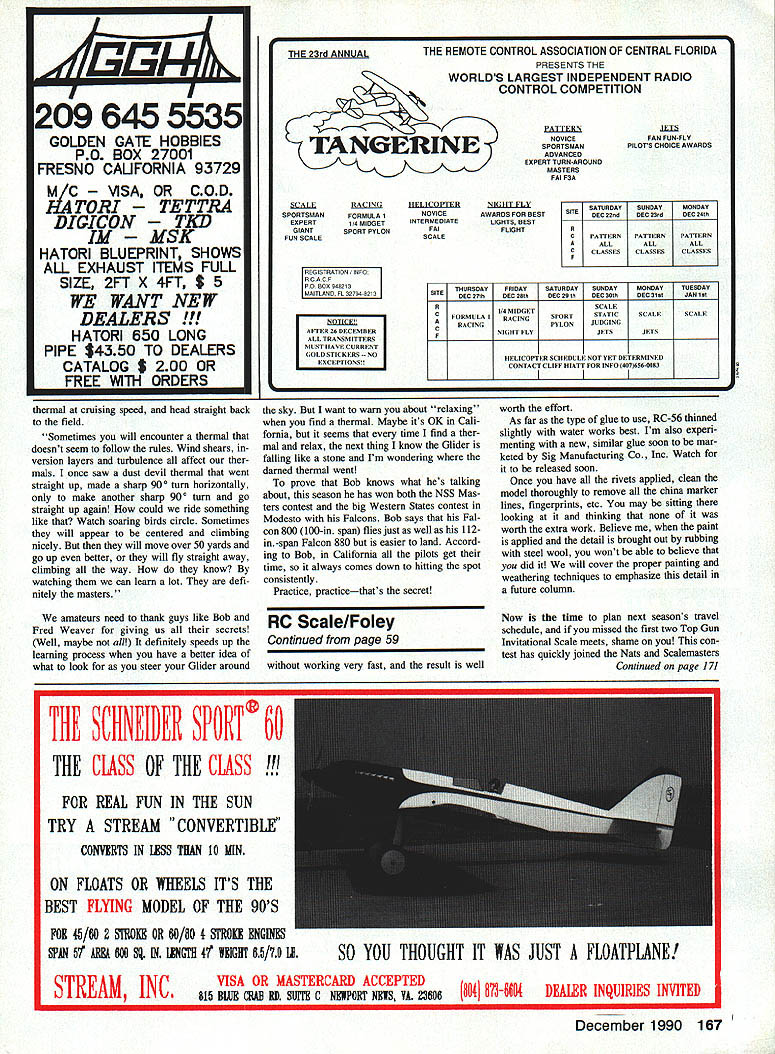
- When the primer is thoroughly dry, wet-sand with 400-grit paper and feather the primer between the panel lines. Pull off the tape after sanding and clean adhesive residue out of the resultant slot. Primer builds up at the tape edges, forming nice indented lines; those that don't look bold and prominent will usually show up well after paint is applied.
- To avoid buildup at lap joints you can put down a couple of layers of masking tape and feather-sand the primer up at the panel lines, but this is difficult and often not worth the extra effort. The drafting-tape method does a good job simulating lines for static judging distances.
Hatches, doors, inspection panels
- Refer to your documentation again to determine the size and location of hatches, doors, inspection panels, etc. There are several ways to simulate these items.
- The best method is to use a thin, soft piece of aluminum pliable enough to conform to gentle compound curves. Printer's plates are commonly used and are usually at least .007-inch thick; they must be attached with glue.
- Another option is 3M foil with a high lead-content pressure-sensitive adhesive (roughly .005-inch thick). It will go around compound curves to some degree—the lead makes it pliable but also heavier.
- Model Engineering sells .002-inch-thick foil with a permanent pressure-sensitive adhesive that works well and adds little weight.
- After selecting the material, cut the pieces to size and apply them to the model. Be precise with the location. If using pressure-sensitive foil, burnish all the edges thoroughly and clean the surface before application. Don't expect foil to hide surface flaws—they will show through.
Rivets and fasteners
- Applying rivets and other fasteners isn't difficult and the impact is tremendous. The hardest part is locating the fasteners properly.
- Use your documentation, calipers, and china marker to draw location lines for all rivet patterns. Many rivet rows are located near panel lines and hatches, so some work is already referenced.
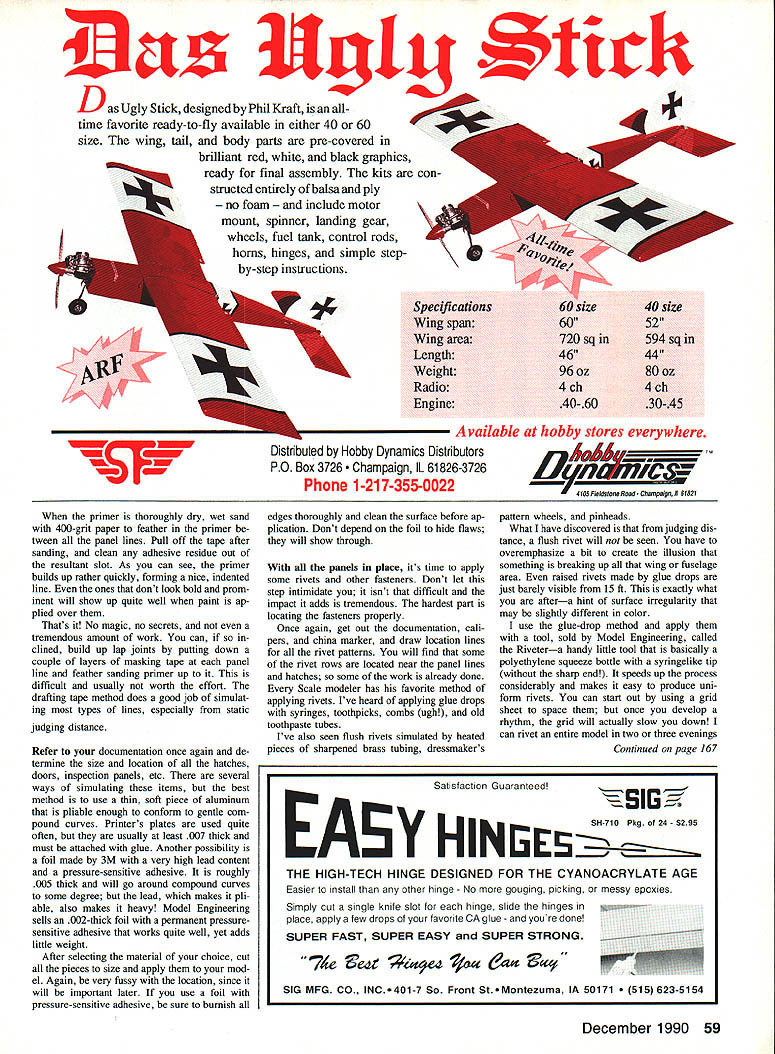
- Methods for simulating rivets vary: syringes, toothpicks, combs, dressmaker's pattern wheels, heated sharpened brass tubing, and pinheads have all been used. From judging distance, flush rivets often won't be seen—it's better to slightly overemphasize to create the illusion of surface irregularity. Raised rivets made by drops of glue are usually barely visible from about 15 ft, which is exactly the effect you want.
- I use the glue-dot method and apply rivets with a tool sold by Model Engineering called the Riveter—a polyethylene squeeze bottle with a syringe-like tip (without the sharp end). It speeds the process and produces uniform rivets. Using this method, an entire model can be riveted in two or three evenings once you develop a rhythm.
Addresses
- Model Engineering, 401 South Front Street, Raleigh, NC 27605
- Sig Manufacturing Co., Inc., P.O. Box 58306, Montezuma, IA 50171
Transcribed from original scans by AI. Minor OCR errors may remain.

