

Radio Control: Scale
Jeff Troy
200 S. Spring Garden St. Ambler, PA 19002
Useful Scale Accessories
I have a few useful scale accessories to share with you this month. Maybe one or more of them will be in tune with your current list of projects. After you've seen the goodies, I'll tell you about the unique covering job and the rest of the finishing touches on my Goldberg Anniversary J-3 Cub.
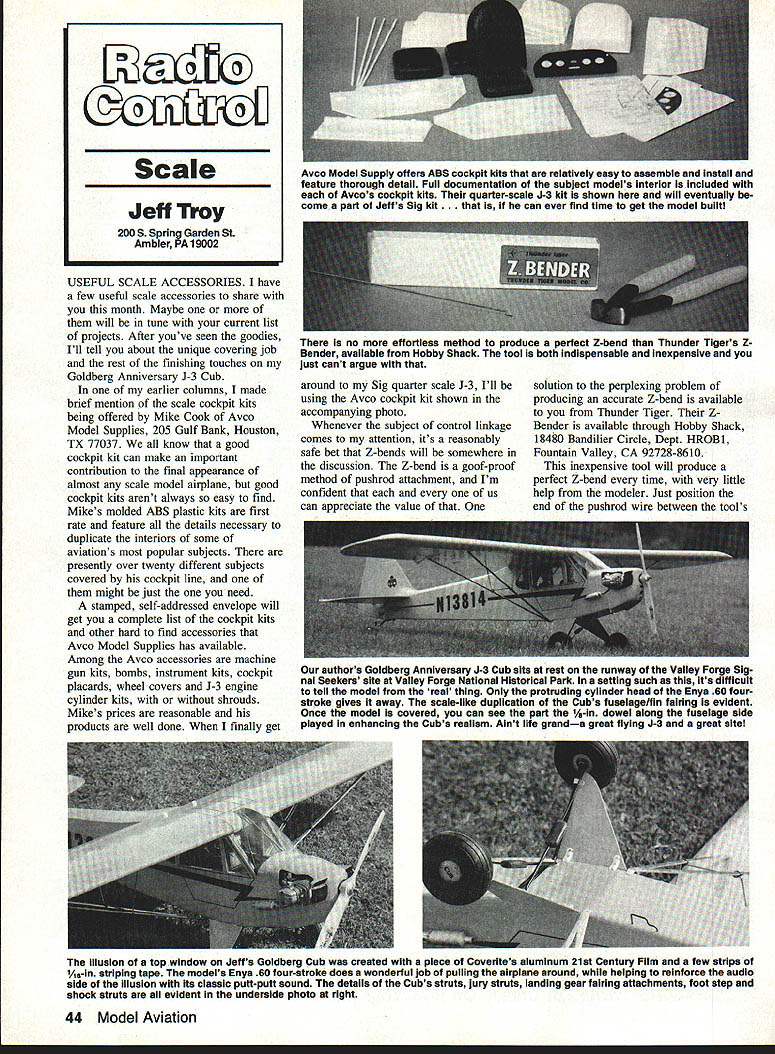
Avco Model Supplies — Cockpit kits and accessories
In one of my earlier columns I made brief mention of the scale cockpit kits being offered by Mike Cook of Avco Model Supplies, 205 Gulf Bank, Houston, TX 77037. A good cockpit kit can make an important contribution to the final appearance of almost any scale model airplane, but quality kits aren't always easy to find. Mike's molded ABS plastic kits are first-rate and feature all the details necessary to duplicate the interiors of some of aviation's most popular subjects. There are presently over twenty different subjects covered by his cockpit line; one of them might be just what you need. A stamped, self-addressed envelope will get you a complete list of the cockpit kits and other hard-to-find accessories that Avco Model Supplies has available.
Among the Avco accessories are:
- machine gun kits
- bombs
- instrument kits
- cockpit placards
- wheel covers
- J-3 engine cylinder kits (with or without shrouds)
Mike's prices are reasonable and his products are well done. When I finally get around to my Sig quarter-scale J-3, I'll be using the Avco cockpit kit shown in the accompanying photo.
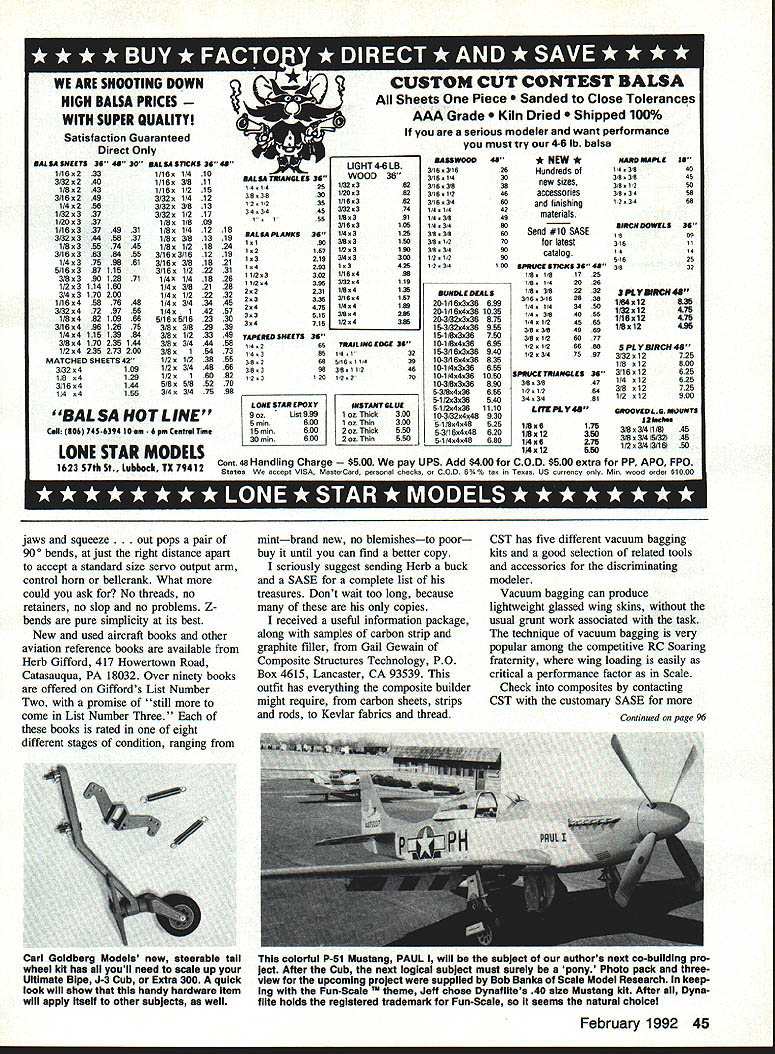
Z-bends and the Thunder Tiger Z-Bender
Whenever the subject of control linkage comes up, Z-bends are usually part of the discussion. The Z-bend is a goof-proof method of pushrod attachment, and its value is easily appreciated. One solution to producing an accurate Z-bend is available from Thunder Tiger. Their Z-Bender is available through Hobby Shack, 18480 Bandilier Circle, Dept. HROB1, Fountain Valley, CA 92728-8610. This inexpensive tool will produce a perfect Z-bend every time with very little help from the modeler.
Place the wire in the jaws and squeeze — out pops a pair of 90° bends at the correct distance apart to accept a standard servo output arm, control horn, or bellcrank. What more could you ask for? No threads, no retainers, no slop and no problems. Z-bends are simplicity at its best.
Books and reference — Herb Gifford
New and used aircraft and aviation reference books are available from Herb Gifford, 417 Howertown Road, Catasauqua, PA 18032. Over ninety books are offered on Gifford's List Number Two, with "still more to come in List Number Three." Each book is rated in one of eight condition categories, ranging from mint (brand new, no blemishes) to poor (buy it until you can find a better copy).
I suggest sending Herb a buck and a SASE for a complete list of his treasures. Don't wait too long — many of these are his only copies.
Composite supplies — Composite Structures Technology (CST)
I received a useful information package, along with samples of carbon strip and graphite filler, from Gail Gewain of Composite Structures Technology, P.O. Box 4615, Lancaster, CA 93539. CST has everything the composite builder might require: carbon sheets, strips and rods, Kevlar fabrics and thread. They offer five different vacuum bagging kits and a good selection of related tools and accessories for the discriminating modeler.
Vacuum bagging can produce lightweight glassed wing skins without the usual grunt work. The technique is popular among competitive R/C soaring pilots, where wing loading is as critical as in Scale. Check into composites by contacting CST with the customary SASE for more information. I was most impressed with their graphite filler — it is super strong when mixed with epoxy and very effective for reinforcing highly loaded areas like wing mounting tubes, firewalls, or retractable gear mounting plates.
Carl Goldberg Models — Scale tail wheel assemblies
Carl Goldberg Models, 4734 West Chicago Avenue, Chicago, IL 60651, has released an affordable pair of scale tail wheel assemblies. Each of their .40 and .60 size tail wheel units comes complete with springs, a dual rudder horn, a dual tiller, and a nicely molded wheel and tire. These assemblies will complement Goldberg's Ultimate and Extra 300 perfectly, and they will suit many other scale projects as well. Take a look next time you visit your local hobby dealer.
The Goldberg Cub
Well, my friends, I've finally finished my Goldberg Cub and I must admit to being very pleased with the final results of my subtle additions. When I left you last, my Cub was ready to be recovered — so that is where I'll pick up.
Several finishing methods can produce an accurate Cub finish, but none so effortlessly as using Coverite's new 21st Century Fabric in Cub yellow. One fifteen-foot roll was all it took to get the model done as you see it, with a good bit left over for repairs. The material is exceptionally easy to use, with excellent shrink qualities and tremendous strength. The only change in normal covering procedure you'll encounter is handling the fuselage top where it flows into the base of the model's vertical fin. This is the one area where most modelers feel Goldberg's Cub deviates a little from prototypical. Ready? Here goes.
Covering with 21st Century Fabric — step-by-step
Start with the wing:
- Cover the wing using two pieces of fabric — one for the bottom of the wing and the other for the top. Coverite's material is 27 inches wide, so there is enough width to handle both sides in a single span's length of covering.
- Cover the ailerons, stabilizer, elevators, and rudder next.
- Apply the fabric to the fuselage bottom in two pieces, then take a deep breath.
Fuselage fin fillet preparation:
- Temporarily fit the vertical fin into the fuselage with no glue, then place two pieces of 1/4-inch scrap over the stab saddle.
- Tack-glue triangle strip tail filler blocks to the two scraps, but glue them firmly to the fuselage.
- Remove the vertical fin and sand the filler blocks to the shape of the rear fuselage sides. You don't need to taper the tops of the blocks, only their sides — the covering will never touch the tops, so the extra wood can remain to enhance the integrity of the fin/fuse joint.
- Carefully remove the two quarter-inch shims.
Fuselage side covering:
- Cut an overly large piece of material for each side — each needs to cover one complete fuselage side, drape around to the fuselage top, and extend well over the top of the vertical fin.
- Iron one piece of 21st Century Fabric in place over the left side, making sure it is attached firmly to the rear of the fuselage at the stab saddle. Slit the covering along the stab cut-out, then iron the edges into the stab opening.
- Do not trim the covering at the top of the side. Fold it back over itself and apply the right side covering in the same fashion.
- The fuselage should now be completely covered except for the top, with the top material still hanging loosely from the upper side dowel.
Stab and fin installation:
- With the stab aligned correctly, glue the stabilizer into the rear of the fuselage using a slow-setting epoxy. Epoxy is preferable because smears can be cleaned with alcohol before it cures completely.
- Install the vertical fin over the stab and between the two triangular tail filler blocks.
- When cured, pull the left side covering up and attach it along the back of the vertical fin. Make absolutely certain the piece is firmly attached to the back of the fin and to the filler block over the stab. If the covering pulls away while you're working, you'll be unhappy.
- Make a few slits in the covering near the base of the fin to allow you to pull the covering around the top of the fuselage.
- Iron the covering down to the center dowel, working the material gradually around the curved forward edge of the fin. When the left piece is in place, trim the edge along the center dowel and fin, and repeat the procedure for the right piece. Let the second piece overlap the first by at least 3/8 inch.
A solid joining area is mandatory considering the stress this joint must endure. Applying the fin/fuselage fillet correctly is fairly difficult but well worth the effort. Be careful not to trim the covering too closely before you understand this portion of the method — once you cut, you can't back up! This relatively simple modification produces a scale-like fuselage/fin fillet and is perhaps the most noticeable improvement over the standard kit.
Trim, markings, and finishing details
- For custom numbers, Coverite Graphics Numbers in two-inch black are adhesive-backed and fuelproof, needing no clear sealer around their edges to remain in place for years.
- Goldberg's water-soluble Cub decals were used on the fin and work well. I believe Goldberg's decals are fuelproof up to 15% nitro with no clear overcoat. I fly with K&B 500 (12½%) and have had no trouble with CGM decals.
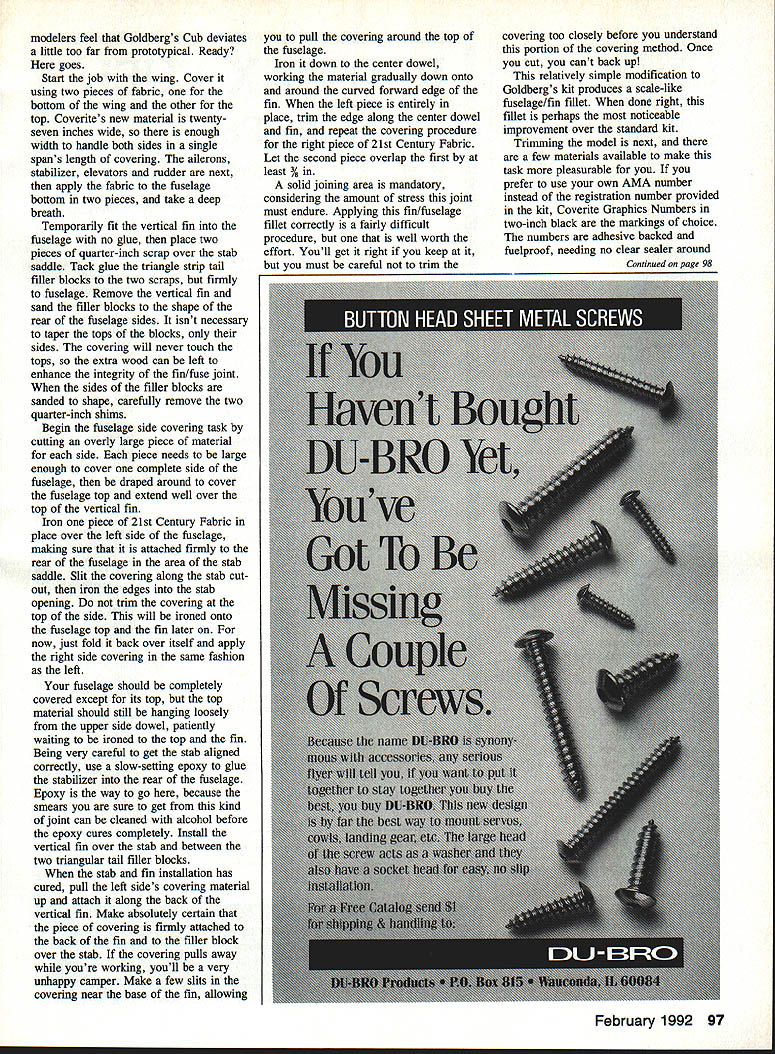
- The fuselage top window was effortless to duplicate: a simple rectangle cut from Coverite's aluminum 21st Century Film and outlined with 1/16-inch black striping tape. Striping tape was also used to give the illusion of the Cub's door outline.
- The illusion of a top window on my Goldberg Cub was created with a piece of aluminum 21st Century Film and a few strips of 1/16-inch striping tape. The model's Enya .60 four-stroke does a wonderful job of pulling the airplane while reinforcing the audio side of the illusion with its classic putt-putt sound.
The Piper J-3 lightning bolt
The Cub's lightning bolt has long been controversial, so I’ll share two items to remove guesswork.
- Official documentation: Contrary to popular opinion, the lightning bolt's actual characteristics can be documented. Bill Brenchley (101 Cohee Lane, Elkton, MD 21921) sent me the precise dimensions of the definitive J-3 lightning bolt as defined by Piper. If your Cub is meant to represent a factory-original J-3, this documentation lets you shape and place the bolt as Piper designed.
- Vinylwrite Custom Lettering: Art Morgen of Vinylwrite Custom Lettering, 16043 Tulsa Street, Granada Hills, CA 91344, can send adhesive-backed pairs of lightning bolts in the correct scale for your project. The markings are supplied on frisket-like masks that allow accurate positioning before applying to the fuselage. For a minimal fee and a SASE you can get these masks — they save measuring, masking, painting, and cussing. I used Vinylwrite's bolts on my Cub and was very pleased with the ease of application, appearance, and durability. I recommend them as the definitive lightning bolt for anyone's Goldberg J-3.
Note on competition: If you're modeling a specific full-scale airplane, AMA Scale rules require you to duplicate that full-scale airplane, warts and all. If the full-scale's bolt is incorrect, your model must duplicate the error.
Structural and hardware changes
- Wing struts: I replaced the Cub's basswood wing struts with four 3/16-inch K&S streamlined aluminum tubes, epoxied together at the fuselage juncture and fitted with the nylon hold-down brackets supplied in Goldberg's kit. The hold-down fittings press-fit into the tubing; fill the tube ends (one at a time) with epoxy, press the fittings in, and use pliers with smooth jaws to squeeze the very ends of the tubes tight against the brackets. Stand each strut on end as the epoxy cures to ensure good flow.
- Jury struts: Bent from 7/32 music wire and attached to the struts with heavy thread and a bit of Zap CA. The slightly overlong ends insert into 3/32 holes in the bottom of the wing. Keep the extra length to 1/16 inch so they don't pop out or poke through the top of the wing.
- Landing gear shock struts: Made of telescoping brass tubing per the kit directions. Landing gear fairings attached per the kit, but attachment to the gear legs was done with 5/32-inch nylon landing gear clamps with one end trimmed off each clamp — this looks less obvious than the rubber bands suggested by the kit.
- Foot step: Fashioned from 1/8-inch music wire and glued into two holes drilled in the fuselage after covering. A backup block was glued inside the fuselage for additional gluing area.
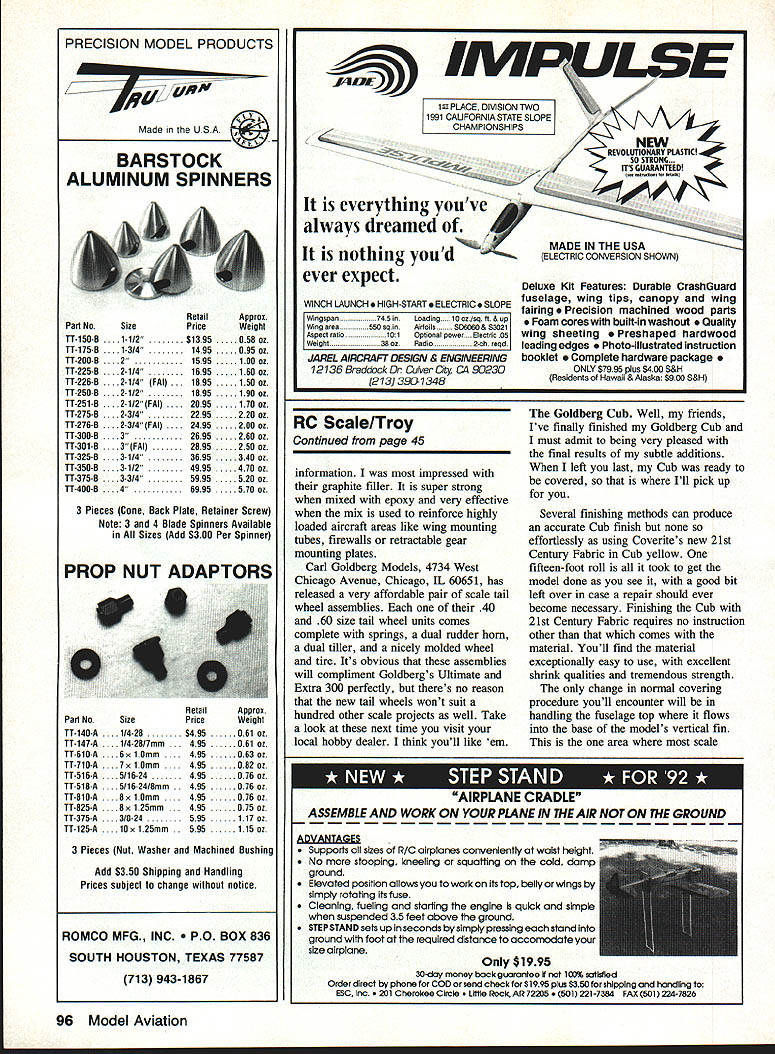
Powerplant and operating notes
My Cub uses an Enya .60 four-stroke. I'm a firm believer in high-quality fuel's ability to ward off perceived problems with four-stroke engines. They add to the scale realism with their throaty putt-putt sound; just don't abuse them. I use castor oil on 12½% nitro and don't tweak for those last two rpm. If you need more power, consider a two-stroke, a larger four-stroke, or a different model that better matches your power needs.
Other notes and requests
I would like to hear a few more of your suggestions for low F.E.D.F. (Emotional Debt Factor), fun-type scale models you'd like to see covered here. This Goldberg J-3 Anniversary series has been well received, so I will continue to present models that I believe will interest most readers. Let me know what you'd like to see!
Next project: Dynaflite Fun-Scale P-51 Mustang
Our next joint building project will be Dynaflite's Fun-Scale™ P-51 Mustang. Next to the Cub, the "pony" is probably the most popular aircraft of all time, and Mark Smith's Dynaflite design is a great airplane for making the everyday builder look like a pro — on the bench and in the air.
Did you know "Fun-Scale" is a registered trademark of Dynaflite? That is one reason I chose their Mustang. Dynaflite recognized the needs of the everyday modeler: those who like scale airplanes but don't want high-commitment builds. Dynaflite's series is designed expressly for these modelers.
Dynaflite has seven Fun-Scale kits available; their .40-size Mustang was the one I chose to cover here. A telephone call to Bob Banka's Scale Model Research (see Model Aviation's advertising directory for contact information) got me a great 8½ x 11-inch three-view and an excellent photo pack of "PAUL I." PAUL I's color scheme lends itself well to full-covering jobs and will make the perfect subject for useful instructionals.
Scale Model Research's photo packs are available for fifty-seven different Mustangs and Bob has excellent three-views to complement five of them — one-stop documentation shopping.
So, round up your Mustang kits, order your photo packs and three-views, check your supplies for glue and fresh razor blades, and get ready for a visit to World War Two — Fun-Scale style. Who says you have to be a pro to fly a Mustang? Dynaflite has tamed that pony; all you have to do is ride it!
Til next time, build straight, fly safely!
Transcribed from original scans by AI. Minor OCR errors may remain.

