
RADIO CONTROL SCALE
Jeff Troy, 200 S. Spring Street, Ambler, PA 19002
As this is being written, final arrangements are being made to attend the 1994 International Modelers' Show (IMS) in Pasadena, California. California business trips are invariably a blast, and it's always a pleasure to say hello to the many Pacific Coast modelers I haven't yet had the pleasure to meet one-on-one.
I'll have photos and show news for you following the IMS, but in the meantime, I had promised to tell you more about the exciting products at the November 1993 Radio Control Hobby and Trade Association (RCHTA) Show in Chicago.
Industry News
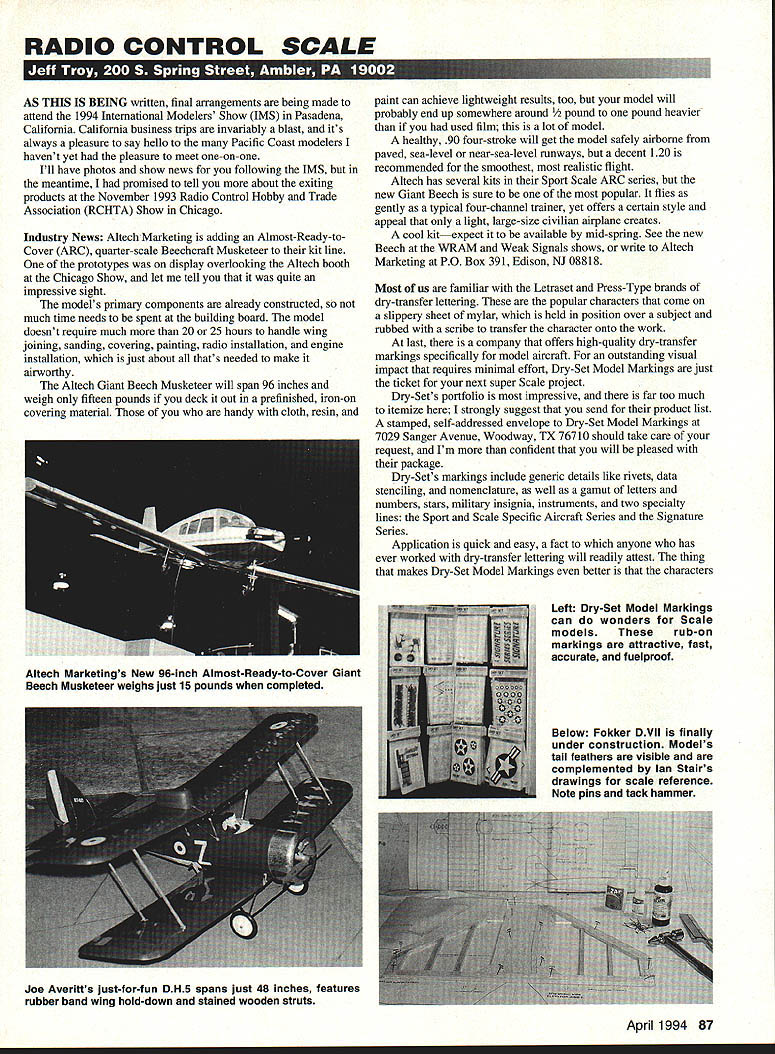
Altech Marketing is adding an Almost-Ready-to-Cover (ARC), quarter-scale Beechcraft Musketeer to their kit line. One of the prototypes was on display overlooking the Altech booth at the Chicago Show, and let me tell you that it was quite an impressive sight.
The model's primary components are already constructed, so not much time needs to be spent at the building board. The model doesn't require much more than 20 or 25 hours to handle wing joining, sanding, covering, painting, radio installation, and engine installation, which is just about all that's needed to make it airworthy.
The Altech Giant Beech Musketeer will span 96 inches and weigh only fifteen pounds if you deck it out in a prefinished, iron-on covering material. Those of you who are handy with cloth, resin, and paint can achieve lightweight results, too, but your model will probably end up somewhere around 1/2 pound to one pound heavier than if you had used film; this is a lot of model.
A healthy .90 four-stroke will get the model safely airborne from paved, sea-level or near-sea-level runways, but a decent 1.20 is recommended for the smoothest, most realistic flight.
Altech has several kits in their Sport Scale ARC series, but the new Giant Beech is sure to be one of the most popular. It flies as gently as a typical four-channel trainer, yet offers a certain style and appeal that only a light, large-size civilian airplane creates. A cool kit — expect it to be available by mid-spring. See the new Beech at the WRAM and Weak Signals shows, or write to Altech Marketing at P.O. Box 391, Edison, NJ 08818.
Most of us are familiar with the Letraset and Press-Type brands of dry-transfer lettering. These are the popular characters that come on a slippery sheet of mylar, which is held in position over a subject and rubbed with a scribe to transfer the character onto the work.
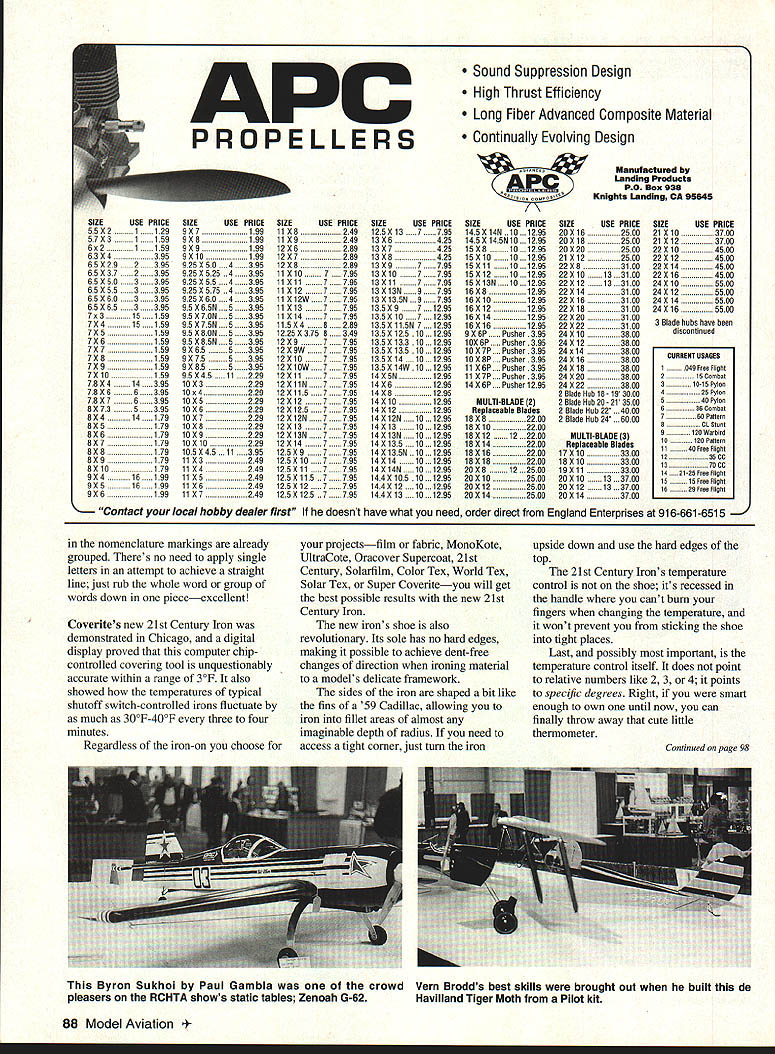
At last, there is a company that offers high-quality dry-transfer markings specifically for model aircraft. For an outstanding visual impact that requires minimal effort, Dry-Set Model Markings are just the ticket for your next Super Scale project.
Dry-Set's portfolio is most impressive, and there is far too much to itemize here; I strongly suggest that you send for their product list. A stamped, self-addressed envelope to Dry-Set Model Markings at 7029 Sanger Avenue, Woodway, TX 76710 should take care of your request, and I'm more than confident that you will be pleased with their package.
Dry-Set's markings include generic details like rivets, data stenciling, and nomenclature, as well as a gamut of letters and numbers, stars, military insignia, instruments, and two specialty lines: the Sport and Scale Specific Aircraft Series and the Signature Series.
Application is quick and easy, a fact to which anyone who has ever worked with dry-transfer lettering will readily attest. The thing that makes Dry-Set Model Markings even better is that the characters in the nomenclature markings are already grouped. There's no need to apply single letters in an attempt to achieve a straight line; just rub the whole word or group of words down in one piece—excellent!
Coverite's new 21st Century Iron was demonstrated in Chicago, and a digital display proved that this computer chip-controlled covering tool is unquestionably accurate within a range of 3°F. It also showed how the temperatures of typical shutoff switch-controlled irons fluctuate by as much as 30°F–40°F every three to four minutes.
Regardless of the iron-on you choose for your projects—film or fabric, MonoKote, UltraCote, Oracover Supercoat, 21st Century, Solarfilm, Color Tex, World Tex, Solar Tex, or Super Coverite—you will get the best possible results with the new 21st Century Iron.
The new iron's shoe is also revolutionary. Its sole has no hard edges, making it possible to achieve dent-free changes of direction when ironing material to a model's delicate framework.
The sides of the iron are shaped a bit like the fins of a '59 Cadillac, allowing you to iron into fillet areas of almost any imaginable depth of radius. If you need to access a tight corner, just turn the iron upside down and use the hard edges of the top.
The 21st Century Iron's temperature control is not on the shoe; it's recessed in the handle where you can't burn your fingers when changing the temperature, and it won't prevent you from sticking the shoe into tight places.
Last, and possibly most important, is the temperature control itself. It does not point to relative numbers like 2, 3, or 4; it points to specific degrees. Want 250°F, 350°F, or 450°F? Easy. Just rotate the dial to the temperature you need, then wait for the iron's lighted Temperature Processing Indicator (TPI) to pulse, and you're in business. This isn't just another iron, no, my friends, it's a covering tool.
Pick up a friend's 21st Century Iron, feel its light weight and fantastic balance, and judge its performance for yourself. For more information, send a stamped, self-addressed envelope to Coverite at 420 Babylon Road, Horsham, PA 19044.
Do you have your 1994 AMA license? Sure you do, but have you indicated to the Academy your need for the new AMA rule book? Look carefully at the form that held your 1994 AMA membership card in its mailing envelope; it contains an AMA rule book request form.
All you have to do is return the form and you'll be on the list to receive this amazing publication. No matter what your competitive aeromodeling interest, the rules and judging guides are detailed for you in black and white.
Even if you have no intention of competing in the Scale arena, it will be quite useful for you to know how the game is played, and how you might chalk up against modelers who appreciate the excitement and the educational aspects of competitive Scale modeling.
Get the book, buds. It answers many of your specific "why should I?" and "how should I?" questions far more accurately than you might think. If you like Scale modeling, you'll be sold — read every chapter on Scale—even those for soaring, helicopters and control line. You'd be surprised at what you learn from even a single scan of all the fabulous information in the AMA rule book's pages.
Docu-Search Requests
- Jason Swartz (3623 E. Orcas Drive, Clinton, WA 98236) is in need of plans, photos, three-views, and anything else you can conjure up for the Fairchild C-119 Flying Boxcar. He intends to build an IMAC-acceptable model, so it would be wonderful if there is a large-scale plan available.
- J.J. Ramjet (730 Badger Drive NE, Palm Bay, FL 32905) would like photos, article reprints, pictures, or even plastic kits of the Westland Wyvern. He would be happy to receive information on this airplane, especially one of the "minutely detailed" variety.
- Tom Kozel (2994 Colvin Boulevard, Tonawanda, NY 14150) needs a lot of help (really!), even with his modeling projects. Tom has taken an interest in crafting a Curtiss Junior, but he is not thrilled with the "done-to-death" silver wings on the blue fuselage. Curtiss Juniors powered by the Szekely three-cylinder engine — the right airplane for Tom — were found mostly in those traditional silver and blue Curtiss colors, but Tom is certain that somebody, somewhere, must have painted his full-scale airplane in a somewhat more creative scheme. If you know of such an airplane, please share your information with Tom.
- Ross J. Summers (13515 Reid Circle, Ft. Washington, MD 20744) is seeking color documentation on the Rankin Collegiate. Ross writes:
"According to page 493 of Jane's All the World's Aircraft 1987-88, Joe Rankin obtained the type certificate, manufacturing drawings, and rights to the Collegiate sometime in 1986 or 1987. The plane shown in the black and white photo in Jane's appears to be white or cream, with perhaps red or black trim. If I must, I can finish my Collegiate in Porterfield red, but I'd prefer to be different. Any help you can provide will be greatly appreciated."
Well, there you are, guys; right from the man who needs the goods. Lend a hand, okay? Joe Rankin, if you read this, try dropping Ross Summers a line. He could use your help.
Keep the Docu-Search requests coming, my friends. It's a pleasure to be of service to you. Nothing more than a simple postcard to me with your name, address, and Docu-Search request is necessary to get help from this column.
However, those of you who send a stamped, self-addressed envelope along with your request will receive a short note from me, indicating which issue of Model Aviation your Docu-Search request has been submitted for publication.
Don't forget that several commercial companies specialize in documentation for your projects. They can often do a very professional and far more expedient job of handling your documentation needs.
Bob Holman Plans, Scale Model Research, Scale Plans and Photo Services, World War One Aero, Skyways, and NASA (National Association of Scale Aeromodellers), just to name a few, offer excellent publications listing hundreds of airplanes for which photos, plans, three-views, or other items of interest are available.
Don't give up hope if you haven't contacted these people. They should not be a last resort, but your first step. These services are listed toward the back of Model Aviation in the Advertisers Index.
Modelers' Projects
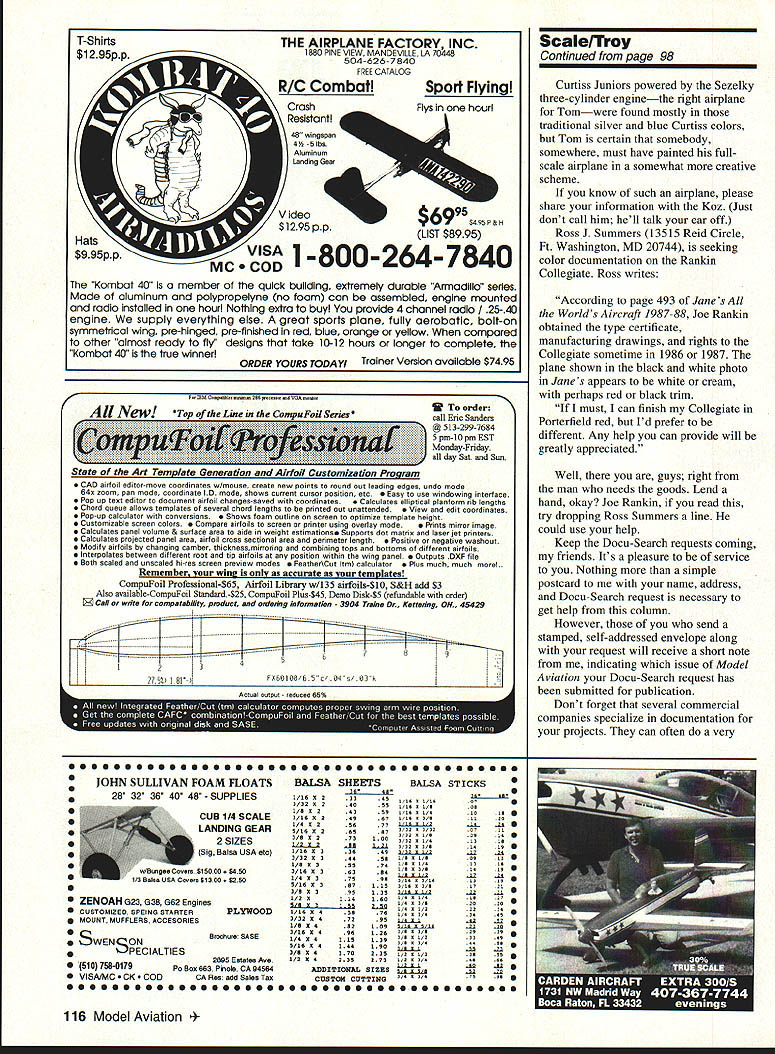
Miami Beach, Florida's Joe Averitt sent the attached photo of his de Havilland D.H.5. Joe's model is not the largest we've seen; it only has a 48-inch wing and flies on an O.S. .40 two-stroke. Who says you have to spend a fortune to enjoy fun-level Scale modeling?
Joe spun this particular model from an old S.E.5a plan set, and made the changes he felt necessary to produce a reasonably convincing de Havilland aircraft. He classifies the model as a Sport Scale, stand-off (20 feet), but I'd like to reclassify it as creative enthusiasm that's found a comfortable place to release itself. Nice job, Joe.
Byron Originals produced an excellent SU-M26, as evidenced by the Paul Gambla model seen at the Chicago RCHTA Show last year. Paul came to the show from Orland Park, Illinois, and his new M26 Sukhoi features a Zenoah G-62 for power and an Airtronics XL radio system. The finished model weighs right in the neighborhood of 24 pounds and it required approximately six months of Paul's time to complete. The effort was a fruitful one; the model looks great.
I wasn't able to collect too much information on the fine de Havilland Tiger Moth I encountered while cruising the Chicago static tables, but I wanted to include the photo here, just the same.
Vern Brodd built this model from a 1/4-scale Pilot kit. He keeps it airborne with a Futaba radio and a Maloney 1.25 with a modified muffler. That's it for the available details, but the model has a way of saying all it needs to without my help, don't you think?
If you plan to display one of your creations at a modeling show, why not consider making available a reasonable amount of information concerning the model? It isn't necessary to print your life story — a simple binder with a sheet of paper explaining the finishing method, engine and radio selected, and such optional features as flaps, retracts, and bomb releases would be of interest to onlookers, or readers, if the model is seen and photographed by magazine columnists.
What kind of construction does your model employ? Balsa? Plywood? Composite? Did you build it from plans or is it truly a scratch-built, where you drew your own plans? Readers are interested, so let us know.
Build-Along Modeling Tips
These modeling lessons are intended for the many non-Scale and novice modelers reading along who would like to expand their abilities and learn some of the more traditional modeling techniques.
Before the first two pieces of your model are cut or glued, make absolutely certain that your work surface is flat — and I mean flat. Warped benches create warped models, and warped models are bad models. I always avoid cork surfaces, because it's nearly impossible to pin parts down without putting unequal pressure on some of the parts. Unequal pressure causes poor joints that don't lay flat when removed from the bench.
I build over a solid-core hardwood door, and use a small tack-hammer to drive my T-pins into the wood. A bit annoying at times, true, but my models are straight.
Tape your plan to the bench and cover the plan, or at least the working section of your plan, with waxed paper. I use the Cut-Rite variety, available at the local grocery store.
Many designers recommend using the backing sheets from film coverings. They work, but I find that CyA can form puddles and stick to most of these materials. Of the many types of plan-protection I've tried (and I've not tried them all), waxed paper is my favorite. If you prefer backing sheets, go for it, because this is one hobby where there are always more than twenty ways to get to the same place. (If anyone ever tries to tell you that there is only one way to do something, graciously say "thank you," and keep on walking.)
Cutting sticks accurately is not the problem it may appear to be. If you cut the long sticks first, you can always use them for shorter sticks if you make a mistake. Use a razor saw to cut sticks slightly oversize. I use X-Acto's #239 fine-tooth blade saw. A handle is not really necessary, but if you like, X-Acto's #5 and #6 do very well with this saw blade.
When the stick is cut, bring it to an exact fit with a sanding block. I use ADC 11-inch Tee-Bar sanders and their Ruff-Stuff adhesive-backed sandpaper sheets in 100, 180, and 280 grits. Each sheet of Ruff-Stuff can be cut to four strips for the sander, and you'll have a thin strip left over to which scrap sticks can be attached for reaching hard-to-get places.
To get the D.VII done, purchase four sheets of 100, two of 180, and one sheet of 280. You will also enjoy having an ADC Mini-Sander on hand. This is a yellow, plastic, foam-backed block that uses ADC Mini-Sander Strips. Purchase one of the ADC assortment packs of wet-or-dry, black-in-color sanding strips made specifically for their Mini-Sander.
ADC and X-Acto products are available at almost all local hobby shops, but remember that there are many other products that can capably handle cutting and sanding tasks. Purchase what will suit your style, and don't be afraid to follow the advice of your dealer or your friends — then develop your own opinion.
An easy way to sand a perfect 90° end is to lay the part in place over the plan and mark the final angle directly on the part. Next, remove the part from the plan and hang the end to be trimmed over the edge of your workbench until the marks line up with the bench's edge.
Start sanding the part's end with the Tee-Bar until you can feel the Tee-Bar seat against the edge of the bench and guide you as you sand. Keep even pressure on the part to avoid rounding the corner. Flat ends make for good joints. Keep it from shifting position, and keep trying to get the Tee-Bar flat to the bench's edge. Stop to check your progress often. Compare the part to the plan and check its fit with the other pieces in the structure. Take a little off, check the fit. Take a little more and check the fit again.
When the Tee-Bar is flush to the side of the workbench, your part will have a perfect 90° end. Try this, and in no time you'll be producing quality joints as if you'd been modeling for years. Personal technique is fun to develop.
I hope you'll trust me when I tell you that there's no such thing as a "hard" model to build; some are just more time-consuming than others and, fortunately, this build-along Fokker is of the friendlier variety.
As parts are cut and sanded to fit, they should be glued in place over the plan, and protected by waxed paper or some other film.
Use thin-viscosity CyA glue (I use Pacer's red-label Zap) for balsa-to-balsa joints and medium viscosity (I use Pacer's green-label Zap-A-Gap) for any other wood.
If a joint involves any other wood in combination with balsa, medium viscosity is generally my choice. Carl Goldberg's medium Super Jet, Satellite City's Hot Stuff and Hot Stuff Super-T, and Hobbico's Bullet CyA's all work very well, and you might prefer one of these. Bob Smith, Global Hobby, and a host of other manufacturers produce quality adhesives and related products.
As parts are joined, pin them in place very carefully. Use your adhesives properly, applying medium CyA to parts before joining them and applying thin CyA to the joints of parts after they are pinned in position.
Don't use so much glue that the part cannot rest dead flat on the bench, and be sure to use T-pins for all pinning chores. I've seen too many dressmaker pins (the ones with the colored, curlicued plastic balls on their heads) split the parts under pressure, causing the end of the pin to puncture a part. Map pins are okay, but their shanks are often too short for modeling work. A good variety of T-pins can be found at the local hobby shop. Check 'em out.
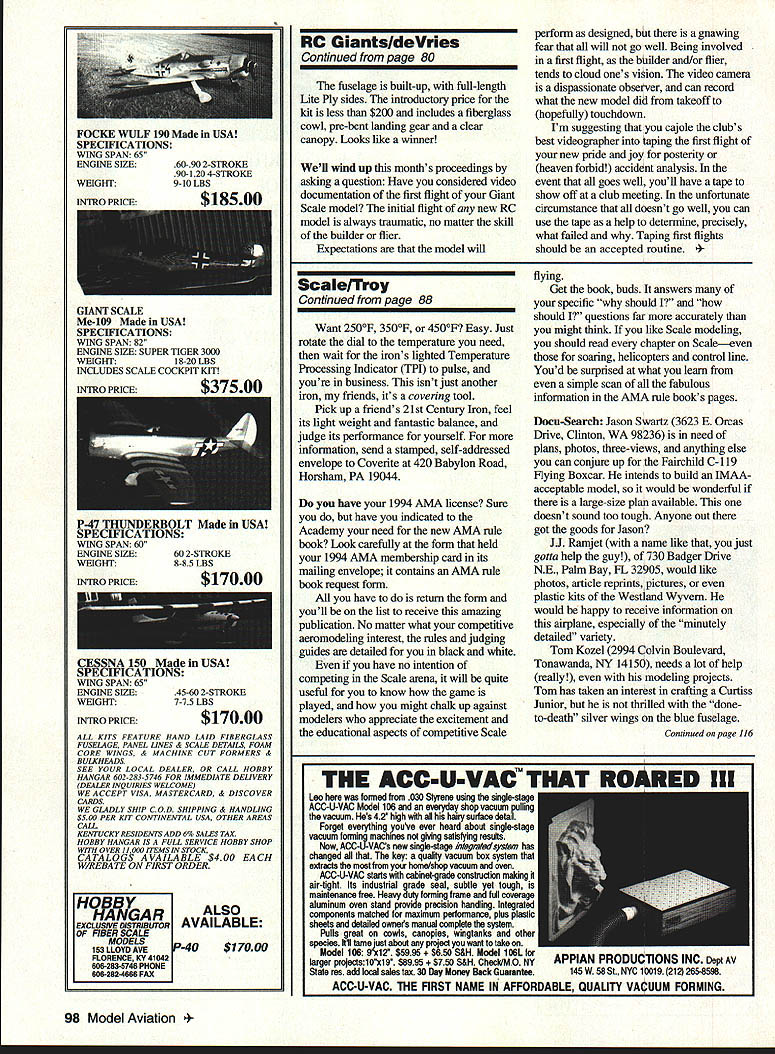
Fokker D.VII Build-Along
Yes, I'm finally putting this thing together. I actually opened the kit box, put my start drawings at the head of the workbench over the plan, got my CyA, razor tools, sandpaper, and hacked wood! Ah, what a feeling. There's nothing like balsa dust in the morning... (oops, wrong movie!)
The quality of the parts is first-class. You will find that this model is a real bargain. I started construction with the tail feathers:
The horizontal stabilizer is framed with 1/8 x 3/8 balsa sticks, cut and sanded to shape, then glued in place over the plan.
The stabilizer ribs are cut and sanded from 1/16-inch-square balsa. Pay particular attention to the slot in the stabilizer's tips area to accept the tips shown in the Uravitch version photos. The tips are blunt, conforming to the full-scale stabilizer's planform.
You should also know that the 1/4-inch center piece (that is to be laminated from two pieces of 1/8 x 4 balsa), should be from one of the two 1/8 x 4 x 36 sheets in the kit box. No callout for which sheet to use where is given on the plan.
The vertical fin, rudder, and elevators are constructed from precut pieces of 1/4 sheet and butt-glued together to create the correct outlines for the parts.
Throughout construction of the tail surfaces, I visually compared the Uravitch plans against my Ian Stair drawings of those components. Mind you, I didn't measure, I only eyeballed. This model is to be a Fun Scale project, not a Top Gun/Scale Masters contender. I simply counted and compared the number of stabilizer ribs, judged their spacing to be close enough for rock 'n' roll, and forged ahead with the task of constructing the Fokker's tail parts.
A closing thought: To develop your skills properly, try every product you can get your hands on, and form your own opinions. If I don't suggest a product, it does not mean that I don't like it. In some cases, I may not even be aware of certain products.
Okay, my friends, clean up your goggles and leather flying helmets, practice your sanding techniques, and we'll continue with the D.VII in the next issue. Until then, build straight and fly safely. I'll talk with you again.
—
Transcribed from original scans by AI. Minor OCR errors may remain.

