
RADIO CONTROL: SCALE
Jeff Troy, 200 S. Spring Street, Ambler, PA 19002
THIS YEAR'S WEAK SIGNALS
Expo in Toledo, Ohio was a very powerful show. The static models—scale and otherwise—were magnificently crafted to the last detail. On the down side, I can't seem to find my Toledo film, so I'm unable to share the experience visually, but there was plenty to see in both manufacturers' exhibits and the static tables.
Two models stood out from the crowd: Terry Nitsch's F-86 with a metal finish that was not to be believed, and Dennis Crooks' impressive Lear 35, which finally received the First Place recognition it's always deserved. I'm partial to antique aeroplanes, but I always try to maintain objectivity; those two jets were top‑shelf material.
Next month I'll have scale activity news from the new East Coast Hobby Show, which took place May 19–21 in Fort Washington, PA. This first‑year show already received major industry attention—more than 190 exhibitors were scheduled to attend—and the suburban Philadelphia location is easily accessible to a large segment of the population.
Top Gun '95: the big event went off very well this year. Rain and wind took their toll on nerves and machinery, but competitors at this level come prepared to do their gentlemanly battle in whatever conditions are dealt them. I was unable to attend, but my friend Tom Kozel, a TGI judge, faxed me the winners list. Top Gun offers Expert Scale and Team Scale events to invited contestants who represent the pinnacle of scale talent and notoriety (see event report elsewhere in this issue). Top Gun is a terrific spectator event—produced by Frank Tiano and held annually at the Palm Beach Polo Club in West Palm Beach, Florida—definitely something to see at least once.
MODELERS' PROJECTS
You've been up to some first‑class work out there; here are several projects readers shared:
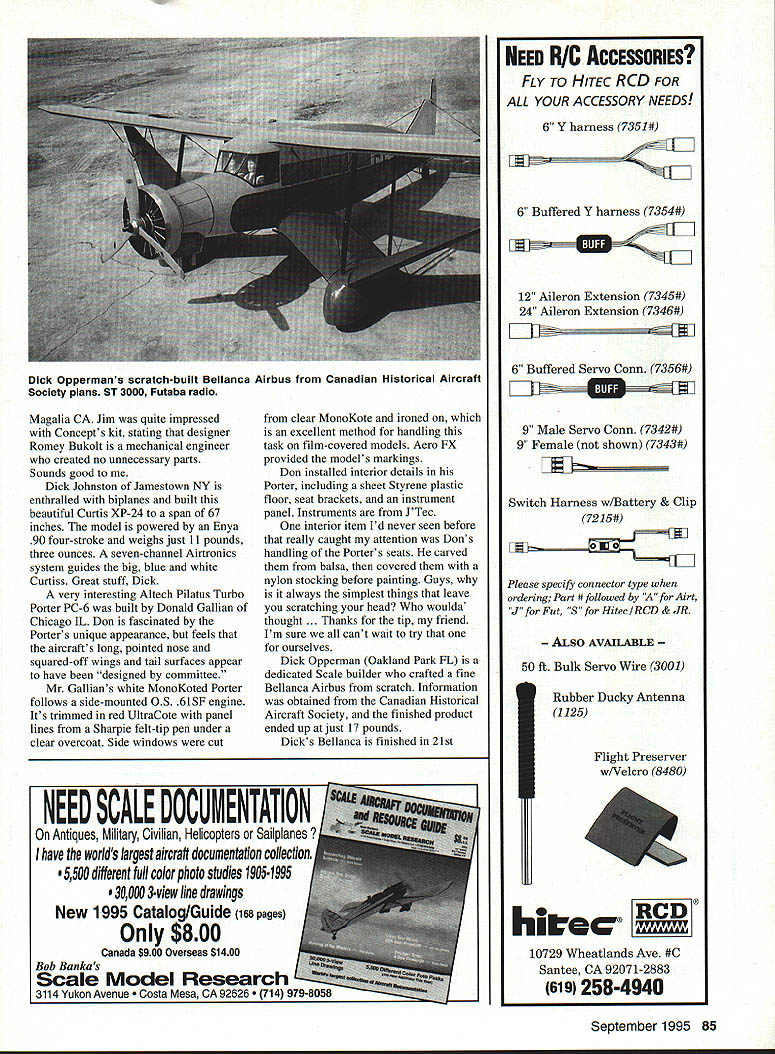
- Ed Muszinski, Tinley Park, IL — Built a Fokker D.VII from Rich Uravitch plans. The model was completed in just two months of spare time. This is not the 1/5‑scale aeroplane we've been featuring on and off in the column; it's the new .40 sport version kitted by Rich's company, Leading Edge Models. Ed praised the plan set as "very good, easy to read and follow." His model features an O.S. .40FP, Williams Brothers pilot, wheels, MonoKote covering and trim, and scratched machine guns. Nice job, Ed.
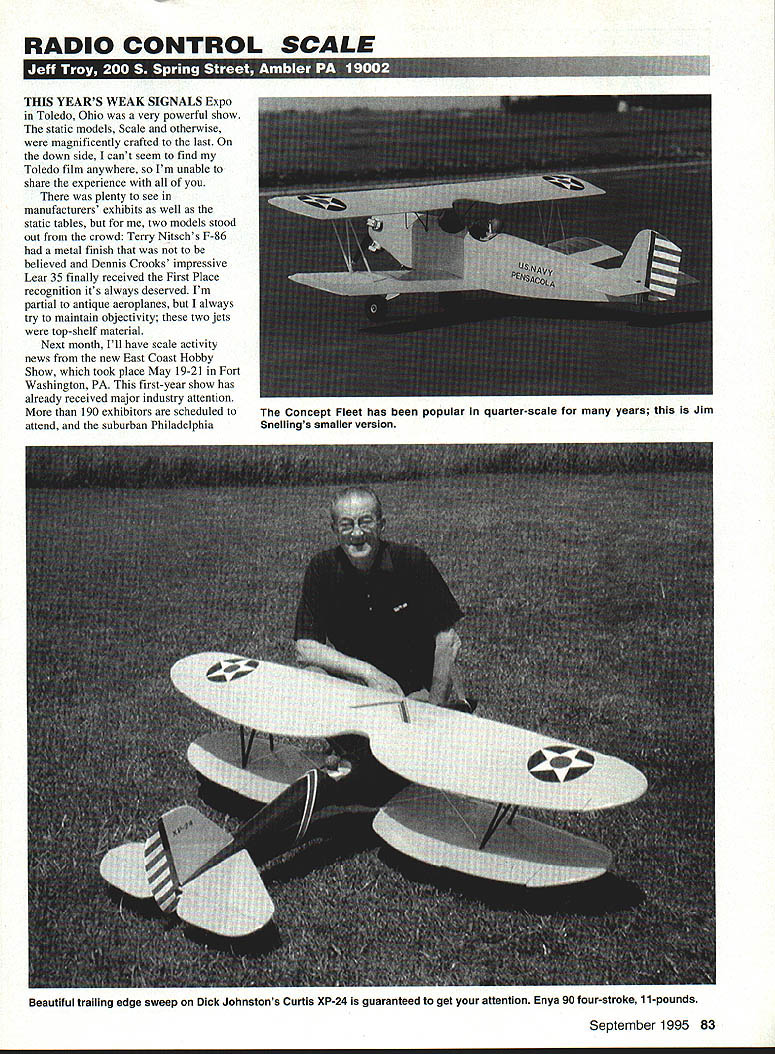
- Jim Snellings, Magalia, CA — Built a Concept Models Fleet Biplane from the 1/6‑scale kit, powered by an O.S. .40 Surpass. Jim crafted four of the five cylinders as balsa dummies. He was impressed with Concept's kit and noted that designer Romey Bukolt, a mechanical engineer, created no unnecessary parts.
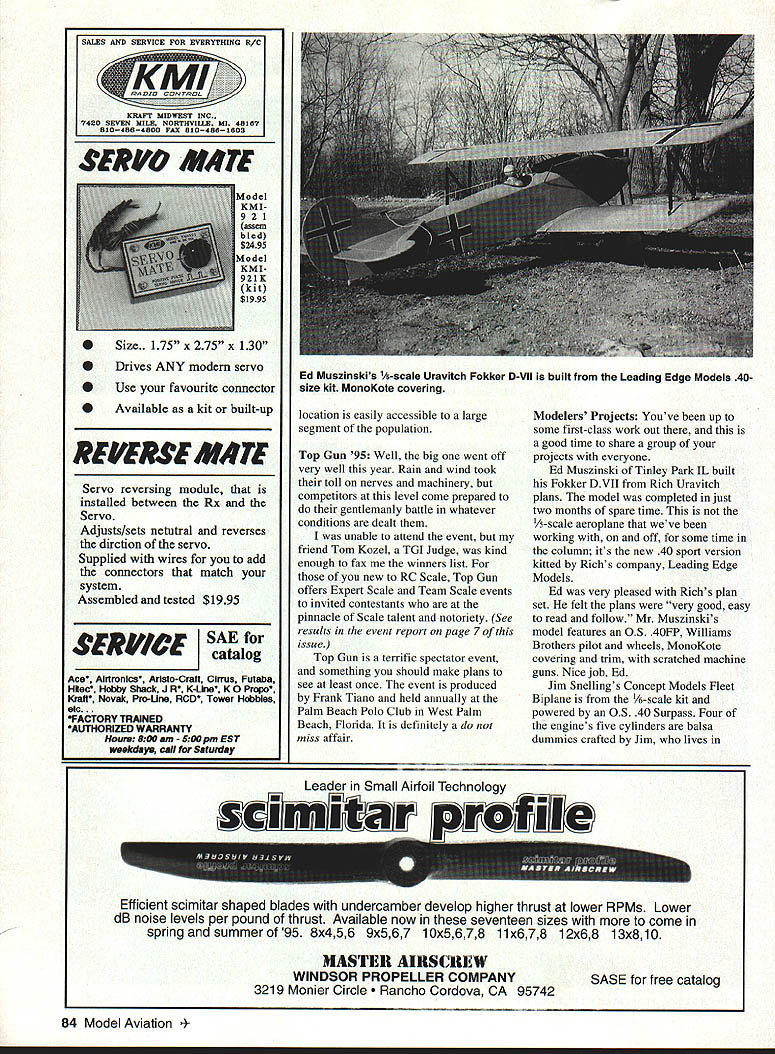
- Dick Johnston, Jamestown, NY — Enthralled with biplanes, he built a beautiful Curtiss XP‑24 with a 67‑inch span. The model is powered by an Enya 90 four‑stroke, weighs just 11 pounds 3 ounces, and is flown with a seven‑channel Airtronics system. A big, blue‑and‑white Curtiss that really gets attention.
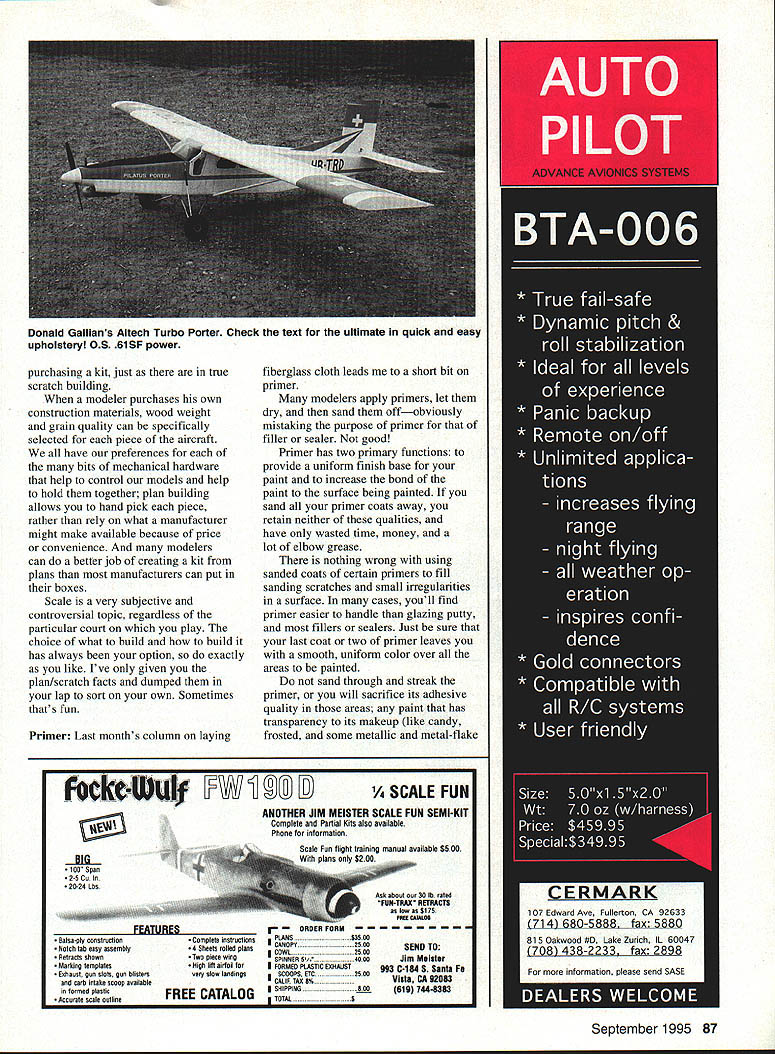
- Donald Gallian, Chicago, IL — Built an Altech Pilatus Turbo Porter PC‑6. Don is fascinated by the Porter's unique appearance—long, pointed nose and squared‑off wings and tail surfaces that he quips look "designed by committee." His white MonoKoted Porter uses a side‑mounted O.S. 61SF engine, is trimmed in red UltraCote, and has panel lines drawn with a Sharpie under a clear overcoat. Side windows were cut from clear MonoKote and ironed on—an excellent method for film‑covered models. Aero FX provided the markings. Don installed interior details including a sheet styrene floor, seat brackets, and an instrument panel (instruments from J‑Tec). A clever trick he used: carving seats from balsa, then covering them with a nylon stocking before painting. Simple and effective.
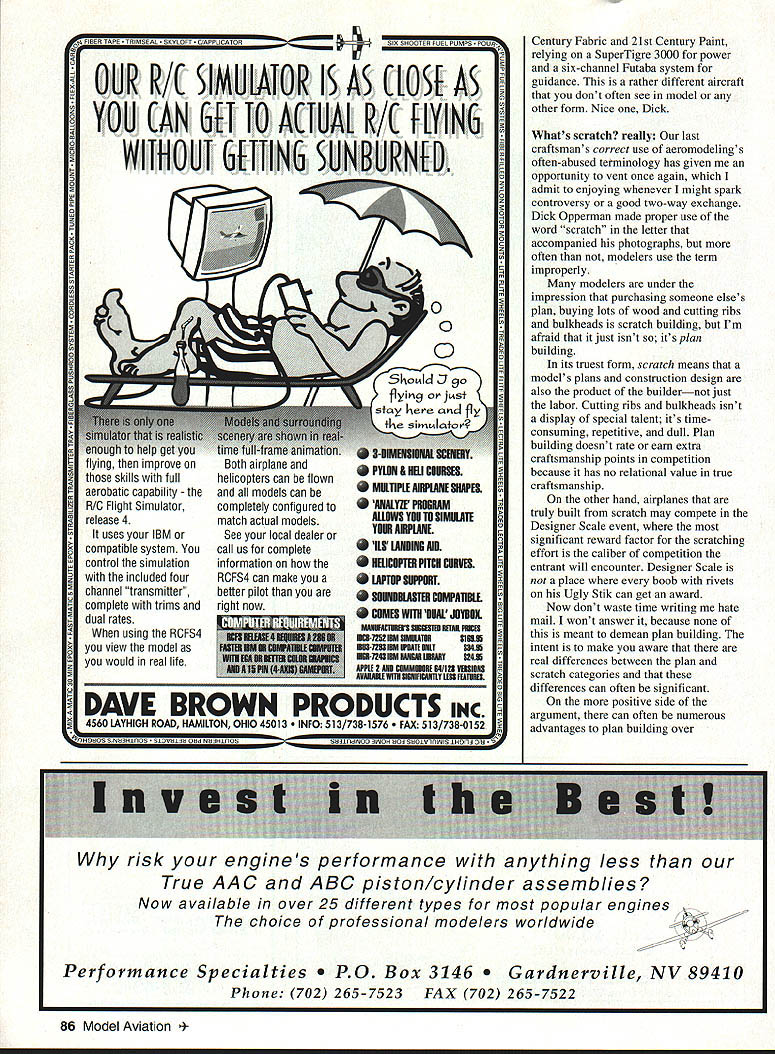
- Dick Opperman, Oakland Park, FL — A dedicated scale builder who crafted a fine Bellanca Airbus from scratch using information from the Canadian Historical Aircraft Society. The finished product ended up at just 17 pounds. He used Century fabric and 21st Century paint, relied on a SuperTigre 3000 for power, and a six‑channel Futaba system for control. This is a rather different aircraft you don't often see—very nicely done.
WHAT'S "SCRATCH," REALLY
Our last craftsman's correct use of aeromodeling's often‑abused terminology gives me an opportunity to vent—so here goes. Many modelers use the term "scratch" incorrectly. Purchasing someone else's plans, buying wood, and cutting ribs and bulkheads is plan building, not scratch building. In its truest form, scratch means that the model's plans and construction design are also the product of the builder—not just the labor.
Cutting ribs and bulkheads is time‑consuming and repetitive but not a demonstration of design craftsmanship. Plan building doesn't earn extra craftsmanship points in competition because it has no relational value in true craftsmanship. Airplanes truly built from scratch may compete in Designer Scale events, where the scratching effort faces the highest caliber of competition. Designer Scale is not a place where merely adding rivets to a ready design will win big.
Now don't waste time writing me hate mail—I won't answer it. This is not meant to demean plan building; the intent is to make you aware that there are real differences between plan and scratch categories and that those differences can be significant. On the positive side, there are advantages to plan building: when you purchase your own construction materials you can select wood weight and grain quality for each piece, and you can hand‑pick mechanical hardware rather than relying on what a manufacturer includes for price or convenience. Many modelers can do a better job of creating a kit from plans than some manufacturers do in their boxes. There are tradeoffs and choices—do exactly as you like.
PRIMER
Last month's column on laying fiberglass cloth leads me to a short bit on primer.
Primer has two primary functions: to provide a uniform finish base for your paint, and to increase the paint's bond to the surface being painted. Many modelers mistakenly apply primer, let it dry, then sand it off—treating primer like filler or sealer. If you sand away all your primer coats, you lose both its uniform color and its adhesive qualities and have only wasted time and effort.
There is nothing wrong with using sanded coats of certain primers to fill sanding scratches and small surface irregularities—primers are often easier to handle than glazing putty or many fillers and sealers. Just be sure your last one or two coats of primer leave a smooth, uniform color over all areas to be painted.
Do not sand through and streak the primer, or you will sacrifice adhesion in those areas. Any paint with transparency (candy, frosted, some metallic and metal‑flake finishes) will show sanding marks and streaks.
Transcribed from original scans by AI. Minor OCR errors may remain.

