

RADIO CONTROL: SCALE
Jeff Troy, 200 S. Spring Garden Street, Ambler PA 19002
SPARCS' 20th Annual Sport Scale Meet (Warminster NAS, PA)
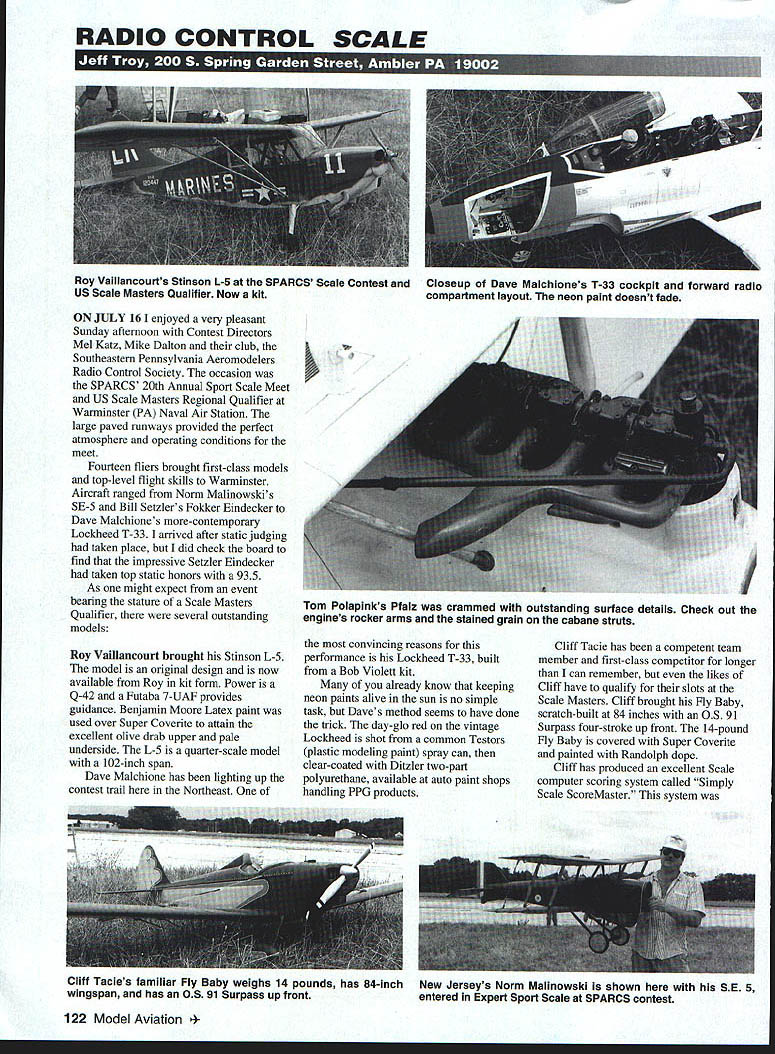
On July 16 I enjoyed a very pleasant Sunday afternoon with Contest Directors Mel Katz, Mike Dalton and their club, the Southeastern Pennsylvania Aeromodelers Radio Control Society. The occasion was the SPARCS' 20th Annual Sport Scale Meet and US Scale Masters Regional Qualifier at Warminster (PA) Naval Air Station. The large paved runways provided the perfect atmosphere and operating conditions for the meet.
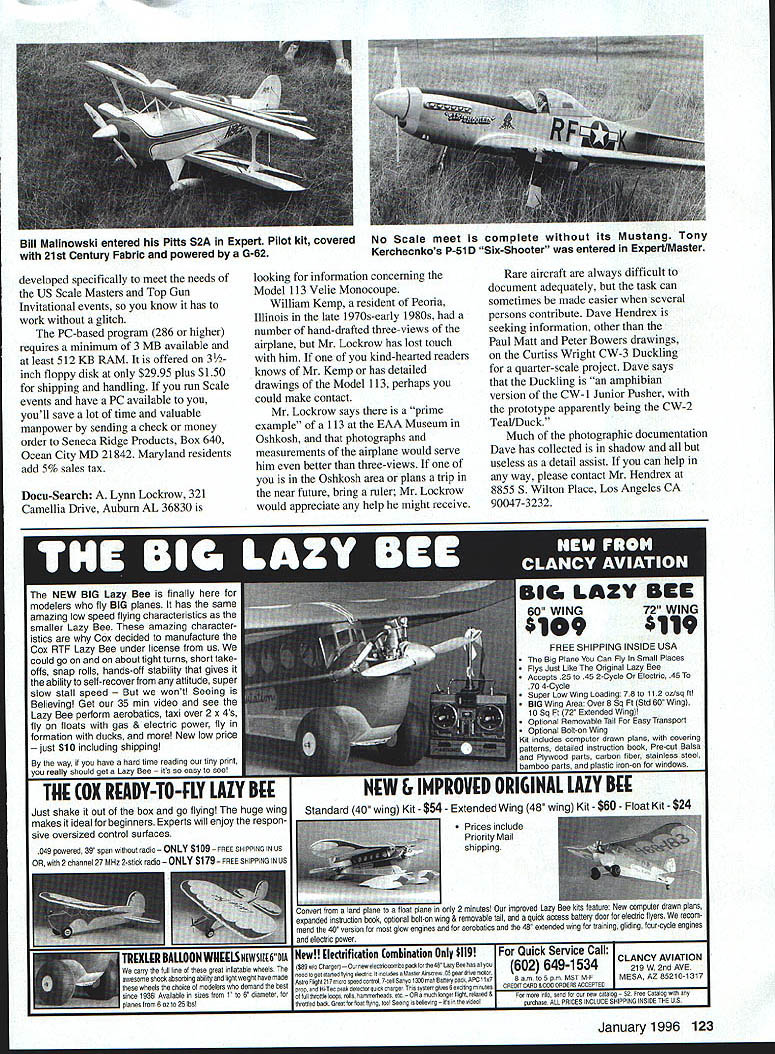
Fourteen fliers brought first-class models and top-level flight skills to Warminster. Aircraft ranged from Norm Malinowski's SE-5 and Bill Setzler's Fokker Eindecker to Dave Malchione's more-contemporary Lockheed T-33. I arrived after static judging had taken place, but I did check the board to find that the impressive Setzler Eindecker had taken top static honors with a 93.5.
As one might expect from an event bearing the stature of a Scale Masters Qualifier, there were several outstanding models.
Roy Vaillancourt brought his Stinson L-5. The model is an original design and is now available from Roy in kit form. Power is a Q-42 and a Futaba 7-UAF provides guidance. Benjamin Moore latex paint was used over Super Coverite to attain the excellent olive drab upper and pale underside. The L-5 is a quarter-scale model with a 102-inch span.
Dave Malchione has been lighting up the contest trail in the Northeast. One of the most convincing reasons for this performance is his Lockheed T-33, built from a Bob Violett kit.
Many of you already know that keeping neon paints alive in the sun is no simple task, but Dave's method seems to have done the trick. The day-glo red on the vintage Lockheed is shot from a common Testors (plastic modeling paint) spray can, then clear-coated with Ditzler two-part polyurethane, available at auto paint shops handling PPG products.
Cliff Tacie has been a competent team member and first-class competitor for longer than I can remember, but even the likes of Cliff have to qualify for their slots at the Scale Masters. Cliff brought his Fly Baby, scratch-built at 84 inches with an O.S. 91 Surpass four-stroke up front. The 14-pound Fly Baby is covered with Super Coverite and painted with Randolph dope.
Scale event software
This program was developed specifically to meet the needs of the US Scale Masters and Top Gun Invitational events, so you know it has to work without a glitch.
The PC-based program (286 or higher) requires a minimum of 3 MB available and at least 512 KB RAM. It is offered on 3-1/2-inch floppy disk at only $29.95 plus $1.50 for shipping and handling. If you run Scale events and have a PC available to you, you'll save a lot of time and valuable manpower by sending a check or money order to Seneca Ridge Products, Box 640, Ocean City MD 21842. Maryland residents add 5% sales tax.
Docu-Search
- A. Lynn Lockrow, 321 Camellia Drive, Auburn AL 36830, is looking for information concerning the Model 113 Velie Monocoupe.
William Kemp, a resident of Peoria, Illinois in the late 1970s–early 1980s, had a number of hand-drafted three-views of the airplane, but Mr. Lockrow has lost touch with him. If one of you kind-hearted readers knows of Mr. Kemp or has detailed drawings of the Model 113, perhaps you could make contact.
Mr. Lockrow says there is a "prime example" of a 113 at the EAA Museum in Oshkosh, and that photographs and measurements of the airplane would serve even better than three-views. If one of you is in the Oshkosh area or plans a trip in the near future, bring a ruler; Mr. Lockrow would appreciate any help he might receive.
- Dave Hendrex is seeking information, other than the Paul Matt and Peter Bowers drawings, on the Curtiss-Wright CW-3 Duckling for a quarter-scale project. Dave says the Duckling is "an amphibian version of the CW-1 Junior Pusher, with the prototype apparently being the CW-2 Teal/Duck."
Much of the photographic documentation Dave has collected is in shadow and all but useless as a detail assist. If you can help in any way, please contact Mr. Hendrex at 8855 S. Wilton Place, Los Angeles CA 90047-3232.
RADIO CONTROL: SCALE
Technique — finishing and weight considerations
I receive a fair number of letters from modelers who fall victim to a long-standing misunderstanding about model finishing. Typically, the letters read something like: "I've built a .60-powered, 65-inch all-wood P-51 with flaps, retracts, a full cockpit, droppable 500-pound bombs, rocket launchers under the wings, and a complete navigation lighting system, but my problem is finding a method of finishing the model without adding too much weight. I don't want a heavily loaded model." Sound familiar?
Why is the addition of weight always perceived to be the fault of finishing? Surely the extras that we add to our models account for some of the damage, if not for more, than a properly and carefully applied finish.
It should occur to many of you that a 65-inch model is perhaps not the best place to add all the extras described in my scenario, as they will add an extraordinary amount of weight to the typical WWII fighter, with or without the finish—especially when the problem is compounded by the addition of surface details, like rivets and panel-line impressions.
Many of the items we typically add are not point-grabbers. I've never seen a model awarded as much for lighting as it might be for finish, color, and markings. Cockpit detail and minuscule surface additions are fine, but if they can't be seen at rule-book distances, don't skimp on finish points to include them.
In my opinion, the best solutions to eliminating common weight concerns are:
- Construct a model with weight in mind from part number one. Make lightening holes in ribs, bulkheads, and anywhere else that won't weaken the structure. Substitute lighter materials wherever possible. Just think "light."
- More obvious: build larger airplanes, because they can carry a similar amount of equipment and detail with far less penalty to their loadings.
- Consider an alternate finishing method. Glass and polyester resin can be heavy if the modeler is not experienced. Glass and epoxy run the same risk, and are generally even heavier.
Iron-on fabrics are fine for fabric-covered prototypes, but usually require a higher level of material to fill their weave, and the weave must be filled (I like the advantages of fabric too, but Mustangs are not fabric-covered airplanes).
One of the slickest alternate methods goes back to most of our childhood days in aeromodeling: the simple application of silkspan and dope. Thinned 50/50 and applied one coat per day, an entire gallon of dope should only add about an ounce to a model.
Silkspan is lighter than fiberglass cloth and requires far less material to fill. There are disadvantages, too, but they can be "outweighed."
Silkspan-and-dope finishes do not afford the same "ding resistance" of glass and resin. But if you care for your model properly, this shouldn't present too many problems.
Another down item is dope's tendency to sink into balsa grain, producing an uneven texture in the finish some months or years after a project has been completed. This can be corrected by a method more commonly used in Control Line.
The next time you need to produce a truly smooth and lightweight finish on a fully-sheeted airplane, try this procedure (with my appreciation and compliments to Precision Aerobatics World Champion and world-class craftsman Bob Hunt). Be sure your model is ready to be finished. This is not a discussion of how to glue, how to sand, or how to vacuum a model. If you don't already know about these things, you won't have much luck with this or any other finishing method, but for those of you who understand that model finishers don't ever hide poor craftsmanship, here goes:
Mix Hobbyoxy Formula II an ounce or two at a time and spread it, full-strength, over the various components of your model. As soon as you can (and long before the epoxy dries) use a playing card or a stiff sheet of balsa to scrape it from the wood.
When the surface epoxy has been removed, use a paper towel to rub what's left into the grain of the wood. You should have only a soft sheen to tell you where the epoxy lays; only a token amount of weight will have been added so far. When the epoxy has cured, sand the surface with #320 grit to smooth the grain and remove any fuzz.
Two purposes have been served here:
- You have filled the bottom of the wood grain.
- Any finish you apply will not sink into the grain, because of the way the wood grain is partially filled.
Brush two coats of full-strength clear nitrate dope over the surface of the model (one coat per day), sanding lightly with #320 after each coat to remove fuzz and keep the underbase smooth.
At this point you can choose to cover the model with 00-grade silkspan (K&S light grade) or proceed without applying any covering at all. I prefer to cover; it gives me an added piece of security and I feel that it takes less material to smooth 00 silkspan than balsa or some plywoods.
After it has been wetted with water and smoothed with a damp cloth, a sheet of silkspan will stretch over the bottom of one piece of dope and will shrink into itself. On the other hand, you could cover with iron-on for a firmer covering. Attach the silkspan by brushing 50/50 clear nitrate through its upper surface, causing it to adhere to the coats of dope underneath.
Work carefully to avoid getting pulls, creases, or wrinkles in the material. You'll soon find that a finger is sometimes a better smoothing tool than a brush.
When the dope has dried, sand—do not cut—the excess edges of the silkspan away with #320, then cover the top of the surface in the same manner. Sand away the excess, leaving a slight overlap—you'll have a covered surface and an invisible seam.
The rest of the method is the same for bare wood as it is for the silkspan-covered model. Use a mixture of clear nitrate dope and talcum powder to fill the weave of the silkspan or the wood grain. Apply this at the rate of one coat daily, sanding with #320 until a smooth, glossy surface has resulted.
Spray two coats of 50/50 clear nitrate over the model to seal the softer talc/dope mix and prevent the surface from being disturbed. After a light sanding with #400 (wet) and a 72-hour wait for the solvents to evaporate, you may prime and paint the model with the materials of your choice. In many cases, dope can produce a strikingly realistic military finish, but this is more a matter of the artist's talent than the medium used for the work.
Try this method on a few scrap structures and see if it produces excellent results for you. It has for me and for many others over many, many years that I care to remember. Give it a shot, then try it on that next fighter you might like to keep somewhere within the weight boundaries of common sense.
I'm off to photograph the Scale Masters. In the meantime, build straight and fly safely. I'll talk with you again.
Transcribed from original scans by AI. Minor OCR errors may remain.

