

RADIO CONTROL SCALE
Jeff Troy 19 East Mt. Pleasant Avenue, Ambler, PA 19002
Spitfire Build-Along
Bringing you up to date: my new Enya R155-4C is the same physical size as and shares mounting lug dimensions with the R120-4C. I mounted the R155-4C on a CB/Tatone mount made for the R120-4C and bolted the mount to the Spitfire's laminated Lite Ply firewall. The Enya four-stroke caused the firewall to be located slightly to the rear of its intended position, which meant that a bit of scrap balsa block was needed to fill the gap between the front of the upper cowl blocks and the spinner ring. That's where last month's work stopped.
The next step is to sheet the turtledeck and forward fuselage deck with balsa. Start with the forward deck by fitting the edge of one balsa sheet against the balsa nose blocks and marking the sheet where it contacts the rear cockpit bulkhead. Trim the sheet at the mark so that the forward sheet and turtledeck sheet rest against the side of the rear cockpit bulkhead.
With medium CyA (cyanoacrylate) glue, edge-glue the forward sheet to the upper edge of the fuselage side, positioning the sheet against the forward bulkheads between the nose blocks and rear cockpit bulkhead. The sheet should stand up as if it's an extension of the fuselage side. Don't try to curve it against the bulkheads yet; glue the edge of the sheet to the edge of the fuselage side.
When the glue is dry, thoroughly wet the outer surface of the balsa sheet and allow about five minutes for the water to penetrate the grain and soften the balsa. Gently use your palms to see if the sheet will bend around the bulkheads to form the top of the fuselage ahead of the cockpit. If you feel too much resistance, apply more water to further soften the balsa grain.
When the sheet conforms to shape without cracking, bend it around and hold it in place over the center 1/4-inch stringer. Mark the centerline of the stringer on the sheet, then lay down a straightedge and use a sharp #11 blade to trim the edge of the sheet. Be careful not to slice into the stringer. When the excess is removed and the sheet's fit is at the centerline of the stringer, apply medium CyA and hold the sheet in place until the adhesive cures.
Before fitting the turtledeck sheeting, shape the die-cut upper turtledeck stringer and the rear formers to the contour. A convenient tool is a good razor plane (I use a Fix brand; sometimes available through Micro-Mark tools). The next best—and almost equal—is a German metal plane available through Hobby Lobby International. Buy at least three extra packages of blades. The German Solingen blades look the same as double-edge razor blades, but are sharper and sturdier.
Shave the turtledeck top's edge to the contour of the formers, then fit a balsa sheet between the edge of the forward deck sheeting and the rear former located just ahead of the horizontal stabilizer's leading edge. Edge-glue the sheet in place along the edge of the rear fuselage in the same manner as the forward deck sheet. Wet the sheet if necessary, then glue it against the sides of the formers and the edge of the shaped, die-cut turtledeck top. When dry, trim the upper edge of the sheet to match the top of the turtledeck, then trim the rear of the sheet to match the stabilizer bulkhead. Repeat the previous steps for the opposite side of the upper fuselage sheets.
Use your razor plane to shave the upper forward balsa nose blocks to blend from the forward deck sheeting to the nose ring. Work slowly and stop often, checking from a distance the changes in contour to ensure the most graceful transition between the forward sheets and nose ring. When finished, admire your handiwork from a few feet away. The assembly should resemble the graceful shape of a Spitfire's upper fuselage.
Next month we'll work on the model's underside.
Enya R155-4C
Too bad I couldn't stop flying long enough to write sooner. I took the aeroplane to Valley Forge, unpinched the fuel line, started the engine, and took off. It flew as never before. The Enya was a consistent performer, and the power increase over the other brand was astounding. I flew the model with enough authority to complete its limited schedule of straight-and-level maneuvers, and experienced the thrill of flight well above stall speed.
Since that flight, I have not purchased another brand of four-stroke. I hope that you find confidence in whatever brands you use, but I — with no patience for tinkering when I could be flying — am happy with my choice.
The new Enya R155-4C four-stroke is basically a bored-out R120 with a larger venturi (9.5 mm) and about a 1/2-horsepower increase. Many of the engine's incidental parts are interchangeable with the R120, but others are specific to the R155. The top-end rpm is the same—9,000–12,500—and the idle is the same at 2,500–3,000 rpm. Basically, the added power and authority make the new engine superior. Where the R120's bore and stroke are 31.0 x 26.4 mm, the R155's numbers are 34.0 x 28.0 mm. Both engines use a steel cylinder liner and a ringed aluminum piston.
As with the R120, the R155 comes with Enya's familiar exhaust header and screw-on four-stroke muffler. The optional R120-4C super muffler and flex-pipe are also available for the R155-4C. Recommended propeller diameter is 13–16 inches with pitch, according to use and desired performance, ranging from 6–11 inches.
Enya's metallurgy is first-rate. Casting is flash-free and parts are sturdy. Polishing is clean and bright, and the valve pushrods are positioned at the rear of the cylinder where they are less prone to damage from less-than-perfect landings, thrown stones, or other propwash debris. The valves are enclosed underneath a black-anodized cover, and the powerful R155-4C features dual ball bearings and an Enya C/4-type carburetor.
The R120 is great for the Dynaflite Spitfire, but the R155's added power (almost 20%) should make a dramatic improvement in the model's ability to climb over any maneuver schedule. My model will be carrying flaps, retracts, a few cockpit details, a pilot bust, and a paint job over sealed fabric, so I don't think that there's anything to lose from having the added power aboard if it's needed.
I've received helpful advice from many modelers who have built and flown the Dynaflite Spitfire. Many have said to make sure that the engine idle is set on the low side; they claim that if it's too high, the model will not want to stop flying—it has a light loading and a desire to remain airborne. I'll experiment with propellers to ensure the airplane's landing ability, but I can't wait to try it on the new R155-4C.
Docu-Search
- Ivo Luccitta needs documentation for a Fairey Tipsy Junior registered in Britain with registration G-AMVP. January 1973's RC Modeler featured a construction article by Dennis Foskett, but Ivo needs more material. Contact: Ivo Luccitta, 6969 Snowbowl View C, Flagstaff, AZ 86001.
- Joseph S. Thorpe is searching for a set of Tom Connor's S.E.5a plans. November's column included a model that Ken Bell built from them. Perhaps Ken, Mr. Connor, or someone else will contact Joseph at HCR 69, Box 89-5, Sunrise Beach, MO 65079.
Modelers' Projects
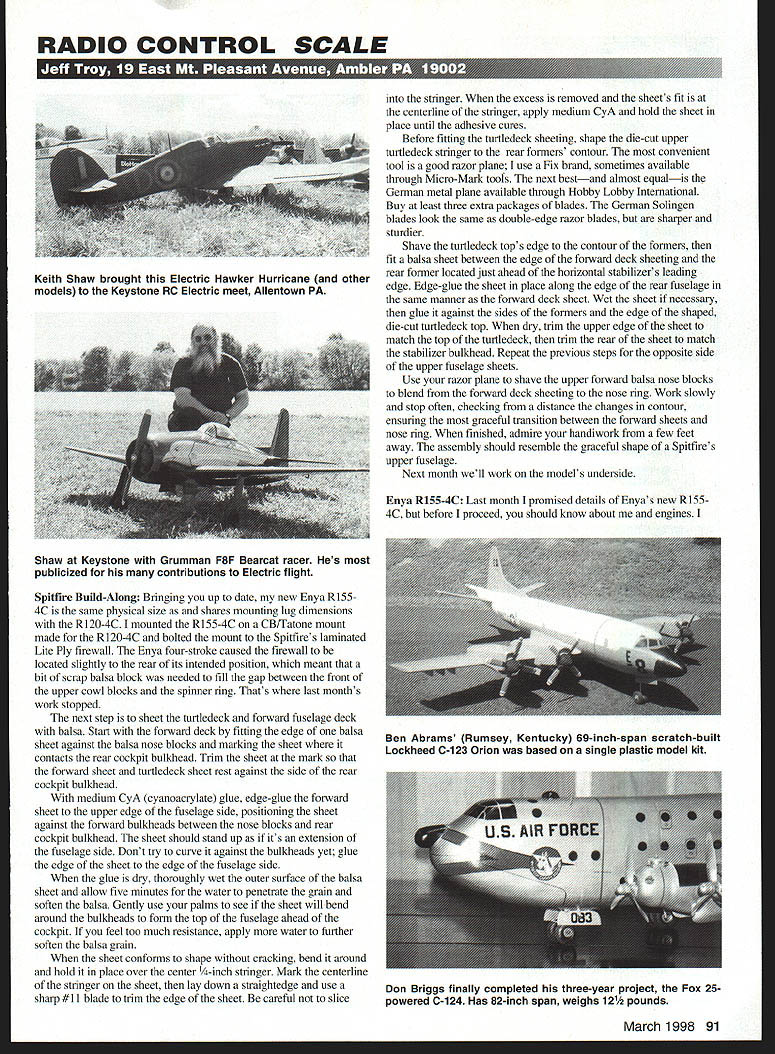
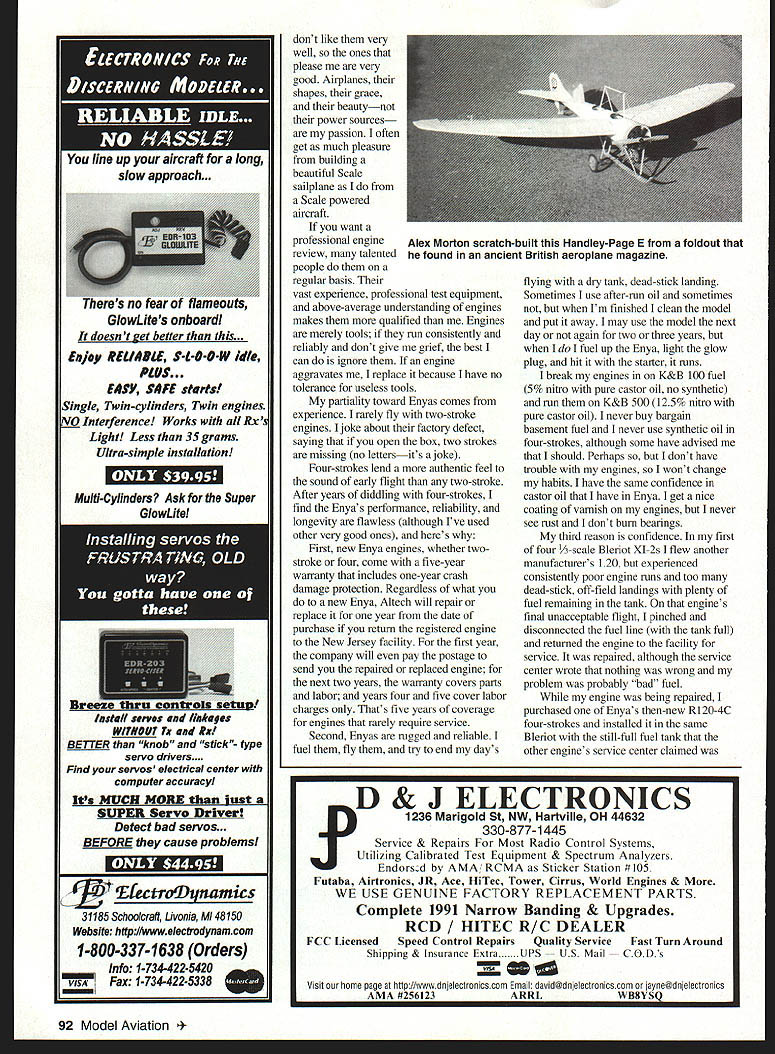
I usually make an annual trek to the Keystone R/C Electric meet (big trek—about 20 minutes from my driveway) to see how the greaseless set operates. One of the highlights is Electric guru Keith Shaw. He consistently flies very capably and brings interesting and beautifully built Scale models to Pennsylvania.
Electric flight is not my regular territory, but RC scale is still RC scale, and Keith should receive appreciation for his extraordinary skills. He brought nearly a dozen Scale models to Allentown for the 1997 meet. I couldn't get the details on each, but they were a cut above the average Scale RC model.
I was especially impressed by Keith's Hawker Hurricane. With fabric-covered ailerons and a stringered rear fuselage, it was a perfect subject for an electric warbird and the perfect companion to his Supermarine Spitfire. Shaw's Hawker featured carefully weathered paint and excellent overall craftsmanship.
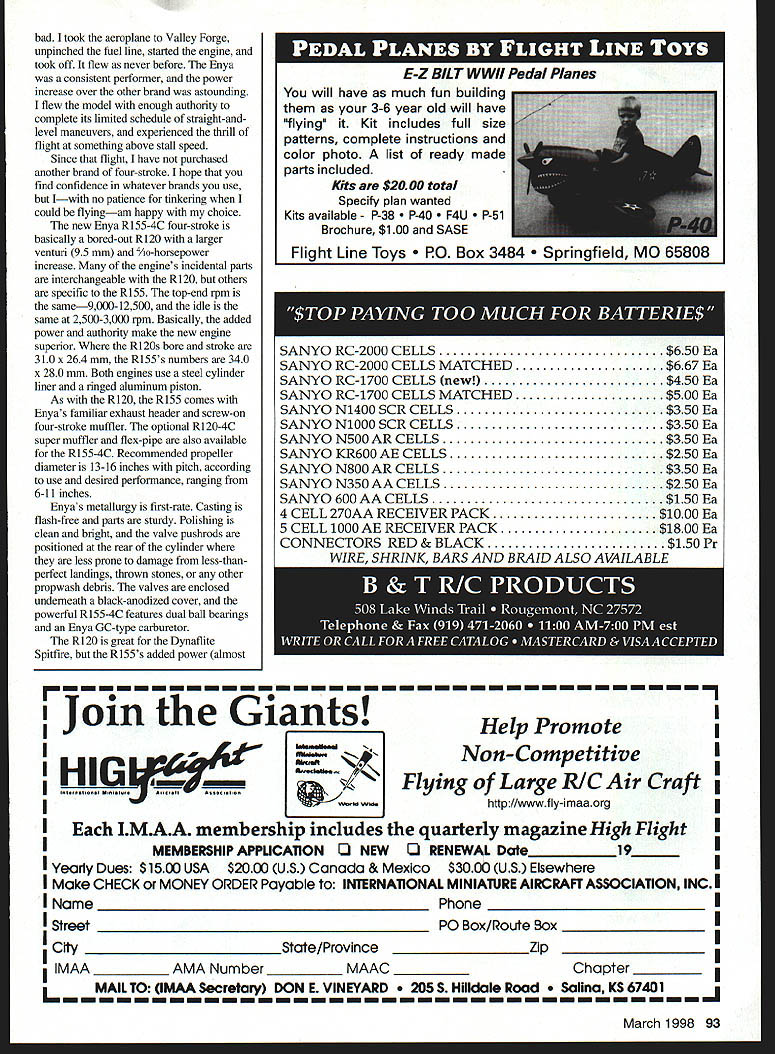
Benjamin Abrams scratch-built a Lockheed P-3 Orion from plans he drew with a plastic model kit as his reference source. The Orion is 79 inches long and uses a 69-inch wing. The model appears to have a finish and engines in each of the four nacelles—nice work!
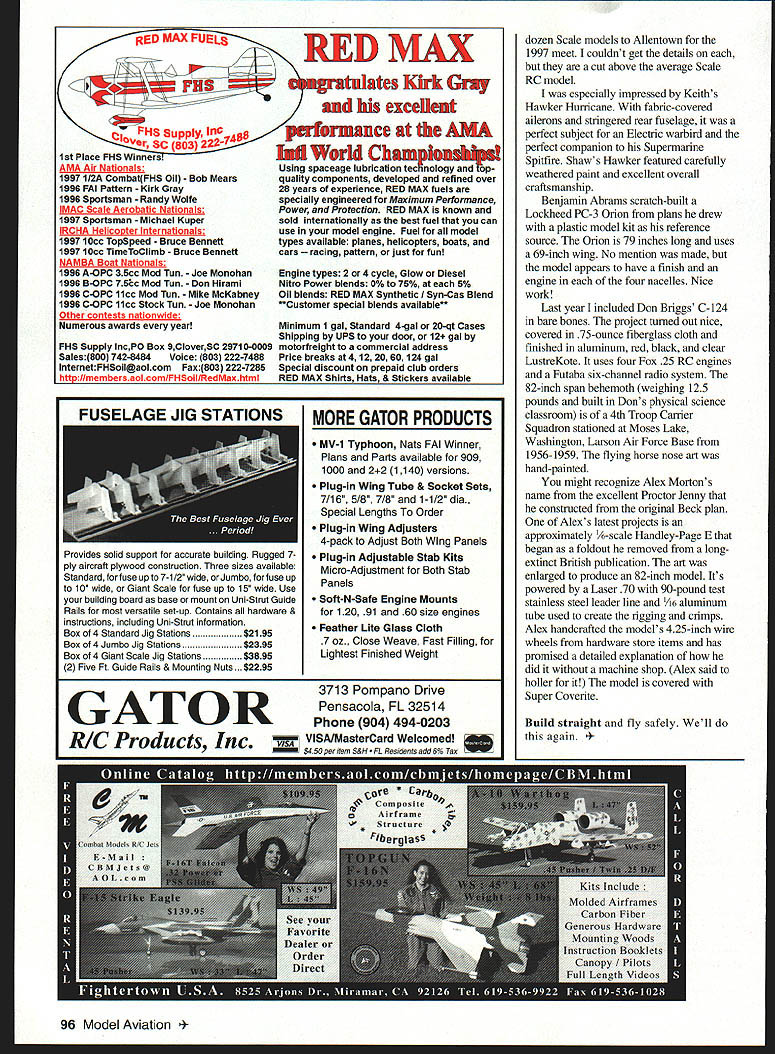
Last year I included Don Briggs' C-124 in bare bones. The project turned out nice, covered in 0.75-ounce fiberglass cloth and finished in aluminum, red, black, and clear LustreKote. It uses four Fox .25 RC engines and a Futaba six-channel radio system. The 82-inch-span behemoth (weighing 12.5 pounds and built in Don's physical science classroom) represents a 4th Troop Carrier Squadron airplane stationed at Moses Lake, Larson Air Force Base from 1956–1959. The flying-horse nose art was hand-painted.
You might recognize Alex Morton's name from the excellent Proctor Jenny that he constructed from original Beck plans. One of Alex's latest projects is an approximately 1/4-scale Handley Page E that began as a foldout he removed from a long-ago British publication. The art was enlarged to produce an 82-inch model. It's powered by a Laser .70. Thirty-pound-test stainless-steel leader line and 1/16-inch aluminum tubing were used to create the rigging and crimps. Alex handcrafted the model's 4.25-inch wire wheels from hardware-store items and has promised a detailed explanation of how he did it without a machine shop.
The model is covered with Super Coverite.
Build straight and fly safely. We'll do this again.
Transcribed from original scans by AI. Minor OCR errors may remain.

