
RADIO CONTROL: SCALE
Jeff Troy, 19 East Mt. Pleasant Ave., Ambler PA 19002
NASA (National Association of Scale Aeromodellers) kingpin Stan Alexander has been kind enough to lend his skill to this column. Stan and I will alternately provide the magazine's monthly Radio Control (RC) Scale report, assuring you a good balance, varying points of view, and a slightly different flavor and style. Stan does a great job!
Spitfire Build-Along
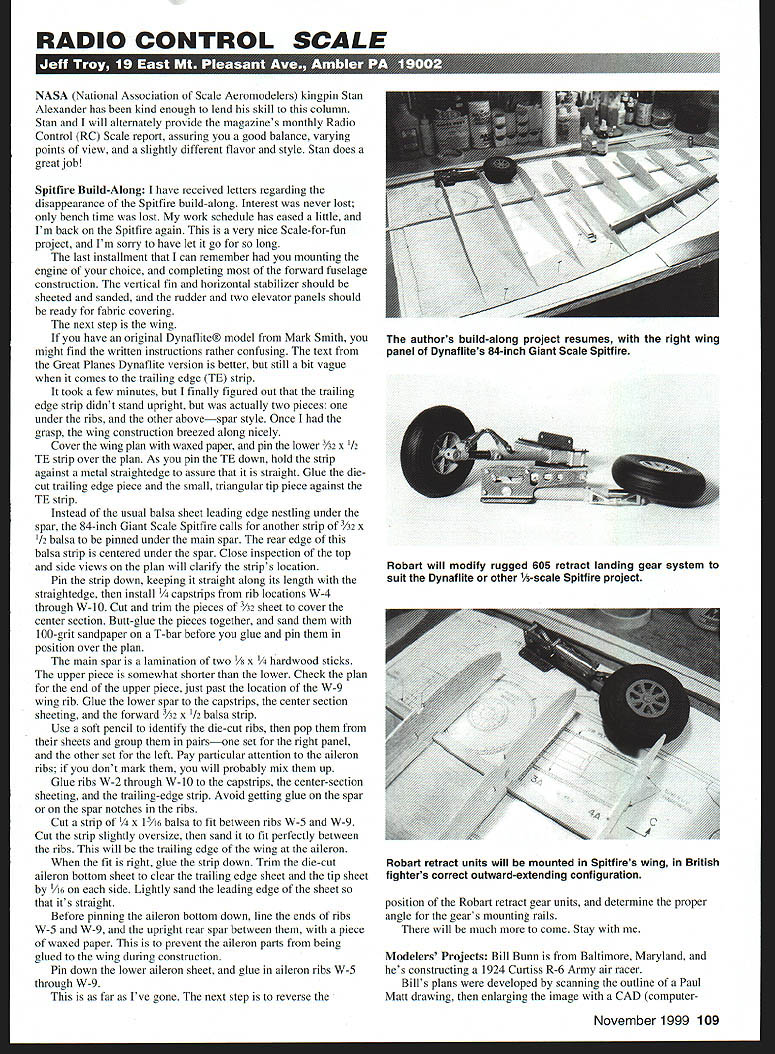
I have received letters regarding the disappearance of the Spitfire build-along. Interest was never lost; only bench time was lost. My work schedule has eased a little, and I'm back on the Spitfire again. This is a very nice Scale-for-fun project, and I'm sorry to have let it go for so long.
The last installment that I can remember had you mounting the engine of your choice, and completing most of the forward fuselage construction. The vertical fin and horizontal stabilizer should be sheeted and sanded, and the rudder and two elevator panels should be ready for fabric covering.
The next step is the wing.
If you have an original Dynaflite® model from Mark Smith, you might find the written instructions rather confusing. The text from the Great Planes Dynaflite version is better, but still a bit vague when it comes to the trailing edge (TE) strip.
It took a few minutes, but I finally figured out that the trailing edge strip didn't stand upright, but was actually two pieces: one under the ribs, and the other above—spar style. Once I had the grasp, the wing construction breezed along nicely.
Cover the wing plan with waxed paper, and pin the lower 3/32" x 1/2" TE strip over the plan. As you pin the TE down, hold the strip against a metal straightedge to assure that it is straight. Glue the die-cut trailing edge piece and the small triangular tip piece against the TE strip.
Instead of the usual balsa sheet leading edge nestling under the spar, the 84-inch Giant Scale Spitfire calls for another strip of 3/32" x 1/2" balsa to be pinned under the main spar. The rear edge of this balsa strip is centered under the spar. Close inspection of the top and side views on the plan will clarify the strip's location.
Pin the strip down, keeping it straight along its length with the straightedge, then install 1/4" capstrips from rib locations W-4 through W-10. Cut and trim the pieces of 3/32" sheet to cover the center section. Butt-glue the pieces together, sand them with 100-grit sandpaper on a T-bar before you glue and pin them in position over the plan.
The main spar is a lamination of two 1/8" x 1/4" hardwood sticks. The upper piece is somewhat shorter than the lower. Check the plan for the end of the upper piece, just past the location of the W-9 wing rib. Glue the lower spar to the capstrips, the center-section sheeting, and the forward 3/32" x 1/2" balsa strip.
Use a soft pencil to identify the die-cut ribs, then pop them from their sheets and group them in pairs—one set for the right panel, and the other set for the left. Pay particular attention to the aileron ribs; if you don't mark them, you will probably mix them up.
Glue ribs W-2 through W-10 to the capstrips, the center-section sheeting, and the trailing-edge strip. Avoid getting glue on the spar or on the spar notches in the ribs.
Cut a strip of 1/4" x 1/16" balsa to fit between ribs W-5 and W-9. Cut the strip slightly oversize, then sand it to fit perfectly between the ribs. This will be the trailing edge of the wing at the aileron.
When the fit is right, glue the strip down. Trim the die-cut aileron bottom sheet to clear the trailing-edge sheet and the tip sheet by 1/16" on each side. Lightly sand the leading edge of the sheet so that it's straight.
Before pinning the aileron bottom down, line the ends of ribs W-5 and W-9, and the upright rear spar between them, with a piece of waxed paper. This is to prevent the aileron parts from being glued to the wing during construction.
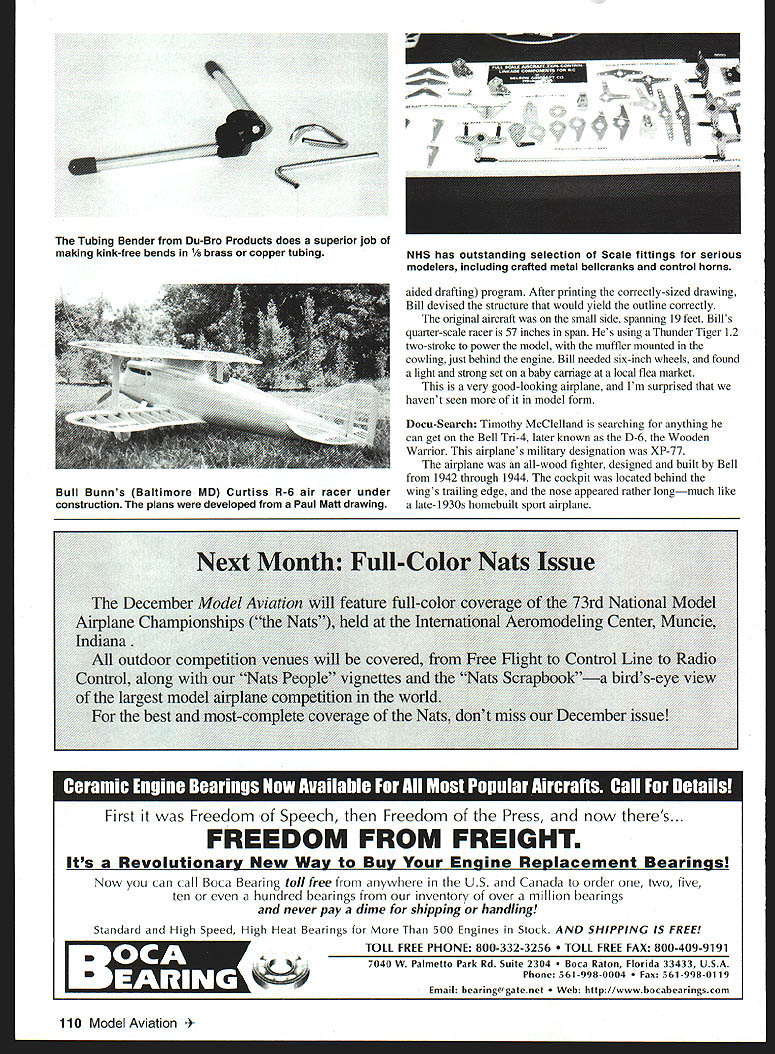
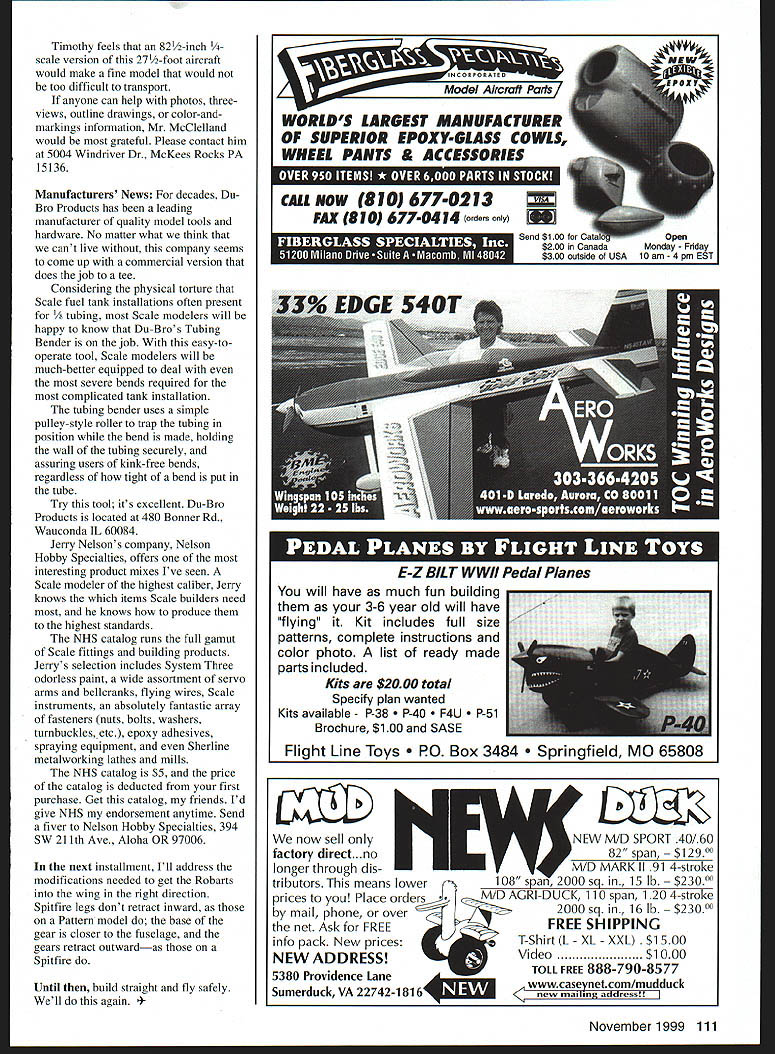
Pin down the lower aileron sheet, and glue in aileron ribs W-5 through W-9. This is as far as I've gone. The next step is to reverse the position of the Robart retract gear units and determine the proper angle for the gears and the mounting rails. I'll have much more on this next time.
Timothy feels that an 82½-inch, 1/4-scale version of this 27½-foot aircraft would make a fine model that would not be too difficult to transport.
If anyone can help with photos, three-views, outline drawings, or color-and-markings information, Mr. McClelland would be most grateful. Please contact him at 5004 Windriver Dr., McKees Rocks, PA 15136.
Manufacturers' News
For decades, Du-Bro Products has been a leading manufacturer of quality model tools and hardware. No matter what we think that we can't live without, this company seems to come up with a commercial version that does the job to a tee.
Considering the physical torture that Scale fuel tank installations often present for 1/8" tubing, most Scale modelers will be happy to know that Du-Bro's Tubing Bender is on the job. With this easy-to-operate tool, Scale modelers will be much better equipped to deal with even the most severe bends required for the most complicated tank installation.
The tubing bender uses a simple pulley-style roller to trap the tubing in position while the bend is made, holding the wall of the tubing securely, and assuring users of kink-free bends, regardless of how tight of a bend is put in the tube.
Try this tool; it's excellent. Du-Bro Products is located at 480 Bonner Rd., Wauconda, IL 60084.
Jerry Nelson's company, Nelson Hobby Specialties (NHS), offers one of the most interesting product mixes I've seen. A Scale modeler of the highest caliber, Jerry knows which items Scale builders need most, and he knows how to produce them to the highest standards.
The NHS catalog runs the full gamut of Scale fittings and building products. Jerry's selection includes:
- System Three adhesives
- A wide assortment of servo arms and bellcranks
- Flying wires and Scale instruments
- An absolutely fantastic array of fasteners (nuts, bolts, washers, turnbuckles, etc.)
- Epoxy adhesives and spraying equipment
- Sherline metalworking lathes and mills
The NHS catalog is $5, and the price of the catalog is deducted from your first purchase. Get this catalog, my friends. I'd give NHS my endorsement anytime. Send a flyer to Nelson Hobby Specialties, 394 SW 21st Ave., Aloha, OR 97006.
In the next installment, I'll address the modifications needed to get the Robart units into the wing in the right direction. Spitfire legs don't retract inward, as those on a Pattern model do; the base of the gear is closer to the fuselage, and the gears retract outward—as those on a Spitfire do.
Until then, build straight and fly safely. We'll do this again.
Transcribed from original scans by AI. Minor OCR errors may remain.

