


Radio Control: Scale
Bob & Dolly Wischer
DESIGN TECHNIQUE
Our most frequent correspondence is from modelers in search of information regarding model mechanical design. It is evident that enough has not been said on the subject of scratch-building scale models from drawings of prototype aircraft, such as those by Peter Westburg in Model Builder, Paul Matt in Historical Aviation Album, and the other specialists purveying graphic information. Usually, it is apparent that these modelers are in search of a plane that is different and not available in kit form, with preference for planes not frequently modeled. The availability of these excellent drawings serves to stimulate the desire for an airplane that is distinctively different, and desire is the necessary ingredient in the recipe for scratch-building. In other words, if you want the plane badly enough, patience, skill and knowledge will be acquired.
The starting point in design is always the enlargement of the outline drawings to the size of the model, with due respect for the need to lift and contain the fixed bulk and weight of radio and engine. Our personal preference in this process is the mathematical approach with a handy electronic calculator to make all of the myriad scale factor multiplications for dimensions. Before the age of calculators we used a slide rule.
The dimensions should be transferred to the model drawing with a decimal-inch scale graduated in increments of 1/50 inch (.02), or a metric scale graduated in millimeters, in order to accurately use the calculator output without conversion to fractions. If you think that the transfer of dimensions from one scale to another is a long, arduous process, this need not be so. We commonly complete a pencil drawing, on sign and poster paper from a 42‑in. wide roll, in less than one evening, including interior detail such as wing and fuselage structure. Obviously, a calculator helps speed the mathematical work, but a slide rule can do almost as well.
Until recently, our drawings were made on the dining table with extension leaves inserted so that the paper length could accommodate a six-foot wingspan. We now use larger work spaces made from inexpensive plywood and hollow-core flush birch doors. A three- to five-foot T-square is handy and this can be made from two pieces of thin scrap plywood. It only needs to make parallel lines; the angle at the Tee need not be a precise 90 degrees. Straightness is important, as is a tight glue joint between the pieces.
Another method of enlarging is by the use of proportional dividers, although it is more likely to introduce errors due to its limitations. The divider is set to the ratio chosen and its opposite tips then are proportionally spaced so that dimensions can be transferred directly without the use of mathematics. Its limitations lie in the translating of long dimensions which seem to abound in aircraft. Here the divider must step off numerous increments with errors accumulating in each step.
A third method is the photographic process in which an enlargement is made of the original drawing. This can be quite costly but the time saved can make it worth the expense. It requires the services of a commercial photographer who has the necessary large-format cameras and equipment. An opaque projector can be used with some success. The drawing is projected on a large sheet of paper and the lines are traced, being careful not to distort the image by misalignment.
There is another, completely different system of producing a model drawing, and it is by far the most accurate. In this process the model dimensions are determined directly from working detail drawings used for the prototype aircraft, a very time-consuming procedure. An electronic calculator is used to divide the individual piece dimensions by the scale factor. Even with odd decimal factors the dimensional accuracy is greater than model building requires. We have used the process for three of our planes and would prefer it for all in the future except that working drawings are very difficult to obtain.
The availability of manufacturing drawings makes a model of a home-built type plane advantageous. The builders are usually delighted and flattered to have someone model their planes. Permission to take the needed photos has never been a problem. In our annual visits to the E.A.A. convention at Oshkosh, the Mecca of homebuilders, we have been exposed to the innovative design efforts that create planes of unique grace and beauty. Obviously, not all of the planes seen there would make good models, but we find a high percentage to be attractive to the extent that a year or two can be spent in their modeling. Oshkosh is also the place to photograph the many hundreds of military, classic and antique visiting planes.
The first step in the generation of a drawing is to look for straight lines in the structure to be used as reference lines in transferring dimensions. If possible, drawings should be made with reference to the center line or thrust line for the fuselage and the front spar or leading edge for the wing and tail surfaces. We would prefer to develop our drawings using the same basic reference lines as were used by the prototype designer. If the original had down-thrust in the engine mounting, it is very likely that another center line or panel line, such as the top longeron, will be the reference line to use. In the case of an elliptical or tapered wing, the leading edge would not be usable for reference and another straight line will usually be found. In the absence of a good line, we have drawn one as basic.
Having developed the model outline drawings by one of these methods, the next step is the sketching of interior structure detail, showing rib and spar locations, fuselage panel lines and bulkheads. At this time the engine and muffler as well as radio control components must be at hand so that provision can be made for their sizes and installation. On scale models, except for the smallest sizes, there is usually much more interior space than needed. For a Precision Scale model this internal volume may not be as plentiful as it seems, because of the space occupied by seats, instrument panels, upholstery, and possibly working controls. Thought must be given to installing radio equipment where it will be hidden from view, beneath seats and floors, without unduly disturbing the desired center of gravity location. As planes grow larger this problem diminishes.
For structural sizes, materials, and joining methods we are very fortunate in having the many volumes of magazines, all profusely illustrated with drawings by modelers, showing their ideas on the subject. Even a few back issues will have abundant material to give a fair idea of the course to follow in designing a model. Since most modelers attempting a scratchbuilt plane for the first time will have built one or more kits, they would have accumulated a few concepts and very likely begun the process of elimination that separates the preferred ways and means. In this respect it should be said that, in almost 50 years of modeling, we have yet to build two planes completely alike structurally. We borrow ideas everywhere and add a few of our own; not a unique practice. Areas that deserve closest attention are those where major joints are located, including engine mount, wing, landing gear, and tail surface attachments. All should be strengthened with plywood or hardwood, following usual model building practices. Scale models which tend toward heaviness with the addition of much detail need shock-absorbing landing gear to a greater extent than a light trainer. If possible, the gear of the prototype should be copied, making certain that loads are spread to the surrounding structure. Avoid load concentrations at single points.
1978 Contests
No single competition event has caught on like Sport Scale. Last year there were ten times as many sanctioned AMA contests for Sport Scale as there were for Precision Scale, and more than for all other scale events combined. The eastern U.S. had the most scale events and the midwest the least. A breakdown follows (no rallies included):
- Radio Control — total 184:
- Sport: 165
- Precision: 16
- Mammoth: 3
- Control Line — total 31:
- Sport: 20
- Precision: 11
- Free Flight, Outdoor — total 51:
- Gas: 9
- Rubber: 15
- Peanut: 27
- Free Flight, Indoor — total 18:
- Indoor: 10
- Peanut: 8
The high level of participation in RC Sport Scale generates much comment and complaints. Bob Temple of Boca Raton, Florida writes: "Here are my suggestions of what I would like to see for Stand-Off Scale."
- 50-ft. circle — 10 feet is way too small, especially for 8- and 9-ft. wingspans.
- Novice and Expert, same as Pattern. Gives newcomers better chance. Once he has won first place, he moves into Expert.
- Time limit on static judging with less conversing between judges, not allowed in flight, should not be allowed in static.
Actually, a nine-foot span, as compared with six feet, has the wing tip only 18 inches closer to the judges' eyes. A change from the present 20-foot circle to 25 feet would compensate and maintain the original intent of the rule. The desire for a greater viewing distance is a reaction to the trend in Sport Scale toward general up-grading of planes, as has happened throughout the history of competition modeling. The process of improvement repeats in all events and the imposition of rule changes has failed to bring a halt to up-grading. Finding good judges remains a problem and getting tough with them won't ease the situation. Judges are not to be regarded as adversaries, and without them we have no event.
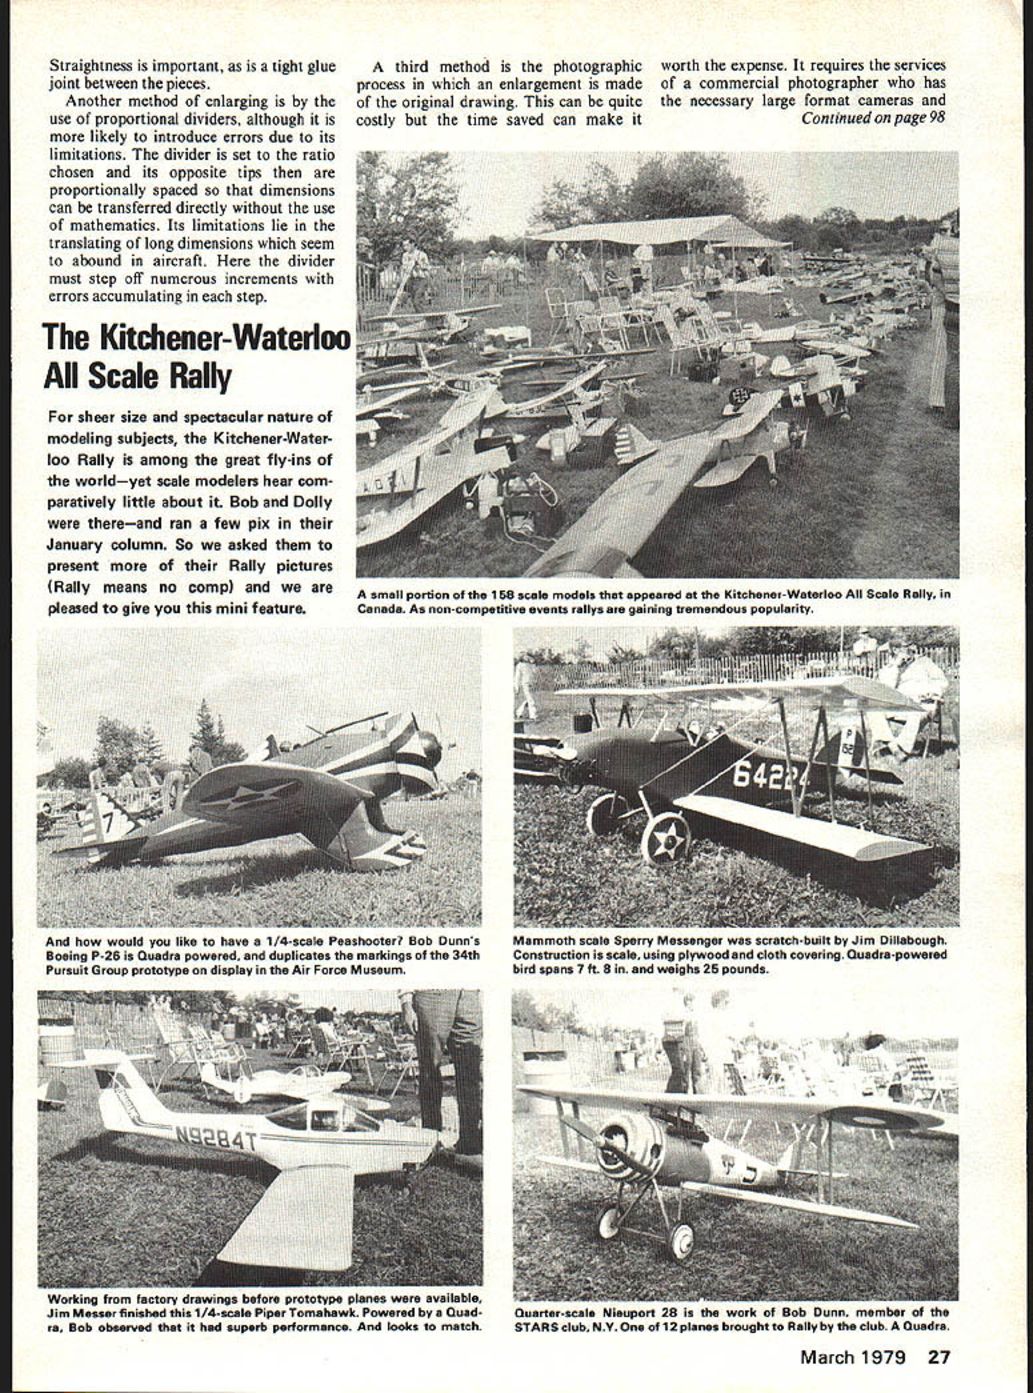
The Kitchener-Waterloo All Scale Rally
For sheer size and the spectacular nature of modeling subjects, the Kitchener-Waterloo Rally is among the great fly-ins of the world—yet scale modelers hear comparatively little about it. Bob and Dolly were there—and ran a few pix in their January column. So we asked them to present more of their Rally pictures (Rally means no comp) and we are pleased to give you this mini feature.
Bob and Dolly Wischer, Rt. 1, S-221 Lapham Peak Rd., Delafield, WI 53018.
Transcribed from original scans by AI. Minor OCR errors may remain.

