
Radio Control: SCALE
Bob & Dolly Wischer
PAINT FINISHES
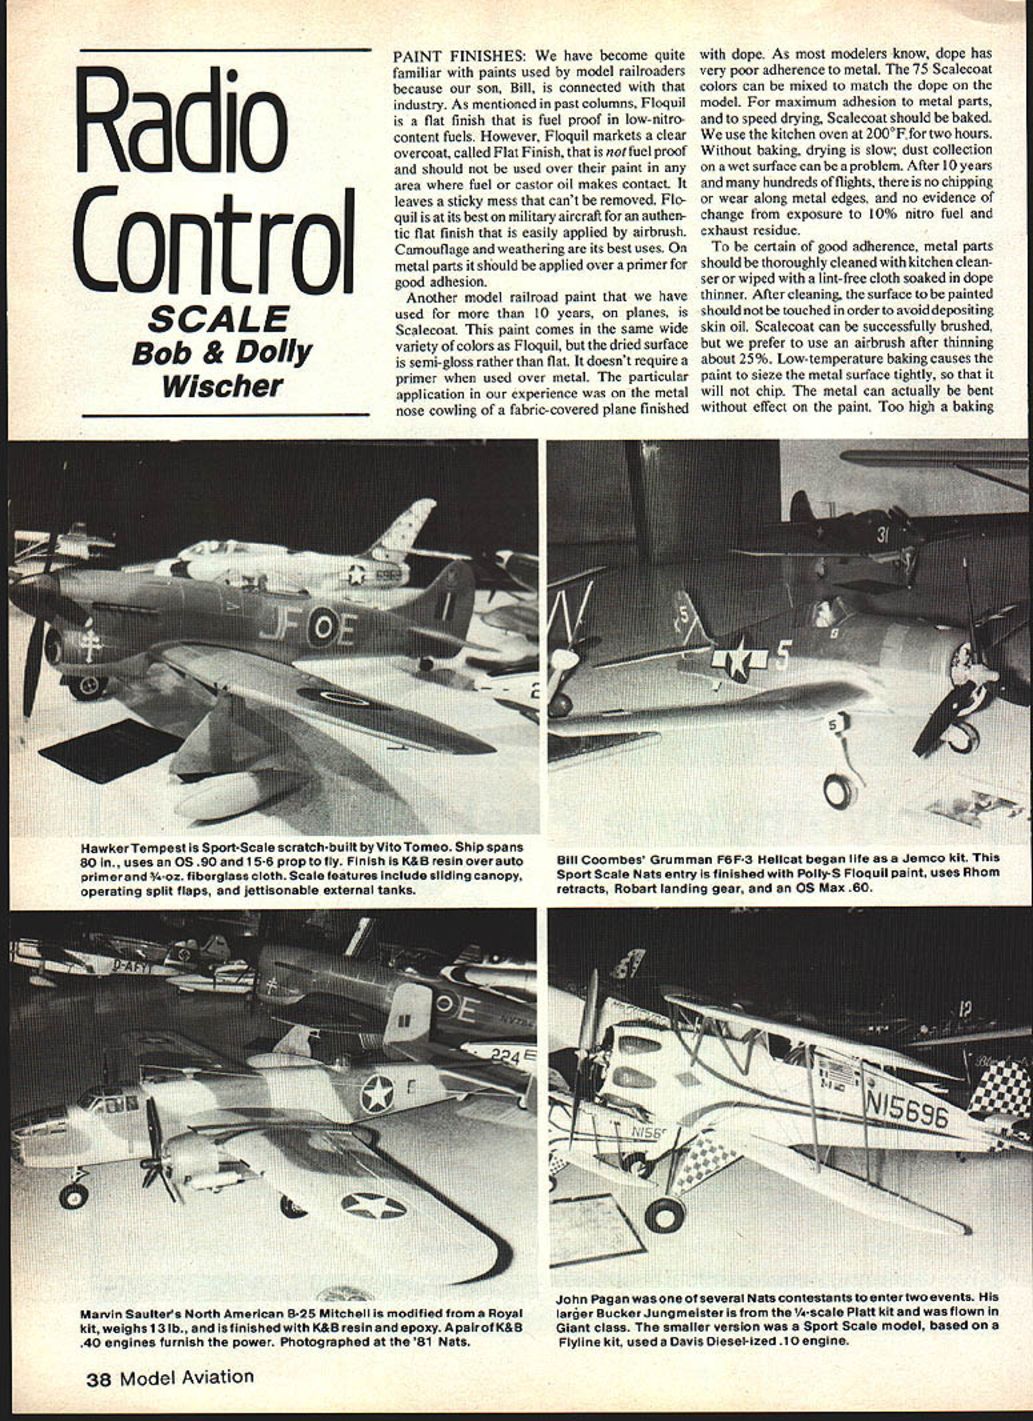
We have become quite familiar with paints used by model railroaders because our son, Bill, is connected with that industry. As mentioned in past columns, Floquil is a flat finish that is fuel-proof in low-nitro-content fuels. However, Floquil markets a clear overcoat, called Flat Finish, that is not fuel-proof and should not be used over their paint in any area where fuel or castor oil makes contact. It leaves a sticky mess that can't be removed. Floquil is at its best on military aircraft for an authentic flat finish that is easily applied by airbrush. Camouflage and weathering are its best uses. On metal parts it should be applied over a primer for good adhesion.
Another model-railroad paint that we have used for more than 10 years on planes is Scalecoat. This paint comes in the same wide variety of colors as Floquil, but the dried surface is semi-gloss rather than flat. It doesn't require a primer when used over metal. The particular application in our experience was on the metal nose cowling of a fabric-covered plane finished with dope. As most modelers know, dope has very poor adherence to metal. The 75 Scalecoat colors can be mixed to match the dope on the model. For maximum adhesion to metal parts, and to speed drying, Scalecoat should be baked. We use the kitchen oven at 200°F for two hours. Without baking, drying is slow; dust collection on a wet surface can be a problem. After 10 years and many hundreds of flights, there is no chipping or wear along metal edges, and no evidence of change from exposure to 10% nitro fuel and exhaust residue.
To be certain of good adherence, metal parts should be thoroughly cleaned with kitchen cleanser or wiped with a lint-free cloth soaked in dope thinner. After cleaning, the surface to be painted should not be touched in order to avoid depositing skin oil. Scalecoat can be successfully brushed, but we prefer to use an airbrush after thinning about 25%. Low-temperature baking causes the paint to seize the metal surface tightly so that it will not chip. The metal can actually be bent without effect on the paint. Too high a baking temperature can cause a slight darkening of hue. We have found the degree of gloss attained to be very similar to that of dope, and no after-treatment or polishing is necessary.
SPRAY PAINTING
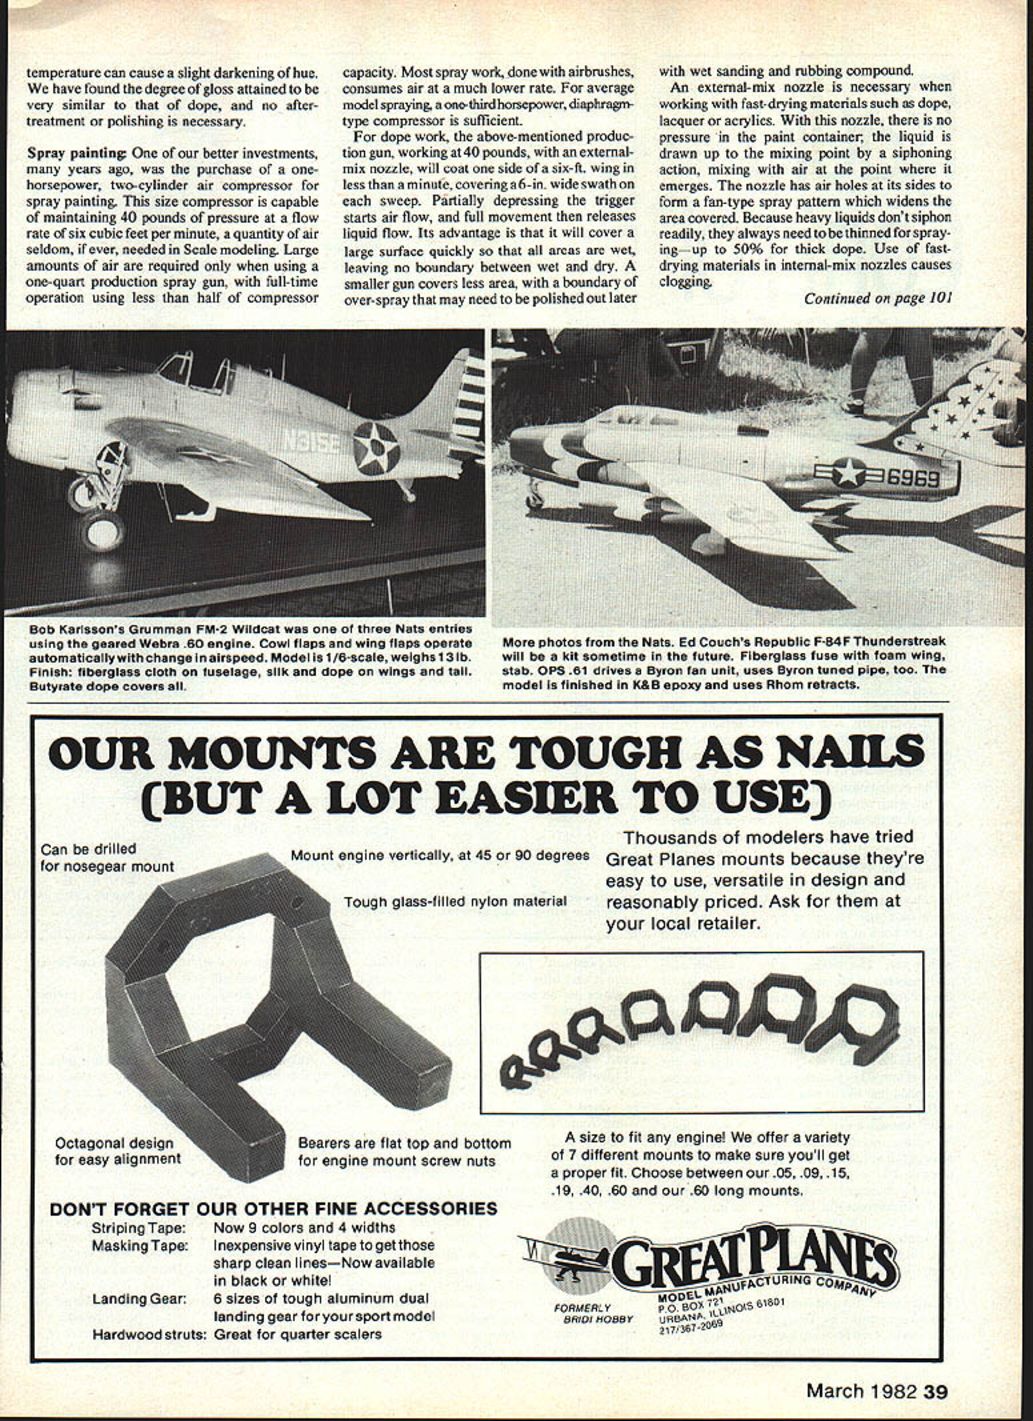
One of our better investments, many years ago, was the purchase of a one-horsepower, two-cylinder air compressor for spray painting. This size compressor is capable of maintaining 40 pounds of pressure at a flow rate of six cubic feet per minute, a quantity of air seldom, if ever, needed in Scale modeling. Large amounts of air are required only when using a one-quart production spray gun, with full-time operation using less than half of compressor capacity. Most spray work, done with airbrushes, consumes air at a much lower rate. For average model spraying, a one-third-horsepower, diaphragm-type compressor is sufficient.
For dope work, the above-mentioned production gun, working at 40 pounds with an external-mix nozzle, will coat one side of a six-foot wing in less than a minute, covering a 6-inch-wide swath on each sweep. Partially depressing the trigger starts air flow, and full movement then releases liquid flow. Its advantage is that it will cover a large surface quickly so that all areas are wet, leaving no boundary between wet and dry. A smaller gun covers less area, with a boundary of over-spray that may need to be polished out later with wet sanding and rubbing compound.
An external-mix nozzle is necessary when working with fast-drying materials such as dope, lacquer, or acrylics. With this nozzle, there is no pressure in the paint container; the liquid is drawn up to the mixing point by a siphoning action, mixing with air at the point where it emerges. The nozzle has air holes at its sides to form a fan-type spray pattern which widens the area covered. Because heavy liquids don't siphon readily, they always need to be thinned for spraying—up to 50% for thick dope. Use of fast-drying materials in internal-mix nozzles causes clogging.
Most versatile in number of uses is the Detail/Touch-Up gun used by specialty auto paint shops. It can cover spray patterns from 1/2 inch to 3 inches wide, depending upon the size nozzle tip that is used. Its cup will hold paint for one side of a large wing, which means more frequent refilling. Its advantage is light weight, easy manipulation, and flexibility. Its disadvantage is high cost.
Lowest in cost is the single-action, external-mix airbrush. For maximum versatility there are three sizes of spray tips to cover areas from 3/8 inch to 2 inches in diameter. Depressing the button releases air and fluid simultaneously. There is no provision for changing the spray pattern from round to oblong, as in the larger guns. Because of the small area, even with the largest tip, it is very difficult to get uniform density of color. Best use for this airbrush is in spraying small areas of trim after masking. We have found the single-action airbrush useful for large areas only with paints such as Floquil. It is simply not practical for doping the full area of a complete model.
For camouflage or weathering, the double-action, internal-mix airbrush has no equal. This brush is really different in that air and paint are mixed inside the spray tip for thorough atomization, resulting in almost complete elimination of overspray. Depressing the button releases air; moving the button rearward controls the quantity of liquid and spray diameter. Don't expect to learn the technique on your recently completed, super-scale model. It takes patience and development of skill. Another disadvantage of an internal-mix spray tip is the frequent cleaning required when using fast-drying materials.
For our purposes in R/C Scale, there is a variant of the internal-mix airbrush that is single-action. The button releases both air and paint, but the paint quantity is easily variable by a secondary control at the rear tip end of the airbrush, not continuously variable as in double-action devices. It is less difficult to master operating techniques, and the paint density remains fairly constant if the secondary control is set properly. Another plus is that this type of airbrush does not draw paint back into the cup, whereas the double-action sometimes does, which causes contamination between colors. We find the single-action internal-mix best for full-model painting.
For the fast-drying dopes we prefer the external-mix production gun. For other finishes, including acrylics, the internal-mix type is best. The internal-mix type maintains a more constant spray on the work, as long as the airbrush is kept moving at a constant rate. This appears to be the most useful airbrush for the non-professional, provided its application is confined to small areas.
When a model has been masked so that a detail or stripe can be painted, a large spray gun is wasteful of paint and thinner. There may be many times more paint on the mask than on the model, and much more thinner is needed to clean the gun than was used on the model's stripe. At $10 per gallon for thinner, the smaller quantity used in an airbrush for small areas eventually pays the cost of the brush.
When spray painting in humid weather, there is likely to be some condensation of water in the hose leading to the gun or airbrush which can be carried out through the nozzle to spoil the finish. It is more likely to occur in systems that have no storage air tank, where air is fed from a diaphragm compressor directly to the sprayer. A water trap can be used in the airline to avoid the problem.
Sudden rapid expansion of air at the spray tip causes a temperature drop that releases moisture. This is combined with evaporation cooling at the model's surface to condense more water from the surrounding humid air and cause blushing, the dulling of surface gloss. In severe cases, the surface turns milky white. Avoid this condition by spraying only on dry days. Don't pump up the tank on a humid day, and then spray in dry weather. We have had blush in dry weather from moist air in the tank. There is a drain plug in the bottom of the tank to release condensate.
To stop blush, we add retarder to dope. It slows down the rapid evaporation of solvents and slows drying. Retarder also helps slow the rapid drying of clear spray, which reduces gloss. Heating dope, in a safe manner, to 120°F–130°F may also be beneficial in reducing blush. The amount of retarder depends upon relative humidity. Aircraft mechanics have told us that they sometimes use retarder in place of thinner during high-humidity periods of midsummer, when a job could not be delayed.
Our preferred surface preparation is silk and clear dope, or 3/4-oz. glass cloth with polyester resin, filled and sanded, all brushed coats up to the point of color application. Only pigmented material is sprayed. If the surface is to be absolutely smooth, with no cloth weave visible, it must be filled and sanded to the finished smooth condition before application of color. This procedure was evolved because we found that color coats build weight quickly and should be kept to a minimum. We have never used more than two sprayed color coats.
Our spray area is the garage, with doors open for ventilation. The production gun will fill the garage with solvent fog in two minutes, and we then permit it to clear out before spraying the next piece. Wear a mask to protect against breathing solvent vapors, or spray quickly and then move out to fresh air. A ventilated spray booth would be best, but very few modelers have one.
We have a wooden bracket nailed to the garage wall that has two dowels extending four feet outward from the wall to support the part being sprayed. This enables the operator to walk completely around the work. Wings and fuselage are supported on the dowels about three feet above the floor. Spraying downward on a horizontal surface minimizes runs. We spray only one surface on large parts; the second surface is done after the first one dries. Small parts, such as tail surfaces, are supported on bent-wire brackets made from coat hangers, held in one hand while spraying with the other. This permits all surfaces to be sprayed without handling.
Spraying techniques and sequences vary with the part being finished and its shape. Our preference on a wing, for example, is to spray the bottom first, beginning with the edges, followed by the flat surfaces. If a wing is too wide to cover in one pass of the gun, spray the near side first, with the gun held at an angle of about 45°. Then follow with a second pass along the far side. This technique covers the off-spray of the first pass with a wet coat from the second. Repeat with the top surface after the bottom has dried. In cold weather, wet parts are carried indoors for drying. Crumpled newspapers are stuffed into openings in the model where spray should not penetrate.
For slow-drying materials, epoxy for example, it is preferred to spray top and bottom at the same time, with the part suspended in a manner so that it can be turned.
NEW DUCTED-FAN BOOK
For all of us who have been impressed by the success of ducted-fan models at the Nats, and the recent first-place win by Tom Cook's F-5 Phantom in the Scale Masters Tournament, a new book by Dick Sarpolus sums up what we need to know for entry into this exciting phase of Scale modeling. The book helps us get into ducted fans without having to reinvent all of those things that others have already done.
Dick Sarpolus is no stranger to those who have been reading the magazines. Forty of his designs have appeared as construction articles. His book explains the operation of ducted-fan accessories needed and tells how to build and fly ducted-fan models. The book also contains an up-to-date listing of ducted-fan units, suitable engines, and currently available ducted-fan aircraft kits. It consists of 52 magazine-size pages of how-to text and includes 134 photos and drawings.
Dick's book is titled Building and Flying Ducted Fan R/C Aircraft ($6.95), available in hobby shops, bookstores, or direct from Kalmbach Books, 1027 N. 7th St., Milwaukee, WI 53233. Include for postage and handling: U.S. $0.75, foreign $1.25.
Bob and Dolly Wischer Rt. 1, S-221 Lapham Peak Rd., Delafield, WI 53018
Transcribed from original scans by AI. Minor OCR errors may remain.

