
Radio Control: Scale
Bob & Dolly Wischer
Flight Problems
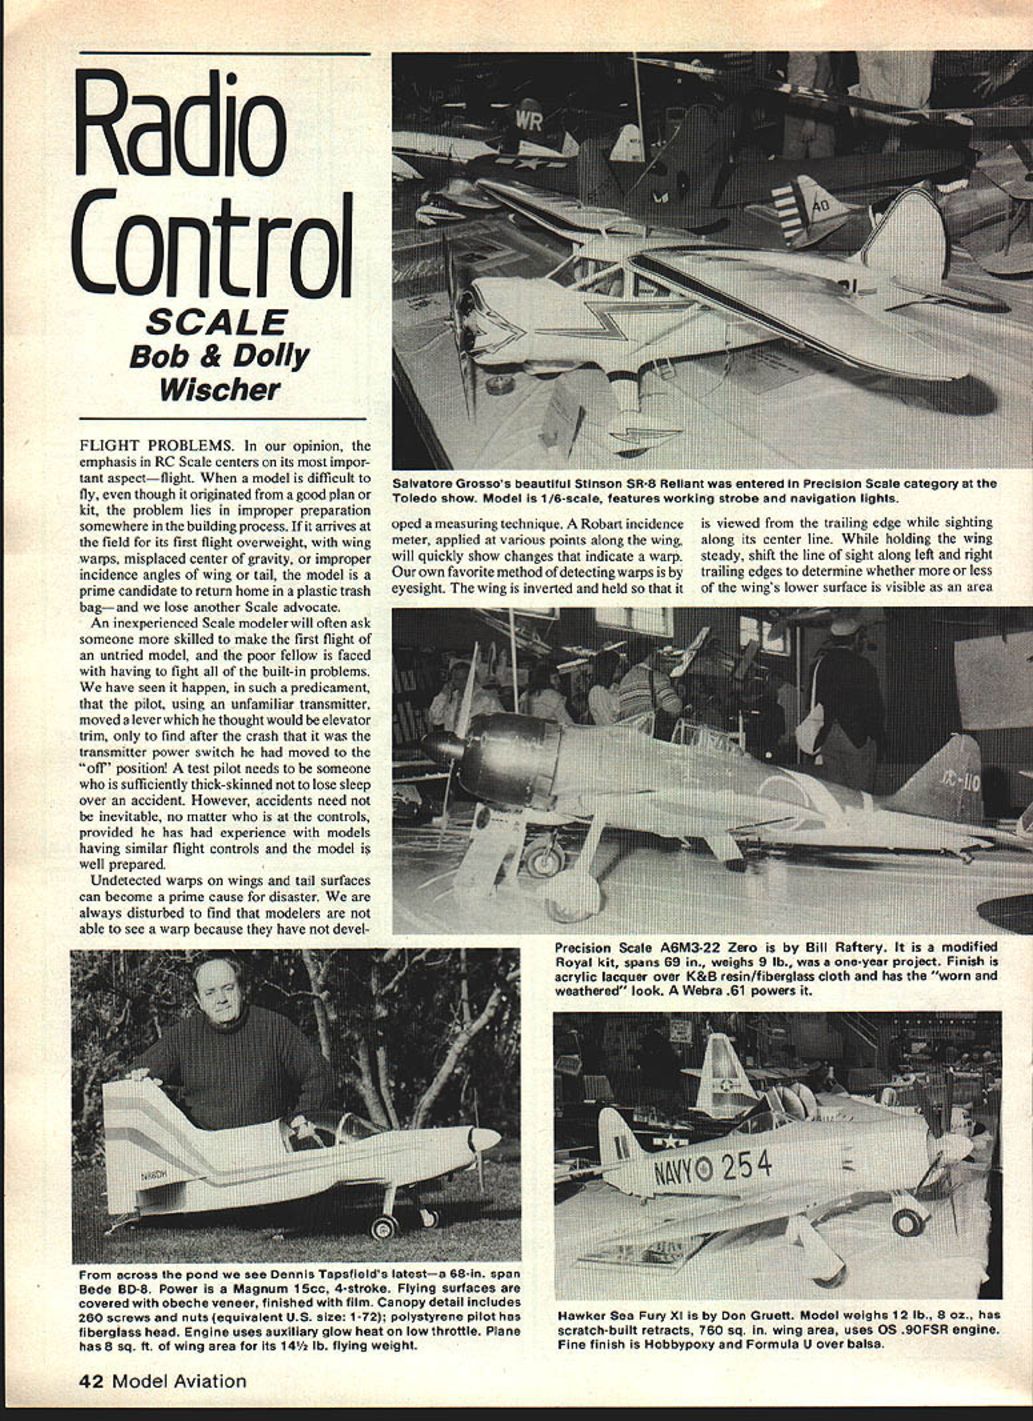
RC Scale centers on its most important aspect—flight. A model may look good but be difficult to fly if it was improperly prepared during the building process. When a model arrives at the field for its first flight overweight, with wing warps, a misplaced center of gravity (CG), or incorrect incidence angles of wing or tail, it is likely to return home in a trash bag—and we lose another Scale advocate.
Inexperienced modelers often ask someone more skilled to make the first flight. The test pilot then must cope with all built‑in problems. Accidents need not be inevitable: with experience on similar control setups and a well‑prepared model, mishaps can be avoided. A test pilot should be thick‑skinned about accidents, but preparation and familiarity with the model are the best safeguards. (We once saw a pilot using an unfamiliar transmitter move the lever he thought was elevator trim, only to find after the crash that he had switched the transmitter power off.)
Detecting and Fixing Warps
Undetected warps in wings and tail surfaces are a prime cause of in‑flight trouble. Many modelers cannot see warps because they have not developed a measuring technique.
- Methods to detect warps:
- Use a Robart incidence meter at various points along the wing to show changes in incidence.
- Our preferred eyesight method: hold the wing inverted and sight along its center line from the trailing edge. Shift the line of sight along the left and right trailing edges—if the amount of lower surface visible changes, the wing is warped. Keep the sighting eye along the center line and move it up or down to adjust visibility.
Tiny warps (about 1/32 in.) can be detected by this simple sighting method. A 1/32‑in. warp may be harmless on an average‑size wing, but a 1/8‑in. warp needs straightening. It is better to find and correct warps during construction rather than after finishing.
- Methods to fix warps:
- Use heat or steam to soften the surface, then twist the wing opposite the warp. Twist beyond the straight position to allow for spring‑back and hold until cool.
- Heat alone may work but must be used with great caution—dope‑thinner fumes inside the structure can be explosive (avoid household ranges and enclosed spaces).
Wash‑in and Washout
Warps may raise or lower the leading or trailing edge at the wing tip relative to the root.
- Wash‑in: leading edge raised and trailing edge lowered at the tip. This is detrimental.
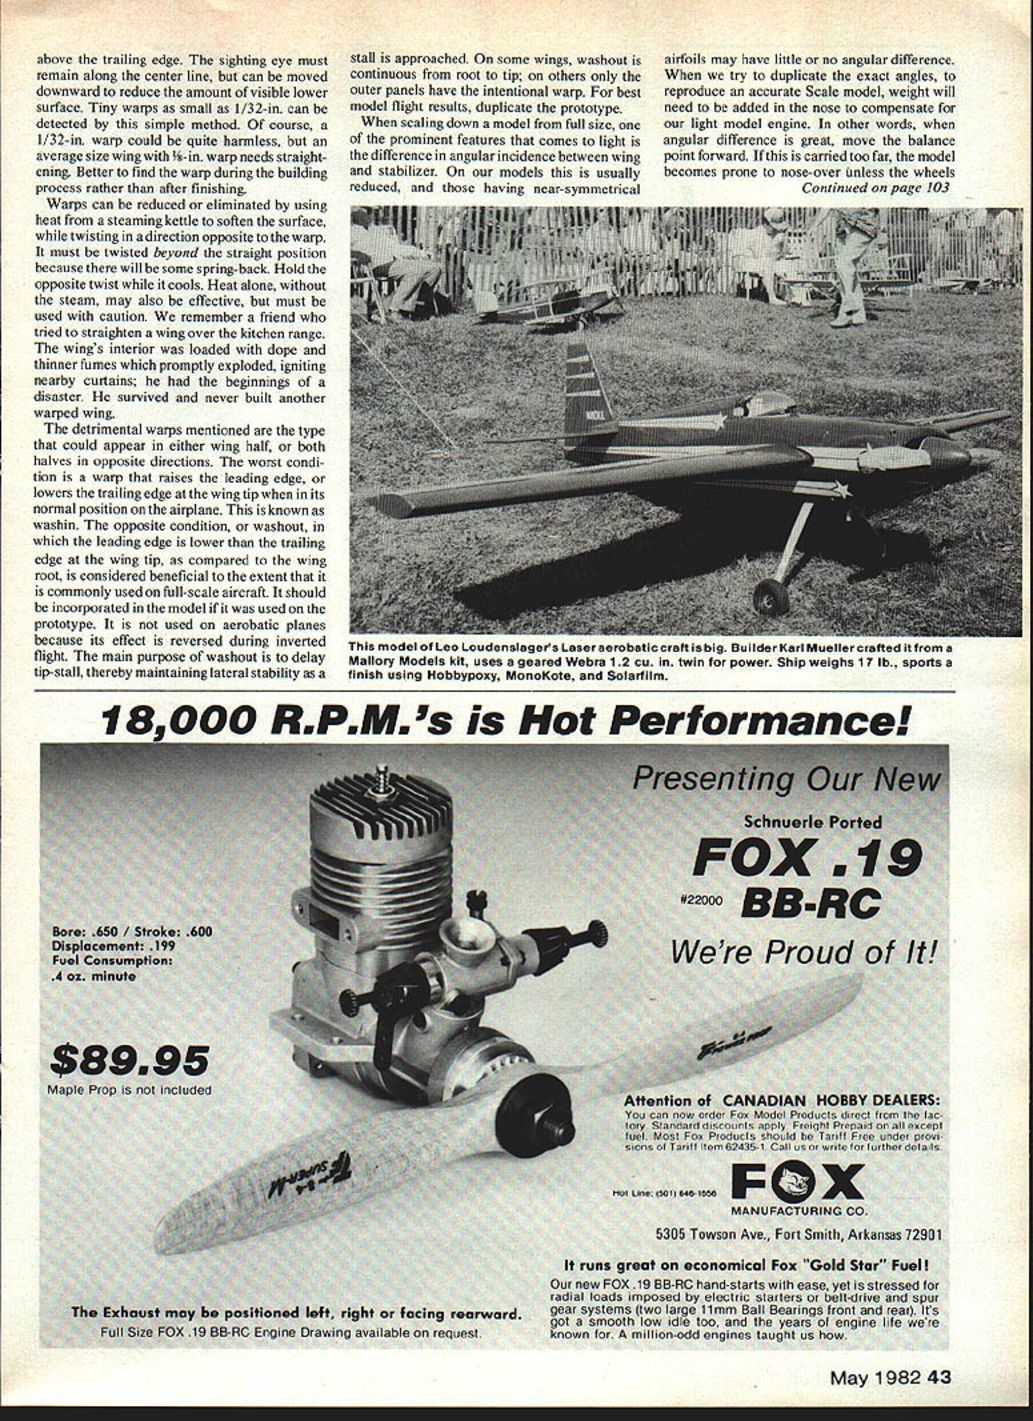
- Washout: leading edge lower at the tip than at the root. Washout is often beneficial because it delays tip stall and preserves lateral stability as a stall is approached. Full‑scale aircraft commonly use washout; incorporate it in models when the prototype had it, and it’s often used on aerobatic planes (its effect reverses in inverted flight).
Some wings have continuous washout from root to tip; others have washout only in outer panels.
Incidence Angles and Center of Gravity
When scaling down a full‑size airplane, differences in angular incidence between the wing and stabilizer become prominent. Models with near‑symmetrical airfoils may have little or no angular difference, but try to duplicate the prototype geometry when practical.
- Replicating full‑size incidence angles often requires adding nose weight to compensate for light model engines.
- If the angular difference is large, the balance point should be moved forward; too much forward balance can cause nose‑over tendencies unless the wheels are moved forward (which harms Scale appearance).
- For first flights, it is desirable to err toward a slightly nose‑heavy condition (it can be reduced later if unnecessary). A slight nose‑heavy model is less sensitive to elevator trim adjustments.
- Moving the battery pack forward is an easy way to redistribute weight. For aerobatic models (spins, snap rolls), adjust nose weight in small increments (1/2–1 oz).
We once had a tailwheel‑type airplane that was nose heavy. In flight the imbalance caused no problems, but on the ground it was impossible to taxi—even in short grass—and the model chewed up several props. Adding weight to the tail (unusual, but effective) solved the ground‑handling problem.
Landing Gear and Ground Handling
On tail‑wheel airplanes, the relation between main gear wheel centers and the CG affects tracking during takeoff and landing rolls:
- Wheels too far forward → tendency to ground loop.
- Wheels too far rearward → tendency to nose‑over.
- Ideal: CG just aft of the wheel centers, with a touch of up‑elevator in the early takeoff roll to keep the tail wheel down for best tracking.
Control Surface Travel
Control travel settings are controversial. Some fliers prefer maximum travel for first flights to cope with unknowns; we prefer close control of variables and minimum surface movement.
- Elevator:
- Keep travel small—about 10° each side of center.
- Enough up‑elevator to raise the nose for takeoff and landing at low speed is the key requirement.
- Down‑elevator is seldom used in Scale flights except for aerobatics.
Example: Our Emeraude originally had about 25° elevator travel each way and would snap roll and enter an unintended tailspin during high G maneuvers. A tiny twitch could trigger it. Reducing elevator travel to about 10° eliminated the problem while retaining aerobatic capability. The model’s 3° washout and increased engine power (which maintained flying speed in steep turns) also helped prevent uncommanded stalls and spins.
- Ailerons:
- Excessive aileron travel is less likely to cause trouble, but non‑aerobatic Scale models do not need extremely fast rolls.
- Aim for a gentle roll taking 4–6 seconds rather than a 1–2 second snap.
- Rudder:
- Tail‑skid‑type airplanes must have sufficient rudder area and travel to be controllable on the ground.
- Many older designs require coordinated aileron and rudder for proper turns—models of those planes should be flown likewise.
- For aerobatics, a large rudder with maximum travel provides quick, accurate response.
As an airplane slows, controls lose effectiveness in this order: ailerons first, then elevators, and finally rudder.
Which Scale Models Are Difficult?
From our experience flying many types, the more troublesome Scale models are typically WW I types with short noses and landing gear far forward—difficult mainly in ground handling just before takeoff and after landing. Most of our flying experience has been with taildraggers, except for a Douglas A‑20 Havoc twin.
- Douglas A‑20 Havoc (model): delightful to fly when both engines run and the model carries about 8 oz. of lead in the nose. Because the engines are mounted at the wing leading edge, they do not provide much nose ballast. The nose wheel provides excellent tracking and the nose weight prevents premature rotation until sufficient speed is attained to make the low‑travel elevators effective.
- Prototype vs. model steering: the full‑size Havoc had a castering nose wheel and was steered by main‑gear wheel brakes; the model is steered by its nose wheel. The single rudder sits out of propwash and is ineffective until the nose wheel lifts—so the full‑size could be flown mostly with feet on the floor; the model duplicates that behavior.
We have limited experience with other multi‑engine models.
Wing Loading and Practice
Our models range in wing loading from about 16 to 37 oz per sq. ft. Apart from the slow‑flight characteristics and wind sensitivity of the lightly loaded models, we don’t see large differences in inherent flight difficulty. Missed spot landings can occur with either light or heavy models.
The real difference in flying competence comes from practice. To avoid flight difficulty, the greatest benefit is to fly a reliable trainer that behaves like a Scale model and to put many hours (and gallons of fuel) through it.
Contact
Bob and Dolly Wischer Rt. 1, S‑221 Lapham Peak Road, Delafield, WI 53018.
Transcribed from original scans by AI. Minor OCR errors may remain.

