
Radio Control: Scale
Bob & Dolly Wischer
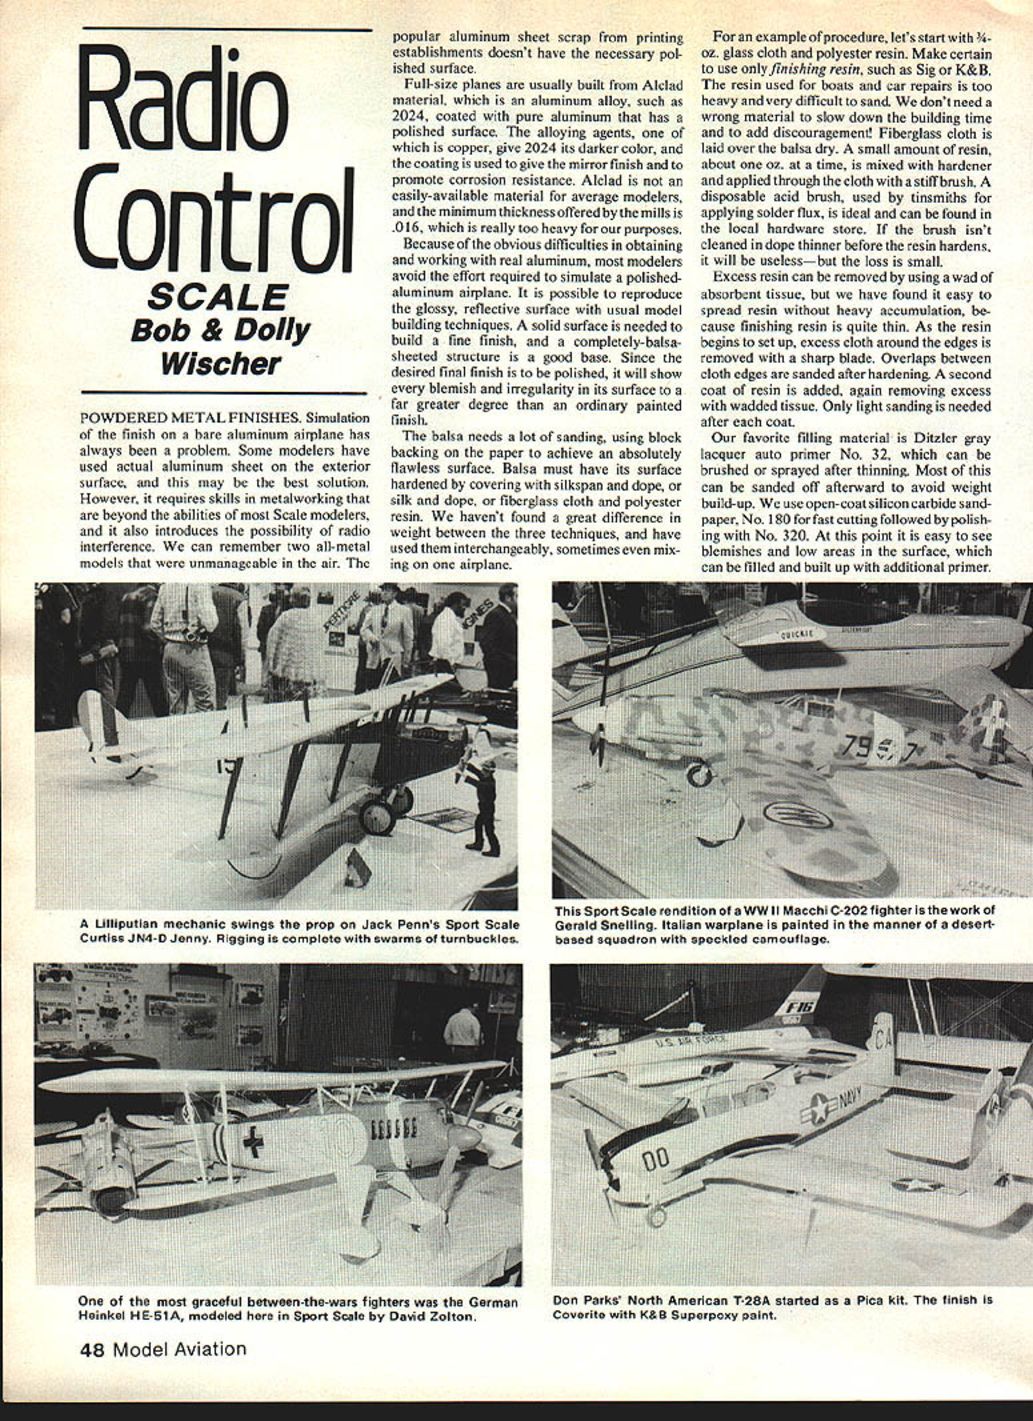
Powdered Metal Finishes
Simulation of the finish on a bare aluminum airplane has always been a problem. Some modelers have used actual aluminum sheet on the exterior surface, and this may be the best solution. However, it requires skills in metalworking that are beyond the abilities of most scale modelers, and it also introduces the possibility of radio interference. We remember two all-metal models that were unmanageable in the air. The popular aluminum sheet scrap from printing establishments doesn't have the necessary polished surface.
Full-size planes are usually built from Alclad material, which is an aluminum alloy, such as 2024, coated with pure aluminum that has a polished surface. The alloying agents, one of which is copper, give 2024 its darker color, and the coating is used to give the mirror finish and to promote corrosion resistance. Alclad is not easily available for average modelers, and the minimum thickness offered by the mills is .016, which is really too heavy for our purposes.
Because of the obvious difficulties in obtaining and working with real aluminum, most modelers avoid the effort required to simulate a polished-aluminum airplane. It is possible to reproduce the glossy, reflective surface with usual model-building techniques. A solid surface is needed to build a fine finish, and a completely balsa-sheeted structure is a good base. Since the desired final finish is to be polished, it will show every blemish and irregularity in its surface to a far greater degree than an ordinary painted finish.
The balsa needs a lot of sanding, using block backing on the paper to achieve an absolutely flawless surface. Balsa must have its surface hardened by covering with silkspan and dope, or silk and dope, or fiberglass cloth and polyester resin. We haven't found a great difference in weight between the three techniques, and have used them interchangeably, sometimes even mixing on one airplane.
For an example of procedure, let's start with 1/4-oz. glass cloth and polyester resin. Make certain to use only finishing resin, such as Sig or K&B. The resin used for boats and car repairs is too heavy and very difficult to sand. We don't need a wrong material to slow down the building time and to add discouragement! Fiberglass cloth is laid over the balsa dry. A small amount of resin, about one oz. at a time, is mixed with hardener and applied through the cloth with a stiff brush. A disposable acid brush, used by tinsmiths for applying solder flux, is ideal and can be found in the local hardware store. If the brush isn't cleaned in dope thinner before the resin hardens, it will be useless—but the loss is small.
Excess resin can be removed using a wad of absorbent tissue; but we have found it easy to spread resin without heavy accumulation, because finishing resin is quite thin. As the resin begins to set up, excess cloth around the edges is removed with a sharp blade. Overlaps between cloth edges are sanded after hardening. A second coat of resin is added, again removing excess with wadded tissue. Only light sanding is needed after each coat.
Our favorite filling material is Ditzler gray lacquer auto primer No. 32, which can be brushed or sprayed after thinning. Most of this can be sanded off afterward to avoid weight build-up. We use open-coat silicon carbide sandpaper, No. 180 for fast cutting followed by polishing with No. 320. At this point it is easy to see blemishes and low areas in the surface, which can be filled and built up with additional primer.
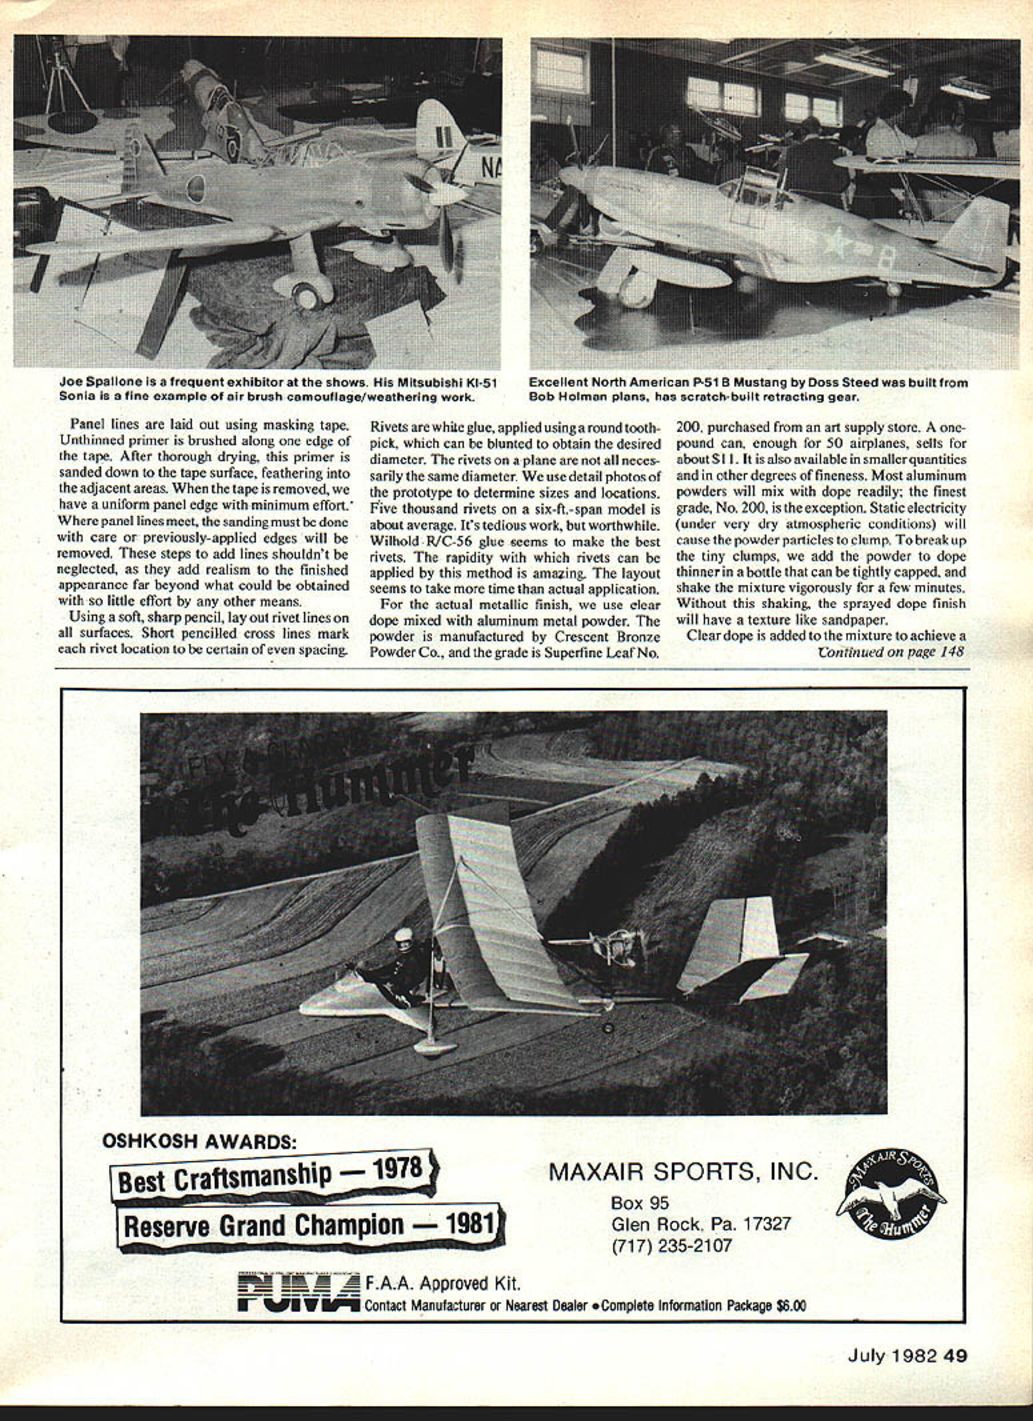
Panel lines are laid out using masking tape. Unthinned primer is brushed along one edge of the tape. After thorough drying, this primer is sanded down to the tape surface, feathering into the adjacent areas. When the tape is removed, we have a uniform panel edge with minimum effort. Where panel lines meet, the sanding must be done with care or previously-applied edges will be removed. These steps to add lines shouldn't be neglected, as they add realism to the finished appearance far beyond what could be obtained with so little effort by any other means.
Using a soft, sharp pencil, lay out rivet lines on all surfaces. Short penciled cross lines mark each rivet location to be certain of even spacing.
Rivets are white glue, applied using a round toothpick, which can be blunted to obtain the desired diameter. The rivets on a plane are not all necessarily the same diameter. We use detail photos of the prototype to determine sizes and locations. Five thousand rivets on a six-ft.-span model is about average. It's tedious work, but worthwhile. Wilholl R/C 56 glue seems to make the best rivets. The rapidity with which rivets can be applied by this method is amazing. The layout seems to take more time than actual application.
For the actual metallic finish, we use clear dope mixed with aluminum metal powder. The powder is manufactured by Crescent Bronze Powder Co., and the grade is Superfine Leaf No. 200, purchased from an art supply store. A one-pound can, enough for 50 airplanes, sells for about $11. It is also available in smaller quantities and in other degrees of fineness. Most aluminum powders will mix with dope readily; the finest grade, No. 200, is the exception. Static electricity (under very dry atmospheric conditions) will cause the powder particles to clump. To break up the tiny clumps, we add the powder to dope thinner in a bottle that can be tightly capped, and shake the mixture vigorously for a few minutes. Without this shaking, the sprayed dope finish will have a texture like sandpaper.
Clear dope is added to the mixture to achieve a spraying consistency of about 50-50. The amount of powder used is not critical. Too much powder can cause a rough finish, while too little means extra sprayed coats for complete coverage. With just the right amount of powder in the mix, we have found that one wet coat will cover the primer.
After the sprayed dope has dried completely, it still doesn't really appear to be a good simulation of a polished metal surface. To get the metallic appearance, the surface is burnished, using a wad of soft facial tissue and rubbing vigorously. Use care in burnishing over the rivets, as it is possible to build up considerable heat in the process, and the glue rivets will melt. Actually, burnishing heat seems to be a factor that brings the polish to the surface and produces the metallic sheen. Keep turning the tissue wad to get a fresh area of tissue to bear against the dope.
The transformation to a metal-like appearance is dramatic. However, it shows fingerprints, particularly if hands are wet or oily. It may be necessary to wear a cloth glove on the holding hand during polishing. To preserve the soft dope surface and protect it from oxidation and fingerprints as well as for fuel-proofing, an overcoat is applied, which can be either polyurethane varnish or clear epoxy to provide the reflective gloss so characteristic of unpainted metal aircraft. Of the two coatings, epoxy is the more durable. Varnish has a slight yellowing tendency. Coverite Glaskote is an excellent coating that leaves no brush marks. With any of these materials, a run too heavy a coat can be ruinous. A run can be sanded out, using No. 600 paper and water, but this can be difficult around rivets. It's best to use a single coat and be very careful to avoid runs.
The brush bristles we prefer for dope work are camel hair, since individual hairs are slightly wavy. Because the hairs are separated by their waviness, the brush will hold very large quantities of liquid, ideal for dope work, especially for that first coat over silk. For applying Glaskote, polyurethane varnish, or clear epoxy, this overloading is intolerable because it can lay too heavy a coat on the surface with runs. The preferred brush is a sable, equally as soft as camel hair, but with straight fibers that will hold much less liquid and, therefore, be capable of laying a more uniform and easily controlled thickness of coating. The varnished surface comes as close to the appearance of polished aluminum as we have been able to achieve with a painting technique.
Future of RC Scale
In our April 1982 column we mentioned the possibility of combining Precision and Sport Scale competitive classes as discussed among Scale Subcommittee members at the Paris FAI meeting in December. It was hinted that the two events could also be combined in AMA competition classes, and we expected a controversy to develop as the issue became public from Sport Scale enthusiasts. There have been no responses, which could mean lack of interest, or that competitors don't read the column.
Under FAI static scoring, which uses K-factors to weight the various areas, the revised scoring schedule to combine the two classes could be as follows:
- Scale accuracy (K-Factor)
- Side view......................10
- End view.......................10
- Plan view......................10
- Color.........................5
- Markings......................5
- Finish.......................10
- Craftsmanship................10
- Scale detail..................10
- Special technical features.....5
Total (Same as at present)......65
Items 1 through 3 to be judged at 3-meter distance, items 4 through 7 at 1-meter distance. Flight scoring under FAI rules is the same for both classes. Dennis Thumpston, chairman of the FAI Scale Subcommittee, emphasizes that this is only a basis for discussion, and he would welcome the views of U.S. scale modelers on the subject of combining F4C and Stand-Off Scale classes. Could our Precision Scale and Sport Scale classes be combined in a similar manner, by a slight revision of AMA RC Sport Scale rules?
Bob and Dolly Wischer Rt. 1, S-221 Lapham Peak Road Delafield, WI 53018
Transcribed from original scans by AI. Minor OCR errors may remain.

