

Radio Control: SCALE
Bob & Dolly Wischer
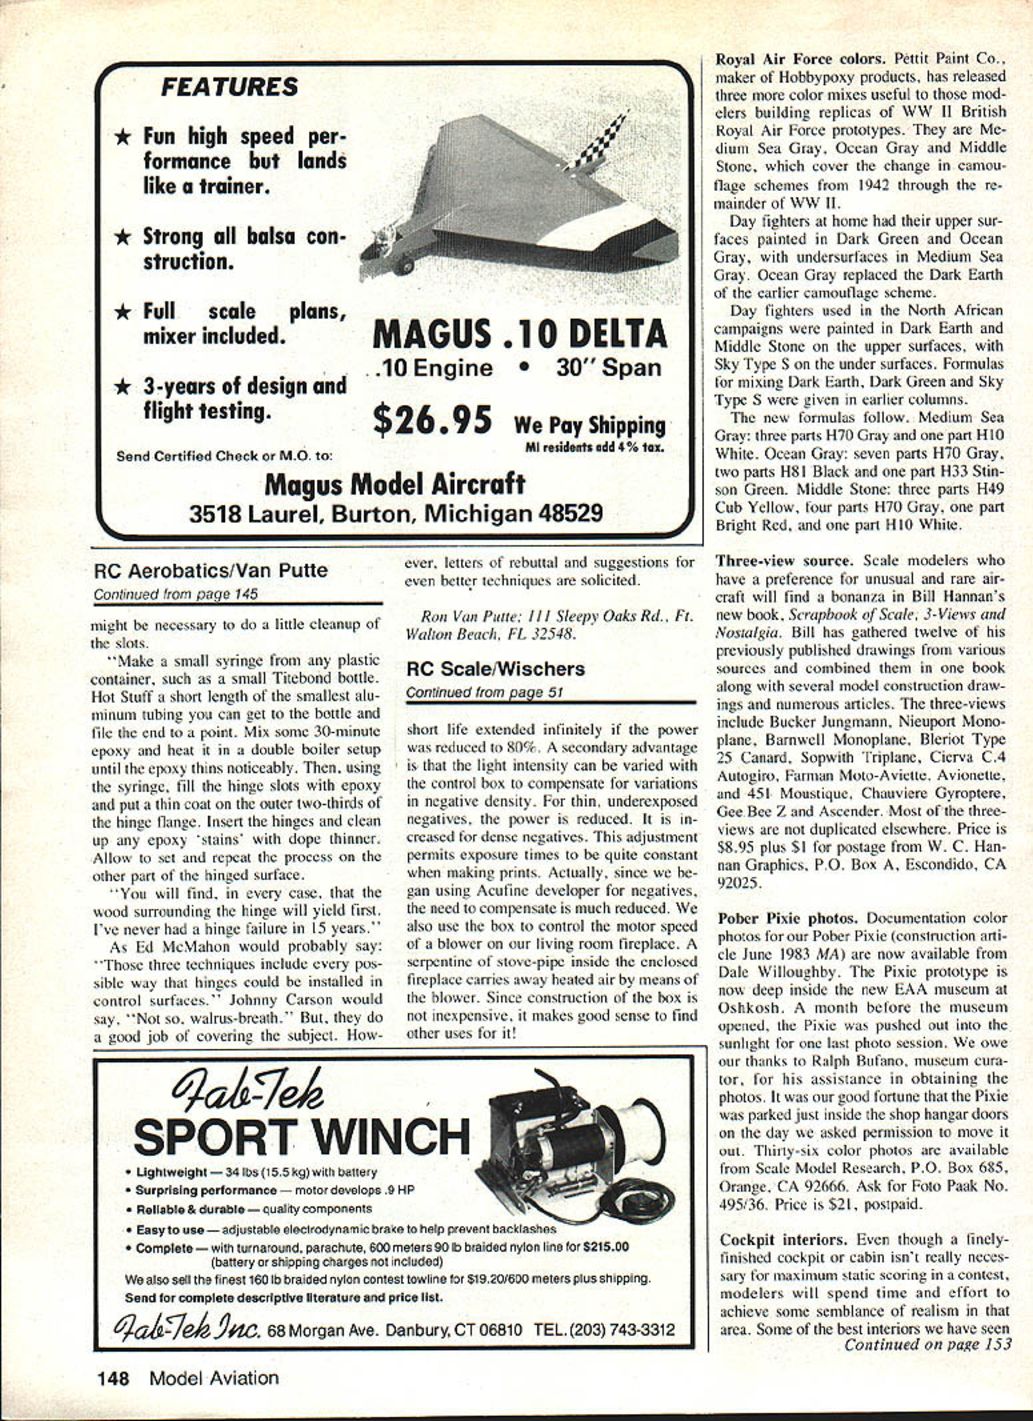
Foam-Cutter Control
Our June 1983 column showed a control box for hot-wire foam cutting. The control was assembled in our workshop from standard components purchased locally.
- Enclosure: standard aluminum electrical box, 4 in. x 5 in. x 6 in.
- Internal components: two transformers
- Powerstat variable autotransformer (Superior Electric Co., type 10B): 120 V input, variable 0–120 V output. This output is not isolated from house power and is hazardous to use directly on the hot wire.
- Isolation transformer (Triad Transformer Co., type F-60U or similar): separate primary and secondary windings. Use a transformer with approximately 26–35 V secondary and at least 3 A load capacity.
Safety notes:
- Because the Powerstat output is not isolated, touching any metal parts of the foam cutter can be hazardous. Currents of about 5 mA or greater can cause muscle contraction and inability to release a grip; higher currents may be lethal.
- To eliminate the shock hazard, feed the Powerstat output into an isolation transformer; connect the isolation transformer secondary to insulated screw terminals on the box top to supply the hot wire. A toggle switch controls power.
- Doorbell or toy-train transformers are generally not safe for this purpose. If in doubt, check with an ohmmeter between input and output; there should be no continuity.
Advantages:
- This type of power supply is safe when the isolation transformer is used and provides an infinitely variable output regardless of hot-wire length.
- On top of the box we mounted a pair of standard 120 V receptacles fed directly from the Powerstat for other shop uses (not for foam cutting).
Additional controls and wiring:
- The control box contains a screw terminal for the hot wire, a control knob for the Powerstat, ON/OFF switches, a line cord, and cutter-wire terminals.
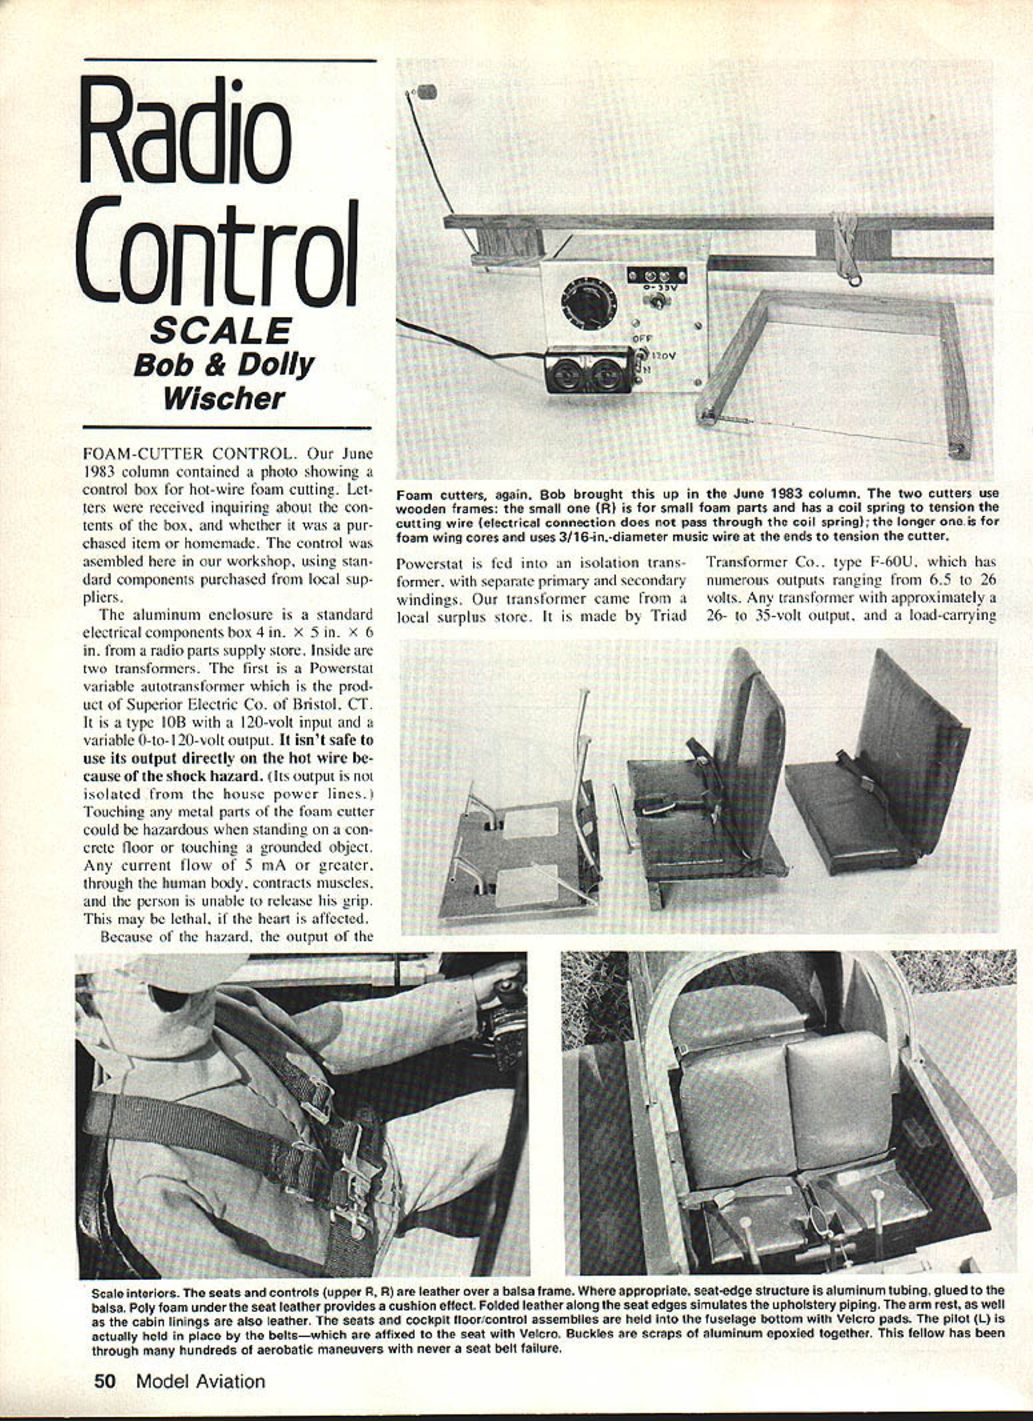
Hot Wire, Tension, and Cutters
- Tension: Use a coiled steel tension spring to stretch the hot wire. Be certain that the current is not carried through the spring—heating the spring will soften it and it will lose its springiness.
- Cutting wire: Nichrome wire, 0.012–0.025 in. diameter, is standard; music wire has also been used. Because the output is variable, wire type and exact size are not critical.
- Operation: Advance the control knob until a clean cut is obtained. Too much heat produces a wide cut and results in undersized foam parts.
- Cutters: Simple wood frames with the wire stretched across are easy to handle and should be kept light in weight.
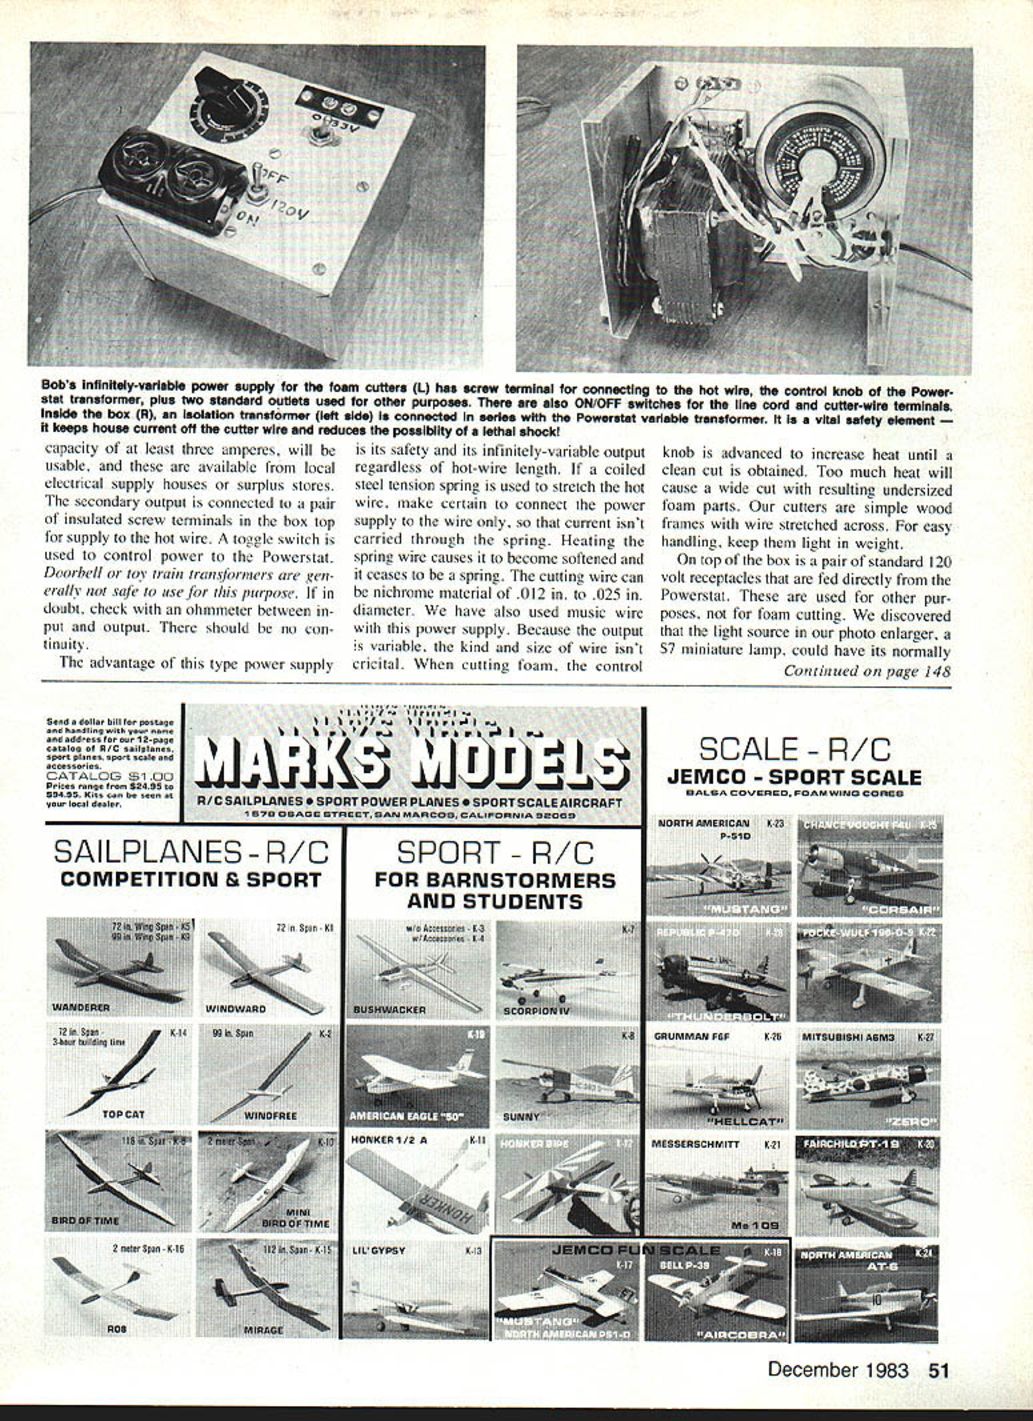
Cockpit and Interior Detailing
An eye-catching cockpit adds much to a model's overall appearance. Casual observers often focus on the area that would contact pilot and passengers, and contest judges—though they may give interior details only cursory attention—are nonetheless influenced by their presence.
Leather Upholstery
Real leather upholstery is one of the most convincing details for a scale interior. Sources for thin, fine-grain leather include thrift stores such as Goodwill Industries and the Salvation Army. Good materials are often found in:
- ladies' purse linings
- leather-bound books
- photo albums
Recommended thickness: about .010 in. to .015 in. This leather can be formed and stretched around small radii to simulate folds and piping. Lighter colors are preferred because they can be darkened by dyeing if necessary.
Working with leather:
- Wetting leather makes it pliable for forming around mild compound curves (water in white glue can assist when gluing).
- Leather can be thinned by sanding the back surface.
- To simulate a piped edge, fold the leather back sharply; it won't be true piping but looks better than raw edges.
- Avoid CYA glues on visible leather surfaces unless tested first—some CYA glues can stain. White glue is safer but requires holding the leather in place while it dries.
- Paint any visible balsa framework to match the leather; our preferred paint is dope.
Seat Construction
- Frames: Build seat frames from balsa wood.
- Visible tubing: Simulate steel tube framework with properly sized aluminum tubing. If bending is required, anneal the tube by heating (kitchen stove is adequate) and quenching in water.
- Cushions: Use thin poly foam (about 1/4 in.) tacked to the balsa to hold it while stretching leather over the cushions.
Fastening and Access
- Fastening options: screws and glue will work, but our current preference is dressmakers' Velcro cut into small strips (about 1/4 in. x 3/4 in.).
- Adhesive: Whitford RC-56 glue adheres well to Velcro; some glues will peel because Velcro’s base is dense synthetic fabric.
- Advantages of Velcro:
- Seats can be removed with a light pull if strips are small.
- Space beneath removable seats can house RC equipment for easy access.
- Velcro can also secure a carpeted floor; beneath the removable floor we place the power switch and charging jack for the battery to enable quick servicing.
- Caution: Using too-large an area of Velcro makes seat removal destructive—use small strips instead.
- Durability: We have not had problems with seats coming loose from landings or engine vibration when Velcro is properly used.
Belts and harnesses:
- Use dressmakers' supplies for a variety of colors, widths, and ribbon materials for seat belts.
- Buckles can be fashioned from bits of aluminum and assembled with epoxy.
- For authentic buckles, study real aircraft at an airport with a rule and sketch pad.
Pilot Figures
New pilot figures with realistic detail are available. A notable product line is "Knights of the Air" by William M. Hawke.
- Material and construction: molded vinyl with detailed lines and textures on a white surface; figures come in kit form (upper body and head, lower body and legs, separate arms) and are assembled with CYA glue.
- Finish: Intended to be painted with Poly S for a natural, non-gloss skin and clothing appearance.
- Configurations: Because the figures come in sections, they can be used as whole figures or as busts.
- Example: The first pilot is 1/2-scale (about 12 in. tall in the sitting position), weighs about 15 oz., and is a civilian type (open-necked shirt, trousers with belt, shoes).
- New figures planned (1983): 1/4-scale civilian, 1/8-scale civilian, and 1/4-scale WWII Navy.
- Price and ordering: 1/2-scale pilot kit priced at $19.95 plus $2 shipping from William M. Hawke, 7148 Lasting Light Way, Columbia, MD 21045.
Bob and Dolly Wischer S-221 Lapham Peak Rd., Delafield, WI 53018
Transcribed from original scans by AI. Minor OCR errors may remain.

