
Radio Control: Scale — Bob & Dolly Wischer
Soft soldering
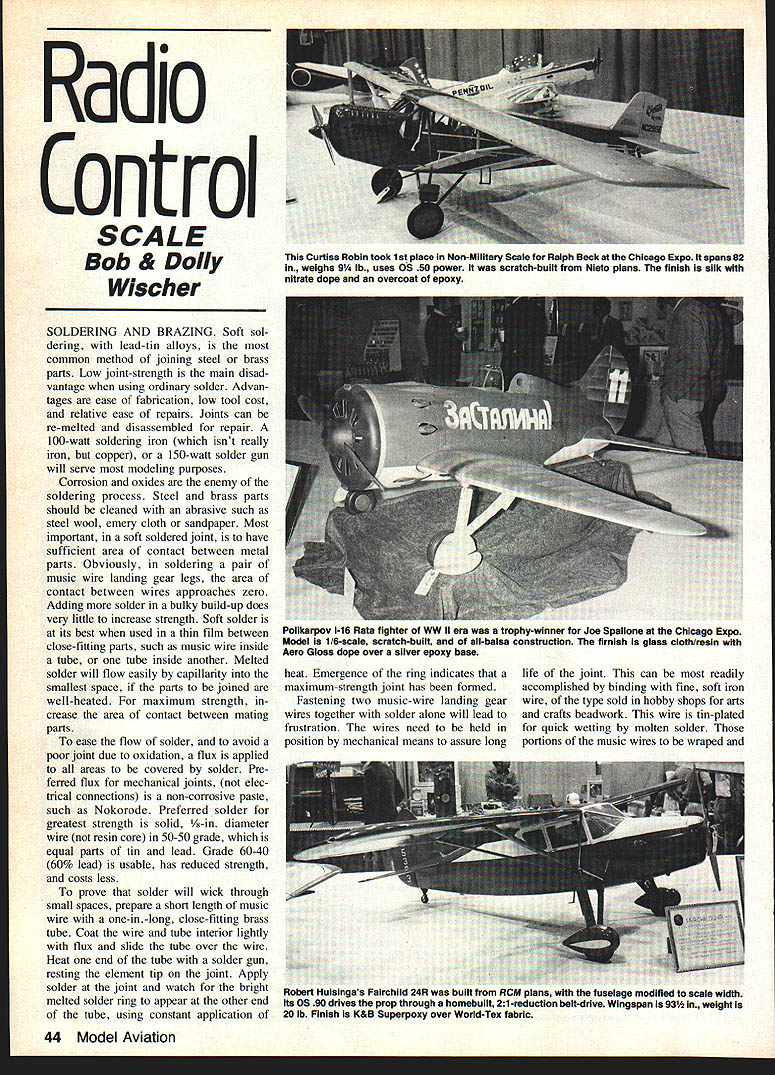
Soft soldering with lead–tin alloys is the most common method of joining steel or brass parts for scale models.
- Advantages:
- Ease of fabrication
- Low tool cost
- Relative ease of repair (joints can be re-melted and disassembled)
- Disadvantages:
- Low joint strength compared with brazing or silver soldering
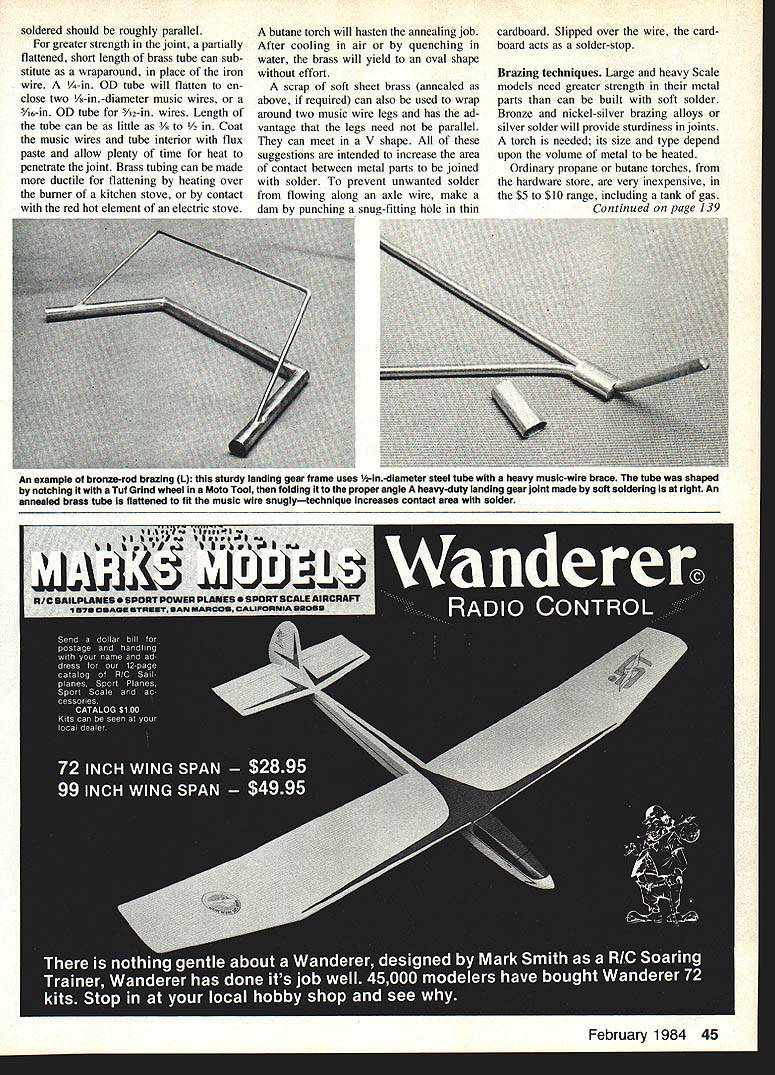
Tools and materials:
- A 100-watt soldering iron (copper tip) or a 150-watt solder gun will serve most modeling purposes.
- Preferred flux for mechanical joints (not electrical connections) is a non-corrosive paste such as Nokorode.
- For greatest strength, use solid 50/50 (tin/lead) solder and avoid resin-core solders for mechanical joints. Solid wire is available in various diameters; larger diameter (for heavy joints) gives more mass to work with.
Preparation and technique:
- Corrosion and oxides inhibit solder flow. Clean steel and brass with abrasives such as steel wool, emery cloth, or sandpaper so mating surfaces are bright.
- Soft solder works best as a thin film between close-fitting parts (e.g., music wire inside a tube or one tube inside another). Melted solder will flow by capillarity into small spaces if the parts are well heated.
- Maximize the area of contact between mating parts to increase joint strength and ease solder flow.
- Apply flux to all areas to be covered by solder to prevent poor joints due to oxidation.
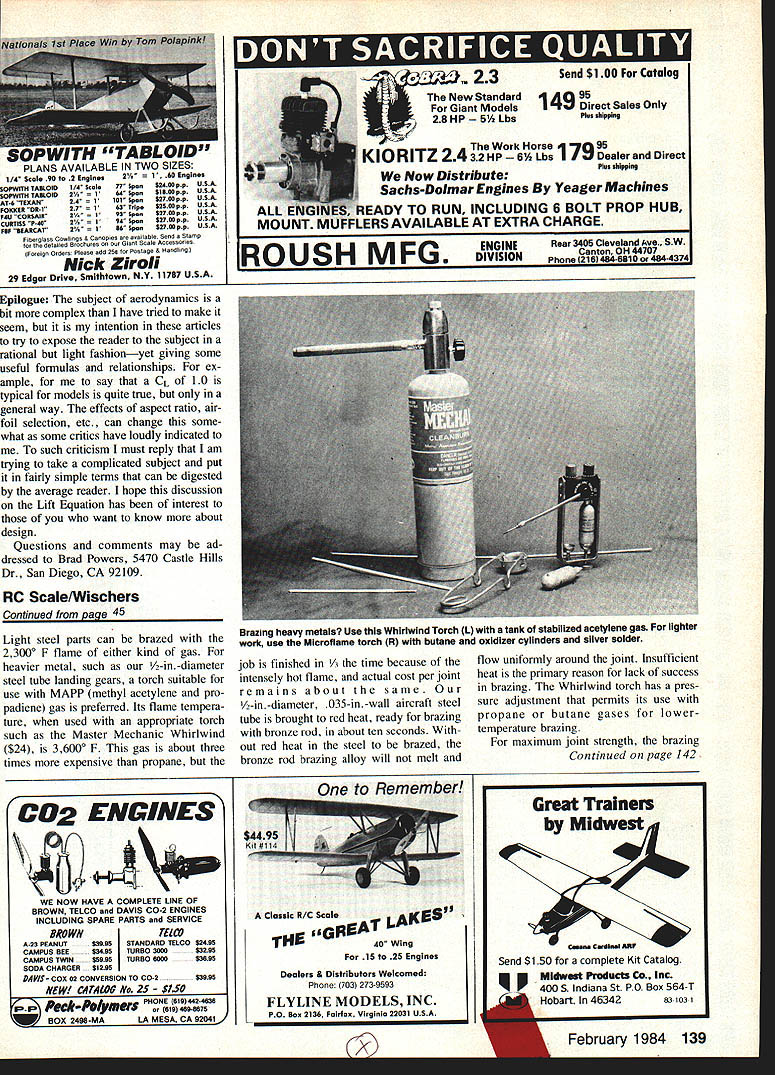
Wicking test (to demonstrate capillary action):
- Prepare a short length of music wire and slide it into a close-fitting brass tube about 1 inch long.
- Coat the wire and tube interior lightly with flux and slide the tube over the wire.
- Heat one end of the tube with the solder gun, resting the tip on the joint, and apply solder.
- Watch for a bright melted-solder ring to appear at the opposite end of the tube — this indicates solder has wicked through and a strong joint has formed.
Mechanical reinforcement:
- Solder alone is usually insufficient to hold two music-wire landing-gear wires together for the long term. Mechanically fix the parts first.
- Bind the joint with fine soft iron wire (tin-plated hobby wire used for beadwork) before soldering; it wets quickly with molten solder.
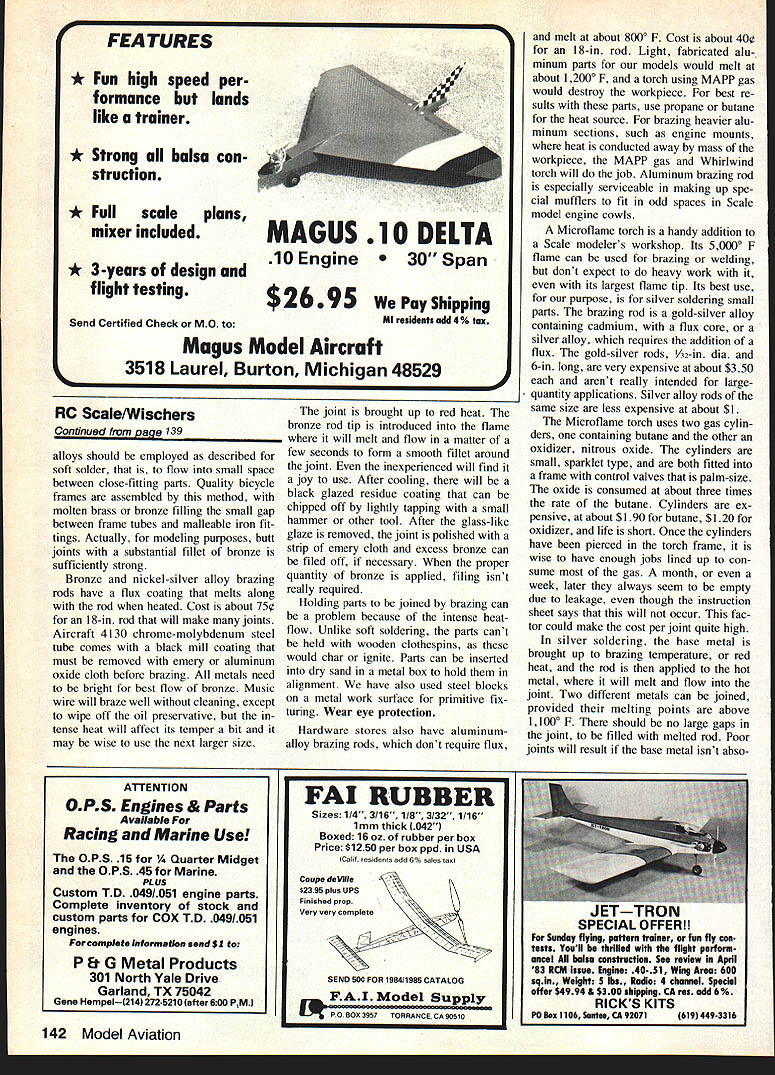
- A short length of brass tube, partially flattened or annealed and wrapped, can substitute for the wraparound to increase contact area.
- To prevent unwanted solder running along an axle wire, slip a punched cardboard dam over the wire to act as a solder-stop.
Annealing brass:
- Brass tubing can be made ductile by annealing (heat until red hot) using a burner, kitchen stove, or butane torch. After cooling (air or water quench), brass will yield and can be formed to an oval or flattened shape.
- Scrap soft sheet brass, if annealed, can be used to wrap two music-wire legs that meet in a V shape.
Brazing techniques
For large or heavy-scale models where greater strength is required, brazing with bronze, nickel-silver, or silver alloys provides sturdier joints than soft solder.
Torches and heat:
- Ordinary propane or butane torches are inexpensive and suitable for light steel parts.
- For heavier metal (for example, 1/2‑in. diameter steel tube landing gear), a hotter flame using MAPP gas is preferred. With an appropriate torch (e.g., Master Mechanics Whirlwind S24) MAPP can reach about 3,600°F; this reduces heating time significantly.
- Insufficient heat is the primary reason brazing fails. Bring the joint to red heat so the brazing rod melts and flows uniformly.
Brazing alloys and flux:
- Bronze and nickel-silver brazing rods typically have a flux coating that melts with the rod; an 18-inch rod is inexpensive and makes many joints.
- Aircraft 4130 chrome-moly steel often has a black mill coating that must be removed with emery or aluminum-oxide cloth before brazing. All metals should be bright for best flow of bronze.
- After brazing, a black glazed residue may form; chip it off gently, then polish the joint with emery cloth. Excess bronze can be filed away if necessary.
Holding parts and fixturing:
- The intense heat used in brazing prevents use of wooden clothespins or similar insulators. Hold parts in dry sand in a metal box or clamp between steel blocks on a metal surface.
- Wear eye protection and take normal torch-safety precautions.
Aluminum brazing
- Hardware-store aluminum-alloy brazing rods often do not require flux and melt around 800°F.
- Light fabricated aluminum parts may melt around 1,200°F; avoid MAPP gas for thin aluminum pieces since the flame intensity can damage them. Use propane or butane for these lighter jobs.
- For heavier aluminum sections (engine mounts, etc.), MAPP gas with an appropriate torch may be required.
Silver soldering and the Microflame torch
- A Microflame torch produces an intense flame (about 5,000°F) suitable for silver soldering small parts; it is less useful for heavy work.
- Silver solder rods can be gold‑silver alloys containing cadmium with flux cores, or silver alloys that require added flux. Rods are relatively expensive.
- The Microflame uses two small cylinders (butane and an oxidizer such as nitrous oxide). Cylinders are short-lived and costly; leakage after piercing can make per‑joint cost high, so plan work to use gas efficiently.
- In silver soldering, bring the base metal to brazing temperature or red heat, then apply the rod so it melts and flows into the joint. Ensure base metals are clean and free of oxide; do not rely on silver solder to fill large gaps.
Practical notes and safety
- Bronze fillets or butt joints with substantial fillets are usually strong enough for modeling applications.
- Music wire generally braces well without extensive cleaning other than removing preservative oil, but intense heating can affect the temper—consider using a heavier gauge.
- Always wear eye protection and work in a well-ventilated area. Use appropriate clamps, sand fixtures, or steel fixturing to hold parts during high-heat operations.
Transcribed from original scans by AI. Minor OCR errors may remain.

