
Radio Control: Scale
Bob & Dolly Wischer
Brace Wires
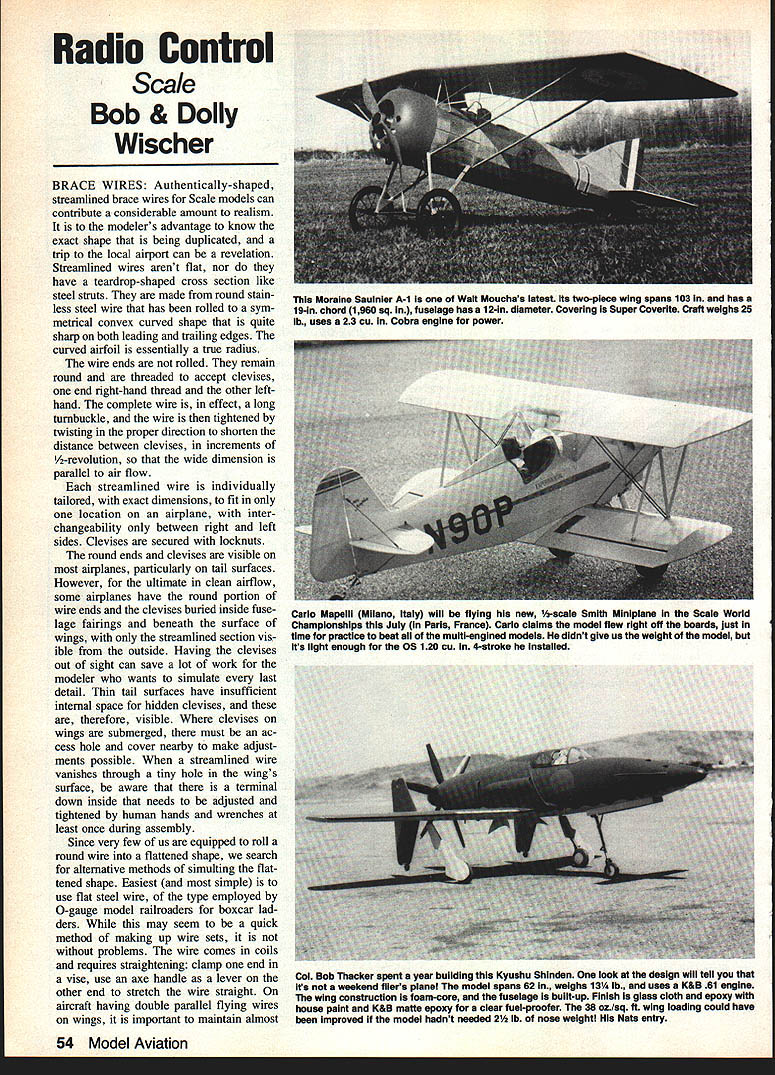
Authentically shaped, streamlined brace wires for scale models can contribute a considerable amount to realism. Streamlined wires aren't flat, nor do they have a teardrop-shaped cross section like steel struts. They are made from round stainless-steel wire that has been rolled to a symmetrical convex curved shape that is quite sharp on both leading and trailing edges. The curved airfoil is essentially a true radius.
The wire ends are not rolled. They remain round and are threaded to accept clevises—one end right-hand thread and the other left-hand. The complete wire is, in effect, a long turnbuckle; the wire is tightened by twisting in the proper direction to shorten the distance between clevises, in increments of half-revolutions, so that the wide dimension is parallel to airflow.
Each streamlined wire is individually tailored, with exact dimensions, to fit in only one location on an airplane, with interchangeability only between right and left sides. Clevises are secured with locknuts. The round ends and clevises are visible on most airplanes, particularly on tail surfaces. However, for the ultimate in clean airflow some airplanes have the round portion of wire ends and the clevises buried inside fuselage fairings and beneath the surface of wings, only the streamlined section visible from the outside. Where clevises on wings are submerged, there must be an access hole and cover nearby to make adjustments possible. When a streamlined wire vanishes through a tiny hole in the wing's surface, be aware that there is a terminal down inside that needs to be adjusted and tightened by human hands and wrenches at least once during assembly.
Since very few of us are equipped to roll a round wire into a flattened shape, modelers often use alternative methods of simulating the flattened, streamlined wire.
Methods to simulate streamlined brace wires
- Flat steel wire
- Easiest and simplest: flat steel wire of the type employed by O-gauge model railroaders for boxcar ladders.
- The wire comes in coils and requires straightening: clamp one end in a vise and use an axle handle or similar lever on the other end to stretch the wire straight.
- On aircraft with double parallel flying wires it is important to maintain almost exact parallelism and straightness because slight waviness becomes an eyesore when two wires are compared in close proximity.
- Flat wire (drawn/manufactured) or round wire subsequently rolled flat produces a bulging edge; because it doesn't have the streamlined shape, it looks exactly what it is—a flat wire—and in this respect is only marginally better than a round wire. Round wires substituted for streamlined are one of those prominent labels that say "model," rather than "scale model."
- Music wire pairs soldered together
- Use parallel pairs of small-diameter music wire soldered together to approximate the look of a flattened, streamlined section.
- It does a pretty good job as long as the solder joints are tucked well inside the streamlined shaping.
- Our Douglas mailplane uses flat steel wires with tiny springs soldered to one end of each wire to help assure tightness and remove sag.
- Wound-and-file method
- Wind two small-diameter wires around a center wire, then file the assembly to a streamlined section.
- Stacked-and-soldered (broached) method — Bob's method
- Stack and solder multiple lengths of music wire in a grooved or notched board jig, then shape or file to the desired streamlined cross section.
- Example: a .062-in. center wire flanked by a pair of .032-in. wires, all pinned in place in a soldering groove cut at 180°. A table saw or similar setup keeps the centers of the wires the same height while soldering.
- This produces a very authentic appearance when solder joints are kept tidy and tucked inside the shaping.
End fittings, adjustments, and installation tips
- Clevises and end fittings are usually made of brass. Small brass tubing with the center punched out to accept the wire, then a drop of solder, works well. Locknuts are used where the end fittings are visible.
- On some models the fittings are positioned under the cowling or inside fairings so the fittings are not visible and give a cleaner appearance. Thin tail surfaces often don't leave enough room for buried fittings, so the fittings are left exposed and made as neat as possible.
- For retrieving and adjusting the wires, provide an access plug in the wing or nearby to allow adjustment with tweezers or small wrenches.
- Bracing wires are functional as well as decorative: install them with enough tension and proper alignment to hold the wing geometry true. Wherever possible, stretch the wires snug, check parallelism, and use turnbuckles or small springs to maintain tension.
Transcribed from original scans by AI. Minor OCR errors may remain.

