
Radio Control: Slope Soaring
Mark Triebes 20794 Kreisler Ct. Saratoga, CA 95070
National Slope Competition
With the AMA Nationals recently completed, something was definitely missing from the competition — Slope Soaring. Sloping continues to grow steadily and, as with most other disciplines in this sport, competition is extremely intense. There are a few events that bring together fliers from across the country, such as the National Slope Fun Fly, the International Slope Race, and some others, but there is no true national competition.
What I am proposing is an event that would bring together fliers from many aspects of slope competition (Racing, Scale, PSS, Aerobatics, Combat, etc.) at a single site for a few days of the most exciting and competitive slope flying yet seen. If you are interested in becoming involved, I would really like to hear from you. Planning and organizing such an event will demand a great deal of effort and time; the sooner we start, the sooner we can hold it and get to some great flying.
Slope Soaring News
Along with the growth of slope soaring, a new publication has been born: Slope Soaring News, put together by three slope enthusiasts in Southern California — Charlie Morey, Chuck Korold, and Marcie Berriz. The first issue is very professional, informative, and entertaining, with articles on Santa Monica Sailplanes' F3B-caliber Flairs, Dick Vader's pod-and-boom planes, and more. Regular features include many photographs, a "Slope Site of the Month," an "Air Mail" column, want ads, and flying tips from "flight instructor extraordinaire," Tipstall Wingover III.
A one-year subscription is available for $15.95 (payable to Charles Morey).
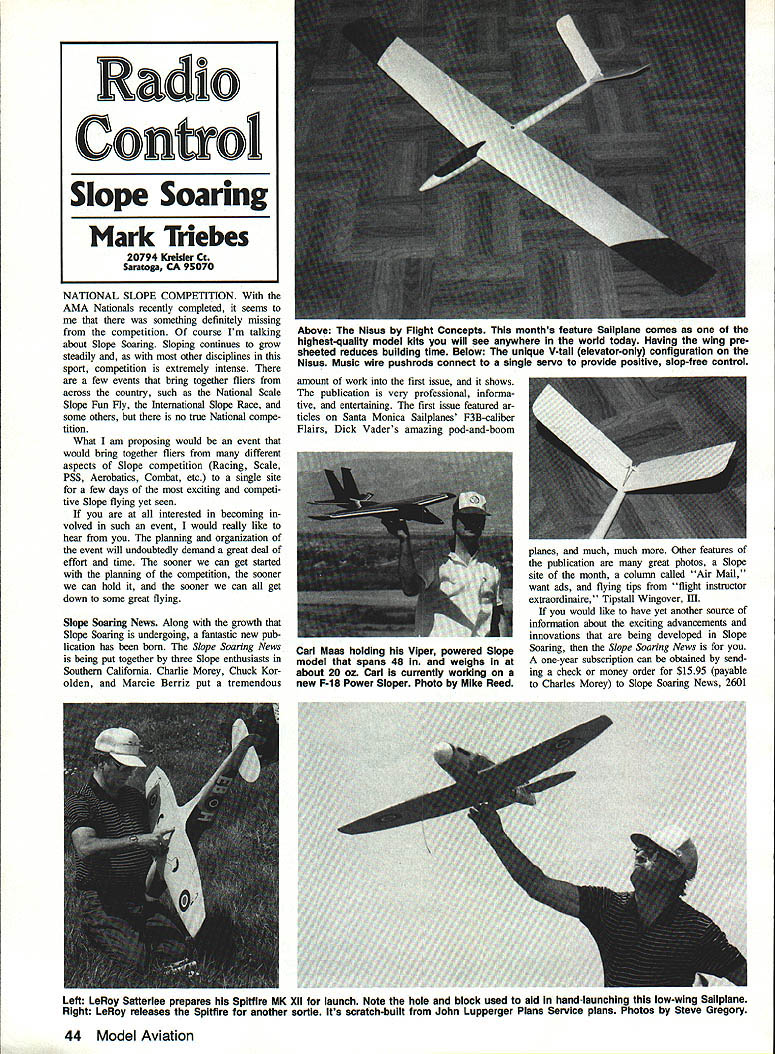
Nisus (Flight Concepts)
The Nisus sailplane kit, originally designed by Mark Allen and produced by Flight Concepts, is a high-quality kit that lets you build and fly a modern sailplane without prior fiberglass or foam experience.
- Wingspan: 59 in.
- Weight: about 20 oz.
- Fuselage: fiberglass-and-epoxy construction.
- Wings: Obechi veneer covering, 1.5‑lb white foam cores, Obechi epoxied to foam and vacuum-bagged, machine-shaped leading edge, aileron stock shaped.
- Stabs: machine-shaped.
- All needed hardware, detailed instructions, and plans included.
- Build time: approximately 15–20 hours.
- Money-back guarantee: returnable if not damaged or repaired in a way that prevents resale.
- Price: $130 from Flight Concepts, 1211 Parkinson Avenue, Palo Alto, CA 94301; (415) 325-7543.
Fully Aerobatic?
I received a letter from Jeff Raskin (San Francisco Vultures) raising a pet peeve about the term "fully aerobatic" as applied to many aileron-and-elevator slope soarers. Excerpts from his letter:
"I'd like to share a pet peeve about Slope Soaring Aerobatics with you. A few months ago, MA presented a well-designed and handsome small slope soarer, the Mariah. My only problem with the article was that it used the term 'fully aerobatic' incorrectly applied to a lot of aileron-and-elevator slope soarers. I would like the editors to be careful with such appellations for slope soarers as they would be with Pattern."
Jeff points out that axial rolls are difficult for many slope planes because the lift force rotates with the airplane as it rolls, causing the airplane to accelerate off a straight path — in practice many planes barrel roll to a degree. To perform maneuvers like snap rolls, four-point rolls, clean hammerheads, and precise inside/outside maneuvers, rudder and (for matching inside/outside sizes) a symmetrical airfoil are generally necessary.
There are almost no slope kits that are truly fully aerobatic now, but if writers and builders keep pointing this out, Jeff believes we will see a new breed of fully aerobatic slope designs. He also asked for information to evaluate symmetrical airfoils for slope aerobatics; any data or experience would be appreciated.
If Jeff's name sounds familiar, he was one of the principal people involved in developing the Apple Macintosh. He also wrote a program in Microsoft BASIC for the Mac that computes coordinates for and displays any NACA four-digit airfoil; it appears in Martin Hollmann's Modern Aircraft Design. If you'd like a listing of the program, send a SASE (two stamps, please).
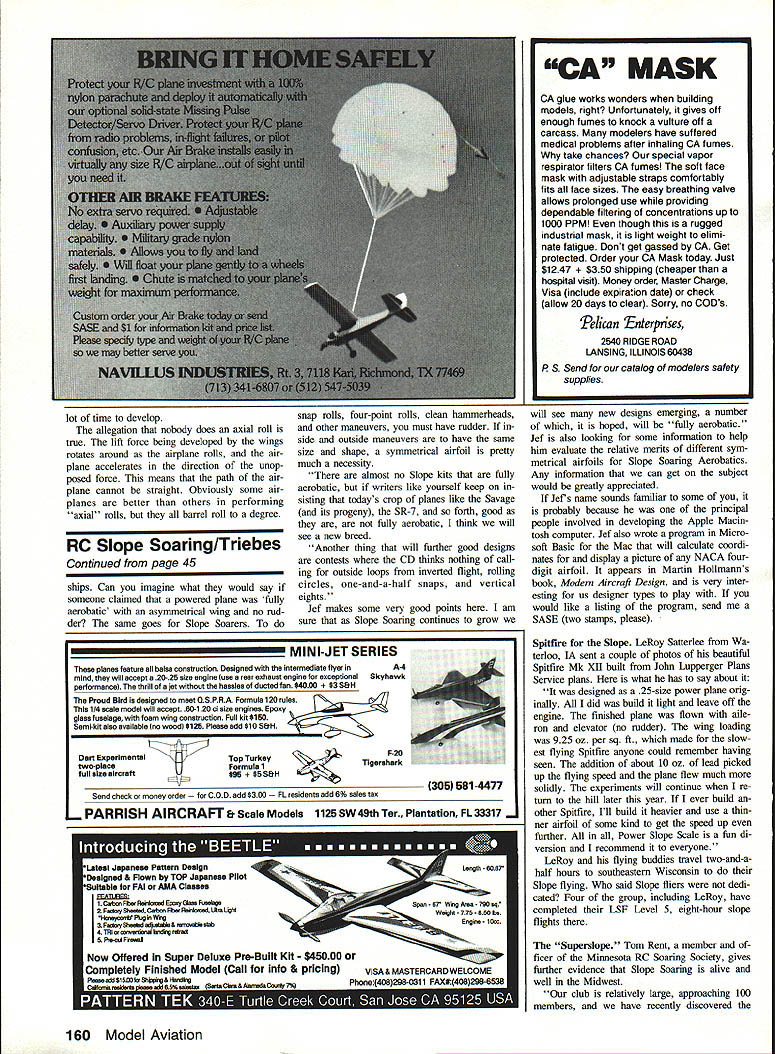
Spitfire for the Slope
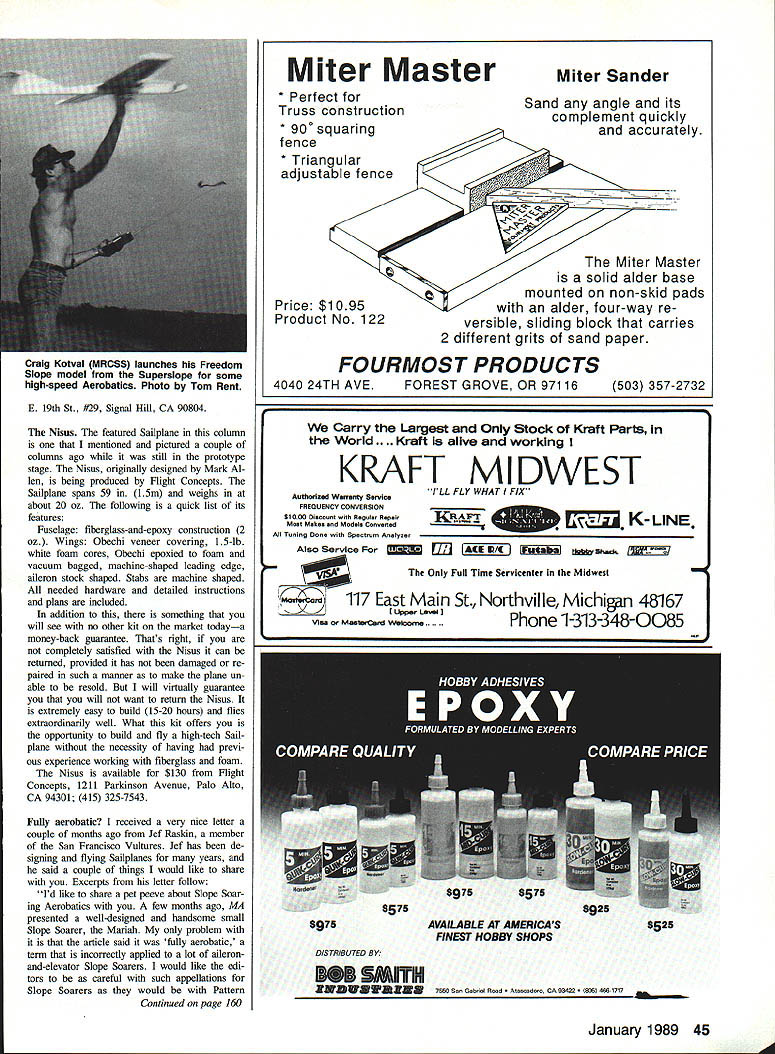
LeRoy Satterlee (Waterloo, IA) sent photos of his Spitfire Mk XII built from John Lupperger Plans Service plans. Originally a 25-size power design, LeRoy built it light and omitted the engine. It was flown with ailerons and elevator only (no rudder). The wing loading was 9.2 oz per sq. ft., producing extremely slow flight. Adding about 10 oz of lead raised flying speed and made the plane fly more solidly. LeRoy plans to experiment further with heavier builds and thinner airfoils to increase speed. He recommends power-slope scale as a fun diversion.
LeRoy and his group travel two-and-a-half hours to southeastern Wisconsin for slope flying. Four members of the group, including LeRoy, have completed their LSF Level 5, eight-hour slope flights there.
The "Superlope" (Minnesota)
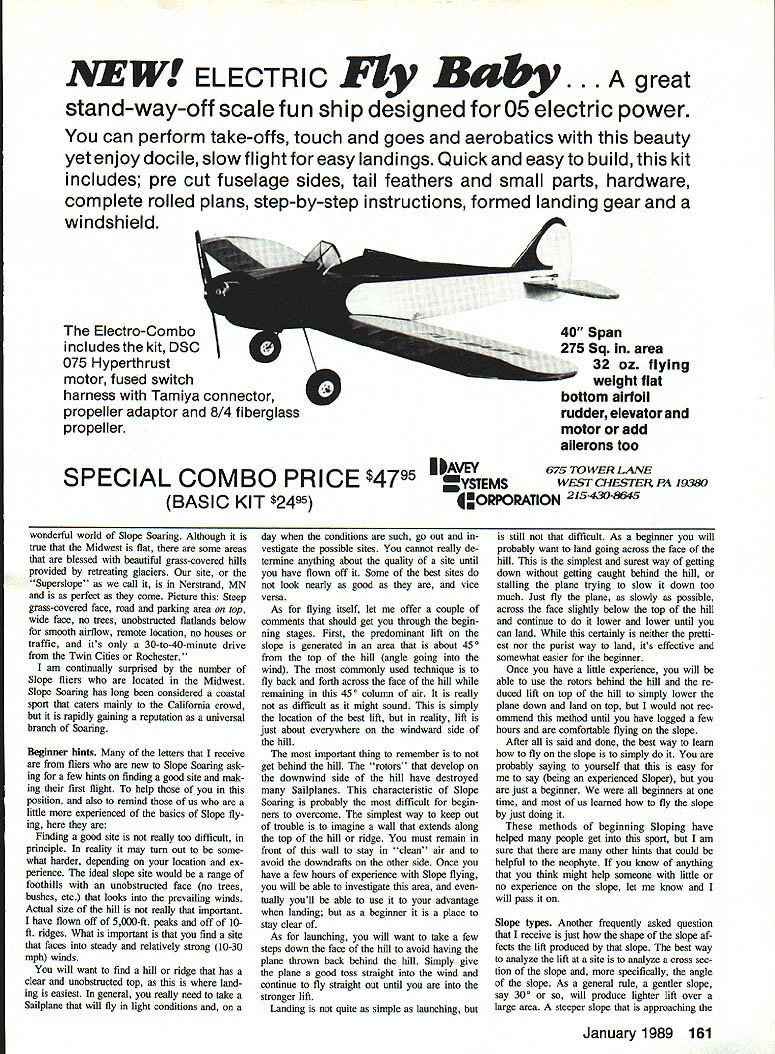
Tom Rent, member and officer of the Minnesota RC Soaring Society, reports strong slope activity in the Midwest. His club, approaching 100 members, discovered a great slope site near Nerstrand, MN — a steep grass-covered face with road and parking on top, wide face, no trees, unobstructed flatlands below, remote location, and only a 30–40 minute drive from the Twin Cities or Rochester. Slope soaring may have coastal roots, but it's rapidly gaining popularity everywhere.
Beginner hints
Many letters come from fliers new to slope soaring asking for site-finding and first-flight hints. Here are basics to help beginners and remind experienced fliers of fundamentals.
- Finding a site: ideally a foothill range with an unobstructed face (no trees, bushes) that faces into prevailing winds. Hill size isn't critical — I've flown from 5,000-ft peaks and 10-ft ridges. Look for steady, relatively strong winds (10–30 mph). A clear, unobstructed top is important for easier landings. Investigate sites by flying them — appearances can be deceiving.
- Predominant lift: generally generated in an area about 45° forward from the top of the hill (toward the wind). The common technique is to fly back and forth across the face while staying within this 45° column of air. In practice, lift is usually found across much of the windward side.
- Avoid getting behind the hill: rotors on the downwind side can destroy sailplanes. Imagine an invisible wall along the top of the ridge — remain in front of it to stay in clean air and avoid downdrafts. With experience you can later use rotors and reduced lift near the top for landing, but beginners should avoid the downwind side.
- Launching: take a few steps down the face to avoid being thrown behind the hill. Toss the plane straight into the wind and fly straight out until you reach stronger lift.
- Landing: beginners should land across the face of the hill, flying slightly below the top and gradually lowering until able to touch down. This is simple and reduces the chance of being pushed behind the ridge or stalling while trying to slow too much. With experience you can learn to use rotors and reduced lift on top to land on the ridge.
The best way to learn slope flying is to do it — everyone was a beginner once.
Slope types
The cross-section and angle of a slope strongly affect the lift produced.
- Gentler slopes (about 30° or less) produce lighter lift over a larger area.
- Steeper slopes approaching vertical produce stronger lift over a much smaller area.
If you want strong lift and to use little sky, fly cliffs or very steep slopes. If you prefer lighter, more consistent lift, choose gentler slopes.
Demon Tweaks
These trimming hints originated in the Pikes Peak Soaring Society newsletter, The Spoiler (editor Randy Reynolds). They can be of great help when trimming a sailplane.
- Make sure all flying surfaces are straight. Sight down the bottom surface of wings and stabs from the rear. If suspicious, dismount a surface and check it on a flat bench. Sight trailing edges for trueness. Be especially critical of the stab/elevator surfaces.
- Avoid washout unless necessary. Washout (twisting the wing so the trailing edge is higher at the tip) was used to prevent tip-stalls, but small differences in washout can cause erratic flight at higher speeds, such as on launch. Test for tip-stall tendency by slowly bringing the nose up until the glider stalls: if it recovers straight ahead without washout, the wing is fine.
- Set the center-of-gravity (CG) properly. Many kit plans call for balancing at the spar — conservative and very stable but mediocre in performance. Beginners should leave the CG there. For more performance, measure CG as a percentage of wing chord and relate field experience to that percentage. Practical method: support the assembled glider on triangular supports under each wing root, balance fore and aft, measure distance from the triangular support to the leading edge, and compute the percentage of chord. Typical ranges:
- Trainers: 30–33%
- Higher-performance ships: 33–38%
- Eppler 205 ships reportedly perform best around 38%
Use your judgment — the author advises not exceeding 37% for flat-bottom airfoiled ships unless you are very skilled.
- Move the tow hook to improve launch angle. Many entry-level kits have the tow hook far forward for safety. Once competent, move the tow hook toward the CG — many place it exactly under the CG for reliable, high launches. Others position it 1/8–1/4 in. forward; aggressive fliers place it behind the CG for maximum altitude. Make changes in small steps (e.g., 1/8 in. increments). (Note: this tweak does not apply to slope soaring; it is for towed/thermal flying.)
- Install turbulator strips for better slow-speed performance. Many entry-level ships have narrow speed ranges and benefit from turbulator strips that reduce airflow separation on the top surface. Recommended placements: one at 10% chord and another at 20–25% chord. Make strips from 1/2" wide color striping tape; doubling the tape creates a repositionable bump.
Bump Soaring
Bump soaring is slope soaring without a slope. A "bump" — a small ridge or obstruction that deflects wind upward — can create rising air sufficient for slope-style flying. I've flown on ridges as small as five to six feet high that produced consistent lift in 25–30 mph winds. Lift heights are limited (typically 25–50 ft.), but the area is strong enough for working the ridge back and forth.
Bump soaring is excellent for polishing skills and learning slope mechanics when you don't have a large hill. Use lightweight hand-launch-type planes or small thermal ships; the smaller and lighter, the better for tight lift areas and quick maneuvering.
More slope sites wanted
Thanks to all who have written requesting information. If you have a slope you'd like to share, send a note with location, nearest city and state, terrain description, and any local restrictions, and I'll try to pass it along to other readers.
Transcribed from original scans by AI. Minor OCR errors may remain.

