

RADIO CONTROL: SLOPE SOARING
David Sanders, 34455 Camino El Molino, Capistrano Beach, CA 92624
Happy New Year! Since this is the holiday season and many folks are or will be vacationing, I thought this might be an appropriate time to talk about traveling with your airplanes. I've had many opportunities in recent months to travel to events, so I have confronted the problems of transporting models by airline and by auto.
It's a shame to go on a long trip where you know you'll be able to get some flying time, only to be stuck without a model—especially if you're traveling from a "real" winter to a more pleasant climate. Paradoxically, the best airplanes to take on these trips for serendipitous slope exploration are often the most delicate and least portable in your fleet (such as a nice, lightweight hand-launch model); but you can take them in complete safety if you plan ahead, and you can do it very inexpensively!
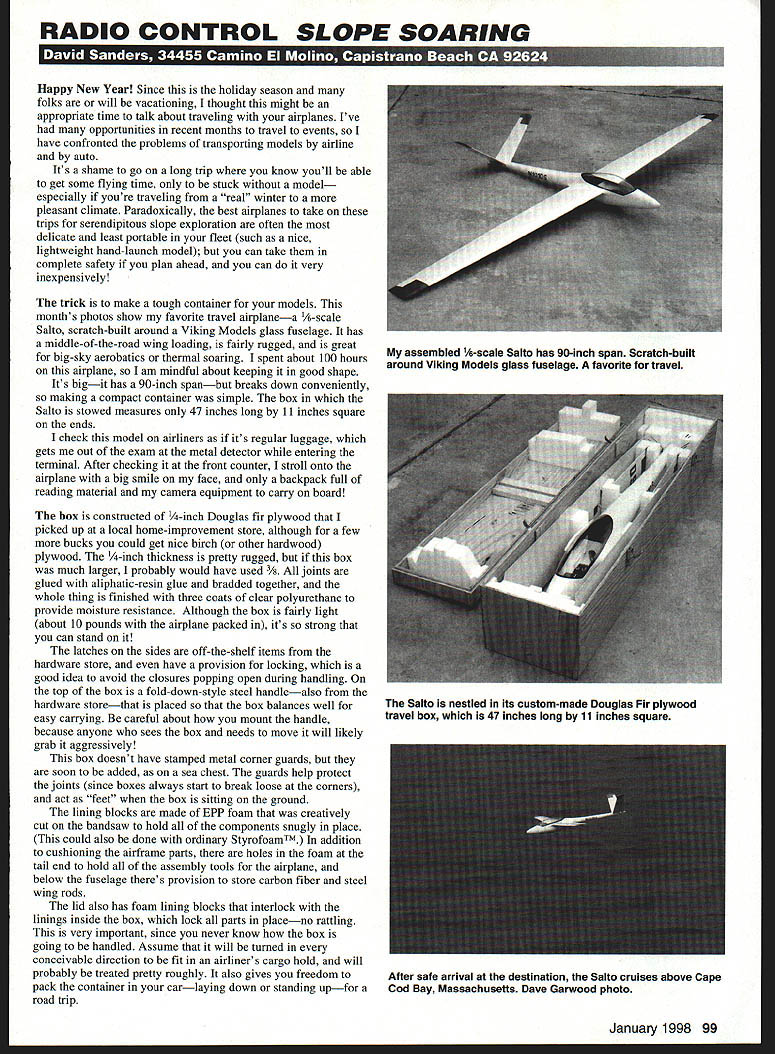
The trick is to make a tough container for your models. This month's photos show my favorite travel airplane—a 1/4-scale Salto, scratch-built around a Viking Models glass fuselage. It has a middle-of-the-road wing loading, is fairly rugged, and is great for big-sky aerobatics or thermal soaring. I spent about 100 hours on this airplane, so I am mindful about keeping it in good shape.
Traveling with Your Airplane
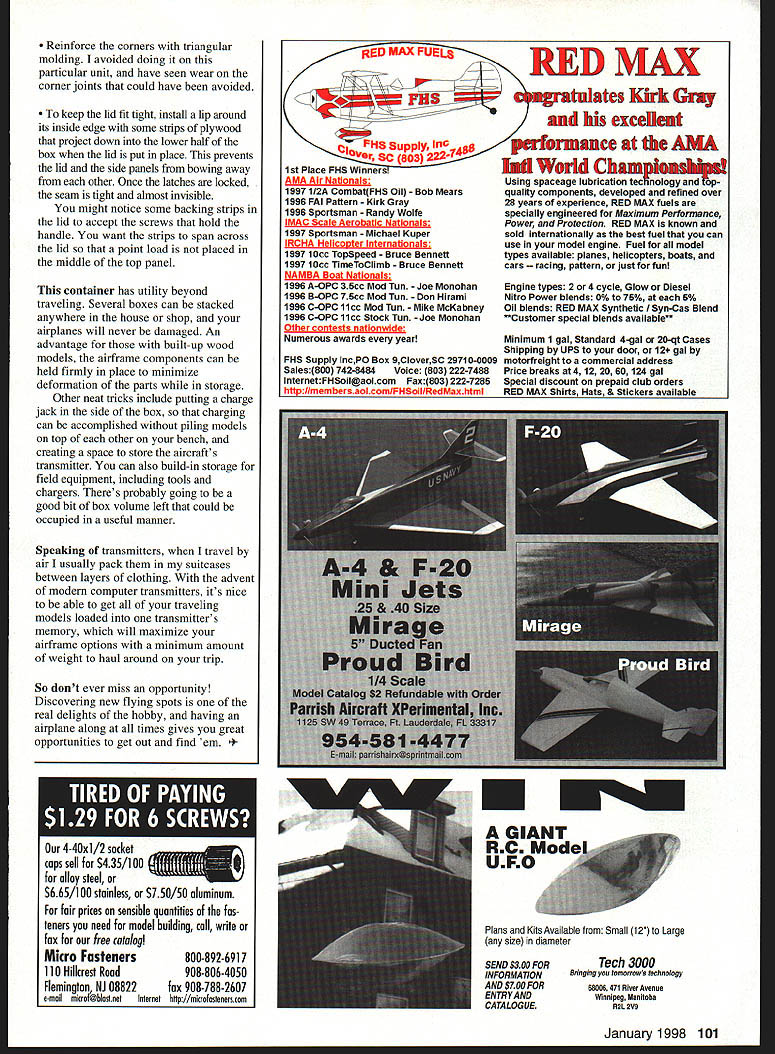
It's big—it has a 90-inch span—but breaks down conveniently, so making a compact container was simple. The box in which the Salto is stowed measures only 47 inches long by 11 inches square on the ends.
I check this model on airliners as if it's regular luggage, which gets me past the metal detector when entering the terminal. After checking it at the front counter, I stroll onto the airplane with a big smile on my face, and only a backpack full of reading material and my camera equipment to carry on board!
The Travel Box
The box is constructed of 1/4-inch Douglas fir plywood that I picked up at a local home-improvement store, although for a few more bucks you could get nice birch (or other hardwood) plywood. The 1/4-inch thickness is pretty rugged, but if this box was much larger, I probably would have used 3/8. All joints are glued with aliphatic-resin glue and bradded together, and the whole thing is finished with three coats of clear polyurethane to provide moisture resistance. Although the box is fairly light (about 10 pounds with the airplane packed in), it's so strong that you can stand on it!
The latches on the sides are off-the-shelf items from the hardware store, and even have a provision for locking, which is a good idea to avoid the closures popping open during handling. On the top of the box is a fold-down-style steel handle—also from the hardware store—that is placed so that the box balances well for easy carrying. Be careful about how you mount the handle, because anyone who sees the box and needs to move it will likely grab it aggressively!
This box doesn't have stamped metal corner guards yet, but they are soon to be added, as on a sea chest. The guards help protect the joints (since boxes always start to break loose at the corners), and act as "feet" when the box is sitting on the ground.
The lining blocks are made of EPP foam that was creatively cut on the bandsaw to hold all of the components snugly in place. (This could also be done with ordinary Styrofoam.) In addition to cushioning the airframe parts, there are holes in the foam at the tail end to hold all of the assembly tools for the airplane, and below the fuselage there's provision to store carbon-fiber and steel wing rods.
The lid also has foam lining blocks that interlock with the linings inside the box, which lock all parts in place—no rattling. This is very important, since you never know how the box is going to be handled. Assume that it will be turned in every conceivable direction to fit in an airliner's cargo hold, and will probably be treated pretty roughly. It also gives you freedom to pack the container in your car—laying down or standing up—for a road trip.
The best part is that all of this protection comes cheap! I only spent about $50 and a day's work on the box, which makes it much less expensive than any commercially available unit, and it fits the model perfectly.
Box size can be an issue, but I don't worry too much since I see people checking skis on airlines. If the airplane is too big to fit in a reasonably sized container, it's probably not a good travel candidate anyway.
Shipping
What if you're going to mail the airplanes? This can be a good strategy if you can keep the size of the containers within the limits set by the shipping companies. Most shippers place limits on the overall size of parcels. For United Parcel Service, the limit for domestic shipping is 130 inches; that figure is derived by measuring the longest dimension of the box, then adding the girth of the box. For the U.S. Postal Service, there's a more stringent limit of 108 inches, measured the same way as above.
It's of particular importance not to exceed these limits; the shippers will refuse to touch parcels if they're oversized. (That happened to a friend of mine who was out here to visit, and it was a mess!) The size limits for international shipping vary with destination, so check with your shipper. The box shown for my Salto comes to 91 inches, so it could be shipped to any domestic destination, and most international destinations, with no trouble.
Cabinetmaker's Tips
I have some old cabinetmaker's tips for constructing a nice, tight, square box:
- Don't try to make the lid separately; build a closed box, then cut the lid off. I do this by running all four sides through my table saw against the rip fence. It can also be done with a Skil or scroll saw, by scribing a line around the box at the lid separation line so the lid will fit perfectly.
- Reinforce the corners with triangular molding. I avoided doing it on this particular unit, and have seen wear on the corner joints that could have been avoided.
- To keep the lid fit tight, install a lip around its inside edge with some strips of plywood that project down into the lower half of the box when the lid is put in place. This prevents the lid and the side panels from bowing away from each other. Once the latches are locked, the seam is tight and almost invisible.
You might notice some backing strips glued to the lid to accept the screws that hold the handle. You want the strips to span across the lid so that a point load is not placed in the middle of the top panel.
Additional Uses and Features
This container has utility beyond traveling. Several boxes can be stacked anywhere in the house or shop, and your airplanes will never be damaged. An advantage for those with built-up wood models: the airframe components can be held firmly in place to minimize deformation of the parts while in storage.
Other neat tricks include putting a charge jack in the side of the box, so that charging can be accomplished without piling models on top of each other on your bench, and creating a space to store the aircraft's transmitter. You can also build-in storage for field equipment, including tools and chargers. There's probably going to be a good bit of box volume left that could be occupied in a useful manner.
Packing Transmitters
When I travel by air I usually pack transmitters in my suitcases between layers of clothing. With the advent of modern computer transmitters, it's nice to be able to get all of your traveling models loaded into one transmitter's memory, which will maximize your airframe options with a minimum amount of weight to haul around on your trip.
Conclusion
So don't ever miss an opportunity! Discovering new flying spots is one of the real delights of the hobby, and having an airplane along at all times gives you great opportunities to get out and find 'em.
Transcribed from original scans by AI. Minor OCR errors may remain.

