
Radio Control: Soaring
Byron Blakeslee 3134 N. Winnebago Dr. Sedalia, CO 80135
VIKING CUP F3F RACE — 1990
F3F is the FAI (provisional) class for model-glider slope racing. In contrast to normal U.S. practice, F3F races one plane at a time against the clock. The Europeans decided that racing four planes at a time was too expensive; Americans, on the other hand, prefer daredevil, mano-a-mano, heat-racing competition. It would be interesting if some of our top racers went to Europe to compete in F3F — there's no reason they shouldn't do well, since our best racers are probably just as fast. The pressure and excitement remain, and aspirants to world-class slope competition will undoubtedly be doing F3F.
Preben Norholm (Denmark), a long-time promoter of F3F, attended the 1990 Viking Cup held in central England and sent this report. With eight nations, 16 teams and 49 competitors, it was the biggest international F3F contest ever. Perfect weather made it one of the greatest F3F events — it was unfortunate there were no American competitors. (Mr. Dale Willoughby did come all the way from Guam to watch.)
Highlights from the event:
- Nations represented: Germany, England, Denmark, Norway, Iceland, Northern Ireland, Austria, France (eight total).
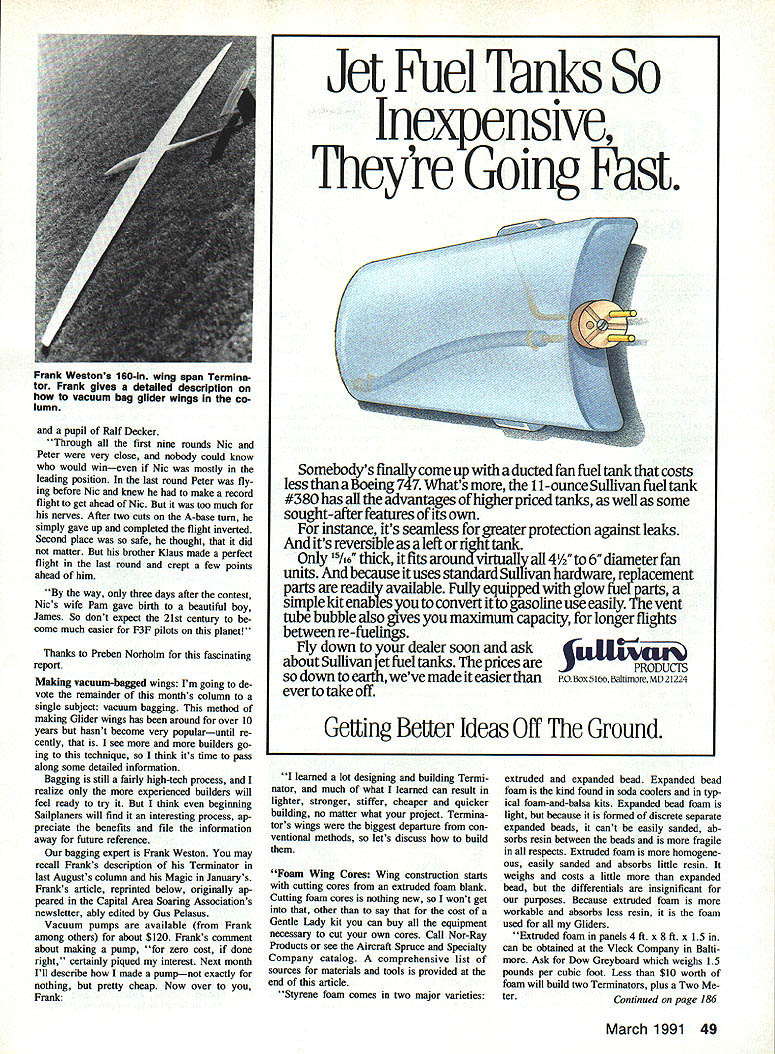
- Teams: 16 teams, including two from Germany and two three-man teams from Denmark.
- Conditions: strong, steady wind mostly between 10–20 in./sec (22–44 mph); Buxton slopes performed well. A practice round experienced wind exceeding the 25 in./sec (55 mph) upper limit. Temperatures ranged mostly between 50° and 60°F. Flying heights were generally between 500 and 600 ft.
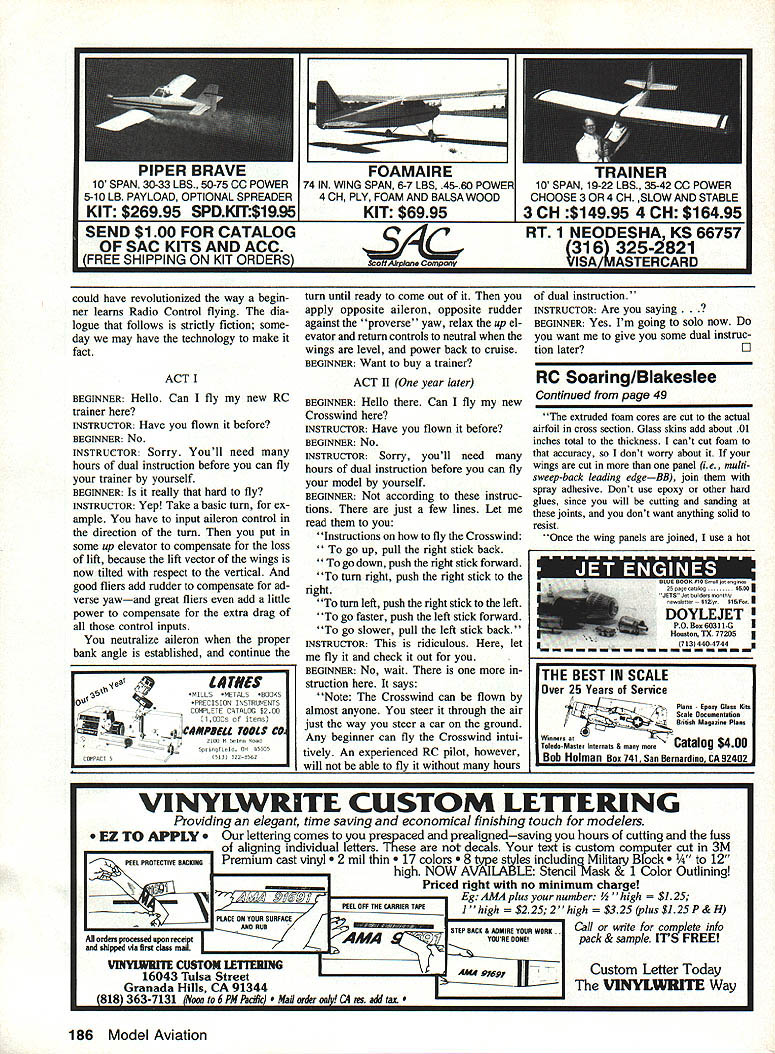
- Notable pilots: Nic Wright (Great Britain) flew very precise and consistent rounds and won the event for the second time in a row. The Kowalski brothers (Peter and Klaus) from Cologne, Germany, were highly competitive — Peter recorded an unbelievable 33.03-second run in one round.
- Equipment and style: The Kowalski brothers flew aggressive, highly maneuverable F3B models with Quabeck 10/90 wing airfoils and 22% flaps. Their flaps and ailerons were deflected only about 3–4 mm (≈1/8–3/16 in.) downward with full-up elevator.
Notable results and anecdotes:
- Nic Wright earned 831 points; his discard round was 39.73 seconds, but Peter Kowalski recorded a 33.03-second run in the same round.
- Course-record flights tended to occur when the wind was at its strongest and combined with a thermal. When top pilots recorded 45–50 second flights, it was usually due to less favorable conditions or mistakes; after 10 rounds, results tended to even out.
- Two teams came from Germany, four from England; Norway, Iceland and Northern Ireland were represented; Denmark had two teams. Austria and France attended with representatives to learn the format.
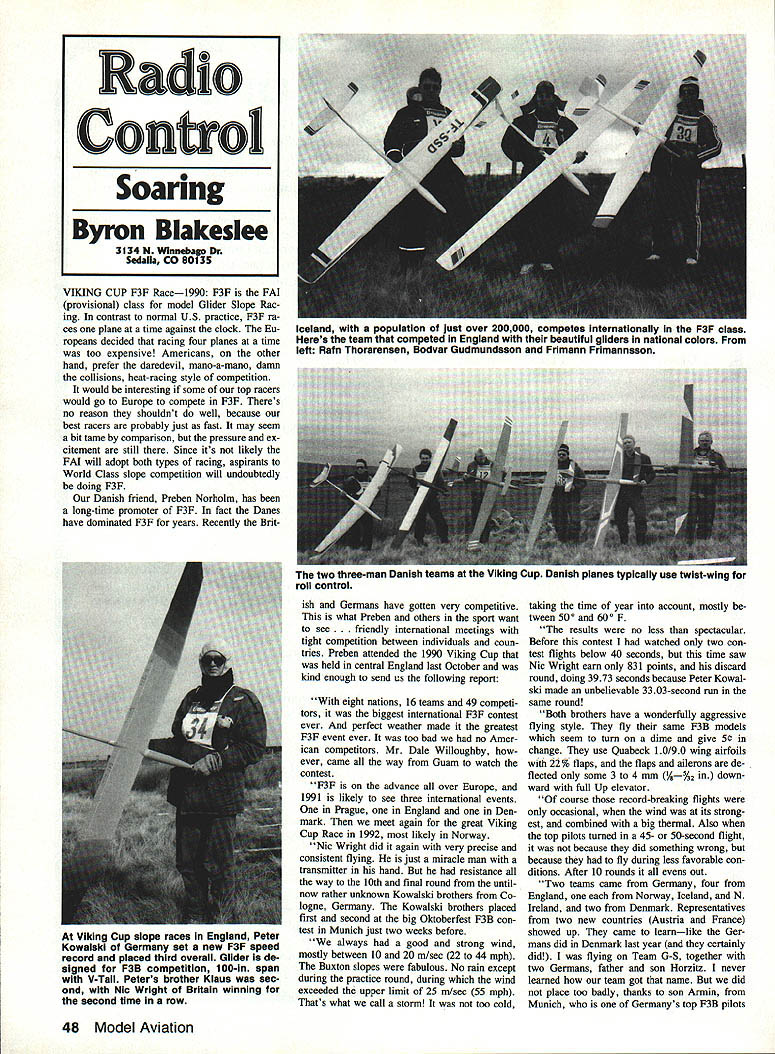
- Iceland fielded a competitive team despite a small national population: Rafn Thorarensen, Bodvar Gudmundsson, Frimann Frimannason.
- Peter Kowalski set a new F3F speed record and placed third overall; Klaus Kowalski finished second; Nic Wright won.
- Through the first nine rounds Nic and Peter were very close. In the last round Peter flew a record run; Nic, flying after Peter and feeling the pressure, had a poor final flight and completed it inverted — thinking second place was safe — but Klaus Kowalski then made a perfect flight and crept a few points ahead.
- Three days after the contest Nic's wife Pam gave birth to a son, James.
Thanks to Preben Norholm for this report.
MAKING VACUUM-BAGGED WINGS
This month's column focuses on vacuum bagging — a method of making glider wings that has been around for over a decade but has recently gained popularity. Bagging is a fairly high-tech process and will appeal most to experienced builders, but beginning sailplane builders may also find it useful and worth learning.
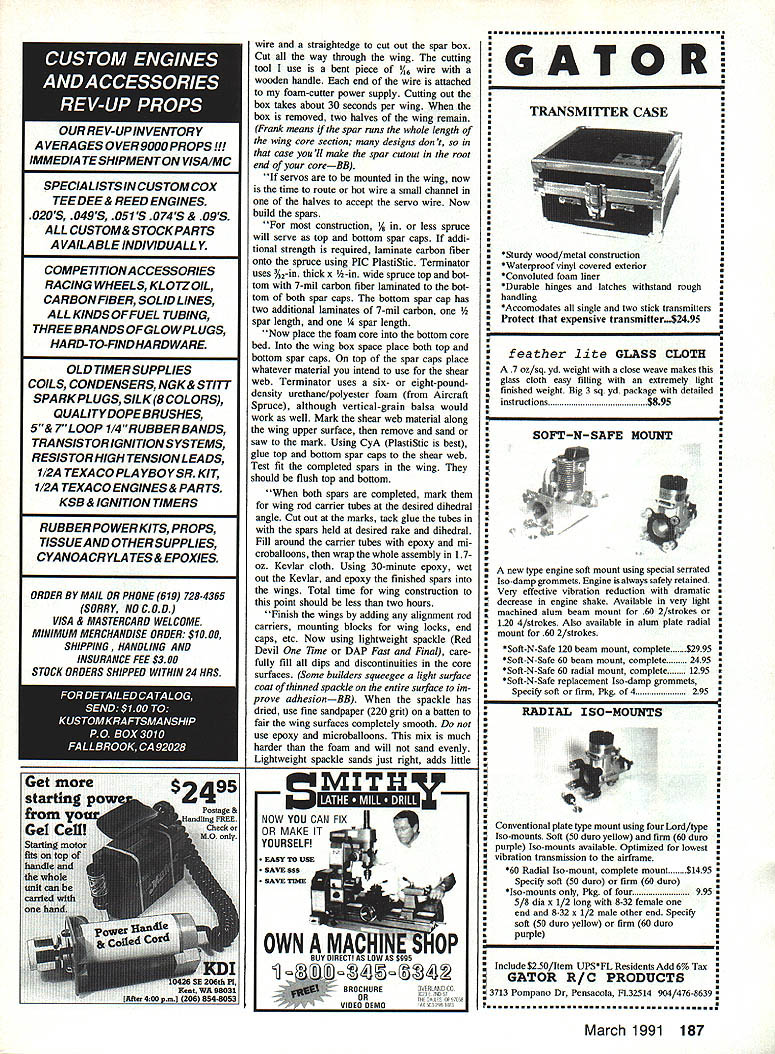
Our bagging expert is Frank Weston. His article (reprinted by permission) originally appeared in the Capital Area Soaring Association newsletter. Frank has built several gliders (including a 160-in. Terminator) and supplies vacuum pumps and bagging materials. Below is a cleaned, organized presentation of his methods.
Foam wing cores
Wing construction starts with cutting cores from extruded foam blanks.
Notes on foam types:
- Expanded-bead foam: light and inexpensive but made of discrete beads; it is difficult to sand, absorbs resin between beads, and is more fragile.
- Extruded foam: more homogeneous, easily sanded, absorbs little resin, and is preferred for glider cores despite being slightly heavier and more costly.
Suggested source: Dow Gyroboard (1.5 lb/ft³) in 4 ft × 8 ft × 1.5 in. panels is one recommendation. Less than $100 of foam will build two Two-Meter wings and more.
Filling and fairing:
- Filling and fairing the foam before glassing is critical for a good-looking wing. Sanding foam and using spackle is much easier than sanding epoxy and glass later, and doing it right will save substantial time.
- The filling and sanding process need not take long (exclusive of drying time), but should be done carefully — one minute now can save 30 minutes later.
Vacuum-bagging — equipment and materials
You can acquire the necessary equipment and materials for a modest outlay. Frank notes some pumps can be salvaged from old refrigerators (zero cost if done correctly), but commercial vacuum pumps are also available.
Essential items:
- Vacuum pump (salvaged refrigerator compressor or a purchased pump).
- Vacuum gauge, T-fittings and hose (Sears or auto stores supply low-cost vacuum gauges).
- Wet-hard-setting caulk (for sealing the bag ends).
- 20-in.-wide tubular 6-mil poly bag material (or equivalent).
- 14-mil Mylar sheet for top and bottom covers (enough to cover all surfaces to be bagged).
- Carnauba wax or mold-release for Mylar.
- 2-oz. and 2–3-oz. glass cloth as required by layup schedule.
- Laminating epoxy (Frank uses West System 205 with 206 hardener) and optional white pigment for color.
- Super-absorbent paper towels for resin pickup.
- Miscellaneous: masking tape, acid brush, 3-in. foam roller, poly film to protect the table surface, bicycle tire stem (for sealing valve into bag), small pieces of foam for beds if desired.
Preparing the vacuum bag
- Cut the tubular bag material about 1 ft longer than the wingspan. Seal one end with caulk.
- Near the sealed end, punch a hole and insert a bicycle-tube tire stem. Leave about a 2-in. square of tube on the stem, remove the valve core, and caulk the stem inside the bag (this becomes the vacuum connection).
- Place a few paper towels in the bag to allow air to flow to the stem from the corners once vacuum is applied.
- Put a strip of caulk at the open end of the bag but do not seal it yet; the wing goes in later.
Connect the intake of your compressor (or pump) to the valve stem using hose and T-fittings; include the vacuum gauge in this line. If using a salvaged compressor, be aware of possible oil in the exhaust. A larger vacuum reservoir helps hold vacuum if the bag has small leaks.
If the bag leaks:
- Check seals at each end and around the valve stem.
- Small pinholes are hard to find; either start over with another bag or run the pump continuously (not recommended for long-term use, as it can burn out compressors).
Glassing the wings — layup on Mylar carriers
- Cut two Mylar carrier sheets to the wing planform plus about 1/2 in. overlap.
- Join the sheets at their trailing edges with masking tape (on the tape side), leaving about a 1/2 in. gap where needed.
- Lay the joined Mylar carrier sheets on a flat surface (masking tape side down). Apply carnauba wax or mold release to the Mylar so epoxy won't stick.
- Unroll 2-oz. glass cloth at a 45° bias over the Mylar and trim to the Mylar edges. Repeat with cloth at the opposite 45° bias so you get two bias layers.
- Add reinforcement strips at the wing root: lay a strip of glass from the root edge out about six inches, and another about three inches, for root strength.
- Place a piece of poly film under the Mylar to protect the table from resin.
- Cut a 1–2 in. wide strip of 2–3 oz. glass cloth long enough to reach from the wing root and around the tip. Mix a small amount of laminating epoxy and, with an acid brush, tack this strip to the leading edge of the foam core and around the tip. Use as little resin as possible — the epoxy should be tacky before the next step.
Epoxy application and resin removal:
- Spread laminating epoxy over the glass on the Mylar using a 3-in. foam roller. Adding white pigment to the epoxy gives a good finished color and can eliminate painting.
- Lay super-absorbent paper towels on top of the wet layup and use a dry roller to roll them onto the glass; the towels will absorb excess resin. Let them sit briefly, then peel and discard them.
- Note: Some builders instead wet each cloth layer and squeegee off excess resin without paper towels; layup schedules will vary by builder and glider.
Assembly and bagging
- Position the wing core so its trailing edge is aligned between the two Mylar sheets, fold the Mylar around the core, and set the assembly in the bottom foam core bed in the correct position. Use masking tape at each end to prevent shifting.
- Slide the whole assembly into the vacuum bag and seal the bag end with caulk.
- Draw a light vacuum first (about 3–5 in. Hg) to smooth wrinkles and check alignment, then increase to about 15 in. Hg (anything over 3–4 in. will generally work). A higher reading will reveal slow leaks.
- Note: Some builders bag only the wing, placing the bottom core bed between the wing and the table to check the bed under light vacuum; the bed must be perfectly flat to avoid warping the wing.
- If vacuum holds steady, allow the epoxy to set undisturbed. Leave for at least eight hours before removing from the bag. Do not remove the Mylar for at least 24 hours, and avoid pressing directly on the surface until epoxy has fully cured (dimples can be made easily while partially cured). After about a week the surface becomes very ding-resistant.
Adding control surfaces (flaps/ailerons)
- Cut along hinge lines with a razor and metal straightedge.
- Epoxy aluminum arrow-shaft tubes to the leading edges of control surfaces for stiffness:
- File a semicircular groove into both the wing trailing edge and the control surface leading edge to accept the tube; the groove should just fit the tube diameter.
- Tubes may be telescoped with graduated diameters to match wing taper.
- Glue tubes in place with 5-minute epoxy and ensure surfaces are true while curing.
- Attach control surfaces using arrow-shaft hangers or tape. Tape is lighter, quicker, and creates no stress points; it also allows removal for repair or painting.
Safety note: Trailing edges can be very sharp and will cut like a razor. Use care when handling; expect to cut yourself at least once.
Finish, paint and weight considerations
- If you added pigment to the resin, the wing finish may already be acceptable for competition, and priming/painting can be avoided.
- Priming and painting add time and typically increase wing weight (up to about 15% of the wing weight).
- If you paint, be cautious: most paints and solvents attack styrene foam. Do not rub solvent on the wing surface or apply heavy coats of paint until the surface is well filled. Solvent can seep through pinholes and cause paint bubbles, or dissolve foam at the trailing edge and cause the glass skins to separate.
Time, cost and durability
- Actual labor for two wing halves is typically 2–6 hours, depending on size and complexity — roughly one-third to one-half the time of many other construction methods.
- Material cost is about 25% of comparable balsa-based construction.
- Weight comparison: a Two-Meter set of foam/glass wings might weigh about 10 oz; Frank's Terminator wings weigh about 20 oz each.
- Durability: vacuum-bagged composite wings are robust. Frank reports losing a Terminator that impacted a plowed field at high speed and suffered only minor damage, repaired in under 30 minutes.
Final hints and suppliers
- Kitplanes magazine and Model Aviation magazine are good sources for composite suppliers, ideas and techniques.
- Frank Weston has a supplier list and carries a full line of sailplanes (Two Meter SAM-1, 100-in. Merlin, 138-in. Magic, 160-in. Terminator) and bagging supplies; he also runs bagging seminars.
Thanks to Frank Weston for this practical and thorough article.
THE BEGINNER AND THE CROSSWIND (FICTIONAL DIALOGUE)
This dialogue is fictional, suggesting how an intuitive trainer might change the learning process.
ACT I
BEGINNER: Hello. Can I fly my new RC trainer here?
INSTRUCTOR: Have you flown it before?
BEGINNER: No.
INSTRUCTOR: Sorry. You'll need many hours of dual instruction before you can fly your trainer by yourself.
BEGINNER: Is it really that hard to fly?
INSTRUCTOR: Yep. Take a basic turn, for example. You have to input aileron in the direction of the turn. Then you put in some up elevator to compensate for the loss of lift, because the lift vector of the wings is now tilted with respect to the vertical. Good fliers add rudder to compensate for adverse yaw — and great fliers even add a little power to compensate for the extra drag of all those control inputs.
You neutralize aileron when the proper bank angle is established, continue the turn until ready to come out of it. Then you apply opposite aileron, opposite rudder against the proverse yaw, relax the up elevator and return controls to neutral when the wings are level, and power back to cruise.
BEGINNER: Want to buy a trainer?
ACT II (One year later)
BEGINNER: Hello there. Can I fly my new Crosswind here?
INSTRUCTOR: Have you flown it before?
BEGINNER: No.
INSTRUCTOR: Sorry, you'll need many hours of dual instruction before you can fly your model by yourself.
BEGINNER: Not according to these instructions. There are just a few lines. Let me read them to you:
Instructions on how to fly the Crosswind:
- To go up, pull the right stick back.
- To go down, push the right stick forward.
- To turn right, push the right stick to the right.
- To turn left, push the right stick to the left.
- To go faster, push the left stick forward.
- To go slower, pull the left stick back.
INSTRUCTOR: This is ridiculous. Here, let me fly it and check it out for you.
BEGINNER: No, wait. There is one more instruction here. It says:
Note: The Crosswind can be flown by almost anyone. You steer it through the air just the way you steer a car on the ground. Any beginner can fly the Crosswind intuitively. An experienced RC pilot, however, will not be able to fly it without many hours of dual instruction.
INSTRUCTOR: Are you saying...?
BEGINNER: Yes. I'm going to solo now. Do you want me to give you some dual instruction later?
ACKNOWLEDGMENTS
- Report on the Viking Cup by Preben Norholm (reprinted with thanks).
- Vacuum-bagging article by Frank Weston (reprinted by permission).
Transcribed from original scans by AI. Minor OCR errors may remain.

