


Radio Control: Soaring
Byron Blakeslee 3134 N. Winnebago Dr. Sedalia, CO 80135
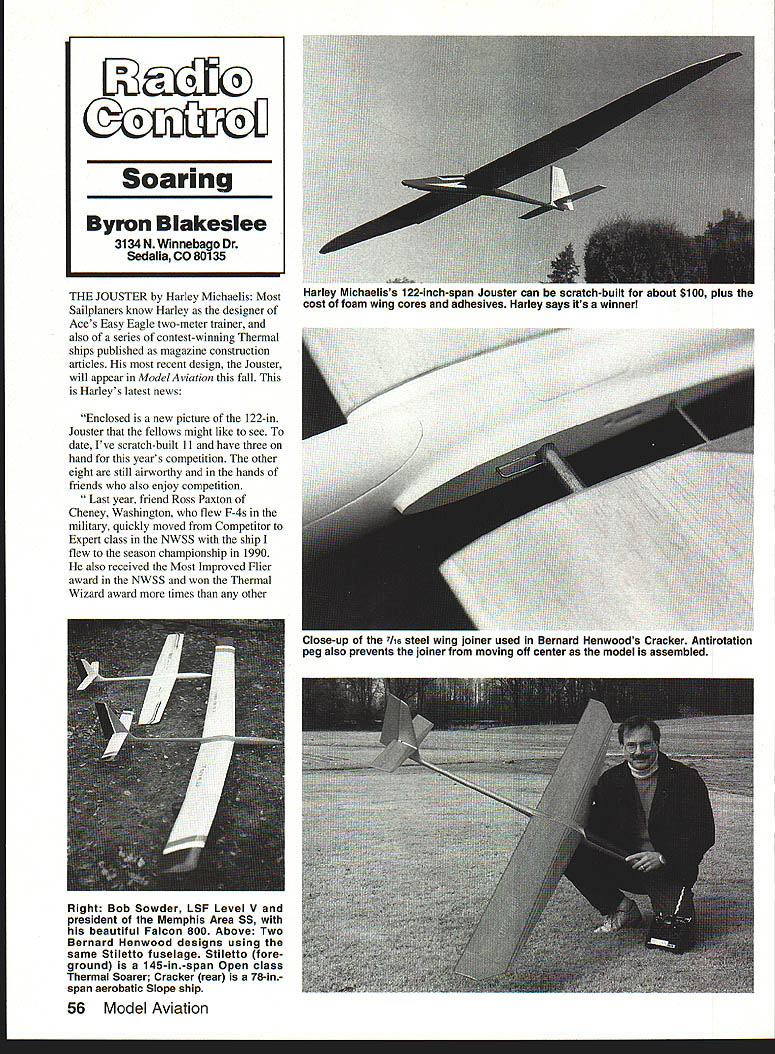
The Jouster (Harley Michaelis)
Most sailplaners know Harley Michaelis as the designer of Ace's Easy Eagle two-meter trainer and a series of contest-winning thermal ships published as magazine construction articles. His most recent design, the Jouster (122 in.), will appear in Model Aviation this fall. Harley reports:
"Enclosed is a new picture of the 122-in. Jouster that the fellows might like to see. To date, I've scratch-built 11 and have three on hand for this year's competition. The other eight are still airworthy and in the hands of friends who also enjoy competition.
"Last year, friend Ross Paxton of Cheney, Washington, who flew F-4s in the military, quickly moved from Competitor to Expert class in the NWSS with the ship I flew to the season championship in 1990. He also received the Most Improved Flier award in the NWSS and won the Thermal Wizard award more times than any other."
I was the only Expert-class flier using a Jouster in 1990, and since I'm not the best pilot around, credit has to be given to the airframe.
"The Jouster is a much-refined Keetah (June '89 RCM). Those plans (No. 1045, $11.50) will do. I can still offer a $12 package to go with them to make the Jouster. It includes a fiberglass canopy, spring steel blades used to support and lock on the tip sections, highly detailed construction text, illustrative detail sheets, materials list, and sources for materials and foam cores.
"The Jouster is designed for scratch-building. Only around $100 in materials is used, not counting adhesives and foam cores for the wing. I find it takes me about the same time to build one as I hear it takes for kits costing $300-plus.
"For those wanting more information first, I have a four-page Jouster information set for the price of a SASE (business-size) plus two loose stamps. This includes information on setting up with simple four-channel, programmable radios. I'm at 26 S. Roosevelt, Walla Walla, WA 99362; telephone: (509) 529-2562."
You can believe that when Harley says he provides detail sheets, he means detailed. He's been in modeling a long time and is one of the most thorough and innovative glider designers I know.
The Stiletto (Bernard Henwood)
Followers of the soaring scene in Britain know Bernie Henwood as one of the top fliers in BARCS (British Association of RC Soarers—the counterpart of our NSS League competition). He was recently named soaring column coeditor (with Alan Cooper) of Radio Modeler magazine, following a long run by George Stringwell.
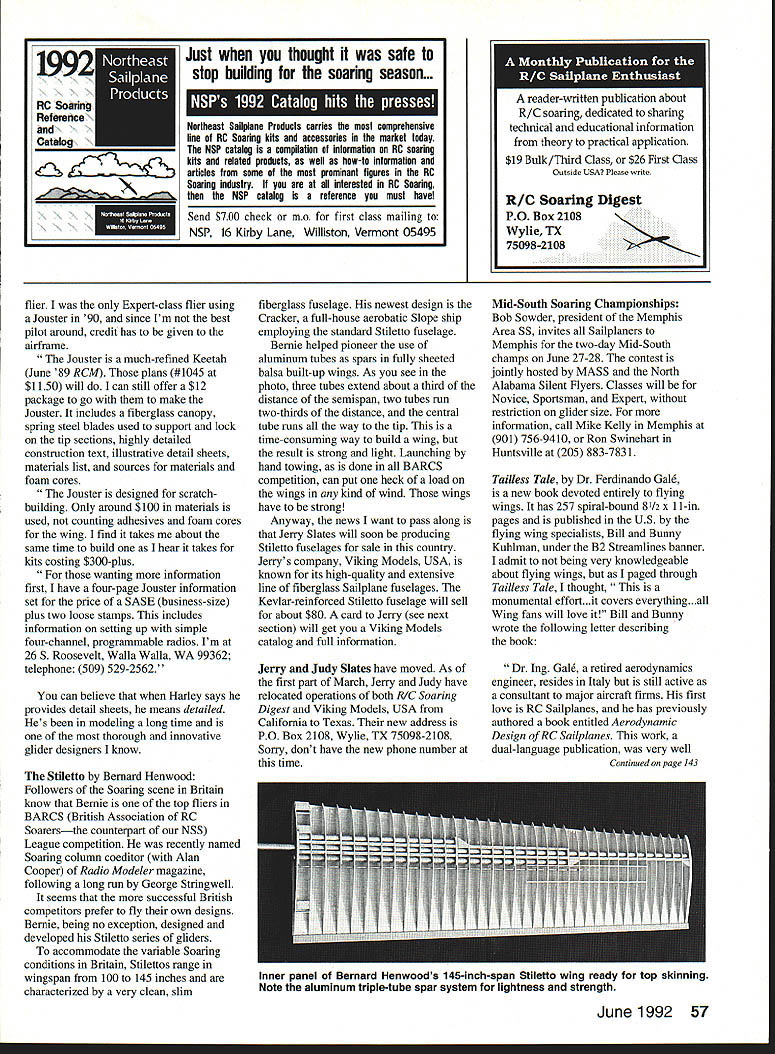
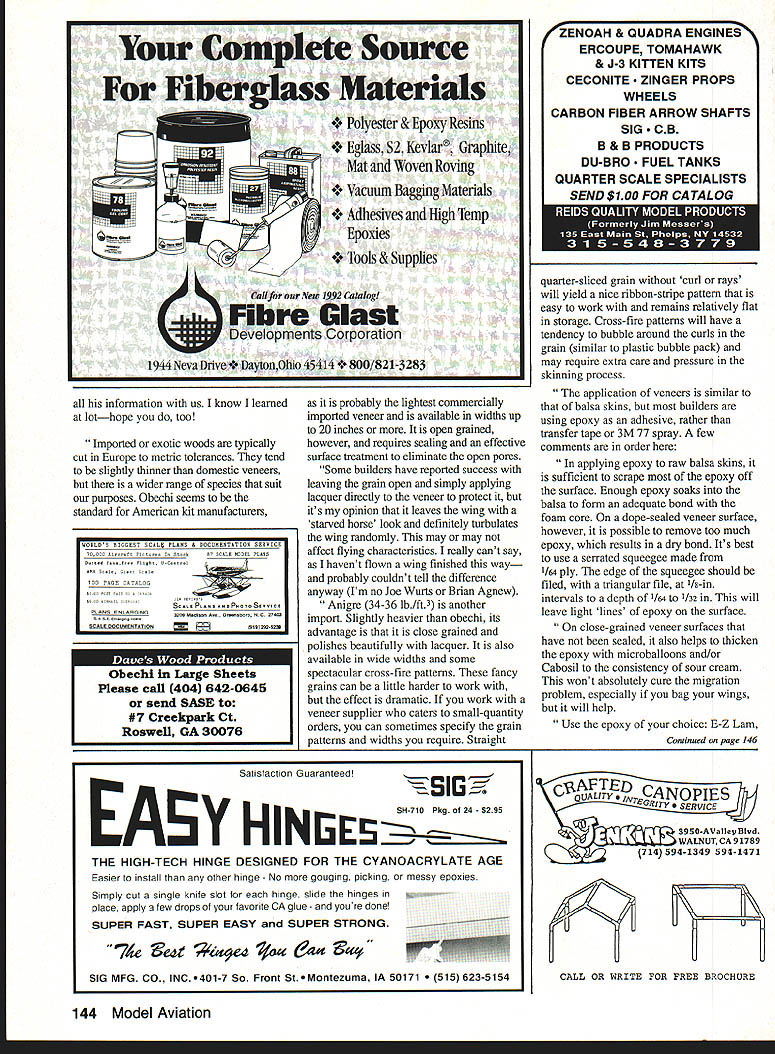
The more successful British competitors often fly their own designs. Bernie designed and developed his Stiletto series of gliders to accommodate the variable soaring conditions in Britain. Stilettos range in wingspan from 100 to 145 inches and are characterized by very clean, slim fiberglass fuselages. His newest design is the Cracker, a full-house aerobatic slope ship employing the standard Stiletto fuselage.
Bernie helped pioneer the use of aluminum tubes as spars in fully sheeted balsa built-up wings. As shown in the photo, three tubes extend about a third of the semispan, two tubes run two-thirds of the distance, and the central tube runs all the way to the tip. This is a time-consuming way to build a wing, but the result is strong and light. Hand towing launches, as used in BARCS competition, can put heavy loads on the wings in wind—those wings have to be strong.
Jerry Slates will soon be producing Stiletto fuselages for sale in the U.S. Jerry's company, Viking Models, USA, is known for a high-quality, extensive line of fiberglass sailplane fuselages. The Kevlar-reinforced Stiletto fuselage will sell for about $80. A card to Jerry (see below) will get you a Viking Models catalog and full information.
Note: Jerry and Judy Slates have moved operations of both R/C Soaring Digest and Viking Models, USA from California to Texas. Their new address is: P.O. Box 2108, Wylie, TX 75098-2108. (Phone number not available at this time.)
Mid-South Soaring Championships
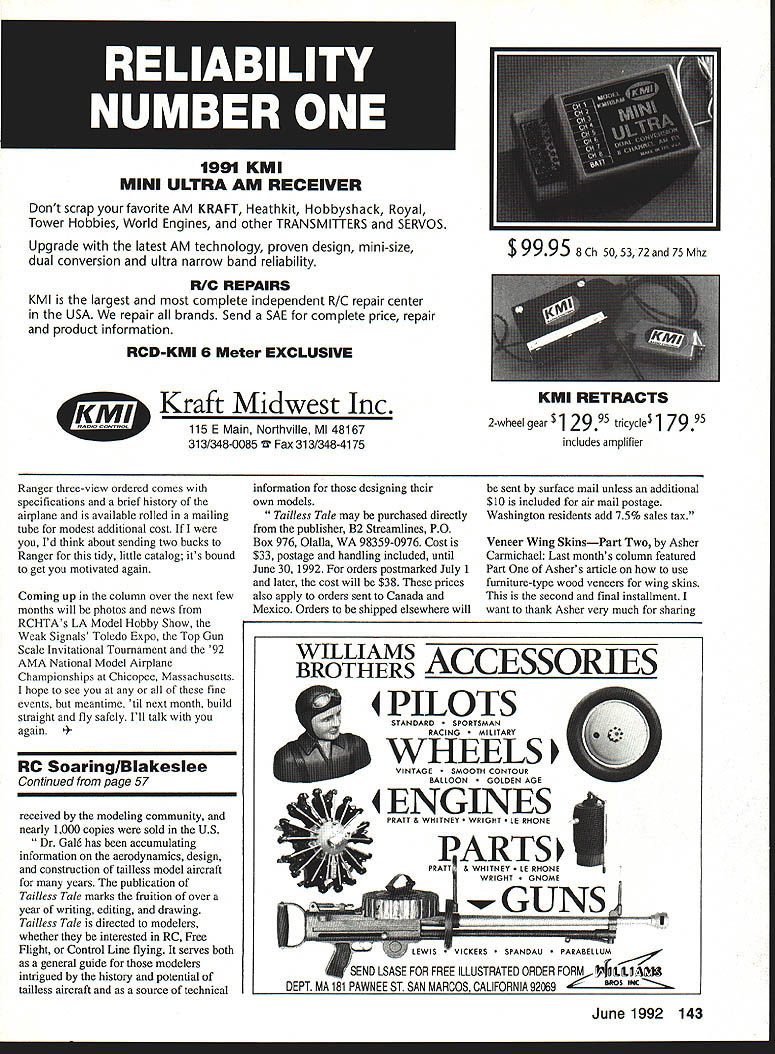
Bob Sowder, president of the Memphis Area Silent Soarers, invites all sailplaners to Memphis for the two-day Mid-South championships on June 27–28. The contest is jointly hosted by MAS and the North Alabama Silent Flyers. Classes will be Novice, Sportsman, and Expert, without restriction on glider size.
For more information, contact:
- Mike Kelly, Memphis: (901) 756-9410
- Ron Swinehart, Huntsville: (205) 883-7831
Tailless Tale (Dr. Ferdinando Galè)
Tailless Tale, by Dr. Ferdinando Galè, is a new book devoted entirely to flying wings. It has 257 spiral-bound 8-1/2 x 11-inch pages and is published in the U.S. by flying-wing specialists Bill and Bunny Kuhlman under the B2 Streamlines banner.
Dr. Galè, a retired aerodynamics engineer residing in Italy, remains active as a consultant to major aircraft firms. His first love is R/C sailplanes; he previously authored Aerodynamic Design of RC Sailplanes, a dual-language publication that was well received by the modeling community—nearly 1,000 copies were sold in the U.S.
Dr. Galè has been accumulating information on the aerodynamics, design, and construction of tailless model aircraft for many years. Tailless Tale is the result of over a year of writing, editing, and drawing. It is directed to modelers interested in RC, free flight, or control line flying. The book serves both as a general guide to the history and potential of tailless aircraft and as a technical resource for designers.
Tailless Tale may be purchased directly from the publisher: B2 Streamlines, P.O. Box 976, Olalla, WA 98359-0976. Cost: $33, postage and handling included, until June 30, 1992. Orders postmarked July 1 and later: $38. Prices also apply to Canada and Mexico. Orders shipped elsewhere will be sent by surface mail unless an additional $10 is included for air mail postage. Washington residents add 7.5% sales tax.
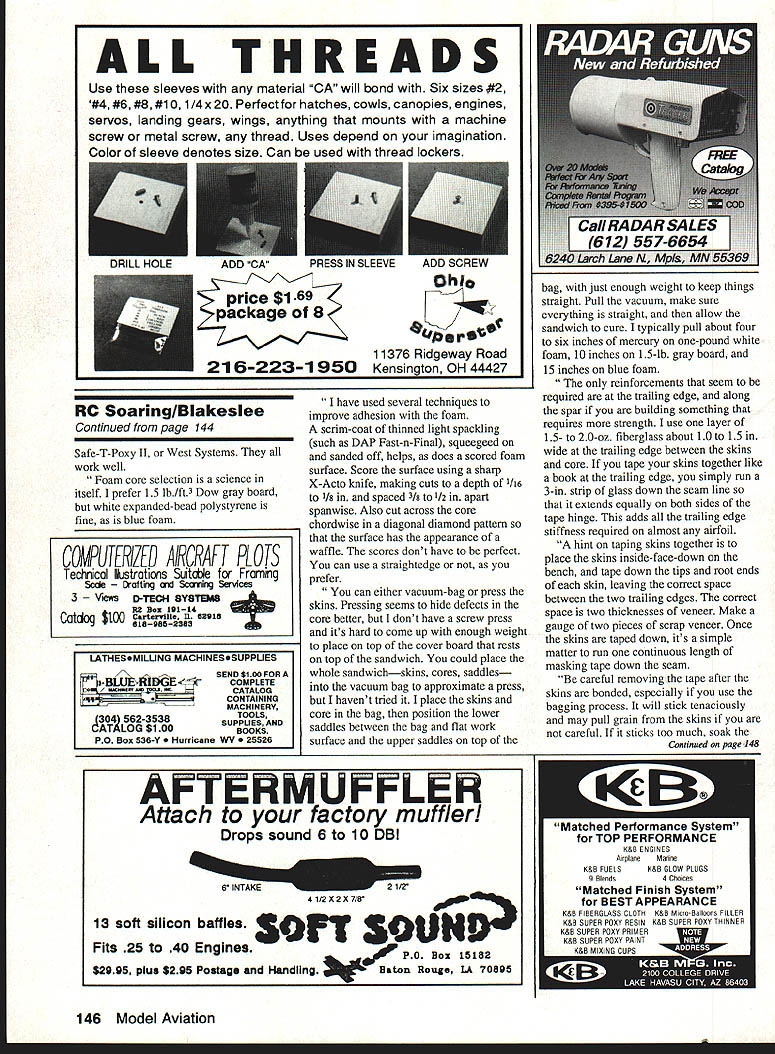
Veneer Skins and Foam-Core Wing Construction
Imported or exotic woods are typically cut in Europe to metric tolerances and tend to be slightly thinner than domestic veneers. There is a wider range of species available. Obechi seems standard for American kit manufacturers: it is probably the lightest commercially imported veneer and is available in widths up to 20 inches or more. Obechi is open-grained and requires sealing and an effective surface treatment to eliminate open pores.
Anigre (about 34–36 lb/ft³) is another import. Slightly heavier than obechi, its advantage is a close grain that polishes beautifully with lacquer. It is available in wide widths and some spectacular cross-fire patterns. Fancy grains can be harder to work with but yield dramatic effects. If you work with a veneer supplier who caters to small orders, you can sometimes specify grain patterns and widths. Straight quarter-sliced grain without curl or rays yields a nice ribbon-stripe pattern that stays relatively flat in storage. Cross-fire patterns tend to bubble around curls in the grain and may require extra care in skinning.
Application of veneers is similar to balsa skins, but most builders use epoxy as an adhesive rather than transfer tape or 3M 77 spray. A few practical notes:
- When applying epoxy to raw balsa skins, scrape most epoxy off the surface; enough soaks in to form an adequate bond with the foam core.
- On a dope-sealed veneer surface, you can remove too much epoxy and get a dry bond. It's best to use a serrated squeegee made from 1/64-inch ply. File the edge with a triangular file at 1/8-inch intervals to a depth of 1/64 to 1/32 inch. This leaves light ridges of epoxy on the surface.
- On close-grained, unsealed veneers, thicken epoxy with microballoons and/or Cabosil to the consistency of sour cream to reduce migration. It helps but may not eliminate migration, especially if you bag wings.
Recommended epoxy choices: E-Z Lam, Safe-T-Poxy II, or West Systems—all work well.
Foam core selection and preparation:
- Preferred cores: 1.5 lb/ft³ Dow gray board is preferred; white expanded-bead polystyrene and blue foam are also acceptable.
- To improve adhesion, use a scrim-coat of thinned light spackling (such as DAP Fast-n-Final), squeeze on and sand off. Also consider scoring the foam surface: make cuts 1/16 to 1/8 inch deep, spaced 3/8 to 1/2 inch spanwise, and add diagonal chordwise cuts to create a waffle pattern. The scores don't have to be perfect.
Pressing or vacuum bagging:
- You can vacuum-bag or press the skins. Pressing hides core defects better, but heavy weights are needed to simulate a press.
- One method: place skins and core in a vacuum bag, position lower saddles between bag and flat work surface and upper saddles on top of the bag, add enough weight to keep things straight, then pull vacuum and allow the sandwich to cure.
- Typical vacuum levels: about 4–6 in. Hg for one-pound white foam, 10 in. Hg for 1.5-lb. gray board, and 15 in. Hg for blue foam.
Reinforcements and trailing edge:
- Only reinforcements usually required are at the trailing edge and along the spar when extra strength is needed.
- Use one layer of 1.5- to 2.0-oz fiberglass about 1.0 to 1.5 in. wide at the trailing edge between skins and core.
- If skins are taped together at the trailing edge like a book, run a 3-in. strip of glass down the seam line, extending equally on both sides of the tape hinge.
Taping skins together:
- Place skins inside-face-down on the bench and tape down tips and root ends, leaving the correct space between trailing edges—two thicknesses of veneer. Make a gauge of two pieces of scrap veneer to set this spacing. Run one continuous length of masking tape down the seam.
- When removing tape after bonding, be careful—tape can stick tenaciously and may pull grain. If it sticks, soak the tape with mineral spirits or naphtha for five minutes and it should pull off easily.
Bagging veneer tips:
- Trim skins as close to final wing size as possible before bagging. A 1/16-inch overhang is okay; more may allow veneer to bend and crack away from the core. Pressing doesn't suffer this issue.
- Adding a balsa sub–leading edge and sometimes a balsa root rib helps take bagging pressures, especially with higher-density foams.
Final wing construction:
- Add leading edges, tips, and root rib; cut out flying surfaces and cap as required. Make provision for servos and pushrods, then finish the wing.
Covering and finishes:
- It is possible to cover a veneered wing with film, but achieving an acceptable job requires care. Grain may show through, and thin veneers require lower-temperature film to avoid foam meltdown.
- On close-grained woods you can paint veneer after sealing the grain; this adds little weight but avoids heavy grain fillers required for open-grained woods.
- For a natural finish on open-grained woods, one effective method is 0.6- to 0.75-oz fiberglass cloth applied with thinned epoxy. This yields a wing as light as a film-covered balsa wing, with a leveled matte finish showing the cloth weave. It may affect aerodynamics slightly on speed sections, but for thermal-duration sections it seems acceptable.
Applying fiberglass cloth:
- Finish sand, vacuum, and dust the surface with a tack rag. Support the wing on two cradles with foam blocks.
- Lay cloth over the wing and trim to within 1–2 inches of the perimeter.
- Mix 1/2 to 3/4 oz. of 30-minute finishing-type epoxy (Bob Smith or Dave Brown brands) and add an equal amount of 90% isopropyl or ethanol alcohol (ethanol is preferred for availability). The mixture will be the consistency of skim milk or water.
- Use a 1–2-inch-wide brush and apply the epoxy over the cloth, working quickly and avoiding excessive overlap. Pull the cloth at the edges to smooth large puckers; pin or clamp at tips and leading edges if needed to improve drape.
- Allow epoxy to cure for about six hours. Trim the overhang with 180–220 grit paper; a light sanding will seal and feather the excess cloth. Repeat on the other side and on exposed areas (leading edges of flaps/ailerons and trailing edge).
- When all components are covered, scuff sand with 220-grit paper. A white residue will remain in the weave; remove it by rubbing with a rag soaked in white shellac (or varnish). Shellac dries faster and is lighter.
Lacquer finishes:
- A lacquer finish on close-grained wood is an exceptionally light, premium finish but requires a compressor and spray equipment. Use a lacquer sanding sealer for the first coats, apply outdoors on a low-humidity, sunny day, and use light coats to prevent solvents from leaching into the core. Two light coats should suffice.
- Level the sealer with 180–220 grit paper, dust off residue, and top with rubbed-effect or gloss lacquer—one or two good coats are usually enough. For a furniture-grade finish, use 0000 steel wool or wet-sand with 600-grit paper.
Other finishes:
- Gelled polyurethane or regular varnish rubbed into the wood with a cloth has been used and may be suitable for close-grained woods if spray equipment is unavailable. Landon Grinstead and Gene Watson started with this system but have switched to brushing sealers and paste wood fillers for obechi.
Summary
Veneer skins offer a cosmetic advantage and, when finished naturally, produce strong, light wings with above-average surface hardness and minimal maintenance. Repairs for dings are not invisible, but patches and strips or adhesive trim sheets can be used. If you can build a foam-and-balsa wing, veneer skins are a logical next step in upgrading your building technique—light, strong, and rewarding to work with.
Transcribed from original scans by AI. Minor OCR errors may remain.

