
RADIO CONTROL SOARING
Dave Garwood 5 Birch Lane, Scotia NY 12302
PACKABLE SAILPLANES
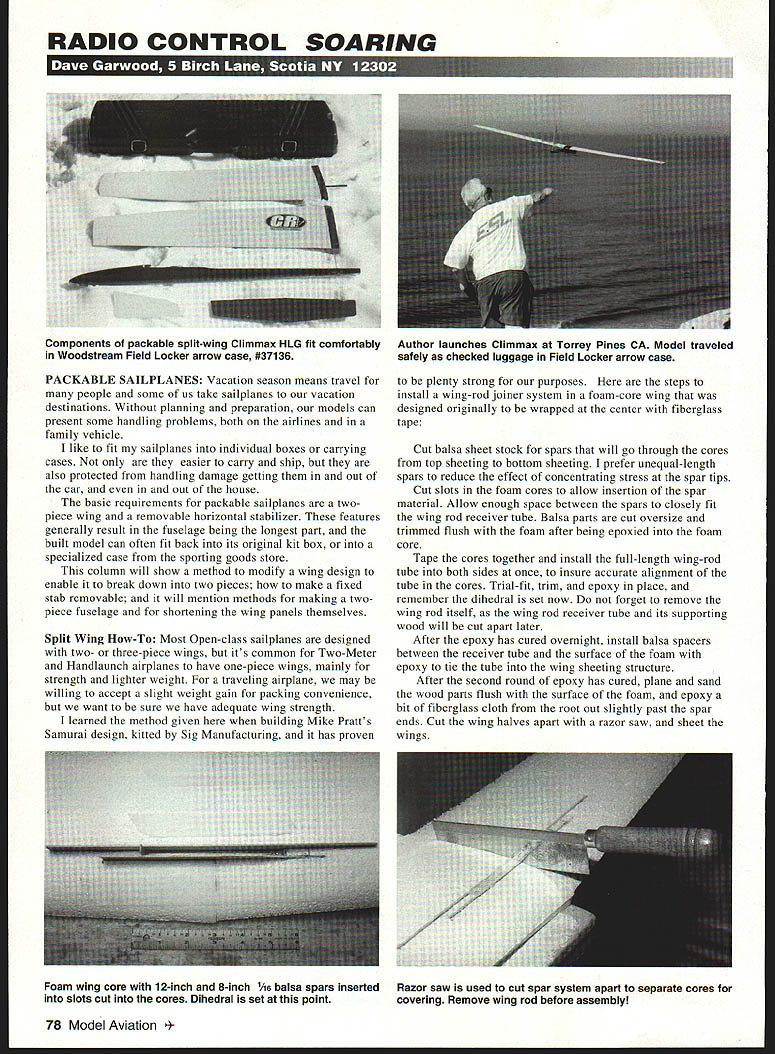
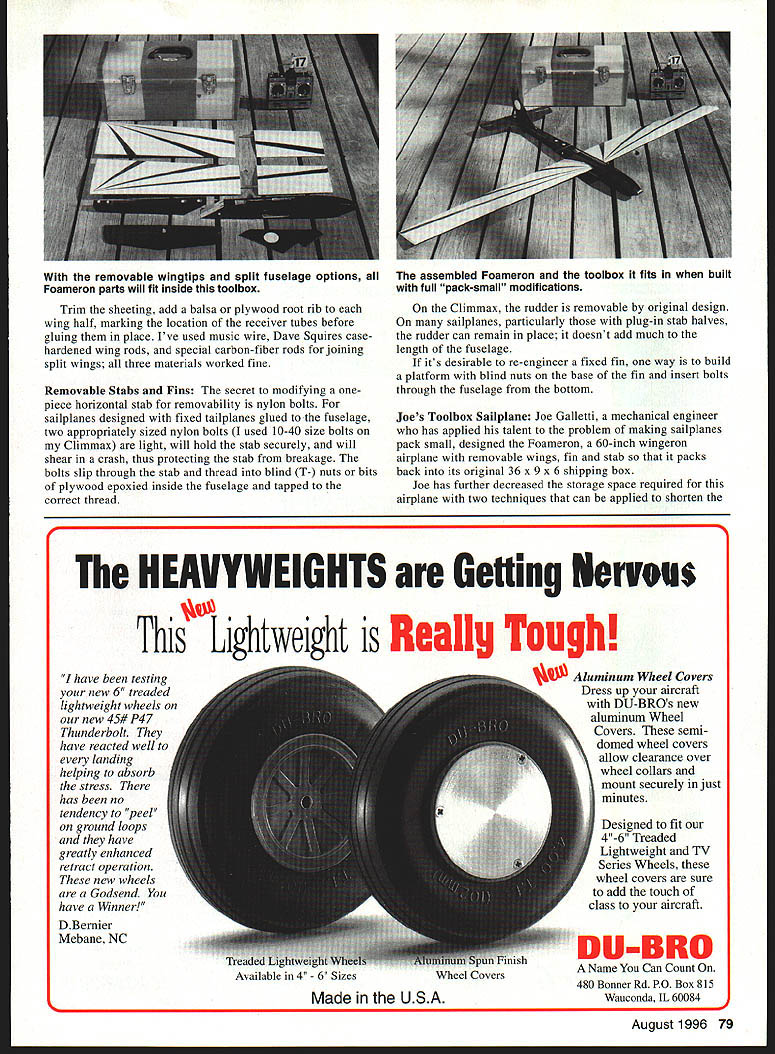
Vacation season means travel for many people and some of us take sailplanes to vacation destinations. Without planning and preparation, models can present handling problems with both airlines and family vehicles. I like to fit my sailplanes into individual boxes or carrying cases: they're easier to carry and ship, and are protected from handling damage getting in and out of the car or house.
Basic requirements for packable sailplanes are a two-piece wing and a removable horizontal stabilizer. These features generally make the fuselage the longest part; a well-built model can often fit back into its original kit box or into a specialized case from a sporting goods store.
This column shows a method to modify a wing design so it breaks down into two pieces, how to make a fixed stab removable, and mentions methods for making a two-piece fuselage and shortening wing panels.
Split Wing How-To
Most Open-class sailplanes use two- or three-piece wings. Two-meter and hand-launch airplanes often have one-piece wings for strength and lower weight. For a traveling airplane you may accept a slight weight gain for packing convenience, but you must ensure adequate wing strength.
I learned the following method building Mike Pratt's Samurai (kitted by Sig Manufacturing). It has proven plenty strong. The steps to install a wing-rod joiner system in a foam-core wing originally intended to be wrapped at the center with fiberglass tape are:
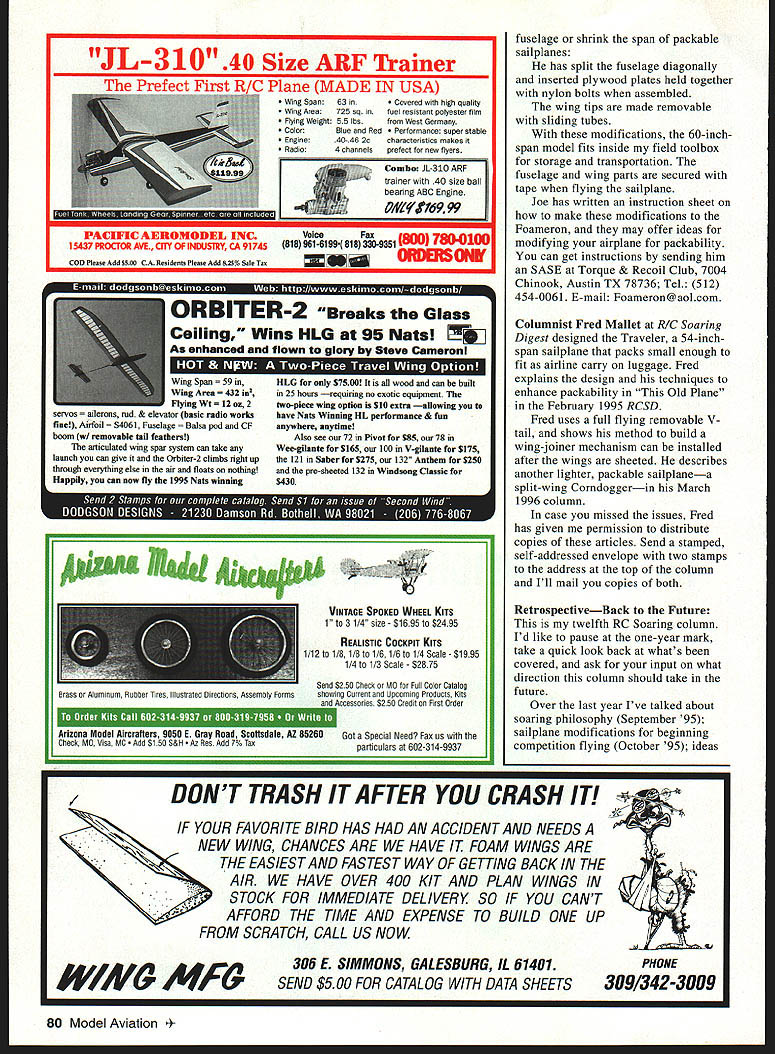
- Cut balsa sheet-stock spars that will run through the cores from top sheeting to bottom sheeting. I prefer unequal-length spars to reduce stress concentration at the spar tips.
- Cut slots in the foam cores to allow insertion of the spar material. Allow enough space between the spars to closely fit the wing-rod receiver tube. Cut balsa parts oversize; trim flush with the foam after epoxying into the core.
- Tape the cores together and install the full-length wing-rod receiver tube into both sides at once to ensure accurate alignment. Trial-fit, trim, and epoxy in place. Note: the dihedral is set when you do this. Remove the wing rod after epoxy — the receiver tube and its supporting wood will be cut apart later.
- After the epoxy cures overnight, install balsa spacers between the receiver tube and the foam surface, epoxying them to tie the tube into the wing sheeting structure.
- After the second round of epoxy cures, plane and sand the wood parts flush with the foam surface and epoxy a bit of fiberglass cloth from the root out slightly past the spar ends.
- Cut the wing halves apart with a razor saw through the sheeting and the spar system to separate the cores. Trim sheeting and add a balsa or plywood root rib to each wing half, marking the location of the receiver tubes before gluing the ribs in place.
- Install the wing rod when assembling the wing halves for flight.
Materials I've used successfully for wing joiner rods:
- Music wire
- Dave Squires' case-hardened wing rods
- Carbon-fiber rods
Removable Stabs
The secret to modifying a one-piece horizontal stabilizer for removability is nylon bolts. Most sailplanes have fixed tailplanes glued to the fuselage. Two appropriately sized nylon bolts (10-40 works well on many models) will hold the stab securely in normal use but will shear in a crash, protecting the stab from more serious damage.
Use blind T-nuts or small plywood plates epoxied inside the fuselage and tapped to the correct thread to accept the bolts. On sailplanes with plug-in stab halves the rudder can remain in place — it doesn't add much length to the fuselage. For fixed fins, build a platform for blind nuts at the base of the fin and insert bolts through the fuselage bottom so the fin becomes removable.
Joe's Toolbox
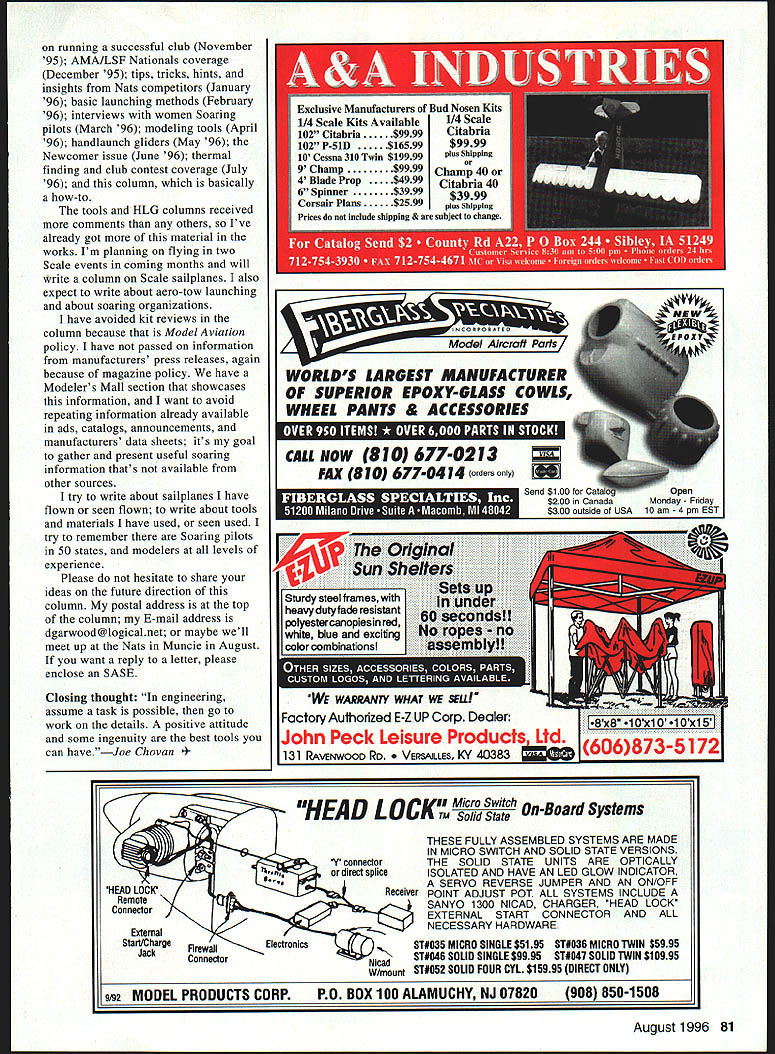
Sailplane designer Joe Galletti (mechanical engineer) designed the Foameron, a 60-inch-span foam airplane with removable wings, fin and stab that packs back into its original 36 x 9 x 6 shipping box. Joe further decreased required storage space using two techniques that can also shorten fuselage length on other models:
- He split the fuselage diagonally and inserted plywood plates held together with nylon bolts when assembled.
- He made the wing tips removable with sliding tubes.
With these modifications the 60-inch-span model fits inside a field toolbox for storage and transportation. The fuselage and wing parts are secured with tape when flying the sailplane.
Joe has written an instruction sheet on these modifications. Send an SASE to: Torque & Recoil Club 7004 Chinook Austin, TX 78736 Tel.: (512) 454-0061 E-mail: Foameron@aol.com
Columnist Fred Mallet at R/C Soaring Digest designed the Traveler, a 54-inch-span sailplane that packs small enough to fit as airline carry-on luggage. Fred uses a full-flying removable V-tail and describes a wing-joiner method that can be installed after wings are sheeted. He also describes a lighter, packable split-wing Corndogger. Fred has given me permission to distribute copies of those RCSD articles; send a stamped, self-addressed envelope with two stamps to the address at the top of this column and I'll mail copies of both.
RETROSPECTIVE — BACK TO THE FUTURE
This is my twelfth RC Soaring column. At the one-year mark I'd like to look back and ask for your input on the column's future direction.
Topics covered over the past year include:
- Soaring philosophy (September 1995)
- Sailplane modifications for beginning competition flying (October 1995)
- Ideas for increasing enjoyment of slope soaring (November 1995)
- Using the winch (December 1995)
- Building and flying discus launch gliders (January 1996)
- Designing and flying aerobatic gliders (March 1996)
- Equipment reviews, tools and HLG columns (received many comments)
Future columns will include more on radio gear, instrumentation, tune-ups for maximum performance, scale sailplanes, aero-tow launching, and soaring organizations. I avoid kit reviews and manufacturer press-release material in deference to Model Aviation policy; instead I aim to present useful soaring information not readily available elsewhere.
If you have ideas or want to share experiences, drop me a note. I read everything and will respond to as many as I can. My postal address is at the top of the column; my e-mail is dgarwood@logical.net. If you want a reply, please enclose an SASE. Maybe we'll meet at the Nats in Muncie in August.
Closing thought: "In engineering, assume a task is possible, then go to work on the details. A positive attitude and some ingenuity are the best tools you can have." — Joe Chovan
Transcribed from original scans by AI. Minor OCR errors may remain.

