
Radio Control: Soaring
Dan Pruss
There was a time when man was sticking himself with straight-pin fasteners, straining his back while using short-handled shovels, and having to turn his head 180 degrees every time he wanted to check out the traffic behind him while driving. Then, along came the safety pin, the long-handled shovel, and the rear-view mirror. Straightforward, common-sense inventions, you say. Right. But somebody had to come up with them.
What does the above have to do with soaring? Nothing, except there are times when we get too hung up and lost in the complexities of some new construction techniques, or are awed by someone's six-channel soarer or one's nuclear-powered winch.
Too often we miss the simple things or how to solve a simple problem. John Lusk (Madison, WI) didn't.
You're all familiar with how two-piece wings are joined to the fuselage by being slid onto a heavy-duty rod. In most cases this rod runs into the main spar and usually presents no wing-mounting problems. But the rear wire, which is normally 1/16 in. diameter, can be troublesome—especially if you forget to plug the tubing ends that support the wire and which are buried in the wing. Now, you probably haven't ever forgotten to plug those ends, but possibly your buddy did—or yours have popped loose at one time or another. When that happens and your plane is assembled, you wonder how much of that rear wire is in the left wing and how little of it is in the right wing (or vice versa).
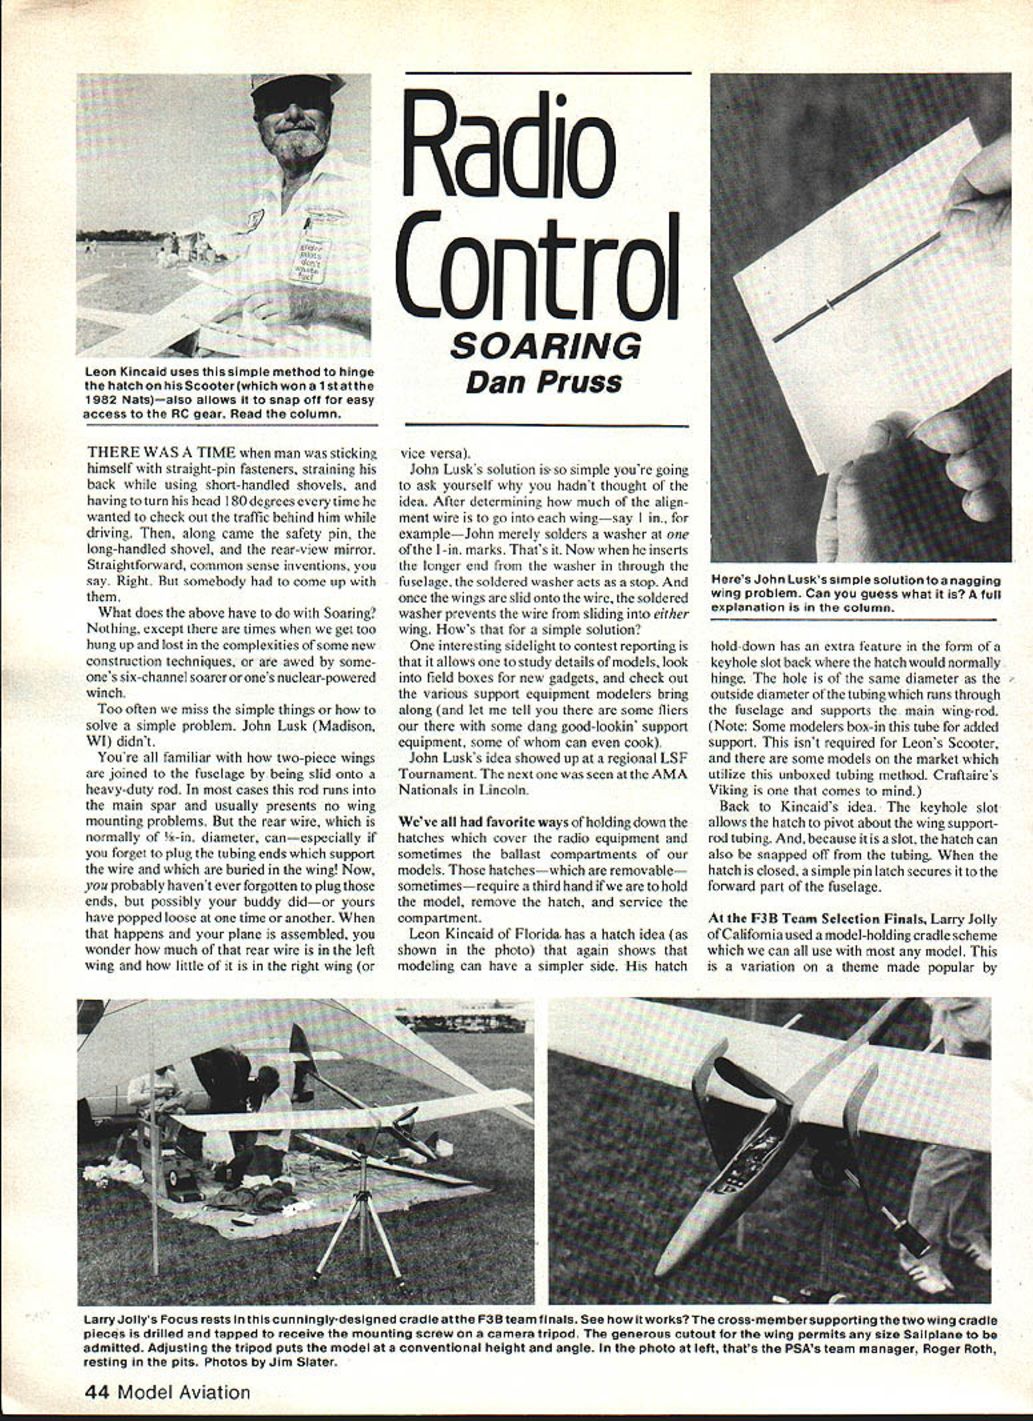
John Lusk's solution is so simple you're going to ask yourself why you hadn't thought of it. After determining how much of the alignment wire is to go into each wing—say 1 in., for example—John merely solders a washer at one of the 1-in. marks. That's it. Now when he inserts the longer end with the washer in through the fuselage, the soldered washer acts as a stop. Once the wings are slid onto the wire, the soldered washer prevents the wire from sliding into either wing. How's that for a simple solution?
One interesting sidelight to contest reporting is that it allows one to study details of models, look into field boxes for new gadgets, and check out the various support equipment modelers bring along (and let me tell you there are some fliers out there with some dang good-lookin' support equipment, some of whom can even cook). John Lusk's idea showed up at a regional LSF tournament. The next one was seen at the AMA Nationals in Lincoln.
We've all had favorite ways of holding down the hatches that cover the radio equipment and sometimes the ballast compartments of our models. Those removable hatches sometimes require a third hand if we're to hold the model, remove the hatch, and service the compartment.
Leon Kincaid of Florida has a hatch idea that again shows that modeling can have a simpler side. His hatch hold-down has an extra feature in the form of a keyhole slot where the hatch would normally hinge. The hole is the same diameter as the outside diameter of the tubing that runs through the fuselage and supports the main wing rod. (Note: Some modelers box in this tube for added support. This isn't required for Leon's Scooter, and there are some models on the market which utilize this unboxed tubing method. Craftaire's Viking is one that comes to mind.) The keyhole slot allows the hatch to pivot about the wing-support-rod tubing. Because it is a slot, the hatch can also be snapped off from the tubing. When the hatch is closed, a simple pin latch secures it to the forward part of the fuselage.
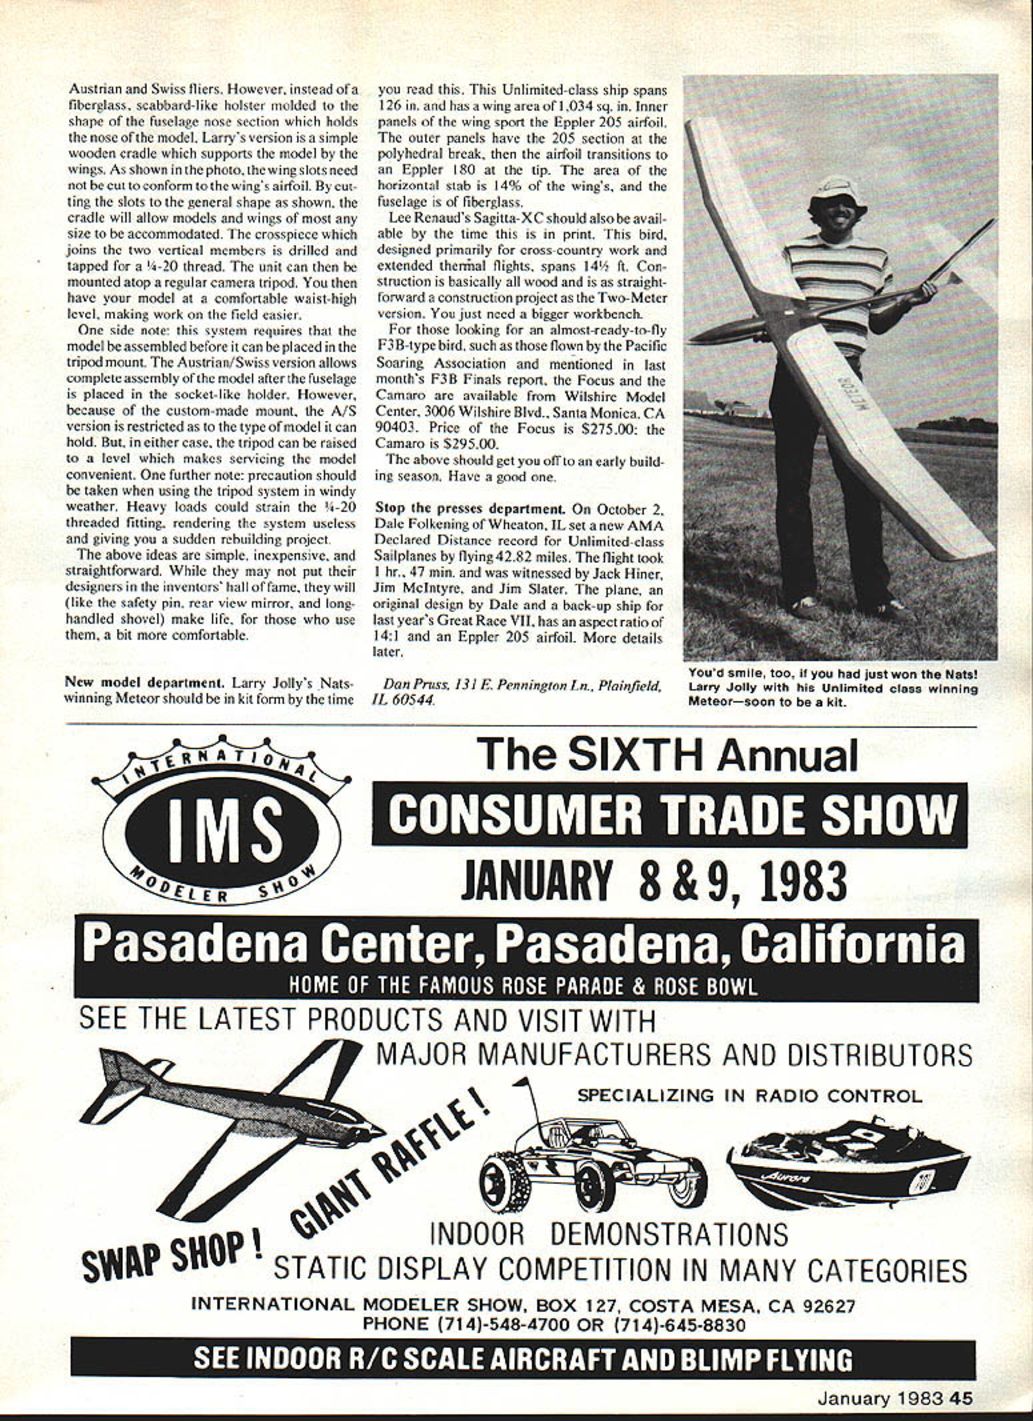
At the F3B Team Selection Finals, Larry Jolly of California used a model-holding cradle scheme which we can all use with most any model. The cross-member supporting the two wing-cradle pieces is drilled and tapped to receive the mounting screw on a camera tripod. The generous cutout for the wing permits any size sailplane to be admitted. Adjusting the tripod puts the model at a conventional height and angle.
The above ideas are simple, inexpensive, and straightforward. While they may not put their designers in the inventors' hall of fame, they will (like the safety pin, rear-view mirror, and long-handled shovel) make life, for those who use them, a bit more comfortable.
New Model Department
Meteor (Larry Jolly)
Larry Jolly's Nats-winning Meteor should be in kit form by the time you read this. This Unlimited-class ship spans 126 in. and has a wing area of 1,034 sq. in. Inner panels of the wing use the Eppler 205 airfoil. The outer panels have the 205 section at the polyhedral break, then the airfoil transitions to an Eppler 180 at the tip. The horizontal stabilizer area is 14% of the wing's, and the fuselage is fiberglass.
Sagitta-XC (Lee Renaud)
Lee Renaud's Sagitta-XC should also be available by the time this is in print. Designed primarily for cross-country work and extended thermal flights, this bird spans 14½ ft. Construction is basically all wood and is as straightforward a project as the Two-Meter version—you just need a bigger workbench.
Ready-to-Fly F3B-Type Birds
For those looking for an almost-ready-to-fly F3B-type ship, such as those flown by the Pacific Soaring Association and mentioned in last month's F3B Finals report, the Focus and the Camaro are available from:
- Wilshire Model Center
- 3006 Wilshire Blvd., Santa Monica, CA 90403
- Price: Focus $275.00; Camaro $295.00
The above should get you off to an early building season. Have a good one.
Stop the Presses Department
On October 2, Dale Folkening of Wheaton, IL set a new AMA Declared Distance record for Unlimited-class sailplanes by flying 42.82 miles. The flight took 1 hr. 47 min., and was witnessed by Jack Hiner, Jim McIntyre, and Jim Slater. The plane, an original design by Dale and a back-up ship for last year's Great Race VII, has an aspect ratio of 14:1 and uses an Eppler 205 airfoil. More details later.
Dan Pruss 131 E. Pennington Ln. Plainfield, IL 60544
Transcribed from original scans by AI. Minor OCR errors may remain.

